Table of Contents
Advertisement
Quick Links
Installation & User Manual
Original document
Version 2018- 3.1
BLACKBELT 3D Printer
BLACKBELT 3D BV
Bremweg 7
5951 DK Belfeld
The Netherlands
T +31 77 3333 721
info@blackbelt-3D.com
support@blackbelt-3D.com
sales@blackbelt-3D.com
www.blackbelt-3D.com
© All rights reserved
The information provided herein may not be reproduced and/or published in any form, by print, photo print, microfilm or any other means
whatsoever (electronically or mechanically) without the prior written authorisation of Blackbelt 3D BV.
Advertisement
Table of Contents

Related Manuals for Blackbelt 3D BV BLACKBELT 3D Printer


Summary of Contents for Blackbelt 3D BV BLACKBELT 3D Printer
- Page 1 © All rights reserved The information provided herein may not be reproduced and/or published in any form, by print, photo print, microfilm or any other means whatsoever (electronically or mechanically) without the prior written authorisation of Blackbelt 3D BV.
- Page 2 The Blackbelt 3D Printer is intended for use as described in Chapter 1 : Technical specifications & Tolerances. Any other use of the printer is not allowed by BlackBelt 3D BV and will expose the user and its surroundings to significant danger.
-
Page 3: Table Of Contents
Description of the machine ........................... 8 Machine overview ............................. 8 Principle of operation ............................9 Positioning the BLACKBELT 3D Printer ......................10 Control panel & electrical cabinet ........................10 Assembly, installation and commissioning the machine ................11 Positioning ............................... 11 Assembly / wiring ............................ - Page 4 User Manual 3D-Printer Maintenance .............................. 40 Preventive maintenance ..........................40 Possible failure mode ............................41 Spare parts ..............................41 8.3.1 Changing the belt ............................ 42 Heated bed modification ..........................46 Customer service and support ........................47 Disposing the machine or machine parts ..................... 47 EG-declaration of compliance ........................
-
Page 5: 1: Technical Specifications And Tolerances
1: Technical specifications and tolerances The sole intention of this machine is 3D Printing of models / parts. The Blackbelt 3D Printer is only intended to produce products and use materials as described in this user manual. A detailed description of the functionality of this machine is described in Chapter 4.2 : “Principle of operation”. -
Page 6: Safety Messages
Completely switch of the main power switch and remove the connector from the wall socket. 11. If a part or sub-assembly of the Blackbelt 3D Printer has been damaged or is not functioning properly, please cease all activities or print jobs immediately. Only resume activities if the part has been repaired or replaced by a spare part. -
Page 7: Definition Of Users
User Manual 3D-Printer 2.2 Definition of users. Operator: Low-skilled technical staff who read this user manual. An operator can work with the Blackbelt 3D Printer, except calibration, fine-tuning and maintenance of the machine. Maintenance: Secondary skilled technical staff who read this manual. A maintenance engineer can work and calibrate the machine, except modifying the fixed machine parameters. -
Page 8: Transportation
In case of eventual damage caused by transportation, please report this damage immediately to your shipping agent or transporter and to Blackbelt 3D BV at all times. Take all necessary steps to prevent further damage to the machine. -
Page 9: Description Of The Machine
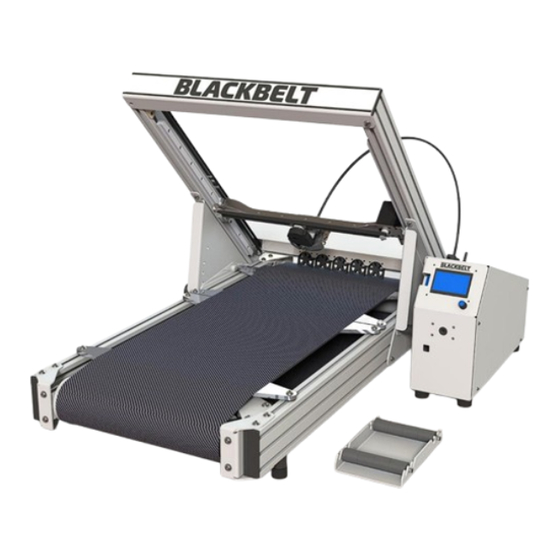
User Manual 3D-Printer 4 Description of the machine 4.1 Machine overview Number: Machine part: BLACKBELT 3D Printer (assembled) Conveyor belt (Z Axis) cold segment Angle Adjusting knob Conveyor belt (Z Axis) heated segment Cooling fan X Axis Y Axis (2x) -
Page 10: Principle Of Operation
User Manual 3D-Printer 4.2 Principle of operation Please ensure that all parts below are present, prior to commissioning the Blackbelt 3D Printer: All parts supplied in the packaging (picture 4.1) : o 1x Printer o 1x Electrical control cabinet o 1x Spool holder... -
Page 11: Positioning The Blackbelt 3D Printer
User Manual 3D-Printer 4.3 Positioning the BLACKBELT 3D Printer Set-up the printer on a stable table in a dry and clean room with a temperature between 15-35°C. The minimal dimensions of the table should be: 80cm x 80cm. 4.4 Control panel & electrical cabinet... -
Page 12: Assembly, Installation And Commissioning The Machine
User Manual 3D-Printer 5 Assembly, installation and commissioning the machine Please follow all prescriptions as described in this manual. In particular chapter 2 : Safety messages. 5.1 Positioning The machine shall be placed on robust flat surface, rigid enough to hold the machine. The machine shall be positioned in such as manner, that at any time there will be enough free moving space around the machine for demonstrations/ service trainings and carrying out maintenance, cleaning and inspections. -
Page 13: Setting Up The 3D Printer
User Manual 3D-Printer 5.3 Setting up the 3D printer Lift the printer from the packaging with 2 persons and place the machine on a table. Remove the angle adjusting knobs (left and right), while holding the XY gantry. Elevate the XY gantry to 45° (preset) and screw the adjusting knobs back in. Position the control cabinet left or right beside the 3D printer. -
Page 14: Installation Of The Printhead Assembly
User Manual 3D-Printer 5.4 Installation of the printhead assembly. Ensure the machine is switched “Off”. Ensure the machine is setup secure on a robust table and can be accessed from all sides. Parts needed to install the printhead: 3D printer, assembled as described in chapter 5.3 : Printhead with Printhead screws Hexagon key 3mm. - Page 15 User Manual 3D-Printer Bigger objects with less details can easily be printed with a bigger nozzle. Just changing the nozzle size will decrease printing time by a factor two if you double the size. Follow these instructions to change the nozzle size. 1.
-
Page 16: Calibration Y Axis
User Manual 3D-Printer 5.5 Calibration Y axis You’ll need a 5mm and 3mm Hexagon key and a sheet of paper 1. Set the gantry to 45° and mount a printhead. 2. Take a piece of paper, put it on the conveyor belt and place the printhead onto it: 3. - Page 17 User Manual 3D-Printer 6. If you start noticing a resistant at one side, move the printhead to the opposite side. 7. Loosen the following 3 screws for ½ rotation at one side of your choice, using the 5mm Hexagon key: Set screw 8.
-
Page 18: Calibrate The Belt
User Manual 3D-Printer 5.6 Calibrate the belt In this procedure we need to touch the belt with the hands. Make sure that you have clean hands with no grease on them to keep the conveyor belt clean. Make sure that the conveyor belt is in between the limitations. [1-2] Check the tension of the belt. -
Page 19: Operation
If a machine part has been damaged or is not functioning in the prescribed way, the machine operation must be stopped immediately and can only be resumed if the damaged part has been replaced or repaired. Please inform or consult Blackbelt 3D BV if the machine is not functioning properly. 6.1 Loading filament Please assure that the 3D Printer is fully assembled and wired correctly and that the printhead has been installed. -
Page 20: Installing Software
3. Open “BLACKBELT Cura”, if this does not start automatically. 4. If the next dialog window does not start automatically, then go to “Settings” – “Printer” – “Add Printer…” 5. Select “BLACKBELT 3D Printer”, secondly in the submenu “BLACKBELT 3D” and click on: “Add Printer” 1: Click here 2: Click here 6. -
Page 21: Generating Machine Code / Gcode
User Manual 3D-Printer 6.3 Generating Machine code / gcode Compatible design CAD languages are: STL, OBJ or 3MF Your hardware (PC / Laptop) must be configured to write data onto an SD card. In order to generate the machine code (gcode) the following requirements are necessary: A Mac or PC equipped with a SD card reader. - Page 22 User Manual 3D-Printer View: Printhead Normal / Solid view Printangle 3D model Transparent / X-ray view Machinecode / Layer view Material Hide advanced setting Saved settings Advanced settings Save gcode to SD CARD Menu structure Estimated Move print time Scale Build surface on checkered surface Rotate...
- Page 23 User Manual 3D-Printer View: Machinecode Model position Solid View / Layer view Color indication Line types Preview Slider (2x) Estimated Print time Save machine code to SC Card Starpoint / first line of the machinecode Correct installation of the SD Card Version 2018-3.1_ENG...
- Page 24 User Manual 3D-Printer 9. Have a look at the gcode / machine code and evaluate your model. You can see the nozzle movements (track) the print nozzle will be following, to build the product. Move the upper “Proview Slider” down, to scroll through the gcode / machinecode. Please check : •...
-
Page 25: Saving A Project
User Manual 3D-Printer 6.4 Saving a project If you are happy with the settings and you want to keep these for later, you can save the entire project in Cura as a *.curaproject.3mf file. This can also be convenient when you want to continue a later time or share your work with others. - Page 26 User Manual 3D-Printer Open as project mode Summary of the printer and profile choice and settings that differ from the “Nomal” profile 4. After pressing the “open” button you will be ask how to load the file. Make sure you choose “Open as a project” here.
-
Page 27: Upgrade Machine Firmware
6.2 https://blackbelt-3d.com/software The USB cable supplied with the BlackBelt 3D printer. 1. First turn on the BlackBelt 3d controller by flipping the main switch and make sure it powers up. 2. Hook-up the machine to the MAC or PC using the USB cable. The USB port of the printer can be found in the front side of the controller console marked USB (figure 1+2). - Page 28 User Manual 3D-Printer 6. The upgrade menu should open where you choose “Automatically upgrade Firmware”. Wait for the process to complete and close all the windows until your back in the main program. Your 3D printer is now up to date with the newest version of the BlackBelt Firmware Blue symbol for successful connection...
-
Page 29: Explanation Menu 3D Printer
User Manual 3D-Printer 6.6 Explanation Menu 3D Printer When starting the BlackBelt 3D Printer, the following start screen will appear. [5] Target [1] Target temperature temperature heated bed printhead [2] Temperature [6] Temperature printhead heated bed [3] Position coordinates [7] Print progress... -
Page 30: Menu Structure
User Manual 3D-Printer 6.7 Menu structure By turning the jog button on the control cabinet, it is possible to change a setting or scroll through the menu structure. By pushing the jog button, is it possible to select a menu item or confirm the set value. Menu item: Function: Info screen... - Page 31 User Manual 3D-Printer Control Back to the previous screen Nozzle: Set temperature printhead Bed: Set temperature heated bed (belt) Fan Speed 1: Set fan speed (0= off, 255=full power) Fan Speed 2: Set fan speed rear fan (0= off, 255=full power) Autotemp: Function, to adapt the temperature of the printhead automatically to the print speed.
-
Page 32: Starting Up A Print
User Manual 3D-Printer 6.8 Starting up a Print Assure that all previous steps have been executed completely and correctly. Hot Surface! Burn hazard when touching the hot surface. Entrapment hazard Danger / moving parts. 1. Insert the SD Card with the gcode into SD the slot (8) 2. -
Page 33: Stop The Print
User Manual 3D-Printer 6.9 Stop the print In this chapter we will explain the most common manual ways to stop the printer. 6.9.1 Stop the print using the menu Push the jog button. Turn the button to the left and select “Stop Print” . Push the button again to stop printing immediately. -
Page 34: Material Change
User Manual 3D-Printer 6.11 Material change Please assure that the 3D Printer is fully assembled and wired correctly and that the printhead has been installed. Scenario 1: NOT during a print job and when the heater is cold. 1. Preheat the nozzle with the presettings: Push the button →... -
Page 35: Design Guide
If a new product is being printed, there is no previous layer. This means that the first layer needs to start onto the conveyor belt. Not every geometry is equally suited to be printed on the BLACKBELT 3D Printer. The model below is a cross section of a plane which does not start onto the composite belt: If the model starts above the belt, it is necessary to apply a support or starting geometry to the part, that can be modelled in using CAD software. - Page 36 Because of these facts, the design of the part needs to be considered carefully. While designing products for the BlackBelt 3D Printer it is important to consider the direction the product will be printed. The cross section below can easily be printed from left to right.
-
Page 37: Using Custom Support
User Manual 3D-Printer 7.1.1 Using custom support The custom support mentioned in the previous chapter can be designed in your CAD program [1-2]. Make sure that the support geometry is an apart volume body that has no offset to the product geometry. It may interfere however. - Page 38 User Manual 3D-Printer ––– BlackBelt 3D BV is at your disposal to help optimize designs for printability. Version 2018-3.1_ENG...
-
Page 39: Materials
User Manual 3D-Printer 7.2 Materials Economy PLA Economy PLA is a bio based material, perfectly suited for: Visual parts Interior parts Very low warp, perfect for e.g. extrusion profiles. Note: low adhesion to the conveyor belt. Part needs a big footprint. NGen nGen copolyester is a multipurpose material most reliable easy to print with. -
Page 40: Custom Materials
User Manual 3D-Printer 7.2.1 Custom Materials Best way to keep track of all the different material settings is to make use of the Material library integrated in BlackBelt Cura. Use the following instructions to add custom materials to the library. To add new materials, go to the Manage Materials menu [1] under materials tab. -
Page 41: Maintenance
To re-assure the functionality of the machine we advise in case of accidents to consult Blackbelt 3D BV immediately. Please doublecheck if the instructions in this manual have been executed properly. If the machine is still not functioning properly, please consult the Blackbelt 3D BV service desk. -
Page 42: Possible Failure Mode
8.3 Spare parts Only original spare parts and machine parts of BlackBelt 3D BV can be used in the machine. All consumer and spare parts can be found in the web shop of Blackbelt-3d.com or by direct inquiries at sales@blackbelt-3d.com. -
Page 43: Changing The Belt
User Manual 3D-Printer 8.3.1 Changing the belt Please make sure all the material is removed from the printer. The material removal steps are explained in chapter 6.11. 1. Turn off the machine and disconnect the controller box [1-3] 2. Remove the printhead, please make sure all the cables are removed [4-6] 3. - Page 44 User Manual 3D-Printer 45° position 5. Remove the 2 screws at the hinge – the gantry will now hold its position [9-10] 6. Detach the rear fan cable! [11] 7. Remove the 2 angle adjusting knobs (3) while holding the gantry up with one hand [12] 8.
- Page 45 User Manual 3D-Printer 10. Loosen the rear roller with the rear 2 screws [14] 11. Unmount the rear roller while holding it with the other hand [15] 12. Remove the rear roller [16] 13. Remove the conveyor belt [17-18] a. Move it carefully to the front, between the limitations b.
- Page 46 User Manual 3D-Printer 17. Turn the base unit back on its feet [24] a. Make sure the belt is between the guiders! Follow instructions in Chapter 5.6 for the belt calibration before continuing this guide. 18. Put the gantry back on the base unit and mount it in 45° position with the 2 angle adjusting knobs [25] 19.
-
Page 47: Heated Bed Modification
User Manual 3D-Printer 8.4 Heated bed modification Before taking these steps make sure the printer is turned off, the power cable is unplugged, and the bed is cooled down to room temperature < 30 °C For parts that extend the heated area during printing, we recommend doing a onetime modification to the printer. This will not affect the printing performance for the other materials. -
Page 48: Customer Service And Support
User Manual 3D-Printer Hot plate Front plate 8.5 Customer service and support Our technical and support department will answer all your questions about repair and maintenance of your machine and spare parts. Team BLACKBELT 3D is happy to advise you regarding your purchase, use of the machine and setting up the products, as well as applying the correct design guidelines. -
Page 49: Eg-Declaration Of Compliance
User Manual 3D-Printer 10 EG-declaration of compliance EG-declaration of compliance for machinery (directive 2006/42/EG, Addendum II, section A.) Blackbelt 3D BV Bremweg 7 5951 DK Belfeld Netherlands Declares that: Machine: BLACKBELT 3D-Printer Type: BLACKBELT 3D-Printer Desktop version complies with Machinery directive 2006/42/EG and complies to the provisions of the EMC-directive 2014/30/EG...
Need help?
Do you have a question about the BLACKBELT 3D Printer and is the answer not in the manual?
Questions and answers