Chapters
Table of Contents

Subscribe to Our Youtube Channel
Related Manuals for Elster A1140


Summary of Contents for Elster A1140
- Page 1 A1120/40 Programmable Electronic Polyphase Meter Users Manual Options • CT or Direct Connected • Serial Communications • Load Profiling • Read Without Power • SO Pulse Output • English or OBIS Display Descriptors M181 001 1 6.2010...
- Page 3 A1120/40 Programmable Electronic Polyphase Meter Chapter 1 - Introduction M181 001 1B 5.2009...
- Page 4 Minor Change Record Date Modification 7.5.2009 Format change...
- Page 5 Chapter 4 - Communications (M181 001 4) Operating and Installation Instructions for all types of communications including, RS232, RS485 and GSM modems. General information and configuration data for setting up ASL, GSM modems are also included. © Elster Metering Limited - M181 001 1A - 5/2009...
- Page 6 A1120/40 Operating & Maintenance Instructions - Chapter 1 ___________________________________________________________________________...
- Page 7 A1120/40 Programmable Polyphase Meter Chapter 2 - Operating & Maintenance Instructions M181 001 2G 5.2010...
-
Page 9: Table Of Contents
13.2 ....................20 ECORDABLE ECURITY EATURES 13.2.1 Phase Present/Phase Fail Indication..................... 20 13.2.2 Reverse Energy Flow ........................20 13.2.3 Power Fail ............................. 21 13.2.4 End of Billing Event ........................21 © Elster Metering Limited - M181 001 2G - 5/2010... - Page 10 )............33 USTOMER ONFIGURABLE UXILIARY UTPUT ELAY 21.2 ) ..................34 NDICATION ANUFACTURING OPTION ADDITIONAL VOLTAGE TERMINALS ..................34 LOAD PROFILE RECORDING (A1140) ..................34 INSTRUMENTATION........................35 TECHNICAL DATA........................36 © Elster Metering Limited - M181 001 2G - 5/2010...
- Page 11 Operating & Maintenance Instructions INSTALLATION ..........................37 26.1 ........................... 37 NPACKING 26.2 ........................... 37 ANDLING 26.3 ........................... 37 TORAGE 26.4 ........................... 37 NSTALLATION 26.5 (EMC) ..................37 LECTROMAGNETIC OMPATIBILITY 26.6 ........................38 IXING AND ONNECTION COMMISSIONING......................... 39 MAINTENANCE ..........................40 DISPOSAL AND RECYCLING .....................
- Page 12 APPENDIX D - EXTERNAL BATTERY MODULE..................60 ......................60 XTERNAL ATTERY ODULE ......................60 XTERNAL ATTERY TATUS ............. 60 SING THE XTERNAL ATTERY ACILITY DURING OWER UTAGES ..........................61 NSTALLATION © Elster Metering Limited - M181 001 2G - 5/2010...
-
Page 13: Foreword
The purchaser is responsible for making sure that everyone, whether in his employment or not, who will be associated with the products supplied by Elster Metering Systems, and to which these instructions and information apply, are made familiar with the contents of this manual. -
Page 14: Warnings
Elster Metering Systems would like to draw the user's attention to the International Standard for Lithium Batteries - IEC 60084-4 - which gives further information about the handling, storage, transport and disposal of lithium cells. -
Page 15: Compliance With Standards And European Directives
Operating & Maintenance Instructions COMPLIANCE WITH STANDARDS AND EUROPEAN DIRECTIVES Meters are marked with the European CE mark, in accordance with the Marking Directive 93/68/EEC, to indicate compliance with the requirements of the EMC Directive 89/336/EEC. Safety requirements for meters are addressed in specific metering standards outlined below. The CE Mark does not denote compliance with the European Low Voltage Directive 73/23/EEC, which specifically excludes electricity meters. -
Page 16: Introduction
Communications are provided via the optical (IEC 62056-21) port and are supported by data stream mode, allowing fast reading of meter data. The A1140 permits up to 90 days of load profile data to be collected in less than 30 seconds. The RJ11 socket provides optional RS232 communications allowing remote access to the same data as the optical port. - Page 17 DIN (BS) double insulated, glass filled polycarbonate case • IP53 in accordance with IEC 60529 : 1989 Options • RS 232 serial communications • Load profiling (A1140) • Module/battery carrier • SO (EN 62053-31) or relay pulsed output • Terminal cover removal detection switch •...
-
Page 18: General Description
(pulses/kWh, pulses/kvarh). Connection diagrams (See Figure 5A for examples) are shown underneath the terminal cover. A Terminal Cover Plate must be fitted to protect the meter Main Terminals. © Elster Metering Limited - M181 001 2G - 5/2010... -
Page 19: Meter Accuracy
Operating & Maintenance Instructions Meter Accuracy The A1120/40 meter measures active energy, in accordance with the requirements of - EN 62053-21/22 for indoor kWh meters of protective Class II and accuracy Class 0.5s, 1 or 2, EC Directive 2004/22/EC (MID) - Class A, B or C The design of the meter ensures life long stability. -
Page 20: Test Indicators & Anti-Creep
Programmable features are selected using Power Master Unit Software that runs on an IBM or compatible PC. This software is available from Elster Metering Systems and is described in M181 001 3. Note: The features available will depend on the meter variant (See Section 5). -
Page 21: Registration Of Quantities
Operating & Maintenance Instructions 10.1 Registration of Quantities 10.1.1 kWh total import (active energy) kWh total export (active energy) Total import and total export quantities are registered separately. The measurement discrimination is such that, as the power factor of any load from 0.05Ib to Imax is varied over 360°, the import and export registers will never advance together. -
Page 22: Customer Defined Registers
13 End of billing dates Daylight savings Independent day control Deferred tariff Tariff scheme CRC At least one Season must be programmed into the meter for TOU registers to be available. © Elster Metering Limited - M181 001 2G - 5/2010... -
Page 23: Time-Of-Use Registers
Section 11.1. The demand integration period can be 1, 2, 3, 4, 5, 6, 10, 15, 20, 30 or 60 minutes. In A1140 meters the integration period used for the demand registers is the same as the load profile integration period. -
Page 24: Switching Times
There may be special days in the year when the tariff does not follow the normal pattern, e.g. public holidays. These can be taken care of by invoking Exclusion Dates. Up to 32 Exclusion Dates can be programmed. © Elster Metering Limited - M181 001 2G - 5/2010... -
Page 25: End Of Billing (Eob)
Operating & Maintenance Instructions These dates will fall into one of three categories: 1 Dates which are fixed for every year e.g. December 25 - programmed by absolute dd.mm 2 Dates which fall on the same day of the month every year e.g. the first Monday in May 3 Dates which vary from year to year e.g. -
Page 26: Daylight Savings
The meter has the facility to have a different switching program consisting of several switching times running on different days of the week. An example of a switching program is below. Mon Tue Wed Thu Switching programs © Elster Metering Limited - M181 001 2G - 5/2010... -
Page 27: Deferred Tariff And Deferred Tariff Changeover Date
Operating & Maintenance Instructions 11.9 Deferred Tariff and Deferred Tariff Changeover Date A second tariff can be programmed in the meter that will take effect from a programmed date. An option to perform an End of Billing on the Deferred Tariff Changeover Date is available as part of the deferred tariff structure. -
Page 28: Security Features
The meter detects and stores the number of reverse running events to a maximum of 65535. The register will then roll over to 0. A time and date stamp of the three most recent events is recorded. © Elster Metering Limited - M181 001 2G - 5/2010... -
Page 29: Power Fail
Operating & Maintenance Instructions The count and time and date stamps can be included in the display sequence. An event is detected if the meter runs in reverse for a period greater than 5 seconds. Reverse energy reading Irrespective of whether the meter is set to import only power flow insensitive mode, reverse kWh power flow will be independently recorded. -
Page 30: Ct Ratio Programming
A time and date stamp of the three most recent non-fatal error events is recorded where possible. In the unlikely event that any of the above meter errors occur, a catastrophic failure has been detected and the meter should be returned to Elster Metering for failure investigation. 13.2.10 Cover Removal Detection Main Cover As a manufacturing option the main cover can be fitted with a tamper switch to detect removal. -
Page 31: 13.2.11 Remaining Internal Battery Life
Operating & Maintenance Instructions Terminal Cover As a manufacturing option the meter can be fitted with a tamper switch to detect removal of the terminal cover. The number of times the cover has been removed to a maximum of 65,535 is recorded together with the time and date stamps of the last 3 occurrences. -
Page 32: Meter Display
The Units of Quantity (Wh, kWh, MWh) and multiplier (x10, x100) displayed are selectable by the Power Master Unit and displayed in the top right corner of the display. The display opposite shows kWh, x10. © Elster Metering Limited - M181 001 2G - 5/2010... -
Page 33: Display Modes
Operating & Maintenance Instructions 14.3 Display Modes The display has two modes of operation, Default Mode and Utility Mode. Up to 40 displays can be made available for each mode of operation. 14.3.1 Default Mode The Default Mode can operate in two ways, Auto-cycle or single step. Auto-cycle At power up the segment test pattern is shown. -
Page 34: Utility Mode
The OBIS code gives a description of the main register displayed. OBIS Code Chevron 7 indicates the register is active. Examples of displays and a full list of displays are given in Figures 7 and 8 respectively. Active © Elster Metering Limited - M181 001 2G - 5/2010... -
Page 35: Displayable Data
Operating & Maintenance Instructions 14.4 Displayable Data A full list of displayable data items is given in Figure 8. Items available will depend on the meter variant. Segment Test Pattern Cumulative Registers Customer Defined Registers Rising Demand Registers TOU Maximum Demand TOU Registers Historical Registers Security... -
Page 36: Using The Pushbuttons
An optional battery (See Section 20) supports the port during power outages. This facility is limited to reading data only. The port can operate at baud rates of up to 9600. © Elster Metering Limited - M181 001 2G - 5/2010... -
Page 37: Optional Rs232 Port
Operating & Maintenance Instructions 16.2 Optional RS232 Port An RJ11 connector provides RS232 communications. The port allows access to the same data as the optical port, using the same protocol. The port operates at speeds of up to 9600 baud. Data Stream Mode (See Section 16.3) allows a fast method of retrieving all data. -
Page 38: Programming The Meter
If a request for a small adjustment (-7.5 minutes to +7.5 minutes) to the current setting is made (with appropriate password), this adjustment will be applied by shortening or lengthening subsequent demand periods by 5 seconds until the whole of the adjustment has been achieved. © Elster Metering Limited - M181 001 2G - 5/2010... -
Page 39: Battery Back-Up
Operating & Maintenance Instructions BATTERY BACK-UP The A1120/40 has an internal battery that supports the clock and calendar. An optional external battery that supports the reading of meter data and display facilities during power outages can be provided. 19.1 Internal Battery In the event of an a.c. -
Page 40: Module/Battery Carrier
Minimum current in On-state 10 mA Maximum current in Off-state 2 mA The output is connected using two 3.2mm diameter terminals (See Figure 5). The pulse output meets the requirements of IEC 62053-31. © Elster Metering Limited - M181 001 2G - 5/2010... -
Page 41: Customer Configurable Auxiliary Output (So And Relay)
Operating & Maintenance Instructions WARNING See Warning in Section 26.6 regarding additional protection for circuits connected to the auxiliary terminals. 21.1 Customer Configurable Auxiliary Output (SO and Relay) Retransmit The customer configurable auxiliary output can be sourced (using the Power Master Unit) to transmit pulses from one of the following registers: •... -
Page 42: Test Indication (Manufacturing Option)
Readings The A1140 can be programmed to record up to four values from any of the rising demand registers at the end of each integration period. Up to 300 days of 30 minute data can be stored for a single channel. -
Page 43: Instrumentation
Operating & Maintenance Instructions Status information is also stored with each integration: • Load profile event indication with time and date stamps – Power up, Power down, Time change, Configuration change, New day, Daylight savings, Forced end of demand. • Load profile status indication per period –... -
Page 44: Technical Data
Note: Sample meters have successfully passed the “Damp heat cyclic” test given in section 6.3.4 of EN50470-1. However, for maximum operational life, it is recommended that installation sites are chosen where condensation is unlikely to occur. © Elster Metering Limited - M181 001 2G - 5/2010... -
Page 45: Installation
Check that there is no movement or loose parts within the meter enclosure. If damage has been sustained in transit, an immediate claim should be made to the Transport Company, and a report sent to the Elster Metering Systems branch office or agent. WARNING Removal of the main cover seals will invalidate certification. -
Page 46: Fixing And Connection
Secure the lower end of the meter to the board using two 5mm dia. x 13mm long round head screws through the lower mounting holes in the area of the terminal chamber. Tighten screws just sufficiently to prevent movement of the meter. © Elster Metering Limited - M181 001 2G - 5/2010... -
Page 47: Commissioning
Operating & Maintenance Instructions WARNING Do not over-tighten the screws or the meter base may be damaged. For connecting to the large diameter terminals, strip back the cable insulation by 26mm. Fully insert cables into the terminals so that the insulation butts up into the counter-sunk recesses in the bottom face of the terminal block. -
Page 48: Maintenance
Elster Metering Systems would like to draw the user's attention to the International Standard for Lithium Batteries - IEC 60084-4. - which gives further information about the handling, storage, transport and disposal of Lithium cells. -
Page 49: Code
A1120 Multi Rate A1140 Multi Rate (with load profile) A1120 Multi Rate with password protected register zeroing and zero level time shift A1140 (with load profile) Multi Rate with password protected register zeroing and zero level time shift AUXILIARY OUTPUT No Output SO output, floating, 2 aux terminals. -
Page 50: C Ode (C Ontinued )
Direct Connected Maximum current (Imax) shall preferably be an integral multiple of Ib. Direct Connected A1120/A1140 meters may have Imax values up to a maximum of 100A CT Operated shall have maximum currents of 1.2 In, 1.5 In and 2 In CT Operated A1120/A1140 meters may be: 1 - 2A (suitable for use as 1 - 1.2A, 1 - 1.5A, or 1 - 2A) -
Page 51: Eter
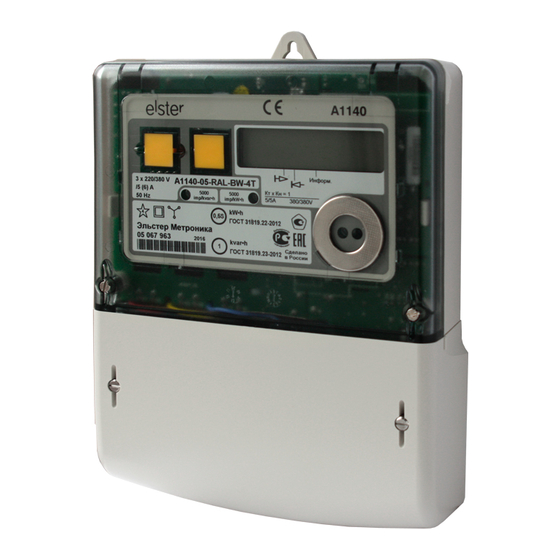
Operating & Maintenance Instructions 1. Reset Pushbutton 5. Display 2. Display Pushbutton 6. Nameplate 7. IEC 62056-21 Port 3. kvarh pulse LED 4. kWh pulse LED Reset Pushbutton (See Section 15) Display Pushbutton (See Section 15) kvarh Pulse Indicator (See Section 9) kWh Pulse Indicator (See Section 9) Display (See Section 14) Nameplate (See Figure 3) -
Page 52: N Ameplate
A1120/40 - Electronic Polyphase Meter Figure 3 - Typical Nameplate © Elster Metering Limited - M181 001 2G - 5/2010... -
Page 53: Urves
Operating & Maintenance Instructions Figure 4 - Load Curves... -
Page 54: A Rrangements
- Voltage Terminal - Line Out Neutral In Neutral Out Auxiliary 20 positive 21 negative See Warning in Section 22 regarding protection for additional voltage terminals. Figure 5 - Terminal Arrangements © Elster Metering Limited - M181 001 2G - 5/2010... -
Page 55: C Onfigurations
Operating & Maintenance Instructions LM3 *** 20 21 3 phase 4 wire, CT operated LM3 *** 20 21 3 phase 4 wire, Direct connected Note: These diagrams are examples only. WARNING Meters must be connected according to the diagram fitted under the meter terminal cover. Figure 5A –... -
Page 56: F Ixing C Entres
A1120/40 - Electronic Polyphase Meter Back View Side View 171.5mm 49mm 139mm 121mm 233mm 150mm 110mm Terminal Cover with Cut-out Short Terminal Cover Figure 6 – Dimensions, Fixing Centres © Elster Metering Limited - M181 001 2G - 5/2010... -
Page 57: Isplays
Operating & Maintenance Instructions English Displays OBIS Displays Segment Test Cumulative Customer Defined (1-2) Rising Demand (Export) Maximum Demand (1-4) Maximum Demand (1-4) Date Time Cumulative Maximum Demand (1-4) Time of Use (1-8) Figure 7 - A1120/40 Displays... - Page 58 End of Billing (Change of Season) End of Billing (Internal Battery Fail) Error (Power Fail Data) Error (Internal Battery Fail) CT (Scalar) CT (Ratio) External Registers Figure 7 - A1120/40 Displays (continued) © Elster Metering Limited - M181 001 2G - 5/2010...
-
Page 59: Table
Operating & Maintenance Instructions Description Units OBIS Display Code English Display Note 1 * Identifier Chevron Index Segment Test Current Time 0.9.1 Current Date 0.9.2 Cumulative Total Import kWh 1.8.0 Total Export kWh 2.8.0 Q1 kvarh kvarh 5.8.0 Q2 kvarh kvarh 6.8.0 Q3 kvarh... -
Page 60: T Able ( Continued )
Error 0100 C Bus error FF 0200 Error 0200 Internal battery life FF 0400 Error 0400 exceeded Internal battery fail FF 0800 Error 0800 Figure 8 - Display Table (continued) © Elster Metering Limited - M181 001 2G - 5/2010... -
Page 61: T Able ( Continued )
Operating & Maintenance Instructions Description Units OBIS Display Code English Display Note 1 Identifier Chevron Index Historical (Most recent only) Total Import kWh 1.8.0.1 Total Export kWh 2.8.0.1 Q1 kvarh kvarh 5.8.0.1 Q2 kvarh kvarh 6.8.0.1 Q3 kvarh kvarh 7.8.0.1 Q4 kvarh kvarh 8.8.0.1... - Page 62 Frequency Phase A 34.7.0 Ins A Frequency Phase B 54.7.0 Ins B Frequency Phase C 74.7.0 Ins C * Units depend on register selected Figure 8 - Display Table (Instrumentation) © Elster Metering Limited - M181 001 2G - 5/2010...
- Page 63 Operating & Maintenance Instructions (Correct level 0 password [Read only]) Level 0 Meter Serial Number Meter Scheme Id (Correct level 1 password [Read only]) Level 1 All data listed at level 0 Half hourly values of Load Profile Total cumulative Active Energy Total cumulative Reactive Energy Total cumulative VA Maximum Demand Registers (MD)
-
Page 64: Appendix A - Checking Kwh And Kvarh Registration Accuracy
994 (LED count) = 0.994 kWh advance. 1000 (meter constant) Compare this kWh advance with the amount the substandard has advanced. Repeat for kvarh using left hand Test LED. © Elster Metering Limited - M181 001 2G - 5/2010... -
Page 65: A2.2 Comparing Led Pulses With Substandard Meter Pulses
Operating & Maintenance Instructions A2.2 Comparing LED pulses with substandard meter pulses This method may be used where the test equipment has the facility to calculate meter errors based on the pulse output from a substandard meter. It will be necessary to set the pulse value of the meter under test (shown on the meter nameplate) into the meter test equipment. -
Page 66: Appendix B - Rs232 Multi-Drop Mode
R 11 Adaptor R 11 Adaptor (3) Rx Tx (3) Flat Pin Cable From PC No Connection (4) Next Meter Zero Volts (5) RJ11 Connector 6 5 4 3 2 1 © Elster Metering Limited - M181 001 2G - 5/2010... -
Page 67: Appendix C - Rs485 Multi-Drop Mode
Operating & Maintenance Instructions APPENDIX C - RS485 Multi-drop Mode A1120/40 meters allow up to 12 meters to be connected in RS485 multi-drop configuration. Two- way RJ11 adaptors will be required to link each meter in the chain. RJ11 RJ11 5 4 3 2 1 5 4 3 2 1 Standard 9-25 Way Lead... -
Page 68: Appendix D - External Battery Module
External Battery Module power will be removed from the meter if the 'No button time-out' (programmable from 10 to 120 seconds using the Power Master Unit) has expired. © Elster Metering Limited - M181 001 2G - 5/2010... -
Page 69: D2 I Nstallation
Operating & Maintenance Instructions Installation WARNINGS Read Section 2 (Warnings) before installing the Battery Module. Check that the terminal cover plate is in place before installing the module. If the terminal cover plate is not in place, all supplies to the meter must be isolated. For correctly installed 3 phase 4 wire meters, one of the battery connections will be at 'Mains Neutral' potential. - Page 72 A1120/40 Programmable Electronic Polyphase Meter Chapter 4 - Communications M181 001 4A 5.2007 DRAFT Other Manuals in this Series A1120/40 Operating & Maintenance M181 001 2 A1120/40 Software Support M181 001 4...
- Page 74 RS 485 Multi-drop Mode......................10 4.2.1 RS485 Multi-drop Mode Installation Procedure..............10 4.2.2 Amplicon Model RS485 Line Driver..................11 Configuring the Technolog Modem..................11 ASL A1120/40 GSM MODEM ....................13 © Elster Metering Limited - M181 001 4A - 5/2007 DRAFT...
- Page 75 Protection Act 1987. The purchaser is responsible for making sure that everyone, whether in his employment or not, who will be associated with the products supplied by Elster Metering Systems, and to which these instructions and information apply, are made familiar with the contents of this manual.
-
Page 76: Scope
Communications ___________________________________________________________________________ Communications SCOPE This Chapter covers the operation and installation of the ASL A1120/40 GSM modem and Technolog A1120/40 GSM modem. Both modems are housed in a secure carrier that fits under the meter terminal cover. Before installing a module or module peripheral equipment, read the Safety Warnings, Warnings, Precautions for handling electrostatic discharge sensitive devices and EMC Guidelines below. -
Page 77: Ce Mark
Elster Metering Systems holds on record the appropriate Declaration of Conformity and supporting documentation, against which the CE mark is affixed. © Elster Metering Limited - M181 001 4A - 5/2007 DRAFT... -
Page 78: Guidelines For Compliance With Emc Directive
Communications ___________________________________________________________________________ Guidelines for Compliance with EMC Directive The A1120/40 meter has been designed and tested for compliance with the EMC and other applicable directives. It is, however, the responsibility of the installer to ensure that an installed system conforms to the directives. -
Page 79: Gsm Modems General Information
There is a wide range of antennae, each with their own characteristics for use with GSM modems. It is therefore important to choose an antenna most suitable for your installation. © Elster Metering Limited - M181 001 4A - 5/2007 DRAFT... - Page 80 Communications ___________________________________________________________________________ How to Site the Antenna The antenna should be mounted vertically in a position where it is possible to receive good mobile phone reception from your Service Provider. Signal strength may be tested by using the monitor on a mobile telephone providing the mobile uses the same service provider as the SIM in the GSM.
-
Page 81: Technolog Gsm Modem
Amplicon Line Driver(s) Model 485 Note: There is a wide variety of equipment meeting the required specifications available for use with Elster GSM modems. Equipment listed is a representative sample only. © Elster Metering Limited - M181 001 4A - 5/2007 DRAFT... -
Page 82: Rs232 Multi-Drop Mode
Communications ___________________________________________________________________________ RS232 Multi-drop Mode Up to 10 meters can be connected in multi-drop configuration from a single modem. The maximum transmission distance is 12 metres. Each meter will require a two-way RJ11 adaptor to link to the next meter in the chain. 4.1.1 RS232 Multi-drop Installation Procedure The connection diagram for RS232 multi-drop mode is shown below. -
Page 83: Rs 485 Multi-Drop Mode
10. Follow steps 6 to 9 to connect the next meter in the chain 11. Replace the terminal cover and fit appropriate seals 12. Continue to the next meter © Elster Metering Limited - M181 001 4A - 5/2007 DRAFT... -
Page 84: Amplicon Model Rs485 Line Driver
Communications ___________________________________________________________________________ RJ11 RJ11 Two-way R 11 adaptor 6 5 4 3 2 1 6 5 4 3 2 1 6 5 4 3 2 1 +VDC 7 +VDC 7 +VDC 7 3: B 4: A 25-way D type 25-way D type 25-way D type 5: A1 6: B1... - Page 85 1 - Odd 2 - None Where z is the data bits 0 - 7 1 - 8 Send the text message to the data number of the SIM Card © Elster Metering Limited - M181 001 4A - 5/2007 DRAFT...
-
Page 86: Asl A1120/40 Gsm Modem
Communications ___________________________________________________________________________ ASL A1120/40 GSM MODEM Features • Modem compatible communications rates up to 9600 baud • Error correction including V110 (for ISDN/GSM connected host • IP connectivity for AMR using low cost GPRS services • SMS AMR capability with programmable read time and remote diagnostics •... - Page 87 1200 E71 Once configured, remember to change HyperTerminal baud rate to match. ATE0 <ENTER> Echo off ATQ1 " Suppress result codes AT&W " Save settings AT&V " View modem settings © Elster Metering Limited - M181 001 4A - 5/2007 DRAFT...
- Page 88 Communications ___________________________________________________________________________ LED Status Indicators The ASL modem has three status LED’s Modem Status (Green LED) Slow flash (once every 3 seconds) CDS mode (waiting for call) Fast flash (twice a second) during call Network status (Red LED) Off (module off) On (Not registered) Long pauses, short blinks (Registered with network) Signal strength (Yellow LED)
- Page 89 A1120/40 Users Manual - Chapter 3 __________________________________________________________________________ © Elster Metering Limited - M181 001 4A - 5/2007 DRAFT...
- Page 90 A1120/40 Programmable Electronic Polyphase Meter Chapter 3 - Software Support M181 001 3C 12.2007 Other Manuals in this Series A1120/40 Operating & Maintenance Instructions M181 001 2 A1120/40 Communications M181 001 4...
- Page 92 Communications....................... 22 Modem Power Supply ......................23 Error Handling ......................23 Other (VA 1) ......................24 VA 2.......................... 24 3.4.12 A1120/40 M ............. 24 ETER NTERFACE PTIONS 3.4.13 & D ......................25 © Elster Metering Ltd - M181 001 3C - 12/2007...
- Page 93 ASTER APPENDIX A........................... 49 ............... 49 XPORTING EADINGS AS A Setting up the File printer ..................49 ........................50 APPENDIX B........................... 51 OMS Software ......................51 Downloading Schemes .................... 51 © Elster Metering Ltd - M181 001 3C - 12/2007...
-
Page 94: Power Master Unit Meter Compatibility
Variants of the A1120/40 Meter that can be programmed with the Power Master Unit are shown opposite. This manual is for use with the A1120 meter and the A1140 load profile meter only. See the list below for details of meter variants. -
Page 95: Software Installation
After a short time the screen opposite is displayed. If the Power Master Unit is not already on your PC a prompt will be displayed to continue. Click Upgrade Power Master Unit, Next to continue. © Elster Metering Ltd - M181 001 3C - 12/2007... - Page 96 Choose Destination The Power Master Unit will be installed in the selected folder. The default destination is C:\ELSTER\PMU\. Use the Browse button to select another folder. Click Next to continue. A prompt is displayed if it is OK to overwrite the...
- Page 97 Probe with DTR disabled Probe with DTR enabled It is important to choose the correct probe for your installation, as optical communications will not be available if the wrong probe is selected. © Elster Metering Ltd - M181 001 3C - 12/2007...
- Page 98 Power Master Unit _________________________________________________________________ Select Program Folder This allows the program to be stored on the Start Menu in the folder name of your choice. You may select a folder already on your system or select a new folder. When you have chosen the folder: Click Next to continue.
- Page 99 Me ter Identifiers, Passwords, Tariff, Deferred Tariff, Billing Dates, Display, Meter Constants, Customer Registers, Rela y Setup, Load Profiling, , A1120 Options, A1120 UI Options, Time & Date A1120/40 Power Master Unit Overview © Elster Metering Ltd - M181 001 3C - 12/2007...
-
Page 100: Power Master Unit
Power Master Unit meter compatibility does not allow different meter types to be programmed by the same scheme, therefore a separate manual support's each application. This manual supports A1120 and A1140 meters only. For information on how to program the A1700 and PPM meters, see manual M120 001 6. -
Page 101: Logging On To The System
User id and Passwords will be permitted to Log On to the Master Unit software. The Password is initially set to Elster. This should be changed as soon as possible to prevent unauthorised access to the Master Unit. The password may be changed using the System/Change Password dialog from the Main Menu bar. -
Page 102: The Main Window
Power Master Unit _________________________________________________________________ Techniques used on the action windows Selecting Objects or folders Point at the object or folder and click the left most mouse button. The object or folder will appear highlighted. Opening folders In the Scheme Manager, double click the leftmost mouse button on Schemes. -
Page 103: Menus
This option allows unwanted .RES files to be deleted. Import old Master Unit file - This allows files produced in the original Elster Metering Systems Master Unit to be converted for use in the Power Master Unit. Files are imported to the Old Master Unit folder and arranged as a scheme for use in the Power Master Unit. - Page 104 Power Master Unit _________________________________________________________________ Import RES file - This retrieves meter readings from different locations such as a:\ to be transferred to the Master Unit. Import Scheme/meter - Import a Scheme or meter parameters from another source such as a floppy disk or Network drive.
-
Page 105: Scheme Editor Pages
The Meter Constants page is shown opposite. It consists of a Page Identifier and three Check Panels. © Elster Metering Ltd - M181 001 3B - 5/2007... -
Page 106: Using The Toolbar
About Help The Power Master Unit Help gives a step-by-step guide on how to enter a scheme into an A1120 meter or A1140 meter. All information required to program a meter is contained in the Help. Using the F1 Key... - Page 107 A1120/1140 Programmable Polyphase Meter Users Manual ___________________________________________________________________ © Elster Metering Ltd - M181 001 3B - 5/2007...
-
Page 108: The Scheme Manager
Power Master Unit ___________________________________________________________________________ The Scheme Manager Introducing Schemes The Scheme manager allows schemes to be organised or read. A Scheme can consist of an individual entry, such as a Tariff/Display sequence. This Scheme may be used to program a number of different meters with the same Tariff and Display sequence. -
Page 109: Scheme Manager
Context Menu with the options shown opposite becomes available. Select A1120/40 scheme. Options obey standard Windows conventions and are viewed by pointing at the right pane of the Scheme manager, then right clicking the mouse. © Elster Metering Ltd - M181 001 3C - 12/2007... -
Page 110: Scheme Editor
Power Master Unit ___________________________________________________________________________ Scheme Editor Selecting the Meter Type Before using the Scheme editor, the type of meter to be programmed must be selected. Select File/New/A1120/40 Scheme and open the scheme. Select Compatibility on the Main Menu Bar. Select the appropriate meter variant only. From now on the Power Master Unit will only display parameters applicable to the selected model(s) of A1120/40 Meter. -
Page 111: Starting A New Scheme
A Scheme called New Scheme is entered in the Scheme manager and is highlighted. Rename the scheme and press Enter. Scheme Editor The Scheme Editor can be used to program all variants of the A1120/40 meter. © Elster Metering Ltd - M181 001 3C - 12/2007... -
Page 112: Summary
Power Master Unit ___________________________________________________________________________ 3.4.1 Summary The Summary gives a quick preview of the schemes entered for each section in the Scheme editor. Using the Summary Page All items shown in bold will be programmed to the meter. 3.4.2 Meter Identifiers This Page allows the Scheme id, Outstation number and Meter serial number to be entered. -
Page 113: Tariff/Display
Q1 kvarh Import Lagging Energy Q2 kvarh Import Leading Energy Q3 kvarh Export Lagging Energy Q4 kvarh Export Leading Energy Add import kVAh Add export kVAh © Elster Metering Ltd - M181 001 3C - 12/2007... -
Page 114: Define Seasons
Power Master Unit ___________________________________________________________________________ Examples of their use are: CD Register 1 kWh import + kWh export (a + b) = Total kWh CD Register 2 kvarh import lagging + kvarh import leading (c + d) = Total Import kvarh Define Seasons 12 Seasons This Tab allows the Seasons to be created. -
Page 115: Season Changeover Dates
A switching time for the 1 Jan is shown opposite. The shaded box indicates the season or day to switch to i.e. Holiday is the day type selected to use. © Elster Metering Ltd - M181 001 3C - 12/2007... -
Page 116: Default Display
Power Master Unit ___________________________________________________________________________ Choosing the Exclusion Date Type The Exclusion Date can be set to one of the following options: Set to day type – this sets an Exclusion Date to a particular day as defined in the Define season day list Set to specific day of the same season –... -
Page 117: Utility Display
The deferred Tariff/Display is a pre-defined tariff that will become active specified by the user in the Deferred Tariff Setup. The setup for the deferred Tariff/Display is exactly the same as Tariff/Display. © Elster Metering Ltd - M181 001 3C - 12/2007... -
Page 118: Deferred Setup
Power Master Unit ___________________________________________________________________________ 3.4.6 Deferred Setup This Page allows the Deferred Tariff/Display to be disabled, or enabled on a specified date. A Billing Reset on switching to Deferred Tariff can also be actioned. 3.4.7 Billing Dates 13 Billing Dates This Page allows the End of billing dates to be set. -
Page 119: Meter Constants
Retransmit is selected along with the appropriate Source, Pulse value and the Pulse width. Ensure that the chosen pulse value and pulse width leaves adequate gaps between pulses at maximum meter loads. © Elster Metering Ltd - M181 001 3C - 12/2007... -
Page 120: Load Profiling
If AC supply is selected, the crystal will take over in the event of a supply failure. Load profiling – The A1140 can be set to observe daylight savings (See 3.4.13, Time and date) or to ignore daylight savings. -
Page 121: Register Formats
Data Stream Mode meters should be set to 8, None, 1. Communication Turn-around Time This is a programmable time before which the meter will respond for a request for data. The default is 200ms. © Elster Metering Ltd - M181 001 3C - 12/2007... -
Page 122: Modem Power Supply
Power Master Unit ___________________________________________________________________________ Modem Power Supply Disable Serial Port Power - The power for the modem is disabled Always Power Serial Port - The power to the modem is permanently enabled Interrupt Serial Port Power - To ensure the correct operation of any device connected to the serial port, power to the port is interrupted for 20 seconds at a programmable period (1 - 24 hours) set by the user. -
Page 123: Other (Va 1)
No Button Time-out - Time after which the display will return to auto-cycle mode after the last press of either pushbutton (10 to 120 seconds) Phase Identifiers - Formats the instrumentation displays to one of the following formats [A, B, C] [1, 2, 3] [R, Y, B] © Elster Metering Ltd - M181 001 3C - 12/2007... -
Page 124: Time & Date
Power Master Unit ___________________________________________________________________________ Voltage Phase Status - Allows the voltage phase indicators (L1, L2, L3) to be displayed as phase fail or phase present. The indicators can be enabled or disabled from the display. Billing Reset Lockout - Manual billing resets can be locked out until midnight or locked out for a set duration. - Page 125 A1120/1140 Programmable Polyphase Meter Users Manual ___________________________________________________________________ © Elster Metering Ltd - M181 001 3C - 12/2007...
-
Page 126: Reading & Examining Meter Data
Power Master Unit ___________________________________________________________________________ Reading & Examining Meter Data Open Data to Read Editor To open the Read Editor, refer to Section 2.1. This Editor allows the Register Values, Instantaneous Values, Load Profile Data, Scheme Page Information and Other information to be read back from a meter. Note: If 1 Day's Load Profile Data is selected, the data read back is the current day’s data from midnight to the end of the last demand period. -
Page 127: Data Stream Mode
Double click on the new data to read in the scheme manager Double click one of the readings to view the data read back from the meter. Generally these are displayed in a similar format to which the data is entered. © Elster Metering Ltd - M181 001 3C - 12/2007... -
Page 128: Viewing Load Profile Data
Power Master Unit ___________________________________________________________________________ 4.2.1 Viewing Load Profile Data Load profile data read back from a meter can be viewed using the readings Viewer. Click on Load Profile Data from the readings to view the screen below. Graph Load Profile readings can be displayed as a graph. The actual value of data can be viewed by placing the cursor on the plotted readings. - Page 129 Excel. Alternatively the data can be exported in a file format that is suitable for being transferred into an MV90 system. © Elster Metering Ltd - M181 001 3C - 12/2007...
-
Page 130: Meter Manager
Power Master Unit ___________________________________________________________________________ Meter Manager Meter Manager Introduction The Meter manager is used to organise the systems meter's. It is used to invoke the Meter Information editor. The Meter manager consists of three components. Meters - This is a list of meters available on the system. It allows Meter Connection information, Identifiers and Security information to be configured. -
Page 131: Meter Information Editor
Enter the connection method and any outstation no., telephone no., baud rate as required Note:- If a suitable Connection method already exists, it can be selected from the Connection List. For new connections refer to Section 8.1 © Elster Metering Ltd - M181 001 3C - 12/2007... - Page 132 Power Master Unit ___________________________________________________________________________ Note 2:- The PC’s baud rate should be set as follows – For RS232 connection the PC baud rate must match the A1120/40 baud rate – For Modem connection the baud rate should be set to the specification of modem connected to the A1120/40 meter.
- Page 133 A1120/1140 Programmable Polyphase Meter Users Manual ___________________________________________________________________ © Elster Metering Ltd - M181 001 3C - 12/2007...
-
Page 134: Meter List
Power Master Unit ___________________________________________________________________________ Meter List The Meter List Components The Meter list consists of a list of meters with their associated Schemes brings together meters configured in the Meter manager, and Schemes created in the Scheme manager, to create a list of meters and their associated schemes. This is achieved by copying a Meter and a Scheme into the Meter list. - Page 135 A1120/1140 Programmable Polyphase Meter Users Manual ___________________________________________________________________ © Elster Metering Ltd - M181 001 3C - 12/2007...
-
Page 136: System Administration
Power Master Unit ______________________________________________________________________________ System Administration System The System menu allows Users to change their password and create new users. It also allows other parameters shown opposite to be entered. Changing Passwords This allows the password for a User to be changed. -
Page 137: Defining A New User
Use the Restore option from the Users dropdown list to return to the original Administrator selection. Use the Delete option from the Users menu list to delete the selected User. © Elster Metering Ltd - M181 001 3C - 12/2007... -
Page 138: File Locations
Power Master Unit ______________________________________________________________________________ File Locations File location points the Master Unit to the location of externally produced files that may require importing into the Master Unit. File types are shown in the left column and the setting (location) in the right column. - Page 139 Note – If this option is used, old readings are stored in the database and new readings are appended. Always overwrite with new data is the option normally used. This overwrites any old data with the new data. © Elster Metering Ltd - M181 001 3C - 12/2007...
-
Page 140: Communications Server Log
Power Master Unit ______________________________________________________________________________ Communications Server Log The communications server log keeps a record of all communications sessions with meters. The log records the following parameters:- Time and Date, Meter Serial Number, Scheme Identifier, Transmit/Receive data, Status. Back-up Database Back-up database allows all files in the database to be backed up. It is recommended that the database is backed up at least once a week and that the files are stored on a separate computer. - Page 141 A1120/1140 Programmable Polyphase Meter Users Manual _____________________________________________________________________________________ © Elster Metering Ltd - M181 001 3C - 12/2007...
-
Page 142: Communications
Power Master Unit ______________________________________________________________________________ Communications Communications Methods Communications are set up within the Meter manager using the Meter information editor. The set up requires the communications type etc., an outstation number and telephone number depending on the communications type to be defined. Connections To Set- up/Modify a Connections for a modem Create a New Meter from the Meter manager. - Page 143 A1120/1140 Programmable Polyphase Meter Users Manual _____________________________________________________________________________________ Methods of Connection Modem - Modems are connected to a meter via the RS232 communications port and the Elster Metering Systems Communications Server. The Communications Serial Port, Outstation number and Telephone number also require entering.
-
Page 144: Sending A Scheme To Meter
Power Master Unit ______________________________________________________________________________ Sending a Scheme to Meter There are two ways of sending a Scheme to a meter, by executing the Meter list or by Quick send scheme. Execute Meter List Execute Meter list can be selected from Transfer in the Main menu, or by right clicking in the Meter list. -
Page 145: Main Menu
Print - Prints an opened file Print Setup - Configures the System Printer Exit - Exits the Communications Server Window Arrange - Arranges customised Meter manager, Meter list and Scheme manager windows to original view. © Elster Metering Ltd - M181 001 3C - 12/2007... -
Page 146: Viewing Communications Failures
Use Save to save the error messages as Text Files. The file will contain information required to analyse the failure. Use the text files if support is required when contacting Elster Metering Systems about communications failures. Networking the Power Master Unit... - Page 147 A1120/1140 Programmable Polyphase Meter Users Manual _____________________________________________________________________________________ © Elster Metering Ltd - M181 001 3C - 12/2007...
-
Page 148: A1 Exporting Readings As A Text Only File
Power Master Unit ______________________________________________________________________________ Appendix A Exporting Readings as a Text Only File Readings and Schemes can be exported and printed as a text only file by setting up a “generic/text only” printer on port “file”. This feature allows schemes/readings (or selected parts of) to be cut and pasted into other applications such as Bug Collector Pro, Word etc. -
Page 149: A2 Live Link
Data will be read back from the meter Note: The Include log data in network output box in System/Communications Server Setup/Client setup must be checked for data to be viewed. © Elster Metering Ltd - M181 001 3C - 12/2007... -
Page 150: Oms Software
Power Master Unit ______________________________________________________________________________ Appendix B OMS Software OMS software forms part of CHIRPS and is configured in the CHIRPS directory. OMS will allow a variety of Hand Held Units (HHU) to be used with the system. The software can be used to transfer schemes to a HHU from the Power Master Unit, using either Quick send or executing a Meter list. - Page 151 ‘Press Escape to Exit’ is displayed Click Transfer This starts HCOM Files are transferred to the HHU At C> Type HCOM Press Enter After Transfer Press ESC Select System Exit © Elster Metering Ltd - M181 001 3C - 12/2007...
- Page 152 Power Master Unit ______________________________________________________________________________ Programming/Reading a Meter A t the HHU Select Quit At the C> prompt type Select Manual When the transfer is complete Press Enter CHK (HUSKY) Press Enter the HHU responds with an Press Enter Select scheme to be transferred Achievement Byte Press Enter (0 if successful)
- Page 153 Press Enter After Transfer Press ESC Select System Exit Number of retries - This is the number of tries CHIRPS repeats the FLAG message before terminating with an error message. © Elster Metering Ltd - M181 001 3C - 12/2007...
- Page 154 Power Master Unit ______________________________________________________________________________ Date of Expiry - This is the date of expiry of the current CHIRPS Configuration File. A new file with the following format must be loaded. Day of Month ( 2 Characters) 01-31 Month ( 2 Characters) 01-12 Last 2 digits of Year ( 2 Characters)
- Page 155 A1120/1140 Programmable Polyphase Meter Users Manual _____________________________________________________________________________________ © Elster Metering Ltd - M181 001 3C - 12/2007...
- Page 157 About Elster Group Elster Group is the world’s leading manufacturer and supplier of highly accurate, high quality, integrated metering and utilisation solutions to the gas, electricity and water industries. In addition, through its subsidiary Ipsen International, it is the leading global manufacturer of high-level thermochemical treatment equipment.
Need help?
Do you have a question about the A1140 and is the answer not in the manual?
Questions and answers