Table of Contents
Advertisement
Advertisement
Table of Contents

Related Manuals for Optoma LV130


Summary of Contents for Optoma LV130
- Page 1 Projector ® User manual...
-
Page 2: Table Of Contents
Menu navigation and features ....................12 OSD Menu tree......................... 13 ADDITIONAL INFORMATION ............17 Compatible resolutions ......................17 Image size and projection distance ..................18 Troubleshooting ........................19 LED lightning messages ......................20 Specifications ........................... 21 Optoma global offices ....................... 22 English... -
Page 3: Safety
‡ Do not attempt to service the unit yourself. Opening or removing covers may expose you to dangerous voltages or other hazards. Please call Optoma before you send the unit for repair. ‡ See projector enclosure for safety related markings. -
Page 4: Copyright
‡ Do not look into straight into the projector lens during operation. The bright light may harm your eyes. ‡ When switching the projector off, please ensure the cooling cycle has been completed before disconnecting power. Allow 90 seconds for the projector to cool down. ‡... -
Page 5: Fcc
This device has been tested and found to comply with the limits for a Class B digital device pursuant to Part 15 of the FCC rules. These limits are designed to provide reasonable protection against harmful interference in a residential installation. This device generates, uses and can radiate radio frequency energy and, if not installed and used in accordance with the instructions, may cause harmful interference to radio communications. -
Page 6: Introduction
Warranty Card* Basic User Manual Projector Power adapter Documentation Note: *For European warranty information, please visit www.optoma.com Optional accessories Power plug for UK Power plug for US Power plug for EU HDMI cable (except UK) Note: Optional accessories vary depending on model, specification and region. -
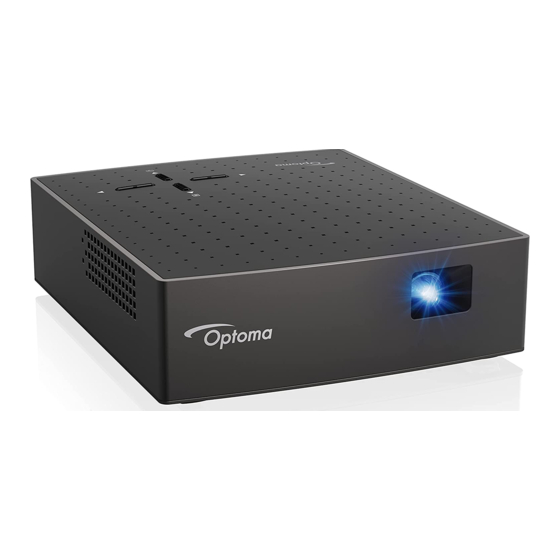
Page 7: Product Overview
INTRODUCTION Product Overview Note: ‡ Do not block projector intake and exhaust vents. ‡ When operating the projector in an enclosed space, allow at least 20cm clearance around the intake and exhaust vents. Item Item Keypad Ventilation (outlet) Ventilation (inlet) Focus Wheel Input / Output Lens... -
Page 8: Connections
INTRODUCTION Connections Item Item Headphone Connector USB Connector (5V 1A) HDMI / MHL Connector DC IN Connector Keypad Top View Rear View Item Item Menu Mode Selection* LED Indicator Four Directional Select Keys* Power Button Note: ‡ Press the key in a sequence to toggle through the display modes while the OSD menu is on. ‡... -
Page 9: Setup And Installation
SETUP AND INSTALLATION Connecting sources to the projector MOLEX Item Item Audio Out Cable Power Adapter HDMI Cable USB Power Supply (5V 1A) MHL Cable HDMI Dongle USB Cable Note: If you charge the battery using a USB cable and display an HDMI source with an audio output simultaneously, the cooling fan speed may increase. -
Page 10: Focus
SETUP AND INSTALLATION Focus To adjust the focus, turn the focus wheel clockwise or counterclockwise until the image is sharp and legible. Focus Wheel Note: The projector will focus at a distance of 0.6m to 1.9m. English... -
Page 11: Using The Projector
USING THE PROJECTOR Powering on / off the projector Powering on Note: Before powering on the projector for the first time, you need to fully charge the battery. Attach the correct power plug that is supported in your region to the power adapter. Connect one end of the power adapter to the DC IN connector on the projector. -
Page 12: Menu Navigation And Features
USING THE PROJECTOR Powering off Turn off the projector by pressing the Power button on the rear panel. The following message will be displayed: P o w e r o f f ? P r e s s p o w e r k e y a g a i n . -
Page 13: Osd Menu Tree
USING THE PROJECTOR OSD Menu tree Level 1 Level 2 Level 3 Default Value Bright Display Mode Standard Standard Brightness 0~10 Contrast 0~10 Front Display Rear Projection Front Front-Ceiling Rear-Ceiling Auto Aspect Ratio Auto 16:9 Auto Keystone Keystone Manual Keystone -40~40 V Keystone -40~40... - Page 14 USING THE PROJECTOR Display menu D i s p l a y D i s p l a y m o d e B r i g h t n e s s Display mode There are many factory presets optimized for various types of images. ‡...
- Page 15 USING THE PROJECTOR V Keystone Adjust image distortion vertically and make a squarer image. Vertical keystone is used to correct a keystoned image shape in which the top and bottom are slanted to one of the sides. This is intended when for use with vertically on-axis applications.
- Page 16 USING THE PROJECTOR Setting menu S e t t i n g R e s e t Logo Select the logo that is displayed when no signal is available. Reset Return the factory default settings for all settings. English...
-
Page 17: Additional Information
ADDITIONAL INFORMATION Compatible resolutions HDMI - PC Signal Mode Resolution Refresh Rate (Hz) Notes for Mac 640x480 60.0 31.5 SVGA 800x600 60.0 37.9 1024x768 60.0 48.4 1280x1024 60.0 64.0 SXGA+ 1400x1050 60.0 65.3 UXGA 1600x1200 60.0 75.0 PowerBook G4 640x480 60.0 31.4 PowerBook G4... -
Page 18: Image Size And Projection Distance
ADDITIONAL INFORMATION MHL Digital Mode Resolution Refresh Rate (Hz) Notes for Mac 640x480 59.94/60 31.5 480i 720x480(1440x480) 59.94/60 15.7 576i 720x576(1440x576) 50(25) 15.6 480p 720x480 59.94/60 31.5 576p 720x576 50.0 31.3 720p 1280x720 59.94/60 45.0 720p 1280x720 50.0 37.5 1080i 1920x1080 60(30) 33.8... -
Page 19: Troubleshooting
ADDITIONAL INFORMATION Troubleshooting If you experience a problem with your projector, please refer to the following information. If a problem persists, please contact your local reseller or service center. Image problems No image appears on-screen ‡ Ensure all the cables and power connections are correctly and securely connected as described in the "Installation"... -
Page 20: Led Lightning Messages
ADDITIONAL INFORMATION LED lightning messages LED Indicator Message Power Battery Color Blue Green Orange Battery Charging Battery Charging is Complete Battery Capacity 70%~100% Battery Capacity 40%~70% Battery Capacity 5%~40% Flashing for 10 sec Battery Level <5%* (0.5 sec on / 0.5 sec off) Flashing for 30 sec Fan Failure*... -
Page 21: Specifications
ADDITIONAL INFORMATION Specifications Optical Description Native resolution FWVGA 854x480 Lens Fixed focus - Mechanical range: 15”~150” Image size (diagonal) - Optical range: 25”~80”, optimized at 40” - Mechanical range: 0.36m~3.66m Projection distance - Optical range: 0.6m~1.9m Electrical Description - HDMI v1.4b, MHL v.2.2, HDCP Inputs - USB DC 5V output @ 1A Outputs... -
Page 22: Optoma Global Offices
ADDITIONAL INFORMATION Optoma global offices For service or support, please contact your local office. Japan 3178 Laurelview Ct. 888-289-6786 東京都足立区綾瀬3-25-18 Fremont, CA 94538, USA 510-897-8601 info@os-worldwide.com 株式会社オーエス www.optomausa.com services@optoma.com 0120-380-495 www.os-worldwide.com コンタクトセンター: Canada Taiwan 3178 Laurelview Ct. 888-289-6786 12F., No.213, Sec. 3, Beixin Rd.,... - Page 23 www.optoma.com...
Need help?
Do you have a question about the LV130 and is the answer not in the manual?
Questions and answers