
Related Manuals for Oberheim Two Voice


Summary of Contents for Oberheim Two Voice
- Page 1 A BRIEF INSTRUCTION MANUAL for the OBERHEIM TWO-VOICE SYNTHESIZER prepared by james michmerhuizen director, the boston school of electronic music...
- Page 2 GETTING FAMILIAR WITH THE OBERHEIM TWO-VOICE SYNTHESIZER 1: The POWER SWITCH is at the top left of the cabinet. 2: The 2ND-VOICE SWITCH is at the left of the keyboard. When the switch is off , voice module two will be gated when any...
- Page 3 7: the OUTPUT LEVEL CONTROL for voice module two, and 8: the MASTER OUTPUT CONTROL for the synthesizer. SETTING THE STAGE Before connecting your Oberheim synthesizer to headphones or to an amplifier, be sure that the master output control is fully off (counterclockwise).
- Page 4 THE MINI-SEQUENCER AND SAMPLE/HOLD. 1. The CONTROL VOLTAGE PRESETS determine two different output voltages at each of the sequencer's eight positions. Each num- bered position in this section of the panel has two independent concentric rotary pots. The outside pot controls the SEQUENCE OUTPUT ONE, and the inner pot determines SEQUENCE OUTPUT TWO.
- Page 5 The third switch allows either KEYBOARD VOLTAGE ONE or KEYBOARD VOLTAGE TWO to be added, respectively, to either SEQUENCE OUT- PUT ONE or SEQUENCER OUTPUT TWO. Thus one of the keyboard volt- age outputs may be used to transpose a sequence from one note to another without affecting the pitches produced by the other voltage in controlling the other voice module.
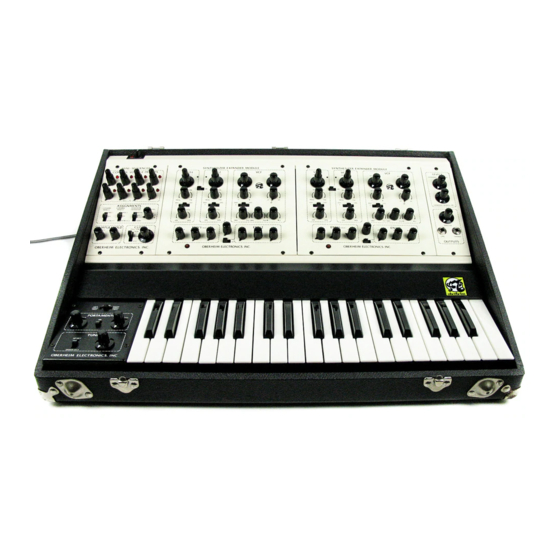
- Page 6 THE VOICE MODULES The panel controls on each module are identical. In the diagram above they are grouped by similar functions for easy under- standing. The asterisks in sections la, 2a, 3, 4, 7, 8, and 10 are for use in the following section of the manual. la, 2a.
- Page 7 such a signal is called a square wave. As the knob is rotated in either direction from vertical, the pulse becomes wider (to the right) or narrower (left). 3. When this switch is moved to the right, VCO 2 is SYNCHRO- NIZED to the frequency of VCO 1.
- Page 8 mini-sequencer. The knob is a "reversible attenuator" for the control signal selected; in the photographed position, no sig- nal will pass through to have any effect on the VCF CUTOFF FRE- QUENCY. As the knob is rotated to the right, the selected control signal affects the VCF directly;...
- Page 9 Gates are thus members of the general class of TIMING signals; other timing signals are TRIGGERS. The Oberheim 2-voice synthesizer does not use trigger signals. 8. These three knobs set the constants attack time, decay time, and sustain voltage level for ENV 2.
-
Page 10: First Steps
FIRST STEPS A. CONTINUOUS SOUND Begin by setting all the controls on VOICE MODULE ONE to the positions indicated in the diagram/photograph on page five, except for #1a, 2a, 3, 4, 7, 8, and 10, which should be set to the positions indicated by the asterisks. - Page 11 Now move the switch to the right. This selects, as a control signal, the output of the LFO. Rotate the knob to the left; you will hear the pitch rise and fall, further in each direction as the knob is rotated further to the left. The rate (i.e. speed or frequency) of this rise and fall is directly determined by the frequency of the LFO itself;...
- Page 12 now, so that the synthesizer "produces" a sound only when you have pressed a key. Experiment with various settings of the ENV 2 controls, and with setting various relationships between the VCF frequency control and the knob (#5) that determines control signal amplitude.
- Page 13 To make a simple beginning at this, return the filter settings to the positions of page five, and open the audio input from the noise generator. Then move the switch #10 to the left. The VCA is now under the control of ENV 1, and will allow signals to pass through only when ENV 1 is gated on.
-
Page 14: Troubleshooting (I)
b) If only one key is depressed, only voice module one will be gated; if, while one key is held down, another is depressed to the right of the one that is being held down, voice module two will be gated on with the new note;... - Page 15 F. USING THE MINISEQUENCER As you already know, the ASSIGNMENTS switches in the minise- quencer section of your Oberheim synthesizer must be down in order to play the voice modules from the keyboard. In the down position, each module gets a keyboard control voltage, which controls the oscillator pitches, and a keyboard gate signal, which starts and stops the envelope generators.
- Page 16 and can have no effect on its behavior. Instead, the envelope generators for the module will get their gate signals from the CLOCK in the minisequencer--you already are familiar with this from paragraph two on page twelve--and the oscillators will get their control voltages from either the S/H unit or from the 8-step sequencer, depending on the center or upper position of the assignment switch.
- Page 17 Through all of your experiments so far with the minisequencer, the third ASSIGNMENTS switch should have been down. Now move it to its center position, labelled SEQ 1 By CV 1. In this position, KEYBOARD CONTROL VOLTAGE #1 is reintroduced to the control inputs of the VCO's in voice module one.
- Page 18 VCA envelope: try it. Make the patch more complex by setting up the keyboard-control-of-tempo effect you learned in the preceding section. H. PERFORMING HINTS You have now learned something about each of the functions in the Oberheim 2-voice synthesizer, and something of how each...
- Page 19 control interacts with the others to produce a wide range of sounds. Continuing practice will make you fluent in moving from one sound to another quickly and accurately. In the meantime, here are some hints to help you achieve this sooner. TUNING AIDS 1.
-
Page 20: General Remarks
the first voice to SEQ 1 control and set the 2ND VOICE switch OFF. Play the first note of the sequence on the keyboard; it will be produced from the second voice mod- ule which is still under keyboard control. (If the sequencer is not at step one of the eight steps, use the manual STEP to get it there.) Use the control voltage preset to tune the first voice to unison with the pitch...
Need help?
Do you have a question about the Two Voice and is the answer not in the manual?
Questions and answers