
Related Manuals for QERIDOO 2018 Sportrex1

Summary of Contents for QERIDOO 2018 Sportrex1
- Page 1 USER MANUAL Q3-18-A Q3-18-DA Q3-18-DW Q6-18-A Q6-18-DA Sportrex1 2018 Q6-18-DW Sportrex2 2018 This product fulfils all safety requirements of the European standard for bicycles and bicycle trailers (DIN EN 15918).
- Page 2 When necessary, individual items of information can be changed quickly and without special notification. This documentation can be ordered from Qeridoo GmbH in other languages, or is available for download on our website if already available. Visit us at: www.qeridoo.de...
-
Page 3: Table Of Contents
Contents Introduction Adjusting the push handle Setting the mode Proper use Adjusting the buggy wheel Performance limits Insert tow bar Notes on the user manual Using the pennant Safety instructions Attaching the hand strap Users Putting on the 5-point safety harness Conditions of use Securing the load Passenger... -
Page 4: Introduction
Introduction Proper use Sportrex was designed as a bicycle trailer and comes with an additional buggy and walker function. For Trailer mode, use a tow bar with coupler to connect the trailer to a suitable towing vehicle (bicycle or motorised pedelec with a maximum speed of 25 km/h). With the buggy wheel attached, the Sportrex can be used as a child carrier in Buggy mode. -
Page 5: Notes On The User Manual
Introduction The following additional restrictions apply to Trailer mode: Requirements for the tow bar Sportrex1 & Sportrex2 Permissible tow bar load range 3 – 8 kg (on the tow bar coupler pocket) Minimum ambient temperature -10° C Requirements for the towing vehicle Sportrex1 &... -
Page 6: Safety Instructions
Safety instructions Danger! Read the safely instructions below carefully. The safety and accident prevention regulations valid in your region and statutory rules such as the road traffic regulations also apply, and take precedence in cases where there is doubt. Make sure that the Sportrex is used only by persons suitable for its operation, as defined below. -
Page 7: Passenger
Install and use only original accessories and spare parts manufactured or recommended by ƒ Qeridoo. Using other products relieves the manufacturer of liability. Only carry out structural modifications or extensions to the vehicle which are necessary ƒ for the use of the approved accessories in accordance with the assembly instructions. Any further manipulation that is not expressly approved by the manufacturer in writing relieves the manufacturer of liability in the event of accidents and defects. -
Page 8: Cycling With A Trailer
Safety instructions Cycling with a trailer The way in which the bicycle moves changes significantly when it is pulling a trailer, and this is particularly noticeable when braking and cornering. With regard to this, pay attention to the following: Practice cycling with the trailer before going out onto the road. ƒ... -
Page 9: Product Overview
Product overview Scope of delivery Pennant with 2-part pennant staff and 2 wheels centre piece Multiwheel buggy wheel Tow bar with coupler and retaining strap Leaf suspension cover Push handle with hand strap Wheel axle with parking brake and Cabin with seats and 5-point safety suspension harnesses Wheel guard (2x) -
Page 10: Components And Control Elements
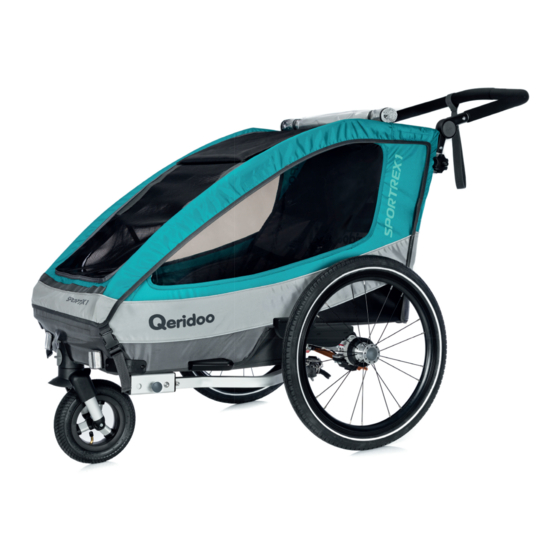
Product overview Components and control elements Side view 12 12 Cabin (frame made from aluminium tubes Tow bar for trailer mode with cotter pin with weatherproof fabric cover) fastening and retaining strap for securing bicycle frame 3-in-1 canopy to protect against insects and rain with integrated sun visor, rollable Tow bar holder Side window... -
Page 11: Rear View
Product overview Components and control elements Rear view Push handle, height adjustable Push button for adjusting the height of the push handle Rain cover, rollable Star grip screw with tube clamp for Pennant pouch for holding the pennant securing the push handle staff Ventilation window with integrated pouch Rear light (Optionally available) -
Page 12: Assembly
Assembly Below you can read all the information that you will need to assemble your Sportrex properly. Make sure that you have sufficient space to assemble it. Also pay attention to the door width at the place of installation: The Sportrex1 is 72 cm wide with the wheel guards fitted and the... -
Page 13: Inserting The Wheels
Assembly Hold the wheel axle with the leaf springs to the lead spring seat. Turn the four screws through the leaf spring in the leaf spring seat. Tighten the screws with the hexagon socket head cup screws firmly. Inserting the wheels Lift the cabin a little bit in order to install the wheel easier. -
Page 14: Installing The Safety Bumper (Sportrex2)
Assembly Slide the wheel guard onto the slide holder as shown in the picture. Be sure that the fixing mechanism locks audibly. Repeat the procedure on the other side of the trailer. Slide the leaf spring cover onto the slide holder as shown in the picture. -
Page 15: Inserting The Pennant
Assembly Attach the tube clamps in turn onto the cabin frame tubes by applying gentle pressure. Secure them by partly tightening the star grip screws. Align the push handle horizontally by pushing the tube clamps all the way up at the same height. Securely tighten the star grip screws in order to fix the tube clamps to the cabin frame. -
Page 16: Adjusting The Buggy Wheel
Assembly Lift the cabin at the front. Place the buggy wheel into the wheel mount as far as it will go, until it engages audibly with a clicking noise. Check whether there is sufficient air in the buggy wheel (maximum air pressure: 1.9 bar). If necessary, use an air pump for car valves to top up with air. -
Page 17: Mounting The Coupler Onto A Bicycle
Assembly Tip! You do not have to remove the tow bar completely. Simply place the tow bar into the tow bar mount from behind to stow it under the cabin floor, see „Insert tow bar“ on page 21. Mounting the coupler onto a bicycle Danger! Make sure that your bicycle is suitable for towing a bicycle trailer, see „Performance... -
Page 18: Installing The Rear Light (Accessory)
The provided universal coupler is suitable for mounting on the most rear-wheel models. If it does not fit your bicycle, find a suitable adapter and special couplers in our manuals on the following website: www.qeridoo.de/kupplungsleitfaden Caution! Do not use a tool which was previously in contact with conventional steel. -
Page 19: Utilisation
Utilisation Below you will find all the information for adapting the Sportrex to the required modes and to allow you to use all the convenience functions. Applying the parking brake Danger! Apply the parking brake to secure the Sportrex in order to prevent it from rolling away. Also remember to release it before you set off. -
Page 20: Setting The Mode
Utilisation Setting the mode You can use the Sportrex in one of the following modes: Trailer mode: Carrying children in the Sportrex when cycling ƒ Buggy mode: Using the Sportrex like a buggy ƒ Walker mode: Carrying children in the Sportrex when walking ƒ... -
Page 21: Insert Tow Bar
Utilisation Tip! Carry the buggy wheel e.g. in the storage space in order to allow you to use the Sportrex flexibly at your destination. Instructions for re-mounting it can be found in the chapter „Installing the buggy wheel“ on page 15. Setting the wheel so that it turns freely (Buggy mode) It must be possible for the wheel to move freely through 360°... -
Page 22: Securing The Load
Utilisation Securing the load Loading the baggage Loading the storage space Undo the Velcro fasteners of the storage space cover and lift it. Pack larger items such as bags, toys or coats in the storage space. Close the cover carefully. Filling the pouch for small items Put those utensils into the pouch for small items which you want to have readily to hand while you are on the road. -
Page 23: Embarking The Children
Utilisation Secure the belts using the belt buckles: Thread each end of the belt in the buckle as it is – shown in the picture. Be sure to check both belt buckles sit firmly. – Put the harness catch, including the pad, onto the centre harness on the front of the seat. -
Page 24: Strapping In Children
Utilisation Strapping in children Help the child to put his/her arms through the two side parts of the 5-point safety harness. Adjust the seat belt, the belt pads and, if necessary, the head rests to the size of the child. Insert the tabs into the belt buckle until they click audibly. -
Page 25: Connecting The Trailer To A Bicycle
Utilisation Checking the tow bar load Use bathroom scales, for example, to measure the tow bar load: Load the Sportrex in the usual way and fasten the children in. Do not connect the trailer to the bicycle yet. Place the bathroom scales next to the tow bar. Get onto the bathroom scales and note the weight displayed. -
Page 26: Using The Comfort Functions
Utilisation Guide the tow bar’s retaining strap through the braces of the rear wheel so that the trailer is securely connected to the bicycle frame. Hook the retaining strap with the carabiner hook into the eye on the tow bar. Make sure that it cannot flutter into the rear wheel’s spokes during the journey. -
Page 27: Adjusting The Suspension
Utilisation Using the ventilation windows The purpose of the ventilation windows of the Sportrex is to improve air circulation in the cabin. Right ventilation window: To open, release the Velcro fastener of the window film in the cabin and fold it down. To close, secure the window film with the Velcro fastener again. -
Page 28: Storage
Utilisation Storage For storage, simply fold the Sportrex together and store it in a protected and dry place without direct sunlight. Please also consider the information in the chapter „Care“ on page 29. Danger! Hands or fingers can become trapped on moving parts while setting up and folding up the cab. -
Page 29: Care And Maintenance
The storage location should be dry, well ventilated and protected against direct sunlight. ƒ At higher storage temperatures, you should store the wheels separately from the cabin ƒ because the tyres’ rubber can cause odours. Use a Qeridoo folding garage if the Sportrex must be kept outdoors. ƒ Sportrex 2018... -
Page 30: Maintenance Intervals
Care and maintenance Maintenance intervals Caution! Replace corroded steel and aluminium parts immediately. Never bend back deformed or bent aluminium parts (danger of breakage). Replace bent aluminium parts immediately. Immediately replace plastic parts that have become porous or fragile due to the effects of the weather, for example. -
Page 31: Appendix
Appendix Technical data External dimensions Sportrex1 Sportrex2 Length (Trailer mode) 155 cm 155 cm Width (external width from wheel to wheel) 72 cm 82 cm Height (from ground to cabin roof) 84.5 cm 84.5 cm Height of push handle 46 cm / 113 cm 46 cm / 113 cm (lowest / highest set dimension) Pack size of the collapsed cabin (H x W x L) -
Page 32: Warranty Terms
Appendix Warranty terms Qeridoo provides a two-year warranty commencing on the purchase date for plastic and cover parts, as well as for load-bearing components. This warranty covers only material and manufacturing faults arising on correctly used and maintained vehicles. In particular, the terms and instructions in the user manual that you received with your vehicle are definitive in this respect. -
Page 33: Spare Parts
Appendix Spare parts (valid from 2018) Frame components Pos. Article Article No. Article No. Sportrex1 Sportrex2 Cotter pin with rubber safety for bicycle coupling from 2018 Z-SMGFFK-18 Z-SMGFFK-18 Coupling bicycle connection accessory from 2018 KUFA-18 KUFA-18 Tow bar head with hexagon socket from 2018 Z-DEIK-6K-18 Z-DEIK-6K-18 Multiwheel from 2017 set... - Page 34 Appendix Other spare parts Locking button tow bar mount Crotch padding from 2017 from 2018 Art. no.: Z-SCHPO-17 Art. no.: Z-VKDA-18 Star knob for handle bar M6 from Head rest from 2017 2017 Art. no.: Y-KS-17 Art. no.: Z-SGFH-M6-17 Brake pedal plastic V1 from 2018 Harness catch Art.
- Page 35 Notes Sportrex 2018 Subject to change. 12|2017 – 35...
- Page 36 Sportrex 2018 Qeridoo GmbH Industriepark Nord 100 53567 Buchholz Germany www.qeridoo.de info@qeridoo.de...
Need help?
Do you have a question about the 2018 Sportrex1 and is the answer not in the manual?
Questions and answers