
Related Manuals for Leigh FMT PRO


Summary of Contents for Leigh FMT PRO
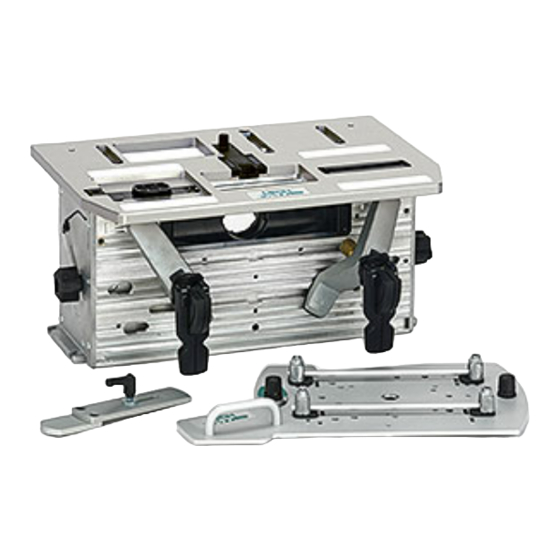
- Page 1 LEIGH FMT PRO Frame Mortise & Tenon Jig User Guide Leigh Router Joinery Jigs 1-800-663-8932 Joining Tradition with Today...
- Page 2 Reminder: If at first you don’t succeed, read the instructions! Important! Inches and Millimeters The Leigh FMT Pro is available in two models; Inch or Metric. The only difference is in the guides and bits used, otherwise the jig itself is identical.
-
Page 3: Table Of Contents
CHAPTER 1 Mounting the FMT Pro .............. - Page 4 Optional Guides, Bits and Accessory Kit Extra Clamps Save Time for Great Savings Leigh Surface clamps are identical to FMT Pro clamps. Save time when switching between mortise and tenon boards. Bonus! This tough, Joint Guides versatile cam-action clamp can also be mounted on any flat surface, on any angle or on a table saw.
- Page 5 Mounting the FMT Pro Jig Assembly and Mounting The Leigh FMT Pro comes almost fully assembled with all adjustments factory set — however, before you start to set up your Leigh FMT Pro Jig, make sure you have received all the required parts.
-
Page 6: Chapter 1 Mounting The Fmt Pro
MOUNTING THE FMT PRO "[84mm] "[13mm] 5"[125+mm] Mounting the FMT Pro: Prepare a flat board at least 1-2 Turn the jig upside down on two wooden blocks ➀ (to ⁄ "[20mm] thick, a minimum of 24"x5"[600x125mm]. Drill four protect the table and sight knob). Using the four nuts and four ⁄... -
Page 7: Mounting The Router
The threaded sub-base mounting holes on many routers are not strong enough for the stresses produced when routing joints with the FMT Pro, so Leigh developed the Universal Fence Rod Mounting System. The Leigh FMT Pro Sub-Base provides great attachment strength and lateral anchoring. Depending on your router model, fitting the Sub-Base to your router may take up to an hour…the first time only. - Page 8 Chapter 2 Frame Mortise & Tenon Jig User Guide MOUNTING THE ROUTER 2-3 If you have a plunge router that is not listed in the Sub-Base list, 2-4 Take the four U-Posts and by trial, establish which four it is essential that your router have two parallel fence rod holes through Sub-Base slots or holes will serve to attach the U-Posts.
- Page 9 Frame Mortise & Tenon Jig User Guide Chapter 2 MOUNTING THE ROUTER 2-9 Note: Use of the shim stops is essential, not only to provide the 2-10 Adjust the four U-Post set-screws with the set-screw end correct rod height but to also act as side-to-side stops for the router ➀ . flush inside the arch of the posts ➀...
- Page 10 Chapter 2 Frame Mortise & Tenon Jig User Guide MOUNTING THE ROUTER 1/4" 12mm 1/2" 2-15 Unplug the router. 2-16 Holding the router as you would in normal use, place it base Note the collet size of the router. Choose the matching size center- down onto the Sub-Base;...
- Page 11 U-Posts clamping the rods assemblies on the second rod. which hold the router against the Leigh Sub-Base. Router /Sub-Base are now a unit. Release the plunge; remove and store the mandrel. You’re set to go.
- Page 12 2-31 Note: Porter Cable 7529 & 8529 (Flex OFT2926VV) have Porter Cable 693, 890, 890 Type 2, 893, 7529, 8529; Flex OFT two sets of 3 threaded holes. Use the inner circle of FMT Pro Sub-Base 2926VV; Festool 1400, 2200; Makita RP0910, Makita RP1100 holes.
- Page 13 Remove the clear plastic dust cover from 8529 router base top (screw a soft-padded vise. Place the Sub-Base upside down onto the holes are used to attach Leigh FMT Pro Sub Base). Store removed parts router’s metal base with the mandrel centering the router to the for future use.
- Page 14 Chapter 2 Frame Mortise & Tenon Jig User Guide MOUNTING THE ROUTER...
-
Page 15: Chapter 3 The Fmt Pro Jig
THE FMT PRO JIG FMT PRO CHAPTER 3 The FMT Pro Jig The Clamp Plate and Clamping The Table Jig Operation Concept Safety and Router Operation Wood Preparation The Clamp Plate and Clamping 3-2 The two clamps are powerful cam-action rocking-arm The clamp plate ➀... - Page 16 Chapter 3 Frame Mortise & Tenon Jig User Guide THE FMT PRO JIG A smooth, firm action is enough to engage the clamp. Do not use the lever as a torque arm! Rule of thumb: if you can’t throw the lever comfortably by strong Adjust the clamp pressure only with the clamp disengaged.
- Page 17 Never use a tool to tighten these nuts! from the rear. See chapter 4, Small Joints. 3-13 The FMT Pro’s sidestop fence is attached in all modes by a 3-14 The sidestop fence is squared at the factory, but check your first single knob and T-bolt inserted to the center clamp plate slot ➀...
-
Page 18: The Table
Chapter 3 Frame Mortise & Tenon Jig User Guide THE FMT PRO JIG 3-18 The jig clamp plate has an opening on each outer edge in 3-17 WARNING: Never rout tenons with the sidestop which to fit the included “outrigger bars” ➀ . The bars are retained fence in the inverted position (with the short end up in the bit by set-screws ➁... - Page 19 Frame Mortise & Tenon Jig User Guide Chapter 3 THE FMT PRO JIG 3-23 The table has a bit opening ➀ and Joint Aligning Sight ➁ . Pulling 3-24 To the right front is the right-hand “Pin Track” ➀ . The right-...
-
Page 20: Jig Operation Concept
Chapter 3 Frame Mortise & Tenon Jig User Guide THE FMT PRO JIG 3-29 If the finger-hole is not accessible from below, use your fin- gernail or a small non-metallic pry to lift the Guide up ➂ . ■ Jig Operation Concept 90˚... -
Page 21: Safety And Router Operation
Note: Only one tenon and perhaps two mortises need to be marked and sighted. Please read all of the procedural chapters to gain the utmost efficiency from your FMT Pro. ■ Safety and Router Operation 3-36 Read the owner’s manual that came with your router. It is 3-37 Always wear approved safety glasses. - Page 22 Chapter 3 Frame Mortise & Tenon Jig User Guide THE FMT PRO JIG 3-41 Make sure the router collet does not contact the FMT Pro 3-40 Always disconnect the power source from the router when fitting bits, or making adjustments.
-
Page 23: Wood Preparation
Leigh FMT Pro. ■ Wood Preparation 3-48 Stock for use on the Leigh FMT Pro should generally be 3-49 You will want to test the jig, so prepare some stock with a straight, flat, of even thickness and width with square ends and thickness ➀... - Page 24 Chapter 3 Frame Mortise & Tenon Jig User Guide THE FMT PRO JIG...
-
Page 25: Mortise & Tenon Procedures
Routing Joints Smaller than 1/4" See Appendix I for complete joint specifications and guide and bit selection Before using your Leigh FMT Pro you must I M P O R T A N T S A F E T Y N O T E have completed all of the preparatory Take great care to not “trap”... - Page 26 Chapter 4 Frame Mortise & Tenon Jig User Guide MORTISE & TENON ROUTING PROCEDURES 4-3 If you have not yet mounted the side stop fence, do so now 4-4 Clamp the tenon piece with the end edge lightly touching (see 3-13 to 3-15). Place it off center by about half the width of the the underside of the sight.
- Page 27 Frame Mortise & Tenon Jig User Guide Chapter 4 MORTISE & TENON ROUTING PROCEDURES 4-10 Check that the left hand knob is two turns up. From this Adjust the right hand guide pin. Grip the right hand pin knob and move the Sub-Base back and forth to feel the “free play”...
- Page 28 Chapter 4 Frame Mortise & Tenon Jig User Guide MORTISE & TENON ROUTING PROCEDURES 4-15 Remove the router and tenon workpiece from the jig. Position 4-16 Extend the sight. With the marked side of the mortise piece the two clamps so the mortise piece can be positioned for secure holding. toward the clamp plate, either move the board left and right ➀...
- Page 29 Establish ideal pin height for both mortise and tenon at one pin setting. Dimensions and angles shown here are exaggerated. 4-23 The FMT Pro can provide this accuracy for settings but 4-24 If you have a dial or digital calliper (every shop should have remember, you’re working with wood and a hand-held router,...
- Page 30 Chapter 4 Frame Mortise & Tenon Jig User Guide MORTISE & TENON ROUTING PROCEDURES Settings Record TURNS UP SPECIES DATE e.g. 1/ 2 x 2 1/ 2 1 -7/8 cherr y 01/01/20 17 e.g. 10x40mm 10mm 1-3 /8 m ahogany Jan.1, 2017 TURNS UP SPECIES...
- Page 31 Frame Mortise & Tenon Jig User Guide Chapter 4 MORTISE & TENON ROUTING PROCEDURES Production Procedures 4-27 Production Procedures When routing frame joints it 4-28 Tenons The router is “parked” with the guide pin in near is only necessary to mark and sight a single tenon and perhaps two front corner of recess ➀...
- Page 32 MORTISE & TENON ROUTING PROCEDURES Production Procedures for Small Joints 4-32 The FMT Pro is designed so that both mortise and tenon of 4-33 Two Bit Combination If you want to rout many a particular-sized joint may be routed with the same sized bit. So ⁄...
- Page 33 Frame Mortise & Tenon Jig User Guide Chapter 4 MORTISE & TENON ROUTING PROCEDURES 4-38 The tiny 4-39 For very small joints we recommend attaching a rigid piece ⁄ " x ⁄ "[0,8 x 2,4mm] mortises and tenons on this “match frame”...
- Page 34 Chapter 4 Frame Mortise & Tenon Jig User Guide MORTISE & TENON ROUTING PROCEDURES...
-
Page 35: Multiple Joints
Twin Joints Quadruple Joints Triple Joints Before using your Leigh FMT Pro you must I M P O R T A N T S A F E T Y N O T E have completed all of the preparatory steps including reading the router safety Take great care to not “trap”... - Page 36 Chapter 5 Frame Mortise & Tenon Jig User Guide MULTIPLE JOINTS 5-3 Mark the two mortise and tenon centers, taking care to allow 5-4 Set the sidestop fence so that the tenon piece is clamped space between the joints ➀ at least equal to the tenon bit diameter. approximately centrally on the clamp plate ➀...
- Page 37 Frame Mortise & Tenon Jig User Guide Chapter 5 MULTIPLE JOINTS 5-9 Extend the sight. Position and clamp the mortise piece so the 5-10 Move the table left and lock. Rout the left hand mortise. right hand mortise of the first pair is centered under the sight ➀ . Leave the table to left.
- Page 38 Chapter 5 Frame Mortise & Tenon Jig User Guide MULTIPLE JOINTS 5-14 Approximately center the table left to right and lock ➀ . 5-15 Unlock the table, sight the rear tenon center and lock the LR limit stops against their stop Extend the sight.
- Page 39 Frame Mortise & Tenon Jig User Guide Chapter 5 MULTIPLE JOINTS 5-21 Extend the sight, unclamp and move the mortise board left 5-20 Move the table back against its stop ➀ and lock. Rout the so that the rear mortise of the pair at the right end of the piece rear mortise ➁...
- Page 40 Chapter 5 Frame Mortise & Tenon Jig User Guide MULTIPLE JOINTS 5-26 5-27 Unlock the table and move to the rear right-hand tenon Release and move the table to sight the rear left-hand tenon ➀ . and sight ➀ . Note: ensure the FB post is still touching the front limit stop ➁...
- Page 41 Either mark an outrigger or set a stop-block for successive mortise boards ➁ . Rout all four mortises in their respective positions ➂ . Note: The FMT Pro vacuum port may prove ineffective on wide mortise pieces, particularly on the front mortises. ■...
- Page 42 Chapter 5 Frame Mortise & Tenon Jig User Guide MULTIPLE JOINTS 5-39 Release the table clamp and move the table to sight the third 5-38 Release the table clamp and sight the rear tenon of the (single) tenon ➀ . Lock the table. LR stop is against its pair ➀...
- Page 43 Frame Mortise & Tenon Jig User Guide Chapter 5 MULTIPLE JOINTS 5-44 Release the table clamp. With the table to the right, against 5-45 Mortises Triple mortises are routed the opposite way LR stop, put the small block between the rear FB stop around.
- Page 44 Chapter 4 Chapter 5 Frame Mortise & Tenon Jig User Guide MULTIPLE JOINTS...
-
Page 45: Chapter 6 Workpiece And Joint Options
Longer and Shorter Joints Thicker and Wider Boards Before using your Leigh FMT Pro you must I M P O R T A N T S A F E T Y N O T E have completed all of the preparatory steps including reading the router safety Take great care to not “trap”... - Page 46 ■ twin-tenon to mortise alignment. Longer and Shorter Joints 6-5 The FMT Pro table movement allows for easy routing of odd- Tenons Mark the center as before. Position and sight the tenon ➀ , and lock the table.
- Page 47 Frame Mortise & Tenon Jig User Guide Chapter 6 WORKPIECE AND JOINT OPTIONS 6-9 - Move the table left to the stop ➀ . 6-10 Mortises Release the table clamp. Use the small block - Rout the left-hand end of the tenon ➁ . between one stop and the stop post ➀...
- Page 48 Thicker and Wider Boards 6-19 Make this bracket to mount and mortise a wide board face, 6-20 Use the Leigh clamps to secure the bracket to the FMT clamp pieces greater than Leigh Clamp 3" capacity, and center mortises Pro clamp face and adjust the distance below the table to slightly on boards up to 4 ⁄...
- Page 49 4 ⁄ "[115mm] ➀ .The thickest capacity in the pin track ➄ (see 6-16). Note: This is not a standard Leigh is 4"[100mm] ➁ . solution, but we thought it would solve this rare challenge. ■...
- Page 50 Chapter 4 Chapter 6 Frame Mortise & Tenon Jig User Guide WORKPIECE AND JOINT OPTIONS...
-
Page 51: Chapter 7 Special Joints
Angling the sidestop fence gives a single angled joint in to angle joints is essential in, for example, chair construction. the left-right direction. Whether these joints are single angles ➁ and ➂ or a compound angle ➃ they are easily achieved on the FMT Pro. - Page 52 The FMT Pro clamp plate can be angled up to 30˚ but it is However, you may for example, want to machine spline doubtful you will ever need to approach even 10˚ on a mortise and mortises or dowel holes in a stave type construction in, say, octa- tenon joint.
- Page 53 Frame Mortise & Tenon Jig User Guide Chapter 7 SPECIAL JOINTS 7-10 Carefully sight the mortise taking particular care to center Here’s an example. ⁄ "[6mm] joint through 1 ⁄ "[35mm] deep mortise. the “vertical” line ➀ in the sight. Plunge and rout down deeper Select ⁄...
- Page 54 TENON 7-16 Select a guide that is greater in length than the workpiece 7-15 Routing bridle joints on the FMT Pro is simple. All the work- pieces (with the exception of the mitered tenon) ➀ are mounted width ➀ by at least two bit diameters. Rout right through the vertically on the jig.
- Page 55 Frame Mortise & Tenon Jig User Guide Chapter 7 SPECIAL JOINTS Asymmetric Tenons 7-20 Asymmetric Tenons Not all tenons are centered on 7-21 Use the LR limit stops for rapid changeover from tenons the long axis of the workpiece end ➀ . This means that tenons “A” “A”...
- Page 56 Chapter 7 Frame Mortise & Tenon Jig User Guide SPECIAL JOINTS 7-26 First, groove all the workpieces ➀ . 7-27 Sight both the “A” and “B” mortises. Set stops or mark the The groove should be less than the mortise width ➁ and shallower outrigger for repeatable successive workpieces.
- Page 57 Frame Mortise & Tenon Jig User Guide Chapter 7 SPECIAL JOINTS 7-32 Move the table right to a position where the bit will clear 7-33 Move the table to the left again and if necessary, set a “guard” the end of the haunch ➀ while the guide pin is still on the straight piece in the guide recess ➀...
- Page 58 MDF which can be retained in the guide recess with A bonus use of the FMT Pro is its ability to provide very precise small flat head screws, using the four countersunk holes through dowel hole boring.
-
Page 59: Joint Specifications
The illustrations and specifications in this Appendix show the largest tenon rail and tenon sizes possible on the FMT Pro, either in one table position or multiple table positions as noted. For all smaller sizes, refer to the guide and bit selection chart. - Page 60 Appendix I Frame Mortise & Tenon Jig User Guide JOINT SPECIFICATIONS, GUIDE & BIT SELECTION A1-5 Largest Single Rail and Tenon - Two Table Positions. A1-6 Largest Tandem Double Tenon - Two Table Positions. Workpiece 1 ⁄ " x 5 ⁄...
-
Page 61: Guide And Bit Selection
Frame Mortise & Tenon Jig User Guide Appendix I JOINT SPECIFICATIONS, GUIDE & BIT SELECTION A1-11 Maximum Mortise Board Width and Thickness A1-12 Maximum Width Mortise Board for Mortising to Center for Mortising to Center Width up to 4 ⁄ "[115mm] ➀... - Page 62 3/16" x 1-3/8" 1/2" x 2" 3/16" x 1-7/16" 3/16 5/16 1/4" x 1-1/2" 1/2" x 2-1/2" 1/2" x 2-1/2" INCH BIT SPECIFICATIONS LEIGH BIT ITEM NO. Solid Carbide Mortise Size Solid Carbide Shank Spiral Upcut Spiral Upcut Cutting Diameter Cutting Depth...
- Page 63 12 x 65 12 x 65 METRIC BIT SPECIFICATIONS Due to limited availability of metric bits in North America, Leigh does not stock Important Note: or sell metric bits. Contact the national Leigh distributor or local supplier in your region.
- Page 64 Appendix I Frame Mortise & Tenon Jig User Guide JOINT SPECIFICATIONS, GUIDE & BIT SELECTION...
-
Page 65: Appendix Ii Jig Adjustments
If your router shaft and bit are not perpendicular to the The left example shows the clamp plate should be adjusted in router sub-base and the Leigh Sub-Base, then the bit will not be toward the jig body ➀ . The right example shows the clamp square to the Jig Table (nor parallel to the Clamp Plate). - Page 66 Appendix II Frame Mortise & Tenon Jig User Guide JIG ADJUSTMENTS A2-5 Table Clamp Setting The setting for this is factory pre-set A2-6 Sight Position The sight position is factory set. If you using a torque tool. Should you need to adjust the pressure, lock ever need to reset it here’s how.
-
Page 67: Appendix Iv Customer Support
CUSTOMER SUPPORT FMT PRO Appendix III FMT Pro Parts List Foreword See the following pages for part drawings and part numbers. Please call Leigh to order parts. - Page 68 Appendix III Frame Mortise & Tenon Jig User Guide CUSTOMER SUPPORT QUANTITY PART NO. PER JIG PART DESCRIPTION 1/2" x 3" Compression Springs 1/4" x 7/8" x .031" Nylon Washers 371R 9/32" x 7/8" x .016" Nylon Washers 8-32 x 3/8" Square Socket No.2 Robertson 5100 Sub-Base Fence Rods 8.453"...
- Page 69 Frame Mortise & Tenon Jig User Guide Appendix III CUSTOMER SUPPORT 6310 6315 6056 6335 6040 6310 6315 6335 6330 6320 6300 6315 6310 6325 6315 6325 6056 6310 6055 6056 6040 6011 6405 6415 6410 6425 6407 7225R 6006 6415 6445 6420...
- Page 70 Appendix III Frame Mortise & Tenon Jig User Guide CUSTOMER SUPPORT QUANTITY PART NO. PER JIG PART DESCRIPTION 6300 Intermediate Plate Assembly c/w pressed-in Pins 6310 4 pairs Wedge Blocks 6315 Wedge Block Compression Springs 6320 Limit Stops 6325 Limit Stop Nuts 6330 10-24 x 3/8"...
- Page 71 Frame Mortise & Tenon Jig User Guide Appendix III CUSTOMER SUPPORT 6200 6205 6210 6240 6230 6155 6245 6635 6225 5100 6640 6645 6220 6235 802-375 801-375 6140 6625 6626 6615 6633 6630 6620 6191 6171 6166 6600 6410 6027 5130 9530 6611...
- Page 72 6900 User Guide, Fully illustrated, English 6950 DVD Video, Instructional, English 6905 Leigh 1/8" Ball End Hex Screwdriver 3156 5/64" Hex Key (for No.6 Button Hd) Leigh No.2 Robertson Screwdriver 170-500 5/16" dia. x 1/2" Shank HSS Spiral Upcut Bit...
- Page 73 Our Commitment to You Leigh Industries takes pride in its commitment to providing excellence in customer service and support. This user guide is designed to provide you with the answers to any questions you have. However, if you require assistance, please feel free to contact our technical support staff or a distributor listed below.
- Page 74 Leigh Router Joinery Jigs Joining Tradition with Today Printed in Canada...
Need help?
Do you have a question about the FMT PRO and is the answer not in the manual?
Questions and answers