Advertisement
Quick Links
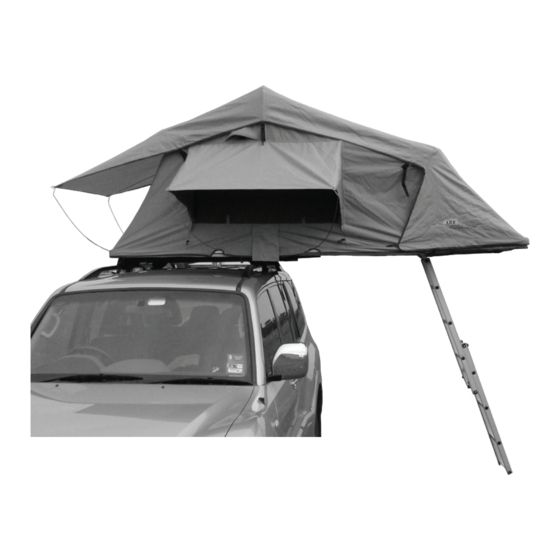
Rooftop Tent
Owners Manual
Congratulations on purchasing your
ARB TOURING ROOFTOP TENT - the quick and easy way to enjoy camping.
Included in this leaflet is all the information that you require to obtain the maximum enjoyment and benefit from
your rooftop tent. Given proper care your rooftop tent will give you many years of trouble free camping.
Advertisement

Related Manuals for ARB Touring Simpson III


Summary of Contents for ARB Touring Simpson III
- Page 1 Owners Manual Congratulations on purchasing your ARB TOURING ROOFTOP TENT - the quick and easy way to enjoy camping. Included in this leaflet is all the information that you require to obtain the maximum enjoyment and benefit from your rooftop tent. Given proper care your rooftop tent will give you many years of trouble free camping.
- Page 2 INDEX Attaching the mounting rails to the base of the ARB Rooftop Tent 1.1. Will the Rooftop Tent be positioned to open to the rear or to the side of the vehicle? 1.2. Attaching the mounting rails. Fitting the ARB Rooftop Tent to your Roof Rack or Roof Bars. Rooftop Tent Setup Instructions.
- Page 3 1. Attaching the Mounting Rails to the ARB Rooftop Tent 1.1. Direction of Opening Before you fit your new rooftop tent to your vehicle, you will need to decide whether you wish to have the rooftop tent open “off the back’” or “off the side” of your vehicle. “Off the Back”...
- Page 4 1. Attaching the Mounting Rails to the ARB Rooftop Tent 1.1. Direction of Opening (continued) “Off the Side” For most medium or small vehicles opening “off the side” is preferable. The advantages of this orientation are: - allows for lift up tailgates to operate normally. - means the closed tent pack is better balanced on the roof and creates less wind drag as the narrow face of the tent pack is travelling forward.
- Page 5 1.2. Mounting Extrusion and Ladder - Attachment Instructions 1. Remove mounting extrusion from the carton (cut as per Diagram 1 if you intend opening the rooftop tent off the rear of your vehicle.) 2. Place the tent on its side on the ground onto a clean surface. 3.
- Page 6 2. Fitting the Rooftop Tent to your Roof Rack or Roof Bars 1. Lift the tent onto the vehicle’s roof rack or roof bars. 2. Place 8mm x 55mm bolt into the slide plate. Slide the plate and bolt into the mounting extrusion.
- Page 7 3. Rooftop Tent Set Up Instructions 1. Remove the travel cover from the tent by unzipping around the 3 edges and slide the remaining edge from the rope track. See 2. Release the hold down velcro straps on each side of the tent. See NB - When closing the tent, do not use excessive force on the side retaining velcro straps.
- Page 8 4. Rooftop Tent Annexe Set Up Instructions 1. Remove the Annexe from it’s bag and unzip the back panel from the rest of the Annexe if necessary. This is the panel with a large inverted U-shaped zip for access to the vehicle. Slide the rope section of this panel into the rope track extrusion situated on the base of the tent.
- Page 9 5. Ladder Extension Accessory A Ladder Extension may be required depending on the height of your vehicle (in most cases where the base of your rooftop tent is more than 2m off the ground). If required slide ladder extension into the base of the main ladder. Position ladder and extension to an appropriate climbing angle.
- Page 10 6. Storage and Handling Guidelines 6.1. Cautions Do not use excessive force on side retaining Velcro straps when closing the tent. These straps are designed only to hold the tent base together, and are not designed to be used to pull the bases together.
-
Page 11: Care Instructions
6.2. Storage of the Tent 1. If the tent is stored on the vehicle for extended periods and is exposed to the elements, it is possible for the tent to absorb moisture from the air into the canvas fabric. For this reason the tent should be opened periodically and allowed to air or dry. -
Page 12: Warranty Terms And Conditions
Warranty Terms and Conditions The ARB Touring Rooftop Tent comes with a 2 year (24 month) warranty, effective from the date of purchase. The warranty covers all aspects of workmanship, finish and fabric. ARB Corporation Ltd will, at its descretion, repair or replace at no charge any fault if: •...
Need help?
Do you have a question about the Simpson III and is the answer not in the manual?
Questions and answers