Table of Contents
Advertisement
Advertisement
Table of Contents

Subscribe to Our Youtube Channel
Related Manuals for METER GROUP AquaLab 4TE


Summary of Contents for METER GROUP AquaLab 4TE
- Page 1 AQUALAB SERIES 4 ®...
-
Page 2: Table Of Contents
13484-14 6.15.2018 TABLE OF CONTENTS 1. Introduction ....................1 2. Operation ....................2 2.1 Installation ....................2 2.2 Sample Preparation ................... 3 2.2.1 Sample Composition ................ 4 2.2.2 Sample Temperature ................ 6 2.3 Taking a Reading ..................7 2.4 Viewing Data ....................9 2.5 Using Moisture Content (AQUALAB DUO Only) .......... - Page 3 3.3 Computer Interface .................. 36 3.3.1 AquaLink 4 Software ..............36 3.3.2 Using a Terminal Program .............. 37 3.4 Theory ...................... 37 3.4.1 Moisture Content ................37 3.4.2 Water Activity ................38 3.4.3 Chilled-Mirror Dew Point Limitations..........40 3.4.4 Water Potential ................41 3.4.5 Sorption Isotherms ................
-
Page 5: Introduction
Either sensor is selected using the instrument menu system. • AQUALAB 4TE DUO uses a chilled-mirror dew point sensor and programmed models obtained from isotherm data to give the user both water activity and moisture content simultaneously in 5 min or less. -
Page 6: Operation
OPERATION 2. OPERATION Please read all instructions before operating the AQUALAB to ensure it performs to its full potential. Please observe the following considerations carefully. • Only allow personnel qualified by METER to carry out service work on the electrical components. -
Page 7: Sample Preparation
AQUALAB Table 1 Installation (continued) Plug In Instrument Plug the power cord into the back of the AQUALAB unit and into an outlet. Only use the supplied power cord or one rated for AQUALAB 4 and certified for the country of use. The cord must be a minimum of 18 AWG and have a rating for 10 A or greater. -
Page 8: Sample Composition
OPERATION Material left on the rim or the outside of the cup can contaminate the chamber and be transferred to subsequent samples. If a sample cannot be measured immediately, put the disposable sample cup lid on the cup to restrict water transfer. For longer term storage of no more than 4 h, seal the lid by placing tape or Parafilm ®... - Page 9 Samples with certain volatiles in high enough concentrations may give inaccurate water activity values in the AQUALAB 4TE and AQUALAB 4TE DUO models. Volatiles condense on the mirror during the reading process but do not evaporate from the mirror as water does.
-
Page 10: Sample Temperature
OPERATION If a sample has a water activity of <0.03 , a < symbol in the Measurement tab indicates the sample is too dry to be accurately measured by the AQUALAB (Figure 1). Figure 1 Low water activity reading If the measured appears lower than the known sample water activity, the instrument sensors may have been contaminated and need to be cleaned or serviced (Section 4.2). -
Page 11: Taking A Reading
AQUALAB If this error message appears, Remove the sample from the instrument. Place a lid on the cup. Allow the sample to cool to within 4 °C of the instrument before measuring. To check the differences in temperature between the sample and the chamber prior to beginning a reading, set the sample in the chamber, close the lid without latching it, and press the RIGHT or LEFT button. - Page 12 OPERATION Figure 4 Measurement screen for AQUALAB DUO Milk Powder product model Verify cleanliness (Section 4.2), calibration (Section 4.1), and sample preparation (Section 2.2). NOTE: The device fan can blow powdery substances; always verify the cleanliness of the sample chamber before reading a new sample. Move the chamber lever to the OPEN position and lift the chamber lid.
-
Page 13: Viewing Data
AQUALAB Figure 5 Completed test results with both water activity and moisture content Autosave (default setting) retains the data without any annotation (Section 3.2.4.2). To add an annotation, select SAVE, add desired letters, and select SAVE again (Figure 6). Figure 6 Keyboard screen to annotate data results 2.4 VIEWING DATA To view prior test results, use the following steps: Press MENU to navigate to the Data tab (Figure 7). -
Page 14: Using Moisture Content (Aqualab Duo Only)
AQUALAB DUO models generate water activity values and moisture content. The DUO models use preloaded product-specific isotherm models to calculate moisture content and present it on the screen with the water activity (Figure 10). The AQUALAB 4TE and AQUALAB 4TEV can be upgraded to an AQUALAB 4TE DUO and AQUALAB 4TEV DUO, respectively. -
Page 15: Obtaining Product Isotherm Models
AQUALAB Figure 10 AQUALAB DUO display with water activity and moisture content readings 2.5.1 OBTAINING PRODUCT ISOTHERM MODELS The isotherm relationship for each product is unique, and each product isotherm model must be determined experimentally prior to testing moisture content with the AQUALAB DUO. -
Page 16: Measuring Moisture Content
OPERATION The Model Manager window will show all current models (Figure 11). If no models have been loaded, the window will be empty. Figure 11 AquaLink 4 model loading tool Click Import. 10. Navigate to the model saved on the computer and select. Each model will need to be imported individually. - Page 17 AQUALAB Figure 12 Changing moisture content model on the Configuration tab Select %Moisture. A list of available models appears, organized by name (Figure 13). Figure 13 Product models for moisture content Select the model for the product to be analyzed. If the listed models do not apply, select None. No moisture content will appear on the Measurement tab.
-
Page 18: Moisture Content Model Offset
OPERATION Figure 14 AQUALAB DUO display with water activity and moisture content readings 2.5.4 MOISTURE CONTENT MODEL OFFSET The AQUALAB DUO calculates moisture content values based on water activity readings by utilizing models stored within the instrument. Because moisture content results vary between reference methods, it is important to ensure that the model in the instrument correlates well with the values obtained from the selected reference method (e.g., Karl Fischer titration or oven loss on drying). - Page 19 AQUALAB Figure 15 Select %Moisture on the Calibration tab The %Moisture Calibration screen will appear (Figure 16). Figure 16 %Moisture Calibration screen If creating an existing model, select New. If editing an existing model, select Edit. 10. Scroll through the reference models for the desired product (Figure 17). Figure 17 Moisture content model list 11.
- Page 20 OPERATION Figure 18 Start test 13. Place a sample in the sample chamber when prompted (Figure 19). Figure 19 Prompt to place sample in chamber 14. Remove the lid from the sample cup prepared in step 3 and place into the chamber. 15. Close and latch the lid. 16.
-
Page 21: Restore Moisture Content Default Settings
AQUALAB 19. If editing an existing model, the model will update but automatically retain the same name. If creating a new model, enter a new name on the Annotation screen. Select CANCEL to return to the Configuration tab and cancel the moisture content adjustment. - Page 22 OPERATION Select the desired model (Figure 23). Figure 23 Moisture content model list Select Defaults (Figure 24). Figure 24 Default options A confirmation dialog will appear (Figure 25). Figure 25 Confirmation dialog to reset calibration to defaults To restore the original model settings, select OK. To cancel and return to the Calibration tab, select CANCEL. A screen will confirm the restoration of factory calibration (Figure 26).
-
Page 23: Deleting Models
AQUALAB Figure 26 Confirmation dialog that AQUALAB was reset to factory calibration Select OK to return to the Configuration tab. 2.5.6 DELETING MODELS If a model is no longer needed, it can be deleted directly from the AQUALAB. Models are not user-specific, so if a model is deleted from the instrument, all users will lose access to it. - Page 24 OPERATION Figure 28 Moisture content model list A confirmation screen will appear indicating the model to be deleted (Figure 29). Figure 29 Confirmation dialog to delete model Select OK to delete the model. Select CANCEL to return to the previous screen.
-
Page 25: System
AQUALAB 3. SYSTEM This section describes the specifications, components, and theory of the AQUALAB instrument. 3.1 SPECIFICATIONS MEASUREMENT SPECIFICATIONS Water Activity Range 0.030–1.000 Resolution 0.0001 Accuracy ±0.003 (4TE dew point) ±0.015 (4TEV capacitance) Repeatability 0.001 Moisture Content (DUO only) Accuracy 0.1%–0.5% to moisture content reference Repeatability 0.02%... -
Page 26: Components
The AQUALAB DUO models make it possible to determine both moisture content and water activity with one machine. For information about upgrading an AQUALAB 4TE or 4TEV to a DUO, contact Customer Support. -
Page 27: Cords And Cables
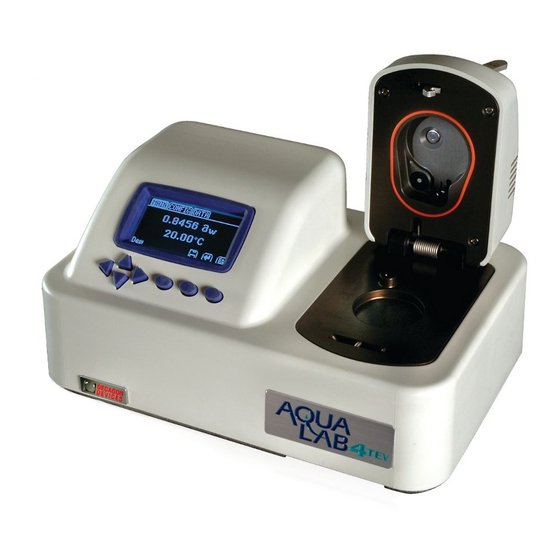
AQUALAB Lever Display Sample chamber Buttons Figure 30 AQUALAB exterior 3.2.1 CORDS AND CABLES The AQUALAB is shipped with a power cord and a USB cable. The power cord plugs into the back of the instrument and must be plugged into a grounded outlet or power strip. -
Page 28: Buttons
SYSTEM thermocouple attached to the mirror then records the temperature at which condensation occurs. The AQUALAB then signals with beeps and displays the final water activity and temperature. The AQUALAB uses an internal fan to circulate the air within the sample chamber to reduce equilibrium time. -
Page 29: Display Screen
AQUALAB There are four arrow buttons: LEFT, RIGHT, UP, and DOWN (Figure 32). These buttons allow for navigation through the various screens on the AQUALAB. The three round buttons have variable uses, depending on what icon is represented above them on the display (Section 3.2.4). - Page 30 SYSTEM The button icons on the display change to show the available actions for the screen (Table Table 2 AQUALAB button icons Icon Name Action ENTER Accepts the current action CANCEL Ends the current action MENU Switches between the Measurement, Configuration, and Data tabs SAVE Saves a setting or a reading Accepts the input from the user...
- Page 31 AQUALAB Figure 35 Temperature difference between sample and lid On AQUALAB DUO models, using the UP or DOWN buttons changes the results according to the models loaded onto the instrument. The main screen shows the water activity in the middle of the screen and above the sample temperature.
- Page 32 • Temperature. Select to set the AQUALAB to the desired temperature using UP and DOWN. When finished, select SAVE (Figure 38). The AQUALAB 4TE models may be set between 15 and 50 °C in 0.1 °C intervals. The default temperature is 25 °C.
- Page 33 Figure 39 Temp Eq screen • Sensor (AQUALAB 4TEV only). Select to choose a capacitance sensor or chilled-mirror dew point sensor for sampling volatiles or nonvolatiles, respectively. The AQUALAB 4TE model only has a dew point option. • Mode. Select to choose between Single, Continuous, Custom, or Low-Emitting mode (Figure 40).
- Page 34 SYSTEM ∆ a Use UP and DOWN to select the value (any number from 0.0005 to 0.0200) (Figure 41). Figure 41 Custom mode screen Select SAVE to update and exit. Select CANCEL to exit without updating. The Mode screen reappears with the updated custom settings at the top of the screen). If autosave is turned on (default), all test readings will save to the instrument memory, but only the final reading will remain on the Measurement screen.
- Page 35 AQUALAB The date is recorded with each water activity reading. Figure 43 Date option • Time. Select to set the time in the instrument. Use RIGHT and LEFT to change between the hour and minute categories and UP and DOWN to change the individual values (Figure 44). The hour setting automatically changes between AM and PM.
- Page 36 SYSTEM Figure 46 Admin Settings option The Admin Settings allow the administrator to grant or block access to some or all the configuration options. NOTE: Once the administrator is set up, the password cannot be recovered. The AQUALAB must be sent back to METER to be reset.
- Page 37 AQUALAB To lock out users from accessing certain settings, enter the Access function and use UP and DOWN to find the desired option. Selecting the option will toggle it ON or OFF: calibration, temperature, temperature equilibration, sensor selection, mode, date/time, region, password, autosave, number of beeps, and delete (Figure 49).
- Page 38 SYSTEM For the capacitance sensor (TEV models only), Diagnostics provides lid, base, and sample temperatures, relative humidity, and the capacitive sensor user offset (Figure 51). If any of the temperature values are outside the ranges specified in the previous paragraph, refer to Section 4.5.
- Page 39 AQUALAB • View. Select to view stored measurements with the most recent measurements at the top of the table (Figure 54). Use UP and DOWN to move through the stored data. Use LEFT and RIGHT to page quickly through the data. Refer to Section 3.3 for information about downloading these readings to a computer.
-
Page 40: Computer Interface
SYSTEM Figure 56 Delete option backup reminder dialog 3.3 COMPUTER INTERFACE The AQUALAB can connect to a computer using USB (included) or RS-232 to send water activity data for further analysis and storage. The interface is run through the AquaLink 4 software or a terminal communication program. NOTE: Install the USB driver before connecting the USB cable to the computer by downloading from software. -
Page 41: Using A Terminal Program
AQUALAB 3.3.2 USING A TERMINAL PROGRAM There are several terminal program options. METER has its own terminal program (DecaTerm) that can be downloaded from software.metergroup.com. Two other options are TeraTerm, a free program that can be found on the internet, and Hyperterminal, the standard program with Microsoft Windows prior to Windows 7 software. -
Page 42: Water Activity
SYSTEM However, moisture content alone is not a reliable indicator for predicting microbial responses and chemical reactions in materials. The limitations of moisture content measurement are attributed to differences in the intensity that water associates with other components. 3.4.2 WATER ACTIVITY Water activity ( ) is a measurement of the energy status of the water in a system. - Page 43 AQUALAB temperature. When the water activity of the sample and the relative humidity of the air are in equilibrium, the measurement of the headspace humidity gives the water activity of the sample. Water activity is the relative humidity of air in equilibrium with a sample in a sealed chamber.
-
Page 44: Chilled-Mirror Dew Point Limitations
3.4.3 CHILLED-MIRROR DEW POINT LIMITATIONS The limitation of the AQUALAB 4TE is its ability to accurately measure samples with high concentrations (typically >1%) of certain volatile compounds such as ethanol or propylene... -
Page 45: Water Potential
AQUALAB is determined by how readily the material volatilizes, which is both concentration and matrix dependent. Therefore, even if a sample contains materials that could volatilize, it may still be possible to make accurate readings using the chilled-mirror dew point sensor. The AQUALAB TDL provides a solution for products containing volatile materials. - Page 46 SYSTEM isotherm and infer the moisture content using the measured water activity of samples and that isotherm. The DUO upgrade to AQUALAB 4TE and TDL enables users to the determine moisture content and water activity simultaneously.
-
Page 47: Service
AQUALAB 4. SERVICE This section contains calibration and verification information, cleaning and maintenance guidelines, troubleshooting steps, and customer support information. 4.1 VERIFICATION AND CALIBRATION It is important to verify the AQUALAB water activity calibration against known standards to guarantee optimal performance and accuracy. METER recommends verification daily, once per shift, or before each use. - Page 48 SERVICE To use a verification standard, remove the twist top and pour the contents into an AQUALAB sample cup. Information about the standard value and molality can be found printed on the outside of the plastic vial. If for some reason METER verification standards are not available, contact Customer Support for instructions on how to create a verification standard...
- Page 49 AQUALAB The water activity readings should be within ±0.003 of the given value for the dew point or ±0.015 for capacitance when testing the verification standard. The standards will read at 25 °C. If other temperatures are required, refer to Table Table 5 Temperature correction of verification standards Temperature...
-
Page 50: Linear Offset
SERVICE Measure verification standard Repeat process Clean sample Clean sample chamber chamber Reread first Read second standard standard Go to offset Go to sampling procedure procedure Figure 59 Verification standard flowchart. A check indicates AQUALAB verified the standard within specification; a cross indicates AQUALAB did not verify the standard within specifications. 4.1.2 LINEAR OFFSET After verification and cleaning, the instrument an offset may be necessary. - Page 51 AQUALAB Figure 61 Calibration instruction dialog Empty the whole vial of water activity standard into a sample cup. METER recommends using the 6.00 NaCl (0.76 ). Do not adjust for the offset using steam distilled water. Ensure the rim and outside of the cup are clean. Place the sample cup in the sample chamber.
-
Page 52: Multipoint Calibration (Tev Only)
SERVICE 4.1.3 MULTIPOINT CALIBRATION (TEV ONLY) The capacitance sensor used for measuring the water activity of materials with volatiles (AQUALAB 4TEV models only) is a secondary method for measuring water activity and may require a slope change to the calibration in addition to a linear offset. This is the case when the offset in capacitance mode is different at high water activities than low water activities. - Page 53 AQUALAB Place the sample cup in the AQUALAB sample chamber. Carefully close the lid and move the lever to the READ position. Select OK to begin testing. After AQUALAB has finished measuring the verification standard, a new screen appears requesting that a 0.50 standard be placed in the chamber.
- Page 54 SERVICE Figure 67 Calibration Complete screen Once the multipoint calibration is saved, a confirmation screen will appear (Figure 68). Figure 68 Calibration saved confirmation 14. Select OK to continue. 15. If the calibration is canceled at any point, a Calibration Canceled confirmation will appear.
-
Page 55: Restore Factory Defaults
AQUALAB 19. Measure a 0.76 verification standard according to the verification procedure detailed in Section 4.1.1. If both verification readings are within ±0.015 , the instrument is ready to begin testing. If incorrect verification standard readings persist, contact Customer Support. 4.1.4 RESTORE FACTORY DEFAULTS To restore original calibration settings, do the following: Navigate to the Configuration tab using MENU. -
Page 56: Cleaning
SERVICE Figure 72 Confirmation that factory calibration was reset Select OK. 4.2 CLEANING Keeping the AQUALAB clean is vital to maintaining the accuracy of the instrument. Dust and sampling debris can contaminate the sampling chamber, so regular cleaning is essential. To clean the AQUALAB, carefully follow these instructions and refer to the labeled diagram in Figure 73. -
Page 57: Cleaning Kit
AQUALAB any contaminants (e.g., fingerprints) on the mirror, the dew forms unevenly and can affect the accuracy of the reading. The instrument should be cleaned if visual inspection indicates the chamber is dirty or as part of the verification process (Section 4.1). 4.2.1 CLEANING KIT The AQUALAB comes with an AQUALAB Cleaning Kit that contains enough cleaning supplies to clean the instrument for about 1 year. - Page 58 SERVICE b. Wrap a new tissue around the end of the spatula and moisten it with cleaning solution. NOTE: Do not dip used tissue into the cleaning solution as the cleaning solution will become contaminated. c. Clean upper chamber, O-ring, and all surfaces of the sample block within the red O-ring.
-
Page 59: Maintenance Packages
AQUALAB This cleans the air inside the chamber, helping it come back to a stable sampling environment. b. Verify the linear offset against known verification standards as described in Section 4.1.2. c. If a linear offset has occurred, adjust for linear offset. If the instrument is still not reading samples correctly, contact Customer Support. -
Page 60: Troubleshooting
SERVICE Do not ship the power cord, serial cable, or any other accessories. If the original packaging is not available, pack the box moderately tight with packing material (e.g., Styrofoam peanuts or bubble wrap), ensuring the instrument is suspended in the packing material. On the RMA form, please verify the ship to and bill to information, contact name, and problem description. - Page 61 AQUALAB Table 6 Troubleshooting the AQUALAB (continued) Problem Possible Solutions The sample chamber may be dirty. Refer to Section 4.2 directions on cleaning the sample chamber. The temperature difference between the sample and the block chamber may be too great. Allow the sample to equilibrate to instrument temperature.
- Page 62 SERVICE Table 6 Troubleshooting the AQUALAB (continued) Problem Possible Solutions Firmware is corrupted. See The firmware on the instrument is corrupted and needs to be Manual for options. reloaded. To download new firmware to the AQUALAB 4 models, the instrument must be serviced by METER (Section 4.4). error message On the measurement screen, toggle to the correct model using the UP and DOWN button (Section 2.5).
-
Page 63: Customer Support
AQUALAB Table 6 Troubleshooting the AQUALAB (continued) Problem Possible Solutions If, after cleaning the instrument and following troubleshooting guidelines, there is still a measurement error, navigate to the Diagnostics screen. The lid, base, and sample temperatures should be between 24.5 Sensors are reading outside and 25.5 °C. -
Page 64: Reference
REFERENCE REFERENCE Labuza TP, Acott K, Tatini SR, Lee RY, Flink J, and McCall W. 1976. Water activity determination: A collaborative study of different methods. J. Food Sci. 41:910–917. -
Page 65: Index
AQUALAB INDEX data accuracy 6, 21 admin settings 31–33 delete 35–36 download 36–37 annual calibration service 43, 55 view 35 AQUALAB models 1 Data tab 34–36 AquaLink 11–12, 36 autosave 30, 33 date 30 dew point sensor 29, 33, 38 diagnostics 33–38 DUO model 1, 42 beep 26, 33... - Page 66 INDEX low-emitting 30 temperature 31 single 29 time 31 moisture content 10, 21 specifications measuring 12 compliance 22 theory 37–38 measurement 21 value 7 physical 21–22 power voltage 2, 22 osmotic effects 40 temp eq 28–29 temperature 21, 28 temperature effects 2, 39–40 Peltier thermoelectric cooler 23, 40 terms and conditions 59 pressure effects 39...
- Page 67 13908-03 8.10.2018 METER Group, Inc. USA 2365 NE Hopkins Court Pullman, WA 99163 T: +1.509.332.2756 F: +1.509.332.5158 E: info@metergroup.com W: www.metergroup.com © 2018 All Rights Reserved.
Need help?
Do you have a question about the AquaLab 4TE and is the answer not in the manual?
Questions and answers