
Related Manuals for Illuminated Mirrors Diamond X Series


Summary of Contents for Illuminated Mirrors Diamond X Series
- Page 1 Mirrors Illuminated The UK’s Largest LED Mirror Supplier to Trade and Retail Bathroom Installation Cabinet & User Guide www.illuminated-mirrors.uk.com...
- Page 2 Bathroom Cabinet Installation & User Guide Thank you for purchasing our illuminated Cabinets. To avoid product damage or personal injuries, carefully read, understand, and follow all the Instructions in this installation guide before installing the product. Save this manual for future reference. Illuminated Bathroom Mirrored Cabinets Instruction manual...
- Page 3 WARNING! To avoid the risk of electrocution, please turn o the electricity supply mains before commencing the installation. Illuminated Bathroom Mirrored Cabinets Instruction manual...
-
Page 4: Table Of Contents
CONTENT IMPORTANT INFORMATION Installation Positioning Aluminium Cabinet Installation Fitting Non-Demister Doors With Soft Close Hinges Fitting of Demister Doors Fitting Non-Demister Doors With Pivot Hinges Shelf Adjustment Oak Cabinets Operation On/O Infrared Sensor Shaver Socket Ambient Lighting RGB Colour Change Lighting Bluetooth Audio FAQs Illuminated Bathroom Mirrored Cabinets... - Page 5 IMPORTANT INFORMATION This product should only be installed by a fully quali ed electrician in accordance with the current IEE wiring regulations (UK) or the equivalent national wiring regulation outside of the UK. This light tting is a Class I product and therefore must be earthed.
-
Page 6: Aluminium Cabinet Installation
Aluminium Cabinet Installation 2. Using a spirit level make sure that the supplied mounting brackets are level and mark the position of the bracket mounting points. The spacing of the brackets will vary depending on the model you have chosen and can be found within the cabinets packaging. 3. -
Page 7: Fitting Non-Demister Doors With Soft Close Hinges
4. Fitting Non-Demister Doors With Soft Close Hinges To t the doors simply clip the sort close hinges into place. This is achieved by locating the front of the hinge into to cabinet mounting plate a) and pushing in the rear of the hinge until it clicks into place b). Door Adjustment There are two adjustments that can be made a) will adjust the door left to right b) will adjust the gap between the door and the cabinet. -
Page 8: Fitting Of Demister Doors
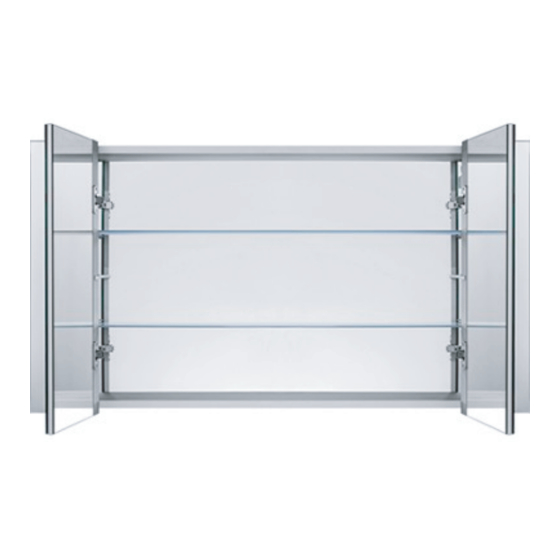
5. Fitting of Demister Doors There are four main styles of cabinet, please identify your cabinet type from the images below and follow the appropriate tting guidelines. (Please note that your speci c cabinet size may be di erent to those shown in the images). Type A Type B Soft Close Hinge With Side... - Page 9 Type A Remove the four panel mounting screws, disconnect the panel, and set aside. Carefully push the door demister cable through the grey grommet. The entry position will depend on the model. Locate the demister cable connection block and connect the wires from the demister door.
- Page 10 Type B Begin by removing the electrics cover mounting screws. Carefully lower the front of the cover to gain access to the demister cable terminal block. Feed the door demister cable through the grey grommet located on the electrics cover. Connect the demister cable and replace the electrics cover.
- Page 11 Type C Remove the panel mounting screws located on the top or sides of the cabinet (depending on the light orientation) and carefully remove and set aside. Carefully align and push the door demister cable through the gap in the side of the cabinet a) until the door is fully positioned under the hinge plate b).
- Page 12 Locate the demister cable connection block and connect the wires from the demister door. Type D This range is available with a single, double or treble doors. The tting is basically the same for Type B products but with the additional requirement to connect the door’s lighting harness as follows: With the cover loosened locate the terminal block for the demister pad a) and the terminal block for the door lighting b).
-
Page 13: Fitting Non-Demister Doors With Pivot Hinges
Type D Cabinets are also available with a digital clock. To set the time on the clock use the buttons located on the edge of the mirror door. Press and hold down the Hours button until the numbers on the clock start to ash. Press the Hours button until the correct Hours time is reached. -
Page 14: Shelf Adjustment
There are two types of door spacer supplied a), the drilled through spacer should be tted to the top part of the door by simply pushing into position b), and the solid based spacer to the bottom should be held into place whilst you position the door on the cabinet. Use the pointed grub screws c) provided and attach the door to the cabinet. -
Page 15: Oak Cabinets
8. Oak Cabinets Using a spirit level make sure that the supplied mounting brackets are level and mark the position of the bracket mounting points. The spacing of the brackets will vary depending on the model you have chosen and can be found within the cabinets packaging. Using an appropriate drill bit for your wall drill the mounting holes and t wall plugs. - Page 16 Connect your cabinet to the mains supply and hang onto the wall brackets. t m e n t h t A d j u s F o r H e i g t m e n t t h A d j u s F o r D e p Adjustments can be made using the two screws on the cabinet hangers.
-
Page 17: Shaver Socket
Operating Instructions: bottom of the frame, simply wave your hand across the sensor and it will instantly power up the lights and demister pad. Repeat the action 2. Shaver Socket All cabinets include a 240 Volt shaver socket for the use of electric rocker switch which works separately from the lights and demister pad. - Page 18 5. RGB Colour Change Lighting Simply point you remote towards the small black sensor located on either the bottom or side of the mirror frame. Select you Static Colour option from the keypad. The brightness of the light can be adjusted in steps by pressing the top left two UP and DOWN control buttons.
- Page 19 FAQs 1. What is a LED Cabinet? A LED Cabinet uses Energy Saving LED light bulbs. They are Waterproof Rated IP44 for use in bathrooms and include clever technology like, Infra-Red on/o sensors, Anti-Mist demister pads and a shaver socket. 2.
Need help?
Do you have a question about the Diamond X Series and is the answer not in the manual?
Questions and answers