Table of Contents

Related Manuals for MasterForce MX77


Summary of Contents for MasterForce MX77
- Page 1 MX77 - Rolling Universal Miter Saw Station 240-1657 OPERATOR’S MANUAL To Reduce The Risk Of Injury, User Must Read And CAUTION: Understand Operator’s Manual. Save These Instructions For Future Reference. © 2016 Menard, Inc., Eau Claire, WI 54703...
-
Page 2: Day Money Back Guarantee
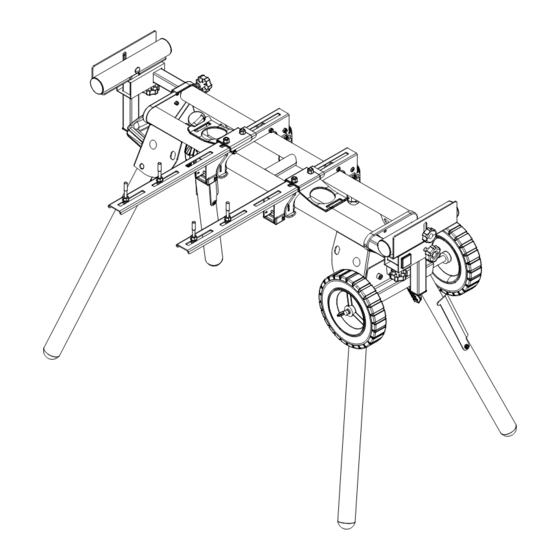
This MASTERFORCE® brand tool carries our famous No Hassle 3-Year Limited fire and/or serious personal injury. Warranty to the original purchaser. If, during normal use, this MASTERFORCE® tool breaks or fails due to a defect in material or workmanship within three (3) years from the... - Page 3 OVERVIEW Figure 1. You have just purchased a MX77 Rolling Universal Miter Saw Station. This product has been specifically designed to assist you in the use of your 10-12" miter saw, as well as increasing efficiency with other benchtop tools such as table saws, band saws, scroll saws, planers, etc.
- Page 4 PARTS LIST ASSEMBLY INSTRUCTIONS TOOL MOUNT ADJUSTMENT SCREW PART # DESCRIPTION PART # DESCRIPTION MITER SAW STATION 2 pcs 1 pcs KNOB NUTS M6 Most plastic tool mounts are designed to fit snugly over the stand rails. With the locking levers in RAPID CLAMP TOOL MOUNT 2 pcs CARRIAGE BOLT M8*55...
- Page 5 2. Unsnap the J-Lock Clips from around the mounting beams to allow your tool to separate ™ are properly locked in place before using tool. Do not exceed the rated capacity on from your MASTERFORCE Miter Saw Station. ® main frame table.
- Page 6 4. Lock the tool mounts in position by lowering the locking levers. FIG 3 5. Snap the J-Lock closed (around the beams) to prevent your mounted tool from detaching ™ from the MASTERFORCE Miter Saw Station. ® Leg Lock Lever...
- Page 7 ASSEMBLY INSTRUCTIONS ASSEMBLY INSTRUCTIONS PREPARING THE STAND 1. Unplug the saw and lock the saw arm in the down position. Figure 5. 2. Place a tool mount underneath the saw, aligning the mounting holes on the miter saw base with the slot in the top of the tool mount. 1.
- Page 8 ASSEMBLY INSTRUCTIONS ASSEMBLY INSTRUCTIONS 5. Tighten down the M8 Nuts (Part 15) that were placed in the Rapid Clamp Tool Mounting Rail FIG 6 and Rapid Clamp Tool Mounts base in Step 2. 6. The Rapid Clamp Tool Handle and Tool Storage Arms can be placed anywhere along the Rapid Clamp Tool Mounting Rail.
Need help?
Do you have a question about the MX77 and is the answer not in the manual?
Questions and answers