Table of Contents

Related Manuals for LG VR6170LVM


Summary of Contents for LG VR6170LVM
- Page 1 OWNER’S MANUAL CLEANING ROBOT Before using, please carefully read the Safety Precautions pages to allow for safe operation of the product. After reading the operation manual, please keep it in an easily accessible location. VR6170LVM www.lg.com...
- Page 2 FEATURES Images of the ceiling and floor are obtained from the sensors of the upper and lower cameras, and through this, the location of Roboking 2.0 will be confirmed, therefore, elaborate cleaning can be accomplished for every part of the room. Camera sensor (upper, lower section) As the noise levels are at a quiet 60dB(A), cleaning can be performed at...
-
Page 3: Table Of Contents
CONTENTS BEFORE THE USE ADDITIONAL INFORMATION Safety precautions 29~31 Troubleshooting Included with product Before you call for service Parts description Button functions Display status information REFERENCE Before you start Product specifications Overview Open source software notice METHOD OF USE How to install the home station How to turn the Roboking 2.0 power supply on &... -
Page 4: 2~4 Safety Precautions 29~31
If the power cord is broken, do not plug it in. Take the product to an LG Electronics Authorised service repairer. Do not place the home station and Always use a dedicated outlet with 5A or above. - Page 5 SAFETY PRECAUTIONS WARNING Do not touch the power plug with Do not allow children or pets to play with or rest upon the Roboking 2.0 at wet hands. any time. Do not use the Roboking 2.0 Doing so can cause electric shock. while an object is hanging from it.
- Page 6 Do not put any water or detergent on the Roboking 2.0. If liquids get inside of the Roboking 2.0, turn off the power supply and contact an LG Electronics sales agent or customer care center. When the robot cleaner is...
-
Page 7: Included With Product
CLEANING ROBOT Before using, please carefully read the Safety Precautions pages to allow for safe operation of the product. After reading the operation manual, please keep it in an easily accessible location. VR6170LVM www.lg.com Side brush Dust bin filter (spare) -
Page 8: 6~7 Parts Description 8~9
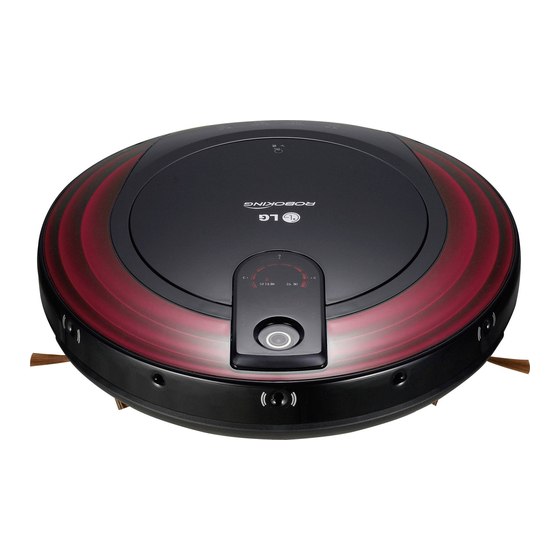
PARTS DESCRIPTION - Roboking 2.0 Plan view Manipulation button Dust bin cover button Dust bin cover Status indication lamp Upper camera sensor Detecting sensor of home station & receiving sensor of remote controller Front view Ultrasonic sensor Obstacle detecting sensor window Rear view Ventilation port Bottom view... - Page 9 PART DESCRIPTION – HOME STATION / DUST BIN Home station Remote controller holder Charging terminal Reset button Power cord fixing hook Dust bin Dust bin handle Dust bin cover Suction port cover Sponge filter Dust bin cover opening button HEPA filter s Figures can be different from actual objects.
- Page 10 BUTTON FUNCTIONS – Roboking 2.0 • Use the TIMER button to start cleaning after a set amount of time has elapsed. • The timer can be set from 1 to maximum of 12 hours in 1 hour units. • If the timer is set whilst the unit is away from the home station, the cleaning TIMER time will be reduced.
-
Page 11: Button Functions
BUTTON FUNCTIONS – REMOTE CONTROL Start Charging The Roboking 2.0 will start The Roboking 2.0 will move to the cleaning home station for charging. Spot Cleaning Cleaning will concentrate Timer within a space of about 1 m The timer can be set from 1-12 (3.28 ft). -
Page 12: Display Status Information
DISPLAY STATUS INFORMATION Spot cleaning • Indicates when the Roboking 2.0 is in spot cleaning mode. (Page 19) Spatial expansion cleaning • Indicates when the Roboking 2.0 is in Zigzag cleaning spatial expansion • Indicates when the cleaning mode. Roboking 2.0 is in zigzag (Page 18) cleaning mode. -
Page 13: Before You Start
BEFORE YOU START Check these items before cleaning • Do not use this device in a room where a child is left alone. The child could be injured. • Remove fragile or unnecessary objects from the room to be cleaned. Especially, remove expensive ceramics and valuables from the floor. -
Page 14: Overview
OVERVIEW Install the home station. (Page 13) Insert the power cord plug into an outlet and locate the station against a wall. If power is not supplied to the home station, the Roboking 2.0 will not charge. Turn on the power supply of the Roboking 2.0. (Page 14) Turn on the power switch located on the bottom of the Roboking 2.0 and press the upper START/STOP button... -
Page 15: How To Install The Home Station
Do not operate the Roboking 2.0 or its Home Station if it has a damaged cord or plug, if it is not working properly, or if it has been damaged or dropped. To avoid hazard, the cord must be replaced by LG Electronics, Inc. or a qualified service person. -
Page 16: How To Turn The Roboking 2.0 Power Supply On & Off
HOW TO TURN THE Roboking 2.0 POWER SUPPLY ON & OFF Turning on the main power supply To turn the power supply on, turn the Roboking 2.0 upside down on a smooth/soft surface and check whether the main power supply switch is turned on. ※... -
Page 17: 5 How To Start And Stop Cleaning 16~17
HOW TO START AND STOP CLEANING Using the buttons on the Roboking 2.0 After the Roboking 2.0 is turned on, press the START/STOP button to begin cleaning. A melody will sound and cleaning will begin. Press the START/STOP button during the cleaning cycle to stop cleaning. -
Page 18: How To Charge The Battery
HOW TO CHARGE THE BATTERY Automatic charging The Roboking 2.0 returns to the home station at the end of a cleaning cycle or when its battery is running low. ※ When cleaning is started from the Home-station, Roboking 2.0 will show better performance in automatic recharge. - Page 19 HOW TO CHARGE THE BATTERY Remaining Battery Charge Indicator The remaining battery charge can be confirmed from the charge indication light, which will indicate charge as follows: • During charging, the charge remaining indication light will flicker. • When charging is completed at the home station, only the battery icon will illuminate to save power. •...
-
Page 20: Cleaning Modes
CLEANING MODES Zigzag Cleaning With zigzag cleaning, the total of the cleaning area will be cleaned with the repetition of zigzag traveling. If rapid cleaning is desired, use zigzag cleaning. When pressing ‘ZIGZAG’ button on the remote controller, zigzag cleaning will be started while zigzag cleaning icon is indicated by the indication lamp. -
Page 21: Auxiliary Cleaning Modes
AUXILIARY CLEANING MODES Manual cleaning This method of cleaning involves manually moving the Roboking 2.0 by pressing the directional (arrow) buttons on the remote control. The interior space will be cleaned by the Roboking 2.0 as it is being moved to the front, rear, or rotated to the left and right side according to the input of the directional buttons. -
Page 22: Timer Cleaning
TIMER CLEANING Set the timer to schedule the cleaning and begin in 1-12 hours. The timer setting is inactive if there is no dust bin. 1. By pressing the TIMER button on the remote control or the Roboking 2.0, a cleaning time can be scheduled. -
Page 23: Mop Cleaning (Option)
MOP CLEANING (OPTION) By attaching the ultra microfiber mop, you can Ultra microfiber mop effectively use the Roboking 2.0 to remove dust from hard floors. Mop plate When the mop plate is attached, the Roboking 2.0 will not climb on to carpets or over thresholds, in order to prevent transferring dirt from the mop. -
Page 24: Location Search Function
LOCATION SEARCH FUNCTION Roboking 2.0 remembers its location while cleaning. If the user moves the Roboking 2.0 while it is operating, it will search its location with the location search function so that it can continue from the previous location. When the user removes any abnormal condition of Roboking 2.0 or moves the location arbitrarily, the location search function will activate. -
Page 25: Cleaning The Dust Bin
CLEANING THE DUST BIN If the dust bin is full, suction power can be weakened. Clean the dust bin before and after each cleaning session. Clean the dust bin using the following sequence: 1. Open the dust bin cover by pressing the PUSH button on the Roboking 2.0. -
Page 26: Cleaning The Dust Bin Filter
CLEANING THE DUST BIN FILTER The dust bin filters are comprised of the HEPA filter and the sponge filter. Clean the HEPA filter and the sponge filter according to the following sequence: 1. Separate the HEPA filter and the inside sponge filter by removing the HEPA filter (as shown). -
Page 27: Cleaning The Brush
CLEANING THE BRUSH The brush, located on the bottom of the Roboking 2.0, helps with the suction of foreign objects. Perform the following steps to clean the brush: ※ Please make sure to remove the dust bin before turning over the main body. Otherwise, the dust in the dust bin may fall out. -
Page 28: Cleaning The Sensor/Charging Terminal
CLEANING THE SENSOR/CHARGING TERMINAL There are sensors on the Roboking 2.0 that can detect obstacles, stairways and the home station for charging the battery. In order to maintain the performance of the Roboking 2.0, regularly clean the sensors and charging terminal as follows: 1. -
Page 29: Cleaning The Side Brush
CLEANING THE SIDE BRUSH Foreign objects/materials such as hair can easily adhere to the side brush. Remove such materials at least once a week. If excessive amounts of foreign materials are stuck to the brush, there is the risk of damage to the brushes. If the floor is rough or skirting boards are frequently cleaned, the side brush may bend or become damaged. -
Page 30: Cleaning The Ultra Microfiber Mop (Option)
3. Use the mop only after allowing it to dry completely in a sunny, well-ventilated area. • To avoid product malfunction, only use the ultra microfiber mop provided with the Roboking 2.0. • Additional microfiber mops can be purchased by visiting a nearby LG Electronics service center. - Page 31 TROUBLESHOOTING When the voice, “Please check the wheels”, is announced. If the unit becomes stuck or suspended and the wheels do not allow the unit to move, the voice, “Please check the wheels”, will be announced. • Is a wheel trapped in a floor gap, door, balcony, stairway, etc? s Move the Roboking 2.0 on to the flat floor.
- Page 32 TROUBLESHOOTING When the voice, “Please check the dust bin”, is announced When an abnormality is detected with the dust bin, the voice, “Please check the dust bin”, is announced. • Is the dust bin fitted correctly? s Open the dust bin cover, and if check if the dust bin is actually fitted. The unit will not operate without the dust bin.
- Page 33 TROUBLESHOOTING When the voice, “Please check the brush”, is announced When the Roboking 2.0 detects that the brush is not functioning properly, you will hear the message “Please check the brush.” Lay a protection cloth on the floor, overturn the Roboking 2.0, and place it on the cloth. ※...
- Page 34 BEFORE YOU CALL FOR SERVICE Confirm before reporting the failure of Roboking 2.0. Problem Solutions (Reference page) The Roboking 2.0 will not Ƭ Confirm that the power switch is turned on. (Page 14) activate. Ƭ Confirm that the battery has been charged. (Page 17) Movements or travel path are Ƭ...
- Page 35 PRODUCT SPECIFICATIONS Item/Model LG Roboking 2.0 VR6170LVM Φ 360 mm × 90 mm External Dimensions Weight 3.2 kg Power Consumption 18 W Battery (Fully Charging) DC 16.8 V Traveling Velocity 350 mm/sec Use Time Approx. 100 minutes (Based on general wooden floor)
- Page 36 REFERENCE ITEMS Open source software notice To obtain the source code under GPL, LGPL, MPL and other open source licenses, that is contained in this product, please visit http://opensource.lge.com. In addition to the source code, all referred license terms, warranty disclaimers and copyright notices are available for download.
- Page 37 MEMO...
- Page 38 MEMO...
- Page 40 Made in Korea...
Need help?
Do you have a question about the VR6170LVM and is the answer not in the manual?
Questions and answers