Table of Contents
Advertisement
Quick Links
Advertisement
Table of Contents

Related Manuals for Constellation Pictor


Summary of Contents for Constellation Pictor
-
Page 2: Table Of Contents
Using the same revolutionary Line Stage Gain Module circuit pioneered in our Altair and Viego preamps, and a fully separate, physically isolated power supply, the Pictor delivers truly ex- traordinary sound quality. However, as with our other preamps, the Pictor’s advanced design necessarily demands a somewhat different setup process compared with typical stereo preamps. - Page 3 Limited warranty New Constellation Audio products are warranted to be free from manufacturing defects for ninety (90) days from date of purchase from an authorized dealer or distributor. If the product is registered on our website: https://www.constellationaudio.com/warranty/register within this period, the warranty shall be extended to three (3) years from the original date of sale.
-
Page 4: Before You Install The Pictor
Make sure the Pictor will not be exposed to moisture. Do not locate it in an area where it might be spilled on, and do not place it in a humid location (such as an unfinished basement). -
Page 5: Power Supply Connections
(O) position. The supplied cables are spiral-wrapped, gold-plated copper designed for aerospace use, and can handle up to 30 amps. Only these cables should be used between the power supply and the Pictor. -
Page 6: Input And Output Connections
1. XLR inputs On the rear of the Pictor are six XLR inputs, two on each side. As you are looking at the rear panel, the left three XLR in- puts are for the right channel, the right three inputs are for the left channel. Underneath each jack is the corresponding input number. - Page 7 When connecting to an amplifier, be sure to match the output to the correct channel on your amp. As you are looking at the back of the Pictor, the outputs on the left side are for the right channel, the outputs on the right are for the left channel.
-
Page 8: Rs 232 / Control
7. Trigger output This 1/8-inch/3.5mm jack outputs a 12-volt DC trigger signal when the Pictor is powered on. This signal can be used to automatically turn on a connected amplifier (if the amp has a DC trigger input), or to trigger home auto- mation systems. -
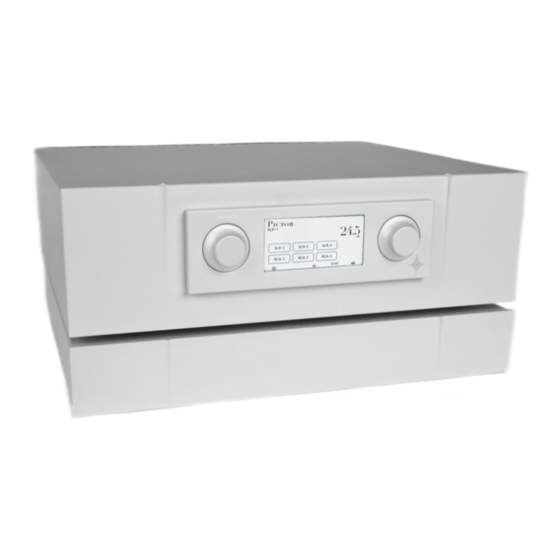
Page 9: Controls / Displays / Indicators
14. Standby/power Push this button to turn the Pictor on and off. When you turn the unit on, it will take a few seconds for the unit to warm up. When it is ready for use, its LCD screen will show the most recently selected input. To put the unit in Standby mode, press this button again after turning on the power. - Page 10 Press this to button to silence the Pictor temporarily. The numerical volume readout will flash. Press again to re- store the audio. Because the Pictor uses a relay to perform the mute function, it may take a second or so for this control to respond.
-
Page 11: Remote Control
22. Input Press this button to select among the Pictor’s XLR and RCA inputs. You will have to wait a second or so be- tween pushes of this button, because for best sound quality the Pictor uses relays to switch inputs. -
Page 12: Control Screens
This screen appears if you touch the touchscreen when the rear-panel master power switch is flipped up. Pushing the onscreen Power button (or the Standby button on the remote) will power up the Pictor and put it into warmup mode. Powering on This screen appears after you press the onscreen Power button or the Standby button on the remote while the Pictor is powered down. - Page 13 To set up a home theater bypass input: First select the input you want to use for this function, then adjust the volume on the Pictor to the desired level. Push the Set Min button, then the Set Max button, then the Apply button.
- Page 14 STEP 2: To turn on the Pictor from the front panel, first make sure the power switch on the back of the unit is on, and your power amplifier is powered off. Now touch the touchscreen. It will illuminate and a power but- ton will appear onscreen.
-
Page 15: Maintenance
C. Flip the master power switch off and on again. This will reset the Pictor's internal circuit breaker. D. Check the circuit breaker for the AC circuit that the Pictor is plugged into. If the breaker is tripped, flip it back on. If it will not turn on, there is likely a short circuit somewhere in the lines or in a device connect- ed to this AC circuit. - Page 16 1. Check each cable between the Pictor and the source components. Make sure the left channel of the source goes to the left input on the Pictor (which is on the right side, as you're looking at the back panel), and the right channel to the right input (which is on the left side).
-
Page 17: Specifications
Power supply: 22 lbs/10 kg For more information Your Pictor line stage should give you many years of trouble-free, maintenance-free service. If you encounter any problems you cannot solve or have technical questions, please contact your Constellation dealer. For more information about Constellation products, please visit our website: constellationaudio.com...
Need help?
Do you have a question about the Pictor and is the answer not in the manual?
Questions and answers