
Related Manuals for GE SVI II AP-2


Summary of Contents for GE SVI II AP-2
- Page 1 GE Oil & Gas QS2002-1 12/10 - Rev H Masoneilan Products II AP Digital Positioner Quick Start Guide (Rev. L)
- Page 2 Please report any errors or questions about the information in this manual to your local supplier or visit www.ge-energy.com/valves. Copyright All software is the intellectual property of GE Oil & Gas. The complete design and manufacture is the intellectual property of GE Oil & Gas. Masoneilan...
-
Page 3: Table Of Contents
Contents Safety Symbols ....................7 Safety Information ................7 SVI II AP Product Safety...................8 Introduction .......................11 Installation and Set Up .................11 Using the Quick Start Guide ................13 Single Acting Positioner ..................14 Double Acting Positioner...................15 Pushbuttons and Local Display................16 Pushbuttons .......................16 ValVue Software....................20 ValVue Lite .......................20 System Requirements ....................20 ValVue Full Trial Version ..................20... - Page 4 GE Oil & Gas SVI II AP Quick Start Guide Verify Wiring and Connections ................43 Overview ......................45 Check Out Procedures ..................45 Actuator, Linkages, or Rotary Adapter ..............45 Check Out, Configuration and Calibration ............45 Verify Mounting and Linkage Adjustment ...............46 Checking the Magnet ....................46...
- Page 5 Document Changes Version/Date Writer Changes H/12-2010 Don Grefe’ Changes ES-699 doc to Rev N. See Appendix A J/3-11 Don Grefe’ Changes ES-699 doc to Rev P. See Appendix A K/12-2011 Don Grefe’ Added description and proce- dures relevant to introduction of the high throughput version.
- Page 6 GE Oil & Gas SVI II AP Quick Start Guide...
-
Page 7: Safety Symbols
Safety Information This section provides safety information and defines the documentation symbols. Safety Symbols Indicates a potentially hazardous situation, WARNING which if not avoided could result in serious injury or death. Indicates a potentially hazardous situation, CAUTION which if not avoided could result in instrument or property damage, or data loss. -
Page 8: Svi Ii Ap Product Safety
GE Oil & Gas ValVue SVI II AP Quick Start SVI II AP Product Safety The SVI II AP digital valve positioner is intended for use with industrial compressed air or, natural gas systems only. NOTE Installations using natural gas are Zone 0 or Div 1 installations. - Page 9 SVI II AP Product Safety Safety Information WARNING Before using these products with fluids/compressed gases other than air or for non-industrial applications, consult the factory. This product is not intended for use in life support systems. WARNING Under certain operating conditions, the use of damaged instruments could cause a degradation of the performance of the system which may lead to personal injury or death.
- Page 10 GE Oil & Gas ValVue SVI II AP Quick Start This page intentionally left blank.
-
Page 11: Introduction
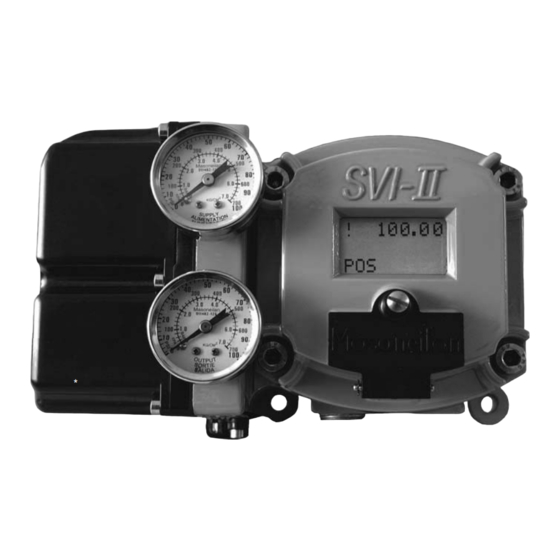
Installation and Set Up Introduction The SVI II AP provides for reliable operations of control valves with utmost simplicity in setup and commissioning. It is uniquely equipped with a non-contact travel sensor allowing for accurate positioning and maintenance free operations. The pneumatic train of the SVI II AP is a dual-stage amplification system with stainless steel wetted parts for durability. - Page 12 GE Oil & Gas ValVue SVI II AP Quick Start SVI II AP Assembled SVI II AP Cover Pneumatic Train and Cover (I/P Module, Relay) Manifold Electronics Module Pneumatic Relay Figure 2 SVI II AP Components Manifold Cover (I/P Module)
-
Page 13: Using The Quick Start Guide
SVI II AP Instruction Manual. If you experience problems that are not documented in this guide refer to the SVI II AP Instruction Manual, call your local representative, or go to www.ge-energy.com/ valves. Sales offices are listed on the last page of this document The steps necessary to complete the SVI II AP installation and software setup are outlined in Table 1. -
Page 14: Single Acting Positioner
GE Oil & Gas ValVue SVI II AP Quick Start WARNING Failure to adhere to the requirements listed in this manual may cause loss of life and property. Before installing, using, or carrying out any maintenance tasks associated with this instrument, READ THE INSTRUCTIONS CAREFULLY. -
Page 15: Double Acting Positioner
Double Acting Positioner Installation and Set Up Supply Output Figure 5 SVI II AP High Flow Air Ports on Single Acting Positioner Double Acting Positioner I) to the inlet port of the actuator and Output 2, Connect Output 1, labeled( ... -
Page 16: Pushbuttons And Local Display
GE Oil & Gas ValVue SVI II AP Quick Start Pushbuttons and Local Display This section covers the optional local interface consisting of the LCD alphanumeric display and pushbuttons. Operation of the SVI II AP Digital Valve Positioner as a local device is controlled through the optional device-mounted pushbuttons and digital display, shown in Figure 7 on page 17. - Page 17 Pushbuttons Installation and Set Up Right Button - Marked , permits you to move forward through the menu structure to the next item in the menu, or to increment the value currently shown in the digital display. When used to increase a displayed value holding this button down causes the value to increase at a faster rate.
- Page 18 GE Oil & Gas ValVue SVI II AP Quick Start Pushbutton Locks and Configuration-Lock Jumper Before performing any of these functions with the local display you must first ensure that the pushbuttons are placed in the unlocked mode using ValVue Lite.
- Page 19 Pushbuttons Installation and Set Up Hardware Configuration Lock Additional security is achieved using the hardware configuration-lock jumper shown in Figure 8. When set to the secure position, shorting the two-pin header, configuration and calibration are not permitted by the local interface or by remote communications.
-
Page 20: Valvue Software
GE Oil & Gas ValVue SVI II AP Quick Start ValVue Software The SVI II AP is shipped with a free version of ValVue Lite and a trial version of ValVue. ValVue Lite ValVue Lite software is shipped with each SVI II for positioner calibration and configuration. -
Page 21: Mounting The Svi Ii Ap
Mounting the SVI II AP Installation and Set Up Mounting the SVI II AP This guide provides installation instructions for mounting an SVI II AP on both rotary and reciprocating actuated valves. The mounting process can be broken down into the following: Attach the mounting bracket to the actuator. -
Page 22: Mounting The Svi Ii Ap On Rotary Valves
GE Oil & Gas ValVue SVI II AP Quick Start Mounting the SVI II AP on Rotary Valves This section describes the procedure for mounting the SVI II AP on rotary control valves that have less than 60° rotation, such as a Camflex... - Page 23 Mounting the SVI II AP on Installation and Set Up 4. On vacuum service, the valve shaft may be drawn into the body by the vacuum acting on the shaft, but the magnetic coupling must be assembled flush with the mounting bracket with the shaft pulled fully out to its thrust bearing.
-
Page 24: Travel Sensor Alignment
GE Oil & Gas ValVue SVI II AP Quick Start Travel Sensor Alignment Table 3 shows the general guidelines for travel sensor alignment. Review the table prior to installing the SVI II AP on a rotary valve actuator for proper alignment of the magnet. -
Page 25: Mounting The Svi Ii Ap On Reciprocating Valves
Mounting the SVI II AP on Installation and Set Up Dismantling the SVI II AP from Rotary Valves Before carrying out any work on the device, power off the instrument or ensure that the device’s location conditions for potentially explosive atmosphere permit the safe opening of the cover. - Page 26 GE Oil & Gas ValVue SVI II AP Quick Start 2. Mount the SVI II AP reciprocating mounting bracket to the actuator using two (2) 5⁄16 - 18 UNC cap screws.The mounting location of the bracket depends on the size and stroke of the actuator. Refer to Figure 11 and Figure 4 on page 28.
- Page 27 Mounting the SVI II AP on Installation and Set Up Figure 12 Reciprocating Linkage 10. Thread the turnbuckle onto the left hand threaded rod end (Figure 12). 11. Adjust the turnbuckle until the hole in the SVI II AP lever is aligned with the indicating hole in the bracket.
- Page 28 GE Oil & Gas ValVue SVI II AP Quick Start Table 4 Reciprocating Valve Mounting Hole and Turnbuckle Length Actuator Mounting Lever Turnbuckle Size Stroke Hole Hole Length Masoneilan 6 and 10 0.5 - 0.8" 1.25" (12.7 - 20.32 mm) (31.75 mm)
-
Page 29: Checking The Magnet
Checking the Magnet Installation and Set Up Checking the Magnet There are two methods of checking the SVI II AP magnet: Perform a visual inspection Use ValVue to check the magnet Performing a Visual Inspection To perform a visual inspection refer to Table 3 on page 24 and ensure that the magnet is correctly oriented for the actuator/valve configuration. -
Page 30: Installing The Svi Ii Ap For Double- Acting Operation
GE Oil & Gas ValVue SVI II AP Quick Start Installing the SVI II AP for Double- Acting Operation This section explains how to mount the SVI II AP for the 84/85/86 kit for double- acting valve positioner configurations. To mount the kit: 1. - Page 31 Installing the SVI II AP for Installation and Set Up 3. Set rod-ends and brackets to stroke and size of actuator. The default setting is a 4.00” stroke. Other stroke settings are as in Figure 15. Figure 15 Stroke Settings 4.
- Page 32 GE Oil & Gas ValVue SVI II AP Quick Start 5. Ensure the turnbuckle assembly is parallel to the stem and the magnets are in the valve closed position (Figure 17) and connect to take-off bracket. Figure 17 Magnet Position with Valve Closed 6.
-
Page 33: Installing The Svi Ii Ap Remote Position Sensor
Installing the SVI II AP Remote Installation and Set Up Installing the SVI II AP Remote Position Sensor The Remote Position Sensor, is a remotely mounted position-sensing device that is connected electrically to an SVI II AP digital valve positioner. It is used as position feedback in applications where direct mounting of an SVI II AP to a valve actuator is not practical due, typically but not limited to, extreme vibration, heat or radiation. -
Page 34: Remote Position Sensor Mounting Instructions
GE Oil & Gas ValVue SVI II AP Quick Start Remote Position Sensor Mounting Instructions Tools Needed 7/16” open end wrench 6 mm hex wrench 2.5 mm hex wrench Blade screwdriver NOTE The instructions below cover mounting the Remote Mount Sensor to both reciprocating and rotary actuators. - Page 35 Remote Position Sensor Installation and Set Up Remote Position Sensor Mounted Remote Position Sensor Mounted on Reciprocating Actuator on Rotary Actuator Figure 19 SVI II AP Remote Position Sensor Installation Table 5 Remote Position Sensor Turnbuckle Length Actuator Size Stroke Turnbuckle Length 6 and 10 0.5 - 0.8"...
- Page 36 GE Oil & Gas ValVue SVI II AP Quick Start 5. Route the cable from the SVI II AP to the RMS and thread the cable through the conduit at the bottom of the housing. 6. Use a blade screwdriver to loosen the screws on the terminal strip and connect the wires;...
-
Page 37: Configuring The Svi Ii Ap For Remote Position Sensing
Configuring the SVI II AP for Installation and Set Up Configuring the SVI II AP for Remote Position Sensing After the Remote Position Sensor is installed and cabled to the SVI II AP, the SVI II AP needs to be configured so that valve position is sensed by Remote Position Sensor. - Page 38 GE Oil & Gas ValVue SVI II AP Quick Start 5. Select the Remote PO checkbox at the left. 6. Activate the Remote Position Sensor by clicking Change Options. SMARTS Assistant changes control to the Remote Position Sensor and displays the message shown below.
-
Page 39: Connecting The Tubing And Air Supply
Connecting the Tubing and Air Installation and Set Up Connecting the Tubing and Air Supply The last step in hardware installation for the SVI II AP is to connect the air supply to the positioner. This section describes the process for connecting the tubing and air supply to a single and double acting positioner. -
Page 40: Connecting The Air Supply
GE Oil & Gas ValVue SVI II AP Quick Start CAUTION The SVI II AP High Flow digital valve positioner cannot be placed in parallel with another volume booster. Contact the factory for further instructions regarding configuration with boosters as well as other non-standard configurations. -
Page 41: Wiring The Svi Ii Ap
Wiring the SVI II AP Installation and Set Up Wiring the SVI II AP In order for the SVI II AP to communicate the positioner data the SVI II AP must be physically connected to a HART communication. The procedure below outlines wiring the SVI II AP. -
Page 42: Svi Ii Ap Setups
GE Oil & Gas ValVue SVI II AP Quick Start 7. Cabling must be shielded to prevent electrical noise that would interfere with the HART tones, with the shield grounded. 8. Signal must be properly grounded in only one place. -
Page 43: Grounding Practices
Grounding Practices Installation and Set Up Grounding Practices To ensure proper grounding make sure that case, signal, and ground connections are made in compliance with the plants normal grounding practices. Any point in the loop can be referenced to ground, but there must never be more than one ground point. - Page 44 GE Oil & Gas ValVue SVI II AP Quick Start NOTE Improperly or inadequately grounded installations can cause noise or instability in the control loop. The internal electronic components are isolated from ground. Grounding the case is unnecessary for functional purposes but grounding the case may be necessary to conform to local codes.
-
Page 45: Overview
Check Out, Configuration and Calibration Overview This section provides the calibration procedures to ensure proper valve positioning. Operational checkout, configuration and calibration procedures are described using an SVI II AP that has a display with pushbuttons. Perform all procedures in this section before NOTE putting the SVI II AP into operation. -
Page 46: Verify Mounting And Linkage Adjustment
GE Oil & Gas ValVue SVI II AP Quick Start Inspecting Actuator, Linkages, or Rotary Adapter Verify that the mounting has not been damaged in shipment for a pre-mounted SVI II AP, physically inspect the actuator, linkage. Record the following information for the configuration checkout: 1. - Page 47 Checking the Magnet Check Out, For reciprocating valves the adjustable link turnbuckle must be parallel to the valve stem. To ensure linearity in positioning, verify that the hole in the lever aligns with the indicating hole in the bracket when the valve is in the closed position. Check that the bracket is mounted using the proper holes (refer to Table 4 on page 28).
-
Page 48: Checking The Air Supply
GE Oil & Gas ValVue SVI II AP Quick Start 2. Read Raw Sensor Data: When the valve is closed the value should be between – 1000 and +1000 for a reciprocating valve or a 60° rotation rotary valve. When the valve is at mid-travel the value should be between –1000 and +1000 for a greater than 60°... - Page 49 Checking the Electronic Module Check Out, Table 7 SVI II AP Models and Functionality Positioner Model Number Available Functionality SVI II AP-2 SVI II AP-3 4 - 20 mA Input Setpoint Display/ Pushbuttons Optional Optional Remote Mount Input...
-
Page 50: Operational Checkout
GE Oil & Gas ValVue SVI II AP Quick Start Operational Checkout The operational checkout of the SVI II AP consists of: Connecting the SVI II AP to a current source Checking the pushbutton locks Powering up the SVI II AP... - Page 51 Powering Up the SVI II AP Check Out, 2. Adjust current to 12 mA. On initial power up of a newly installed SVI II AP, the positioner runs in NORMAL mode using the default instrument parameters installed at the factory. The positioner cycles through the NORMAL cycle menu and LCD displays the following values: PRES: Pressure - unit of measurement and value* SIGNAL...
-
Page 52: Configuration
GE Oil & Gas ValVue SVI II AP Quick Start Configuration Use the procedures that follow to: calibrate, tune, view configuration data and status messages for the SVI II AP. Observe all warnings as the valve moves during these procedures. - Page 53 Configuration with Pushbuttons Check Out, Configuration Menu Because calibration depends on certain configuration options you must perform Configuration before you perform Calibration when installing the SVI II AP for the first time. If a change is made in the Air-to-Open / Air-to-Close configuration option or if you move the SVI II AP to a different valve or make any change to the valve position linkage, you must run the find STOPS calibration again.
-
Page 54: Viewing Status Messages
GE Oil & Gas ValVue SVI II AP Quick Start Viewing Status Messages To view SVI II AP status messages: 1. Press + and * to select VIEW ERR 2. Observe any internal errors. For example, there should be a RESET status caused by powering up. -
Page 55: Calibration
Calibration Check Out, Calibration CAUTION Pilot Trim Valve Applications require the use of the Manual Stop calibration procedure (refer to Configuration and Calibration of the SVI II AP Instruction Manual, EW2002-AP). Do not run Find Stops or the ValVue Setup Wizard on valves with Pilot Trim or damage to the valve will occur. - Page 56 GE Oil & Gas ValVue SVI II AP Quick Start Calibration Menu The Calibration menu shown in Figure 29 provides access to all the calibration functions for the SVI II AP. If a change is made in the Air-To-Open/Air-To-Close configuration option or if you move the SVI II AP to a different valve or make any change to the valve position linkage, you must run the find STOPS calibration again.
- Page 57 Calibration Check Out, Auto Tune This process takes 3 to 10 minutes and strokes the valve in large and small steps to set the PID parameters for best positioning response. WARNING DO NOT perform STOPS while the valve is controlling the process.
- Page 58 GE Oil & Gas ValVue SVI II AP Quick Start any key Normal Cycling View Normal Manual View ERR CLR ERR Menu Data View View any key Manual Mode Instant Errors Data Cycling Menu Action Menu Menu <value> View Normal...
-
Page 59: Check-Out With A Hart Handheld Communicator
Check-out with a HART Check Out, Check-out with a HART Handheld Communicator If the SVI II AP is not equipped with optional push buttons and local display the checkout and configuration is performed using the standard HART communications interface. onnect the HART handheld communicator to the SVI II AP as shown in Figure 31. - Page 60 GE Oil & Gas ValVue SVI II AP Quick Start Proceed with the following steps: 1. Press NEXT. 2. Field device has more status available 3. Press NEXT 4. Ignore next 50 occurrences of status? 5. Press YES 6. Change to MANual mode ->...
-
Page 61: Svi Ii Ap Maintenance
Maintenance SVI II AP Maintenance The SVI II AP was designed based on a modular concept. All components are interchangeable allowing for easy, quick component swapping. The only maintenance procedures recommended for the SVI II AP are: Remove and install the cover Remove and install the I/P module Remove and install the pneumatic relay Upgrade to display cover... -
Page 62: Display Cover Removal And Installation
GE Oil & Gas ValVue SVI II AP Quick Start Display Cover Removal and Installation The cover with display (shown in Figure 32) is an option for the SVI II AP. If you have an SVI II AP with a solid cover and would like to upgrade to a display cover, follow the instructions below for removal and installation. - Page 63 Display Cover Removal and Maintenance To Install the cover: 1. Install the lanyard and tighten the screw to 5 in/lb. 2. Using the 3 mm hex key, remove the screw from the lower left corner, connecting the terminal board to the SVI II AP housing. 3.
- Page 64 GE Oil & Gas ValVue SVI II AP Quick Start This page intentionally left blank.
-
Page 65: Physical And Operational Specifications
Specifications and References Physical and Operational Specifications This section provides the physical and operational specifications for the SVI II AP. Table 9 Environmental Specifications Operating Temperature Limits -58° F to 185° F (-50° C to 85° C) Storage Temperature Limits -58°... - Page 66 GE Oil & Gas ValVue SVI II AP Quick Start Table 10 Operational Specifications Accuracy +/- 0.5% (typical +/-0. 10% or less) Full Span Hysteresis and Deadband +/- 0.3% Full Span Repeatability +/- 0.3% Full Span Conformity +/- 0.5% Full Span Start-Up Drift Less than 0.02% in first hour...
- Page 67 Specifications and Table 11 Input Signal, Power, and Display Specifications Power Supply Loop powered from 4-20 mA control signal Compliance Voltage Rating 9.0 V at 20 mA, 11.0 V at 4.0 mA Minimum Current Signal to Start Up 3.2 mA Minimum Input Span for Split Range Operation 5 mA Upper Range Value for Split Range Operation...
- Page 68 GE Oil & Gas ValVue SVI II AP Quick Start Table 13 System Connectivity HART Physical Device Type Valve positioner; HART device type 7, Device type 202, 0, 00CA) DD Registered with HART Communication Foundation Integration with HART Host software...
- Page 69 Specifications and Table 15 High Flow Pneumatics Single Acting High Flow Air Supply Dry, oil-free, 5 micron filtered air (See ISA S7.3) Action Direct Acting Supply Pressure 20 -100 psi max. (1.4 - 6.9 bar) Regulate 5 - 10 psi (.345 bar - .69 bar) above actuator spring range.
- Page 70 GE Oil & Gas ValVue SVI II AP Quick Start Table 16 Pneumatics Double Acting Standard Flow Air Supply Dry, oil-free, 5 micron filtered air see ISA S7.3 Action Output 1 increases with increasing signal Output 2 decreases with increasing signal Supply Pressure for 25 - 150 psi max.
- Page 71 Specifications and Series Identification SVI AP-abcdefgh a Style 1,2,3 1. ES Version - Easy Smart 2. SD Version - Standard Diagnostics 3. AD Version - Advanced Diagnostics b Pneumatic Train 1,2 1. Single Acting 2. Double Acting c Pneumatics 1. Standard flow 2.
-
Page 72: Hazardous Location Installation
GE Oil & Gas ValVue SVI II AP Quick Start Hazardous Location Installation The following pages provide the agency approved installation procedure for hazardous locations. NOTE The installation procedure is accurate at time of print. For further hazardous installation information please consult the... - Page 73 Hazardous Location Installation Specifications and ES – 699 SPECIAL INSTRUCTIONS FOR INSTALLING MASONEILAN SVI-II AP AND SVI II REMOTE IN AREAS WHERE THERE IS A POTENTIAL FOR EXPLOSIVE GAS ATMOSPHERE OR INFLAMMABLE DUST INTRODUCTION This manual covers the requirements for safe installation, repair, and operation of the SVI-II AP as it relates to operation in areas where there is a potential for explosive atmosphere or inflammable dust.
- Page 74 GE Oil & Gas ValVue SVI II AP Quick Start GENERAL REQUIREMENTS !WARNING! Failure to adhere to the requirements listed in this manual may cause loss of life and property. Installation and maintenance must be performed only by qualified personnel.
- Page 75 Hazardous Location Installation Specifications and Model Number Description of SVI-II AP SVI2-abcdefgh Not all combinations are available. SVI2- Generic ( National Labeling as Required) ES -Easy No Display Standard Hart FM, CSA,ATEX, IEC Smart (1) Single Acting No Buttons None Flow 4 to 20 MADC (XP, DIP, IS, NI)
- Page 76 GE Oil & Gas ValVue SVI II AP Quick Start 4.4 Bolting “X” Marking on label- M8 X 1.25-6g cover screws must be supplied by Masoneilan. No substitution allowed. Minimum yield stress to be 296 N/mm^2 (43,000 psi) INTRINSICALLY SAFE REQUIREMENTS 5.1 Div 2...
- Page 77 Hazardous Location Installation Specifications and Description of Flameproof and Intrinsically Safe Markings Applicable Model Numbers: SVI2-abcdefgh, where “a” thru “h” can take on the following values: a = 2,3,4,5 ; b = 1,2 ; c = 1,2 ; d = 1,2,3,4 ; e = 3 ; f = 1 ; g = 1,2,3 ; h = 1 The label may not appear exactly as shown, but must contain the following information listed below.
- Page 78 GE Oil & Gas ValVue SVI II AP Quick Start (CSA) {Certifying Agency} CL I; DIV 1; GP B, C, D {Explosionproof, gas} CL II; DIV 1; GP E, F, G {Explosionproof, dust} CL III, DIV 1 {Explosionproof, fiber} IS – CL I; DIV 1; GP A, B, C, D {Intrinsically Safe, gas} IS –...
- Page 79 Hazardous Location Installation Specifications and 6.3 Operating Ranges 6.3.1 Temp: -40°C to +85°C 6.3.2 Voltage: 30 Volts 6.3.3 Pressure: 150 psig (1.03MPa) 6.3.4 Current: 4-20mA 6.4 Enclosure Type: Type 4X-IP66 6.5 Temperature Code: T6 Ta=60°C, T5 Ta=75°C, T4 Ta=85°C 6.6 Notes Related to Explosionproof Rating 1) “DO NOT OPEN EVEN WHEN ISOLATED WHEN FLAMMABLE GAS OR DUST ATMOSPHERES ARE PRESENT”...
- Page 80 GE Oil & Gas ValVue SVI II AP Quick Start Description of Intrinsically Safe Markings Applicable Model Numbers: SVI2-abcdefgh, where “a” thru “h” can take on the following values: a = 1 ; b = 1 ; c = 1, 2 ; d = 1, 2 ; e = 3 ; f = 1 ; g = 1,2 ; h = 3,4 The label may not appear exactly as shown, but must contain the following information listed below.
- Page 81 Hazardous Location Installation Specifications and (IEC) IECEx {IEC Logo} Ex ia IIC T6 {Intrinsically Safe} IECEx FMG 07.0007x {CertificateNumber} 7.3 Operating Ranges 7.3.1 Temp: -40°C to +85°C 7.3.2 Voltage: 30 Volts 7.3.3 Pressure: 80 psig (0.55 Mpa) 7.3.4 Current: 4-20mA 7.4 Enclosure Type: “Type 4X-IP66”...
- Page 82 GE Oil & Gas ValVue SVI II AP Quick Start Description of Flameproof and Intrinsically Safe Markings, SVI-II Remote Mount 8.1 Manufacturers Name and Location Dresser Inc. Masoneilan Operations Avon, MA 02322 8.2 Product Name: “SVI-II Remote Mount” ES-699 Rev U...
- Page 83 Hazardous Location Installation Specifications and 8.3 Logos/Markings: (Factory Mutual, US and Canada) IS CL I, II, III; DIV 1; GP A, B, C, D, E, F, G {Intrinsically Safe} NI CL I; DIV 2; GP A, B, C, D {Non-Incendive, gas} SUITABLE FOR CL II, III;...
- Page 84 GE Oil & Gas ValVue SVI II AP Quick Start FM06ATEX0004X {Certificate Number} II 3 G EEx nL IIC T5 Ta=85°C, T6 Ta=°75C {Non- Incendive, gas} II 3 D Ex tD A22 IP66 T96°C {Non- Incendive, dust} FM06ATEX0005X {Certificate Number} 8.4 Operating Ranges...
- Page 85 Hazardous Location Installation Specifications and Intrinsically Safe Installation Wiring Requirements Each intrinsically safe cable must include a grounded shield or be run in a separate metal conduit. ES-699 Rev U Page 13 of 17...
- Page 86 GE Oil & Gas ValVue SVI II AP Quick Start 10 Notes for Intrinsically Safe Installation 10.1 HAZARDOUS LOCATION Refer to the device label for the description of the environment in which the device may be installed. 10.2 FIELD WIRING Intrinsically Safe wiring must be made with grounded shielded cable or installed in grounded metal conduit.
- Page 87 Hazardous Location Installation Specifications and Entity Parameters: Vmax = 30 Vdc; Imax = 125 mA; Ci = 8 nF; Li = 1 uH max = 900 mW. 10.5 SVI-II AP (+) and (-) PV 1-5VDC Terminals The Process Transmitter and the SVI-II AP PV Input are both barrier protected.
- Page 88 GE Oil & Gas ValVue SVI II AP Quick Start 10.9 Entity Requirement Cable capacitance and inductance plus the I.S. apparatus unprotected capacitance (Ci) and inductance (Li) must not exceed the allowed capacitance (Ca) and inductance (La) indicated on the associated apparatus.
- Page 89 Hazardous Location Installation Specifications and 11.2 I/P Make sure that: The wire is not damaged when feeding it through the housing. A single “O” ring is in place on the wire-sleeve and is not damaged. The four retaining screws are snug. Inserting the wire sleeve through the housing does not require force.
-
Page 90: Spare Parts
GE Oil & Gas ValVue SVI II AP Quick Start Spare Parts... - Page 91 Spare Parts Specifications and...
- Page 92 GE Oil & Gas ValVue SVI II AP Quick Start...
- Page 93 Spare Parts Specifications and Relay Spare Part Kit, Standard Construction, High Flow, Single Acting SVI II AP-2 720014541-999-0000...
- Page 94 DISTRIBUTOR E.P. & S. - FRANCE 24 bis rue de Picpus 75012 PARIS Tel: +33 (0)9 83 01 21 01 ventes@fr-eps.com E.P. & S. - CAMEROON Immeuble Carré d'Or, Rue Njo-Njo Bonapriso, DOUALA Tel: +237 6 52 12 70 95 ventes@fr-eps.com Visit your web-site: www.fr-eps.com...
Need help?
Do you have a question about the SVI II AP-2 and is the answer not in the manual?
Questions and answers