Table of Contents
Advertisement
Advertisement
Table of Contents

Related Manuals for smartmotion HyperSonic


Summary of Contents for smartmotion HyperSonic
- Page 1 User Manual Sonic user manual.indd 1 9/4/2017 3:50:41 PM...
-
Page 2: Table Of Contents
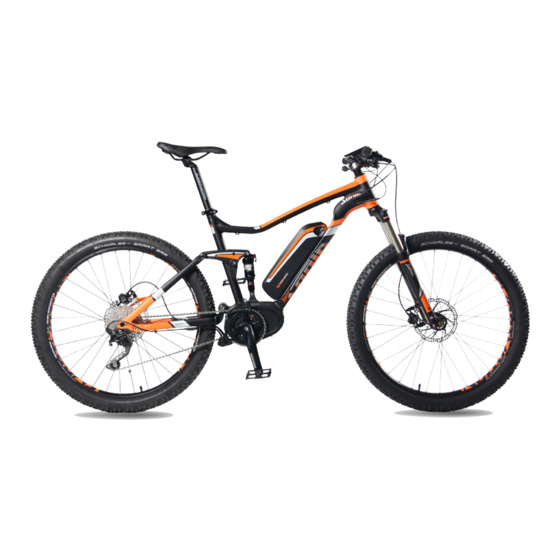
User Manual Congratulations for purchasing a SmartMotion electric In the HyperSonic box you will find the following items: bicycle! 1. SmartMotion electric bicycle Please read this guide fully BEFORE using your electric 2. Battery charger bike. 3. 2X Pedals 4. 2X keys for battery lock 5. -
Page 3: Service Record
1. Service Record Model: Dealer: Serial Numbers: Purchase Date: Check for damage 6 Weeks/200km Date: Frame & Fork Rims Shop: Cables & connections Mechanic: Lubricate 6 Months Chain Date: Derailleur Shop: Seatpost Mechanic: Adjust and Tension 12 Months Spokes* Date: Gears Shop: Seat... -
Page 4: Assembly Instructions
2. Assembly Instructions Your electric bike is shipped 85% assembled. Follow 1. Unpack these steps to get it ready and safe for you to ride. a. Carefully lift the electric bike out from the carton (two people recommended for this task). Cut the To Prepare nylon zip ties with suitable scissors and remove the We recommend that you familiarise yourself... - Page 5 2. Assembly Instructions 2. Handlebar and Stem Loosen the handle bar angle the four handlebar clamp bolts and rotate the handlebar to make sure the brake lever, shift lever and switch positions are at the correct angle. Finally fasten the angle adjusting bolt to 5-8N.M.
- Page 6 2. Assembly Instructions 3. Seat 4. Pedals Release the seat post clamp lever and set the Attach the pedals to the cranks, paying attention to seat post height to the position which is suitable the markings on the axle. The pedal with markings for you to comfortably reach the ground when is the left pedal.
- Page 7 2. Assembly Instructions 5. Front wheel Carefully lift the bike front forks off the ground and lower the forks onto the wheel axle, being careful the disc rotor fits correctly into the disc calipers (this job is best with 2 people). Slide the axle through from the left side.
-
Page 8: Safe Riding Recommendations
SmartMotion dealer. Your eUrban is not a toy and 7. Check the front and rear rim’s safety line. Replace wheel should be considered a serious mode of transport. - Page 9 3. Safe Riding Recommendations Pre-ride Checklist c. Brake centre bolt 11N.M d. Seat angle clamp bolt 24N.M Please make sure the brake lever sequence is e. Crank axle nuts R:42N.M correct for your country before riding. In UK, NZ L: 46N.M and Australia the left brake lever is for rear brake f.
-
Page 10: Maintenance & Adjustment
4. Maintenance & Adjustment 1. Gear Adjustment Adjust the rear derailleur cable tension to align guide pulley with the centre of the cogs (setting this in gear 3 or 4 is easiest). Low adjustment: In 1st gear check and if necessary, turn the L adjustment screw so that the guide pulley moves to a position directly in line with the largest (1st gear) sprocket. - Page 11 Note: in salty conditions it is essential to clean and and tear. lube your bike regularly. Excluding the electric drive side of things, your SmartMotion bicycle is a normal bicycle, with 3. Lubrication normal components. Your dealer will be able to Once a month lubricate all pivot points...
- Page 12 4. Maintanance & Adjustment 5. Fork adjustment 6. Rear Shock The SR Suntour XCR Air has a both air and coil with To set the air unscrew the dust cap and rebound adjustment. pump the shock up to reccomended pressure. When sitting on the bike the shock should sit at around To adjust the air unscrew left cap and 30% sag.
-
Page 13: Main Specifications
Multifunction full color LCD system including cadence rpm, speed, avg speed, max speed, trip, and battery level. BATTERY Panasonic 36V 11.6Ah, optional 36V 14.5Ah. CHAIN GUIDE Smartmotion CNC hard anodised alloy backplate, durable plastic cages and pully wheel. Sonic user manual.indd 13 9/4/2017 3:50:56 PM... -
Page 14: Do's And Don'ts
You need to give it a full charge away from the elements. before ANY use. Smartmotion batteries have been precondition-cycled, so no need to do 3 full deep Don’t treat your eBike as a dirt-bike! The motor and discharges as for some other brands. - Page 15 Treat any memory effects). Keeping your battery topped up charging lithium battery (including SmartMotion) as between rides will prolong the life of your battery a potential fire risk (yes, this includes cellphones, and give you more power too, as a full battery is computers too).
- Page 16 7. LCD Display Panel Controls Your display is easily controlled with 4 buttons located Change mode on your handlebars Touch to change modes. Power On/Off Walk Mode Press to start the display and power up the Press and hold down for 3 seconds to enter into bike.
- Page 17 7. LCD Display Panel Controls Error Code Display Setup If there is something wrong with the electronic Press and hold for 2 seconds to enter the control system, the display will show the error code setup menu. automatically. Should you receive an error code, Touch to select the menu.
-
Page 18: Display Panel
8. LCD Display Panel Cadence/Torque/Walk-along An icon will be displayed depending what mode of assist. Cadence measures your pedal rotation, but not pressure. Use this mode for the easiest ride. Torque mode measures your pedal pressure and multiplies the output. Walk-along will allow you to walk with the bike with a small amount of assistance. - Page 19 8. LCD Display Panel Speedometer Large display of your current speed. You can toggle between average and max speed also. Odometer Displays the total distance the bike has travelled. Power/Assist Level of assist. 1 being low, 5 being high. Trip Meter Displays the distance you have travelled from when you last tripped the meter.
-
Page 20: Battery Instructions
9. Battery Instructions Charging your Battery Battery Removal You can charge the battery on or off the bike. The To remove the battery, insert the key into the lock charging port is located on the right of battery. Lift on the front left side of battery, turn the key, slide the rubber cap and plug in your charger. - Page 21 9. Battery Instructions Battery Capacitance Display On the top front of the battery is the capacitance display button. When pushed in, the LED lights below will glow for 4 seconds, indicating the battery output power is live. The number of LED glowing displays the amount of battery capacitance.
- Page 22 9. Battery Instructions Connections All ebike components (brake sensors, controller, etc) on the SmartMotion bikes have isolating marine-rated plugs, so, should you damage a component, replacement is easy. Take the bike to your local dealer and they will order a replacement part.
-
Page 23: Warranty
10. Warranty Warranty Your SmartMotion bike is covered by the following 4. Failure to produce invoice or proof of purchase. extensive Warranty 5. Failure to meet the six-monthly/1000km service Battery schedule. 2 years (warranted to still supply at least 60% of rated... - Page 24 www.smartmotionbikes.com Sonic user manual.indd 24 9/4/2017 3:51:06 PM...
Need help?
Do you have a question about the HyperSonic and is the answer not in the manual?
Questions and answers