Table of Contents
Advertisement
Advertisement
Table of Contents

Summary of Contents for HUONIAO HN125-4F
- Page 1 Disclaimer: Model shown may differ slightly to that received...
- Page 2 HUONIAO Motorcycle HN125-4F HUONIAO MOTORCYCLE MANUAL...
- Page 3 HUONIAO MOTORCYCLE Passed ISO9001:2000 International Quality Series Verification Passed China Compulsory Product (3C) Verification...
- Page 4 Dear User: Thanks very much for purchasing HN125-4F motorcycle! This manual gives you directions on how to operate HN125-4F properly, how to drive it safely, and how to service it, etc. This product observes the Standards Q/DH 001-2005. For the sake of driving safely and comfortably, please read this manual carefully.
-
Page 5: Table Of Contents
Contents Safe driving 1. Cautions 2. Altering the Motorcycle 3. Clothing 4. Driving Methods Components and Their Usage 1. Serial Number of the Motorcycle 2. Main Switches 3. Handle lock 4. Meters 5. Fuel Valve 6. Far and Near Light Switch 7. - Page 6 III. Operating Instructions 1. Essentials of Starting-up and Cautions 2. Essentials of Driving on Slopes 3. Essentials of Starting to Move the Motorcycle and Cautions 4. Stopping Methods and Cautions Pre-driving Check-up, Adjustment and Maintenance 1. Pre-driving Check-up 2. Checking and Refilling Machine Oil 3.
- Page 7 Checking the Front Light and the Rear Light/Braking Light 14. Checking the Turning Lights and the Horn 15. Checking and Refilling the Electrolyte 16. Cleaning the Battery Terminals 17. Checking and Replacing the Fuse 18. Checking the Tyres 19. Cleaning the Filtering Net of the Air filter 20.
-
Page 8: Safe Driving
I. Safe driving A pleasant mood and appropriate clothing are key elements to safe driving. For the sake of your safety and the safety of others, please observe the traffic regulations. 1. Cautions ·Please wear a helmet. ·Please observe the speed limit. ·When the exhaust Sound-killing Tube gets extremely hot, please park the motorcycle in a place where no one will touch it. -
Page 9: Clothing
3. Clothing ·Please wear a helmet and fasten its band. ·Please wear appropriate low-heel shoes. ·Please hold both handlebars and never drive with one hand. ·Please don’t wear wide sleeves or unbutton your sleeves, because wide sleeves and unbuttoned sleeves may be blown onto your handlebar and endanger your driving. - Page 10 Please don’t make sudden braking or sudden turning. ·Sudden braking and sudden turning may turn over the motorcycle. ·Especially on rainy days and wet floor, sudden braking and sudden turning may endanger the driver by turning over the motorcycle. Special caution is required when driving on rainy days. ·On rainy days and wet floor, it takes a longer distance to stop the motorcycle when braking, so please slow down before braking.
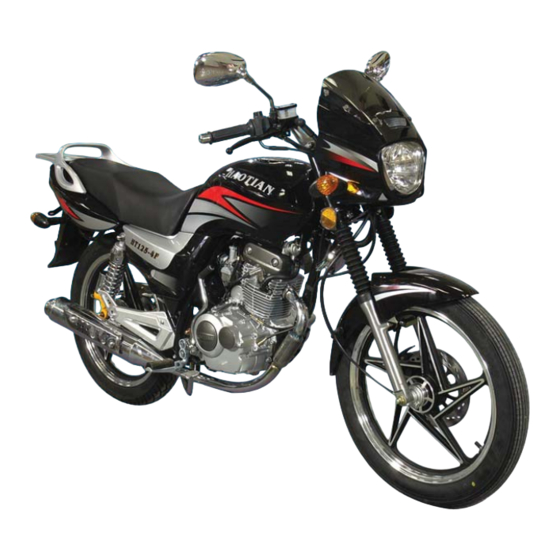
- Page 11 II. Components and Their Usage Back mirror (1)后视镜套件 Head Light (2)前大灯 Front Winker (3)前转向灯 Front Reflector (4)前反射器 Fuel Tank (5)油箱 Saddle (6)座垫 Back Carrier (7)后货架 Tail Light (8)尾灯 Exhaust Silencer (9)排气消声器 Chief Stand (10)主支架 Front Foot Rack (11)前脚蹬 Rear Brake Paddle (12)后刹车踏板...
-
Page 12: Serial Number Of The Motorcycle
1. Serial Number of the Motorcycle The serial number of the frame is engraved on the right side of the turning fork. The serial number of the engine is engraved on the left of the The name plate of the motorcycle is engraved on the front of the turning fork. Frame No: Engine No: 2. -
Page 13: Handle Lock
3. Handle lock In order to guard against theft, HN125-4F is with a handle lock on the s teering stem comp. Locking up operation is as follows: ·Turn the steering handle to left fully ·Insert the main key into the handle lock ·Turn the key clockwise to lock... -
Page 14: Fuel Valve
4) Gear Indicator: when the engine changes its gear, the corresponding numerical light will shine. 5) Fuel Meter: The digit device on the top of the meter indicates the approximate fuel volume in the tank 6) Fuel Meter Red Area: When finger of the device turn to Red Area, the fuel in the tank is not enough, please refill fuel. -
Page 15: Far And Near Light Switch
Warning: In order to prevent sudden braking-off when the motorcycle runs out of fuel, you must use the Fuel Valve properly in the course of driving. Avoid touching any part of the scorching hot engine when operating the Fuel Valve. 6. -
Page 16: Light Change Switch
8. Light Change Switch ·When the Light Change Switch is on the “●” position, neither the front light nor the rear light shines. This position is for daytime driving. ·When the Light Change Switch is on the “P∈” position, both the location light inside the front light and the rear light shine. -
Page 17: Horn Button
10. Horn Button ·The Horn Button is the lowest push button. The horn sounds as soon as the Horn Button is pressed. Caution: Don’t press the Horn Button in the “No Horning” areas. III. Operating Instructions 1. Essentials of Starting-up and Cautions 1) Insert the key into the Key Switch and turn it to the “ON”... -
Page 18: Essentials Of Driving On Slopes
Caution: ·After the engine is started, it must be preheated for 2-3 minutes, and then push the wind-blocking knob back to its “fully-opened” position. ·After the engine is started, please put the Starting-up Lever, the Side Stand, and the Chief Stand back to their original positions. ·After the engine is started, don’t speed hastily while the engine is still in the neutral gear so as to protect the engine and save fuel. - Page 19 press the Clutch Lever), and use the front brake or the rear brake whenever necessary; And on a steep slope or when the motorcycle has a heavy load of weight, you should change to the third, the second, or the first gear accordingly, and also use the brakes properly. Cautions: ·When braking, use both the front brake and the rear brake, otherwise, the motorcycle may be in danger.
-
Page 20: Essentials Of Starting To Move The Motorcycle And Cautions
Possible Speed Range When Changing to a Lower Gear Gear → 4 Below 70 km/hr Gear Gear → 3 Below 60 km/hr Gear Gear → 2 Gear Below 50 km/hr Gear → 1 Gear Below 25 km/hr 3. Essentials of Starting to Move the Motorcycle and Cautions ·Before driving, you should check both the front brake and the rear brake to ensure that they are working well, and check the tyres to make sure that they have got adequate air pressure. - Page 21 1) Turn the Fuel Throttle Handlebar to regulate the driving speed. ·Speeding up is to increase the speed of the motorcycle. When driving on a slope, turn the Fuel Throttle Handlebar slowly to regulate the rotation speed of the engine and the speed of the motorcycle, and change the gear accordingly.
-
Page 22: Stopping Methods And Cautions
3) When braking you should brake both the front and the rear wheels. ·After releasing the Fuel Throttle Handlebar, you should brake the front and the rear wheels simultaneously. ·You should press the brakes slowly and gently in the beginning, and then forcefully to stop the motorcycle. - Page 23 2) Safe Stopping ·Turn the Key Switch to its “OFF” position, the engine will be turned off. Caution: You should never turn off the Key Switch in the course of driving. If you do, the power is suddenly turned off and unexpected dangers and accidents may result.
-
Page 24: Pre-Driving Check-Up, Adjustment And Maintenance
IV. Pre-driving Check-up, Adjustment and Maintenance 1. Pre-driving Check-up ·Form the habit of checking up the motorcycle before driving. ·For the sake of safety, and in order to prevent dangers and traffic accidents, you should make pre-driving check-up. If you find anything wrong, please take the motorcycle to the distributor or maintenance centre for service. -
Page 25: Replacing Machine Oil
Caution: If after refilling the machine oil, the oil mark on the dipstick still goes down to the Lower Limit line, you should check the engine to see whether it has a leakage, and refill the machine oil till it gets to the Upper Limit line. When checking and refilling the oil, please keep away from fire. -
Page 26: Checking And Refilling Fuel
Point for attention when refilling the machine oil: ·You should use good quality machine oil. ·Don’t let foreign substances or dust get in when refilling the machine oil. ·Mixing up different brands of oil may affect the performance of the engine. ·The total volume of the machine oil tank is 1.0 litre. -
Page 27: Checking The Front Fork Turning Handlebar
Checking the Front Fork Turning Handlebar For damage: 5. ·Check the Front Fork with your eyes to see if it is damaged. ·Turn the Turning Handlebars to see if the Front Fork is curved and produces noise. Lock-up of the Front Fork Axle: ·Use a spanner or other tools to check the Front Fork Axle to see whether its screw nuts are tight. -
Page 28: Readjusting The Brakes
·Then, you have to readjust the Brake Paddle to increase its free travel distance. 7. Readjusting the Brakes Front Brake readjusting ·Check the level of the Brake Oil in the Brake Oil Box. ·If the level of the Brake Oil is lower than the Lower Marking Line, please add some Brake Oil. ·The Brake Oil standard is DOT.3. -
Page 29: Checking And Adjusting The Clutch Lever
8. Checking and Adjusting the Clutch Lever The free travel distance of the Clutch Lever is 10-20 mm. Please check this any time and make appropriate adjustment to the screw nut whenever necessary. If you turn the screw nut in the direction of A, you will shorten the free travel distance of the Clutch Lever. -
Page 30: Readjusting The Free Travel Distance Of The Fuel Throttle Handlebar
·whether the Throttle Wire will be entangled if you turn the Handlebars; ·whether the Throttle Wire will be entangled with other wires, which could result in a blockage. Readjusting the free travel distance of the Fuel Throttle Handlebar ·The ideal free travel distance allows the Fuel Throttle Handlebar to turn for 5-10 degrees. ·When adjusting, you should loosen the fixing screw nut first, turn the adjusting nut, and then fasten the fixing nut again. -
Page 31: Checking The Front Light And The Rear Light/Braking Light
and make noise. ·If the driving chain doesn’t work properly, please readjust it. How to readjust the Chain ·Loosen the fixing screw nut on the Rear Wheel Axle. ·Turn the adjusting screw nuts on both sides of the Chain till they become reasonably tight, and then adjust the screw till its marking gets on the same line with the marking shown in the picture, and finally fasten the fixing screw nut. -
Page 32: Checking The Turning Lights And The Horn
·Check the Light Shade to see if it is dirty, damaged, or loosened. Checking the Turning Lights and the Horn ·Turn on the Key Switch. ·Turn on the Turning Lights to check whether they flicker. ·Check the Shades of the Turning Lights to see whether they are dirty, damaged or loosened. ·Press the Horn button to see whether the Horn works properly. -
Page 33: Cleaning The Battery Terminals
Caution: ·When the motorcycle tilts towards one side, the level of the electrolyte can’t be measured; ·Adding too much distilled water into the Storage Battery will make the electrolyte overflow and corrode the motorcycle; ·When taking out the Storage Battery, try to keep it away from fire; ·After checking and refilling the electrolyte, don’t squeeze or block the air ventilation hose;... - Page 34 terminals with a steel brush or sand paper. ·After rubbing off the corrosive powder, connect the electric wires back to the terminals, and apply a thin layer of margarine to the terminals. Caution: ·When dismantling the electric wires from the terminals, you must turn off the Key Switch and dismantle the wire from the negative electrode first.
-
Page 35: Checking And Replacing The Fuse
Checking and Replacing the Fuse ·Turn off the Key Switch, and take off the left side cover. ·The fuse is located near the Storage Battery in the Fuse Box. ·In order to take out the fuse, you should open the cover first, open the fuse box, grab the two ends of the fuse wire and take it out, and then disconnect the fuse from the electric wire. -
Page 36: Checking The Tyres
·When the fuse is blown, if you can’t find the reason, please take the motorcycle to the distributor for a thorough examination. ·When washing the motorcycle, try not to splash onto the fuse box. Checking the Tyres ·If the part of the tyre that touches the ground is improperly curved, check the tyre with an air pressure meter, and inflate the tyre till it gets a normal inner pressure. -
Page 37: Cleaning The Filtering Net Of The Air Filter
If the demonstrative patterns of the tyre are worn out too much, the stability of the motorcycle will be lowered and the motorcycle could get out of control. When the depth of the patterns on the front tyre becomes less than 1-6 mm, it is advisable to replace the tyre. As for the rear tyre, if the depth of its patterns gets to be less than 2 mm, the tyre should be replaced with a brand new. -
Page 38: Adhesiveness Of The Machine Oil Of The Engine And Its Selecting Reference
·Check the electrodes of the Ignition Plug, adjust the distance between them to 0.6-0.7 mm. (Please use a thickness gauge to measure) ·When installing the Ignition Plug, please put it in first, and then use a spanner to turn it half a round . Caution: ·When the motorcycle stops, its engine can be extremely hot. - Page 39 ·The single grade petrol is good for an area where the temperature difference between day and night isn’t very significant. ·The comprehensive grade petrol is good for an area where there is a big difference between the temperature in daytime and that of at night. ·The “W”...
-
Page 40: Common Troubles, Their Causes And Solutions
Common Troubles, Their Causes and Solutions The common troubles of the engine, their causes and solutions include: Where the trouble Symptoms Causes Solutions Fuel Supply Fuel supply is stopped, a) There is no fuel in the 1. Refill the tank; System (when the engine can hardly tank;... - Page 41 The idle speed doesn’t 1. The carburettor is 1. Clean the carburettor; fit, making it hard to blocked; 2. Turn on the air throttle start the engine; the 2. The air throttle valve is valve; accelerator doesn’t not turned on; 3.
- Page 42 Ignition system The engine doesn’t start 1. The ignition plug 1. Decarburize the ignition or the motorcycle carburized and is dirty; plug and rub off the dirt breaks down: 2. The interval between the on it; 1. when the compression electrodes of the ignition 2.
- Page 43 Crank connecting 1. The engine doesn’t 1. The piston ring is worn 1. Replace the piston; rod of the engine start or the out or broken; 2. Clean the piston ring; motorcycle breaks 2. The piston ring is stuck; 3. Readjust or replace the down (when the 3.
- Page 44 2. The engine doesn’t 1. The piston, the piston 1. Replace the piston, the revolve properly and ring and the air cylinder ring, and the air produces a beating are worn out; cylinder noise. 2. The piston pin rubs 2. Replace the piston and against the piston;...
- Page 45 3. The spark is normal, There is water in the fuel. Clean the fuel supply but the engine doesn’t system. revolve normally. 4. Temporarily the 1. The ignition plug is 1. Replace the ignition engine doesn’t have problematic; plug; enough horsepower. 2.
- Page 46 Common troubles of the Transmission Case and their solutions Troubles Causes Solutions 1. The gear doesn’t work 1. The gear and the cog are worn 1. Replace the gear and the cog; properly. out; 2. Replace the spring. 2. The spring is broken. 2.
- Page 47 Common troubles of the driving and operating parts as well as their solutions Troubles Causes Solutions 1. The motorcycle shakes The springs of both the front and Replace the dampers. dramatically. the rear dampers are broken, they leak oil; the dampers are curved.
-
Page 48: Appendix
4. The driving inertia 1. The inner pressure of the tyre is 1. Inflate the tyre and adjust the chain; problematic. inadequate and the chain is too 2. Replace the bearing and repair the tight; problem. 2. The wheel bearing is worn out and the relevant parts are stuck. - Page 49 Items Travelling distance (km) Check daily 1000 2000 3000 4000 5000 6000 7000 8000 9000 10000 11000 12000 before starting Machine Oil filter Gear oil Ignition Clean it every 2000 kilometres and replace it whenever necessary. plug When the Ignition Plugs works well valve...
- Page 50 Air purifier Clean the filter net every 1000 km and replace it whenever necessary. Electrolyte Fuel fil ter Machine oil pump Braking system Screws and nuts The above-listed items vary according to type of motorcycle. Please implement the maintenance according to your own motorcycle. Beyond the listed mileage, please have your motorcycle serviced in an interval showed in this chart.
- Page 51 2. Main Functional Parameters List Measurements and weight Main functional parameters External Maximum speed (km/h) 2075×725×1145 measurements (mm) Wheelbase 1290 ≤20.0 Lowest steady speed (km/h) (mm) Starting time (s) ≤15 Minimum ground clearance (mm) Accelerating time (s) Completed vehicle weight (kg) Start-off accelerating ≤16...
- Page 52 Parameters of the engine consumption (L/100 km) Pattern Sole-cylinder, Braking distance ≤7.0 wind-cool [m/(30km/h)] four-stroke 124.1 Luminosity of the front ≥10000 Displacement (ml) far light(cd) 56.5×49.5 Electric system Bore × stroke (mm) Compression 9.0:1 Ignition method C.D.I ratio 7.2/8000 Fuse 12V, 15A Standard power...
- Page 53 Sincerity as principle Quality as principle HUONIAO Jiangmen Huoniao Motorcycle Co. Ltd. Manufacturer: Jiangmen Dihao Motorcycle Co. Ltd. Address: 7 Jianda North Road, Hongda Industrial Zone, Jiangmen, Guangdong, China Telephone: (0750)3210171 Fax: (0750) 3219812 E-mail: jmml@pub.jiangmen.gd.cn Http://www.dihaomaotor.com...
Need help?
Do you have a question about the HN125-4F and is the answer not in the manual?
Questions and answers