
Related Manuals for Vega VEGATOR 132


Summary of Contents for Vega VEGATOR 132
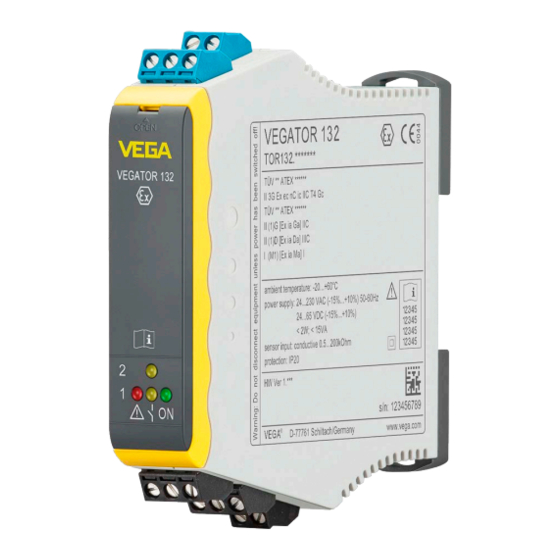
- Page 1 Operating Instructions Double-channel signal conditioning instrument for point level detection with conductive sensors VEGATOR 132 Document ID: 46837...
-
Page 2: Table Of Contents
Rectify faults ........................21 How to proceed if a repair is necessary ................22 Dismount..........................23 Dismounting steps......................23 Disposal ......................... 23 Supplement ..........................24 Technical data ........................ 24 Dimensions ........................26 Industrial property rights ....................27 Trademark ........................27 VEGATOR 132 •... - Page 3 Contents Supplementary documentation Information: Supplementary documents appropriate to the ordered version come with the delivery. You can find them listed in chapter "Product descrip- tion". Editing status: 2017-09-04 VEGATOR 132 •...
-
Page 4: About This Document
The dot set in front indicates a list with no implied sequence. → Action This arrow indicates a single action. Sequence of actions Numbers set in front indicate successive steps in a procedure. Battery disposal This symbol indicates special information about the disposal of bat- teries and accumulators. VEGATOR 132 •... -
Page 5: For Your Safety
During work on and with the device the required personal protective equipment must always be worn. Appropriate use VEGATOR 132 is a universal signal conditioning instrument for con- nection of conductive sensors. You can find detailed information about the area of application in chapter "Product description". Operational reliability is ensured only if the instrument is properly used according to the specifications in the operating instructions manual as well as possible supplementary instructions. -
Page 6: Eu Conformity
That is why we have introduced an environment management system with the goal of continuously improving company environmental pro- tection. The environment management system is certified according to DIN EN ISO 14001. Please help us fulfil this obligation by observing the environmental instructions in this manual: • Chapter "Packaging, transport and storage" • Chapter "Disposal" VEGATOR 132 •... -
Page 7: Product Description
Alternatively, you can access the data via your smartphone: • Download the "VEGA Tools" app from the "Apple App Store" or the "Google Play Store" • Scan the Data Matrix code on the type label of the instrument or •... -
Page 8: Adjustment
Technical data - Ambient conditions" • Relative humidity 20 … 85 % With an instrument weight of more than 18 kg (39.68 lbs) suitable and Lifting and carrying approved equipment must be used for lifting and carrying. VEGATOR 132 •... -
Page 9: Mounting
4 Mounting Mounting Mounting instructions VEGATOR 132 is designed for carrier rail mounting (top hat rail 35 x 7.5 according to DIN EN 50022/60715). Due to its protection rating of IP 20, the instrument is suitable for mounting in switching cabinets. It can be mounted horizontally and vertically. -
Page 10: Connecting To Power Supply
Detailed information about the power supply can be found in chapter "Technical data". Connection cable The voltage supply of VEGATOR 132 is connected with standard cable according to the national installation standards. The sensors are connected with standard two-wire cable without screen. -
Page 11: Connection Procedure
4. When using several instruments on one sensor (Master/Slave operation), connect terminal 3 of all instruments together 5. Connect switched-off power supply to terminal 16/17 6. Connect relay 1 to terminal 10/11/12 7. Connect relay 2 to terminal 13/14/15 The electrical connection is finished. VEGATOR 132 •... -
Page 12: Wiring Plan
10 11 12 13 14 15 16 17 Fig. 1: Wiring plan VEGATOR 132 Sensor circuit 1 (terminal 1 + 2) and Master/Slave connection (terminal 3), max. level with two-point control Sensor circuit 2 (terminal 4 + 5), min. level with two-point control... -
Page 13: Wiring Plan Four-Channel Control
5 Connecting to power supply Wiring plan four-channel control Two VEGATOR 132 are required for a four-channel control which must be configured via the DIL switch to master/slave mode. 1 2 3 1 2 3 OPEN OPEN EL MA/SL EL MA/SL Fig. 2: Wiring plan VEGATOR 132 Sensor circuit 1 (terminal 1 + 2) and Master/Slave connection (terminal 3), max. -
Page 14: Setup
– Operating control lamp – Mains voltage on, instrument is operating • – Fault indicator – Fault on the sensor circuit due to sensor failure or line break – The relay deenergises in case of failure • Yellow VEGATOR 132 •... - Page 15 DIL switch block The DIL switch block is located behind the front cover. The individual switches are assigned as follows: Fig. 4: DIL switch VEGATOR 132 Mode, channel 1 (min./max. adjustment) 2 Line monitoring, channel 1 Off/On Switch-on delay 2 seconds Switch-on delay 6 seconds...
- Page 16 2 are then in safe state. For Ex applications, the 220 kΩ resistor must be approved together with the sensor. For this purpose, we offer an approved resistor spe- cially adapted to VEGA instruments. You can find further information in the documentation of the respective sensor. Fig. 5: Ex resistor for line monitoring with sensors of the EL series Note: Line monitoring may only be activated if a 220 kΩ resistor is con- nected between the two electrodes. VEGATOR 132 •...
-
Page 17: Proof Test
By changing the mode, the function of the relays can be inverted. If several instruments are to be connected to the same electrodes, Master/Slave switchover then all VEGATOR 132 must be connected together via terminal 3. One instrument must be configured as Master, all others as Slave. Through synchronization of the measurement voltages, faulty switch- ing due to crossover of measuring currents is avoided. -
Page 18: Function Table, Two-Point Control
Function table, two-point control The following charts provide an overview of the switching conditions depending on the set mode and the level. Overfill protection, two- point control Sensor Signal conditioning instrument Level Electrode LED yellow LED red Relay (output) (fault) Uncovered Uncovered VEGATOR 132 •... - Page 19 Uncovered Covered Covered Covered Uncovered Covered Uncovered Uncovered Dru run protection, two- point control Sensor Signal conditioning instrument Level Electrode LED yellow LED red Relay (output) (fault) Uncovered Uncovered Uncovered Covered Covered Covered Uncovered Covered Uncovered Uncovered VEGATOR 132 •...
- Page 20 6 Setup Sensor Signal conditioning instrument Level Electrode LED yellow LED red Relay (output) (fault) VEGATOR 132 •...
-
Page 21: Maintenance And Fault Rectification
24 hour service hotline Should these measures not be successful, please call in urgent cases the VEGA service hotline under the phone no. +49 1805 858550. The hotline is manned 7 days a week round-the-clock. Since we offer this service worldwide, the support is only available in the English language. The service is free, only standard call charges are incurred. -
Page 22: How To Proceed If A Repair Is Necessary
7 Maintenance and fault rectification Cause Rectification • Welded contacts - for Exchange VEGATOR 132. If necessary, integrate example after a short- a fuse into the contact circuit circuit Switching function wrong Cause Rectification • Wrong operating mode Set the correct mode on the DIL switch block (min./max. -
Page 23: Dismount
WEEE directive. Correct disposal avoids negative effects on humans and the environ- ment and ensures recycling of useful raw materials. Materials: see chapter "Technical data" If you have no way to dispose of the old instrument properly, please contact us concerning return and disposal. VEGATOR 132 •... -
Page 24: Supplement
24 … 65 V DC (-15 %, +10 %) Max. power consumption 2 W (8 VA) Sensor input Quantity 2 x for connection of a conductive electrode Input type Active (sensor power supply by VEGATOR 132) Measured value transmission Alternating voltage Response resistor 500 Ω … 200 kΩ, adjustable Hysteresis 100 Ω … 100 kΩ... - Page 25 Instruments with approvals can have different technical specifications depending on the version. For that reason the associated approval documents of these instruments have to be carefully noted. They are part of the delivery or can be downloaded under www.vega.com "Instrument search (serial number)" as well as in the general download area.
-
Page 26: Dimensions
9 Supplement Dimensions 20 mm 113 mm (0.79") (4.45") OPEN Fig. 56: Dimensions VEGATOR 132 VEGATOR 132 •... -
Page 27: Industrial Property Rights
Les lignes de produits VEGA sont globalement protégées par des droits de propriété intellec- tuelle. Pour plus d'informations, on pourra se référer au site www.vega.com. VEGA lineas de productos están protegidas por los derechos en el campo de la propiedad indus- trial. Para mayor información revise la pagina web www.vega.com. - Page 28 Switch-on delay 15 Data matrix code 7 Two-point control 17 DIL switch 15 Type label 7 Documentation 7 Dry run protection 15 VEGA Tools app 7 Ex version 9 Voltage supply 10 Fault rectification 21 WEEE directive 23 Grounding 10 Hysteresis 17...
- Page 29 Notes VEGATOR 132 •...
- Page 30 Notes VEGATOR 132 •...
- Page 31 Notes VEGATOR 132 •...
- Page 32 Subject to change without prior notice © VEGA Grieshaber KG, Schiltach/Germany 2017 VEGA Grieshaber KG Phone +49 7836 50-0 Am Hohenstein 113...
Need help?
Do you have a question about the VEGATOR 132 and is the answer not in the manual?
Questions and answers