Ryobi A18MS01 Operator's Manual
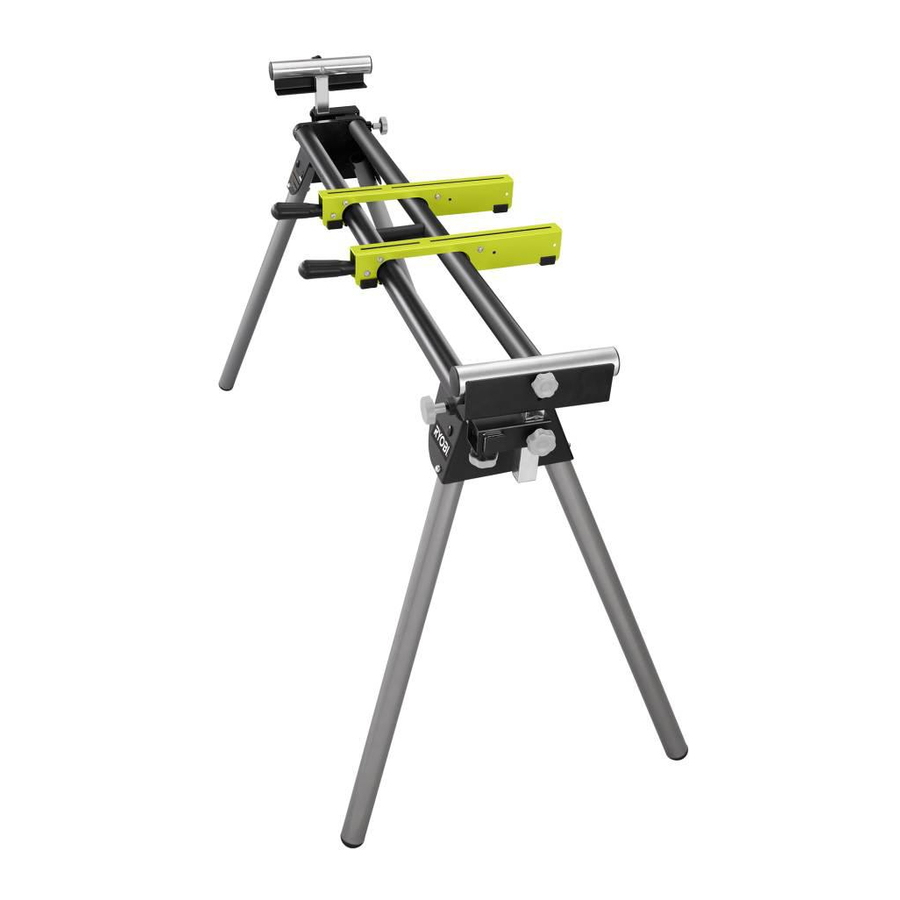
Miter saw stand
Hide thumbs
Also See for A18MS01:
- Manuel d'utilisation (12 pages) ,
- Manual del operador (12 pages) ,
- Repair sheet (3 pages)
Advertisement
Quick Links
Your miter saw stand has been engineered and manufactured to Ryobi's high standard for dependability, ease of operation,
and operator safety. When properly cared for, it will give you years of rugged, trouble-free performance.
WARNING:
To reduce the risk of injury, the user must read and understand the operator's manual before using
this product.
Thank you for buying a Ryobi product.
SAVE THIS MANUAL FOR FUTURE REFERENCE
OPERATOR'S MANUAL
MITER SAW STAND
A18MS01
Advertisement

Related Manuals for Ryobi A18MS01


Summary of Contents for Ryobi A18MS01
- Page 1 Your miter saw stand has been engineered and manufactured to Ryobi’s high standard for dependability, ease of operation, and operator safety. When properly cared for, it will give you years of rugged, trouble-free performance. WARNING: To reduce the risk of injury, the user must read and understand the operator’s manual before using this product.
-
Page 2: Table Of Contents
WARNING: This stand is designed for use with miter saws with a blade diameter not larger than 12 in., or a slide miter saw with a blade diameter not larger than 10 in. -
Page 3: Symbols
Some of the following symbols may be used on this tool. Please study them and learn their meaning. Proper interpreta- tion of these symbols will allow you to operate the tool better and safer. SYMBOL NAME Volts Amperes Hertz Watt Minutes Alternating Current Direct Current... -
Page 4: Features
The following signal words and meanings are intended to explain the levels of risk associated with this product. SYMBOL SIGNAL DANGER: WARNING: CAUTION: CAUTION: SAW MOUNTING WORK WORK STOP SUPPORT WORK SUPPORT MOUNTING BRACKET EXTENSION RAIL SYMBOLS MEANING Indicates an imminently hazardous situation, which, if not avoided, will result in death or serious injury. -
Page 5: Packing List
Failure to comply could result in accidental starting and possible serious personal injury. PACKING LIST Miter Saw Stand Saw Mounting Brackets (2) Work Supports (2) Work Support Mounting Brackets (2) Work Stops (2) Extension Adjustment Knobs (M8 x 25 mm) (2) - Page 6 Make sure bolts do not extend above the table of the miter saw. If the saw has holes that line up with the slots in the saw mounting brackets: n Unplug the saw and lock the saw arm in the down position.
- Page 7 After making sure both brackets are parallel to each other, finger tighten all four nuts to hold in position. If the saw has holes that do not line up with the slots in the saw mounting brackets: n Unplug the saw and lock saw arm in the down position.
- Page 8 The mounting brackets are designed to fit snugly over the stand rails. With the locking levers in the lowered (locked) position, you should not be able to remove the saw and bracket assembly from the rails. If the mounting brackets will...
-
Page 9: Operation
WARNING: Do not allow familiarity with tools to make you care- less. Remember that a careless fraction of a second is sufficient to inflict serious injury. WARNING: Always wear safety goggles or safety glasses with side shields when operating tools. Failure to do so could re- sult in objects being thrown into your eyes, resulting in possible serious injury. - Page 10 USING THE EXTENSION RAILS See Figure 10. Use the extension rails when working with larger workpieces. To extend the rails: n Loosen the extension adjustment knob. n Extend the rail to the desired position. n Tighten the extension adjustment knob. EXTENSION RAIL EXTENSION...
- Page 11 n Insert the 3/4 x 7-1/2 in. plywood strip horizontally be- tween the 6 in. strips, making sure the long edge is flush with the base. n Pre-drill and countersink two holes; install screws. NOTE: The corners of the shelf can now be mitered, if desired, to remove sharp edges.
-
Page 12: General Maintenance
WARNING: When servicing, use only identical Ryobi replacement parts. Use of any other parts may create a hazard or cause product damage. WARNING: Always wear safety goggles or safety glasses with side shields during power tool operation or when blowing dust.
Need help?
Do you have a question about the A18MS01 and is the answer not in the manual?
Questions and answers