Advertisement
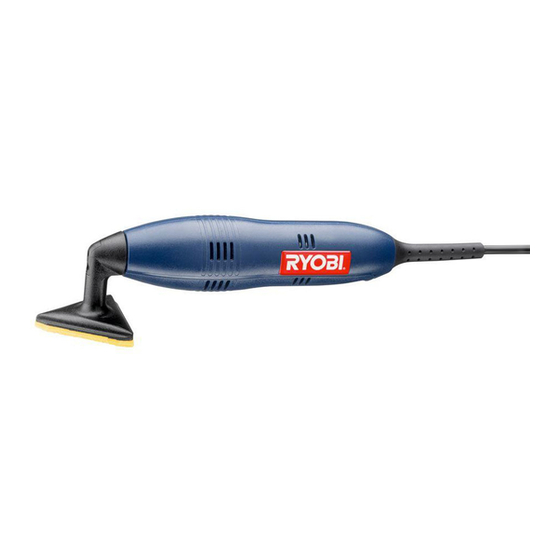
THANK YOU FOR BUYING A RYOBI DETAIL SANDER.
Your new Detail Sander has been engineered and manufactured to Ryobi's high standard for dependability, ease of operation,
and operator safety. Properly cared for, it will give you years of rugged, trouble-free performance.
CAUTION: Carefully read through this entire operator's manual before using your new sander.
Pay close attention to the Rules for Safe Operation, Warnings, and Cautions. If you use your sander properly and only for what
it is intended, you will enjoy years of safe, reliable service.
Thank you again for buying Ryobi tools.
SAVE THIS MANUAL FOR FUTURE REFERENCE
OPERATOR'S MANUAL
DETAIL SANDER
MODEL DS11008
DOUBLE INSULATED
SPECIFICATIONS:
Sanding Pad
No load speed
Motion
Rating
Input
Paper type
Arc size
120 volts, 60 Hz, AC
Pressure sensitive adhesive backed
Triangle shaped
12,000 spm
Oscillating
.30 amperes
3.0 mm at tip
Advertisement
Table of Contents

Summary of Contents for Ryobi DS11008
-
Page 1: Specifications
THANK YOU FOR BUYING A RYOBI DETAIL SANDER. Your new Detail Sander has been engineered and manufactured to Ryobi's high standard for dependability, ease of operation, and operator safety. Properly cared for, it will give you years of rugged, trouble-free performance. -
Page 2: Rules For Safe Operation
RULES FOR SAFE OPERATION WARNING: Read and understand all instructions. Failure to follow all instructions listed below, may result in elec- tric shock, fire and/or serious personal injury. SAVE THESE INSTRUCTIONS Work Area Keep your work area clean and well lit. Cluttered benches and dark areas invite accidents. - Page 3 “live” wire will make exposed metal parts of the tool “live” and shock the operator. Never use this or any power sander for wet sanding or liquid polishing. Failure to comply can result in electrical shock causing serious injury or worse.
- Page 4 Important: Some of the following symbols may be used on your tool. Please study them and learn their meaning. Proper interpretation of these symbols will allow you to operate the tool better and safer. SYMBOL NAME Volts Amperes Hertz Watt Minutes Alternating Current No Load Speed...
- Page 5 ELECTRICAL CONNECTION Your sander has a precision built electric motor. It should be connected to a power supply that is 120 volts, 60 Hz, AC only (normal household current). Do not operate this tool on direct current (DC). A substantial voltage drop will cause a loss of power and the motor willl overheat.
-
Page 6: Operation
INSTALLING SANDPAPER See Figure 2. The felt pad on your sander accepts pressure sensitive adhesive backed sandpaper. Precut triangle shaped sandpaper in assorted grits is available from your local Ryobi dealer. UNPLUG YOUR SANDER. WARNING: Failure to unplug your sander could result in accidental starting causing possible serious personal injury. -
Page 7: Preparing For Operation
SANDING See Figures 3 and 4. Hold sander in front and away from you, keeping it clear of the workpiece. Start sander and let the motor build to its maximum speed, then gradually lower on the work with a slight forward movement. -
Page 8: Maintenance
WARNING: When servicing use only identical Ryobi replacement parts. Use of any other parts may create a hazard or cause product damage. GENERAL Avoid using solvents when cleaning plastic parts. Most plastics are susceptible to various types of commercial solvents and may be damaged by their use. -
Page 9: Optional Accessories
WARNING: The operation of any sander can result in foreign objects being thrown into your eyes, which can result in severe eye damage. Before beginning power tool operation, always wear safety goggles or safety glasses with side shields and a full face shield when needed. We recommend Wide Vision Safety Mask for use over eyeglasses or standard safety glasses with side shields. - Page 10 RYOBI DETAIL SANDER – MODEL NUMBER DS11008 WARNING: THE FOOT COVER, KEY NUMBER 20, INSULATES THE CAP SCREW, KEY NUMBER 21, MAKING IT PART OF THE DOUBLE INSULATED SYSTEM. THEREFORE, IT MUST ALWAYS BE REPLACED WHEN REPLACING PARTS OR MAKING REPAIRS TO THIS TOOL.
-
Page 11: Parts List
RYOBI DETAIL SANDER – MODEL NUMBER DS11008 The model number will be found on a plate attached to the motor housing. Always mention the model number in all correspondence regarding your DETAIL SANDER or when ordering repair parts. Description Data Plate ... 1 Screw (#6-19 x 5/8 in. - Page 12 Now that you have purchased your tool, should a need ever exist for repair parts or service, simply contact your nearest Ryobi Authorized Service Center. Be sure to provide all pertinent facts when you call or visit. Please refer to the Service Center insert or call 1-800-525-2579 in the United States or 1-800-265-6778 in Canada for your nearest Ryobi Authorized Service Center.


Need help?
Do you have a question about the DS11008 and is the answer not in the manual?
Questions and answers