Panasonic BB-HCM547A Service Manual
Hide thumbs
Also See for BB-HCM547A:
- Important information (2 pages) ,
- Product catalog (122 pages) ,
- Product catalog (125 pages)

Related Manuals for Panasonic BB-HCM547A


Summary of Contents for Panasonic BB-HCM547A
- Page 1 Order No.KMS0808505CE Network Camera BB-HCM547A Model No. (for U.S.A.) © 2008 Panasonic Communications Co., Ltd. All rights reserved. Unauthorized copying and distribu- tion is a violation of law.
-
Page 2: Table Of Contents
BB-HCM547A TABLE OF CONTENTS PAGE PAGE 1 Warning --------------------------------------------------------------3 10.1. For The Schematic Diagram -------------------------- 56 1.1. Battery Caution ---------------------------------------------3 10.2. Schematic Diagram ------------------------------------- 57 1.2. About Lead Free Solder (PbF: Pb free) --------------3 10.2.1. Main Board ------------------------------------------- 57 1.2.1. Suggested PbF Solder -------------------------------4 10.2.2. -
Page 3: Warning
BB-HCM547A 1 Warning 1.1. Battery Caution Danger of explosion if the battery is replaced incorrectly. Replace only with the same or equivalent type recommended by the manufacturer. Discard used batteries according to following caution: Disposal or transportation of lithium batteries should be performed by permitted, in accordance with federal, state and local guidelines. -
Page 4: Suggested Pbf Solder
BB-HCM547A 1.2.1. Suggested PbF Solder There are several types of PbF solder available commercially. While this product is manufactured using Tin, Silver, and Copper, (Sn+Ag+Cu), you can also use Tin and Copper, (Sn+Cu), or Tin, Zinc, and Bismuth, (Sn+Zn+Bi). Please check the manufacturer’s specific instructions for the melting points of their products and any precautions for using their product with other materials. -
Page 5: Specifications
BB-HCM547A 2 Specifications Camera Specifications Items Specifications Zoom 4.6× zoom (2.3× optical zoom, 2× digital zoom) Pan/Tilt Angle Pan: -175 ° to +175 ° Tilt: 0 ° to +82 ° Number of Pixels 1/3.6 inch MOS sensor, 370,000 pixels Illuminance 2-100,000 lx (0.2-100,000 lx when in Color Night View mode) - Page 6 BB-HCM547A Items Specifications Power Supply Optional AC adaptor (Model No. BB-HCA3A) Input 100-120 V AC, 50/60 Hz Output 12 V DC, 750 mA PoE standard IEEE802.3af-2003 Power Consumption When Using an Optional AC Adaptor (Model No. BB-HCA3A) About 4.4 W (8.5 W during pan/tilt scan) When Using PoE About 4.4 W (7.9 W during pan/tilt scan)
-
Page 7: Features
Camera images can be recorded to an optional SD/SDHC memory card in addition to the camera’s internal memory. The cam- era supports Panasonic SD memory cards from 64 MB to 2 GB in capacity, as well as Panasonic SDHC memory cards. Addi- tionally, the Stand-alone SD Memory Card Recording feature allows you to configure the camera to record images without using a PC. -
Page 8: Technical Descriptions
BB-HCM547A 4 Technical Descriptions 4.1. CPU Peripheral Block... - Page 9 BB-HCM547A [IC 101 peripheral] • The function of the IC101 is a system LSI for a network camera containing the CPU • The power supply voltages are +3.3 V (IO) and +1.2 V (inside) and there are two power supply.
-
Page 10: Camera Block(Image Signal Processing, Lens Control)
BB-HCM547A 4.2. Camera Block(Image signal processing, LENS control) [VIDEO Board] • IC201 is a MOS type image sensor of approximately 370 thousand pixels, which outputs the image signal (M_OUT) of an VGA (640x480) size. • IC202: This IC is to remove noise in the M_OUT signal, adjust the gain and output the 12-bit data (D_OUT[11:0]). - Page 11 BB-HCM547A Figure 2 Sharing of Serial Signals (SDI and SCL) [Main Board] • Pixel clock (PCLK: 17.172MHz), 12-bit RAW (AFE_D[11:0]) and synchronizing signal (AFE_VD and AFE_HD) that are output from the IC202 are transmitted to the LVDS Receiver IC (IC604) on the Main board via the LVDS Transmitter. They are serial- parallel converted in the LVDS Receiver IC (IC604) and are output recovered the pixel clock (CCDCLK), 12-bit RAW data (CCD [11:0]) and synchronizing signal (CCDCLK and CCDHD) into the CPU (IC101).
- Page 12 BB-HCM547A controlled from the CPU (IC101) on the main board. [ZOOM drive motor control] The CPU controls the ZOOM motor drive driver (IC303) mounted on the LENS board by drive timing signal (Z_1, Z_2 and Z_END) of the ZOOM motor. The output current, pulse period, and the number of pulses are also set up by the driver. This ZOOM motor drive driver (IC303) controls phase two excitation for the ZOOM lens drive motor.
-
Page 13: Image Compression Block
BB-HCM547A 4.3. Image Compression Block • Image compression (JPEG/MPEG-4 encode) function, memory control unit (MCU), ETHERNET MAC and SD card controller are built into IC101. • Picture data input from the camera block is captured in SDRAM (1). • Captured image data is input to the ZOM block, where the scaling of the image size is done, (an image size of 640 x 480, 320 x 240, or 192 x 177 is generated from the one with the size of 1280 x 1024, or an image size of 320 x 240 or 192 x 177 from the one with the size of 640 x 480), and is stored in SDRAM again (2). -
Page 14: Audio Block
BB-HCM547A 4.4. Audio Block The audio circuit is mounted on the IO board, and included the internal MIC terminal (MIC901) and the external MIC terminal (CN504) as the audio input and included the SP terminal (CN505) as the audio output, and supports one channel respectively for audio input of the microphone and audio output from the camera. -
Page 15: Lan Block
BB-HCM547A 2. After the µ law to linear conversion, amplification and DA conversion, they are output as audio output signal in the PCM Codec (IC531). 4.5. LAN Block Composed of ETHERNET MAC Block inside of the IC101 and the IC171 (ETHER-PHY) on the Main board, and the T531 (Transformer) and the CN502 (RJ45 jack) on the IO Board. -
Page 16: Pan And Tilt Motor Control Circuit
BB-HCM547A 4.6. Pan and Tilt Motor Control Circuit PAN drive motor and TILT drive motor are driven under the control from the CPU (IC101). [PAN drive control] PAN drive control circuit is mounted on the Main board. For the PAN drive control, the CPU (IC101) generates a variety of pulses that are applied to the PAN motor diver (IC608) to con- trol the speed and direction of the rotation of the motor. -
Page 17: Power Supply Block
BB-HCM547A 4.7. Power Supply Block The above figure shows the flow to supply power. There are two ways to supply power to the camera. One is the POE power feed via the LAN cable and the other is the power feed from the AC adaptor. -
Page 18: Poe Block
BB-HCM547A 4.8. PoE Block [Power receive] The power supplied from a LAN cable receives voltage (+48 V) via a diode bridge from a RJ-45 connector (CN502) on the IO Board. There are 2 types of PoE receiving methods; a type using unused pins (4, 5, 7 and 8 pin) for LAN data transmission and a type using the mid point of data lines (1, 2, 3 and 6 pin). -
Page 19: Others
BB-HCM547A 4.9. Others [I/O Terminal] • The Input terminal has two systems; both of them are connected to the Input Port of the IC101 GPIO. • Due to Internal Pull-up Resistance, the PNP Transistor (Q532, Q533) on the following level is usually in the OFF state and the Input Port connected to the collector is at L level. -
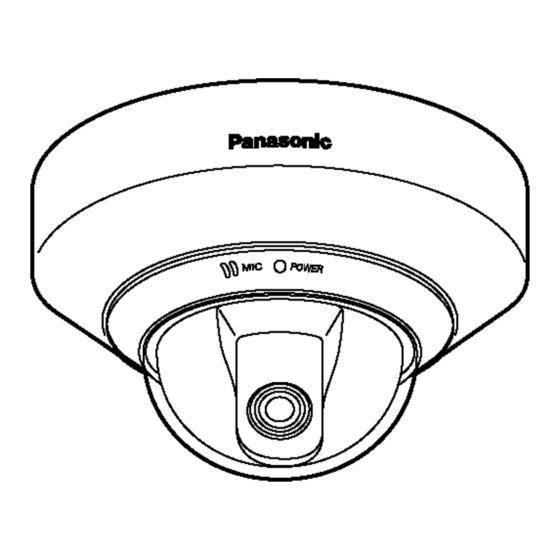
Page 20: Location Of Controls And Components
BB-HCM547A 5 Location of Controls and Components *1 Understanding the Camera Indicator The camera’s indicator lights as follows according to the status of the camera. Understanding how and when the indicator lights can help you troubleshoot problems with the camera. -
Page 21: Installation Instructions
BB-HCM547A 6 Installation Instructions 6.1. Installation Guide... - Page 22 BB-HCM547A...
- Page 23 BB-HCM547A...
- Page 24 BB-HCM547A...
- Page 25 BB-HCM547A...
-
Page 26: Setup Guide
BB-HCM547A 6.2. Setup Guide... - Page 27 BB-HCM547A...
-
Page 28: Troubleshooting Guide
BB-HCM547A 7 Troubleshooting Guide 7.1. Basic Operation... -
Page 29: Other Function Check
BB-HCM547A 7.2. Other Function Check... -
Page 30: Power Supply Block Check
BB-HCM547A 7.3. Power Supply Block Check... -
Page 31: Cpu Peripheral Block Check
BB-HCM547A 7.4. CPU Peripheral Block Check... -
Page 32: Lvds Block Check
BB-HCM547A 7.5. LVDS Block Check... -
Page 33: Image Block Check
BB-HCM547A 7.6. Image Block Check... -
Page 34: Audio Block Check
BB-HCM547A 7.7. Audio Block Check... -
Page 35: Lan Block Check
BB-HCM547A 7.8. LAN Block Check... -
Page 36: Motor Block Check
BB-HCM547A 7.9. Motor Block Check... -
Page 37: Lens Block Check
BB-HCM547A 7.10. Lens Block Check... - Page 38 BB-HCM547A...
-
Page 39: I/O Terminal Check
BB-HCM547A 7.11. I/O Terminal Check... -
Page 40: Sd Card Block Check
BB-HCM547A 7.12. SD Card Block Check... -
Page 41: Rtc Circuit Check
BB-HCM547A 7.13. RTC Circuit Check... -
Page 42: Led Circuit Check
BB-HCM547A 7.14. LED Circuit Check... -
Page 43: Diagnosis Ng Check
BB-HCM547A 7.15. Diagnosis NG Check... -
Page 44: Version Upgrade Check
BB-HCM547A 7.16. Version Upgrade Check... -
Page 45: Resetting The Camera
BB-HCM547A 7.17. Resetting the Camera You can reset all of the camera’s settings to their factory default settings. 1. Click the [Maintenance] tab. 2. On the left side of the screen under [Maintenance], click [Reset to Factory Default]. 3. Click [Execute]. -
Page 46: Updating The Camera's Firmware
5. After the camera restarts, a dialog prompts you to select the firmware file. 6. Click [Browse...]. A dialog prompts you to specify the location of the firmware file. 7. Select the firmware file you downloaded from the Panasonic Network Camera website and click [Open]. The selected file name is displayed. -
Page 47: How To Change Mac Address Label
BB-HCM547A 7.20. How to Change MAC Address Label MAC address label caution When you replace the Main board, you must attach the new MAC address label. -
Page 48: How To Replace A Flat Package Ic
BB-HCM547A 7.21. How to Replace a Flat Package IC 7.21.1. Preparation 7.21.3. Removing Solder from Between Pins • PbF (: Pb free) Solder • Soldering Iron 1. Add a small amount of solder to the bridged pins. Tip Temperature of 700°F ± 20°F (370°C ± 10°C) 2. -
Page 49: Disassembly And Assembly Instructions
BB-HCM547A 8 Disassembly and Assembly Instructions 8.1. Disassembly Instructions MAC address label caution When you replace the Main board, you must attach the new MAC address label. 8.1.1. How To Remove Main Board, IO Board and LED Board. 1. Remove four Screws (D) and remove Cabinet Cover. -
Page 50: How To Remove Tilt Board
BB-HCM547A 8.1.2. How To Remove Tilt Board 1. Remove Dome Cover. - Page 51 BB-HCM547A 2. Remove four Screws (A) ,and Dome and Rubber parts. 3. Remove a Screw (A) and remove Pan Cover.
- Page 52 BB-HCM547A 4. Tilt Block is rotated in the direction of figure and Remove FFC from Connector. 5. Remove two Bearings and two E-rings. 6. Run UP Tilt Block. 7. Remove two Tilt Spacers and a Tilt Belt.
- Page 53 BB-HCM547A 8. Remove Lead Wire from Connector A. 9. Remove FFC from Connector B. 10. Remove two Screws (A) and remove Tilt Board.
-
Page 54: How To Remove Lens Block
BB-HCM547A 8.1.3. How To Remove Lens Block • 1-7 are the same as 8.1.2. How To Remove Tilt Board. 8. Remove two Screws (A), and remove Tilt Case Rear and Heat Trans- fer Rubber. 9. Remove a Screw (B) and remove Tilt Case Front. -
Page 55: Block Diagram
BB-HCM547A 9 Block Diagram... -
Page 56: Schematic Diagram
BB-HCM547A 10 Schematic Diagram 10.1. For The Schematic Diagram Note: 1. DC voltage measurements are taken with an oscilloscope or a tester with a ground. 2. The schematic diagrams and circuit board may be modified at any time with the development of new technology. -
Page 57: Schematic Diagram
VSSH7 FUNC_SW VSSH8 SW102 VSSH9 VSSH10 VSSH11 VDDI DGND DGND DGND TP_NRSTSW R118 NRST_SW SW103 DGND AGND AGND DGND AVDD +3.3V VIDEO DGND L101 C116 IRIS_OPEN AGND AGND TH101 AGND AGND DGND DGND DGND AGND BB-HCM547A MAIN BOARD No.1 (1/2) - Page 58 27 VDD27 VSS28 VDD17 VDD18 VDD19 DGND SDA[11-0] VDD20 +3.3V VDD21 VDD22 SDD[31-0] VDD23 VDDQ VSSV17 VSSV7 VSSV6 VDDQ VSSV5 TP_VDDQ VDDQ DGND L105 DGND +1.2V_VDDI DGND DGND AVDD W001 PQUP11549ZA-CM DGND VIDEOOUT Q101 AGND BB-HCM547A MAIN BOARD No.1 (2/2)
- Page 59 R174 MII_RXDV VDDIO_3.3 DGND L173 RXDV/CRSDV/CONFIG2 MII_RXCLK LAN_TXP D241 IC171 RXER/RX_ER/ISO INTRP VDDA_3.3 VDDPLL_1.8 TXEN/TX_EN LAN_TXN TXD0 DGND LAN_RXP MII_RXER C181 L174 0.1u MII_TXCLK D241 LAN_RXN DGND DGND MII_TXEN MII_TXD0 MII_TXD1 MII_TXD2 MII_TXD3 MII_COL MII_CRS PHY_NRST BB-HCM547A MAIN BOARD No.2...
- Page 60 R646 (10) 18 VIDEO_OUT C601 VIDEOOUT GND19 GND39 C610 IC601 6.3V33u GND20 GND40 C611 Vsag Vout 6.3V47u DGND AGND AGND LED_G LED_R +3.3V R625 +3.3V IC602 D601 INT1 XOUT INT2 +3.3V DGND IICSDA IICSCL DGND BB-HCM547A MAIN BOARD No.3 (1/2)
- Page 61 3 GND1 4 VSD R629 SDIOCLK 5 SDCLK 6 GND2 R630 SDIOD0 7 SDDAT0 R631 SDIOD1 8 SDDAT1 R632 SDIOD2 9 SDDAT2 R633 SDIOCD 10 CARDDET 11 COMMON R634 SDIOWP 12 SDWP 13 FG DGND DGND BB-HCM547A MAIN BOARD No.3 (2/2)
- Page 62 HM102 L673 TILT_I01/TILT3 DGND DGND HM102 L674 TILT_I02 C677 0.1u HM102 R667 DGND L675 TILT_I11/TILT2 HM102 PHO_STOP L676 R664 TC_CONT HM102 Q671 L677 HM102 DGND L678 HM102 +12V DGND +12V IC609 L682 L681 L683 DGND BB-HCM547A MAIN BOARD No.4 (1/2)
- Page 63 R678 NC10 L656 PWMSW AOUT2 PAN5 PAN_1B PHA1 PAN6 PHB1 BOUT1 PAN1 R680 PAN2 RCSB Q673 Q674 TO PAN Motor PAN3 1.0 1% PAN4 BOUT2 ENABLEA TJMON IC608 Q672 PC_CONT DGND DGND (Reference 650 699) BB-HCM547A MAIN BOARD No.4 (2/2)
-
Page 64: Video Board
BB-HCM547A 10.2.2. Video Board X201 0.1u 0.1u C248 C249 100p 100p C247 C246 6.3V10u 6.3V10u C245 C244 0.1u 41 DVSS41 C243 42 PLLVDD 43 PLLTESTIO 44 PLLVSS RSTB 45 DVSS45 DVSS15 46 VDD5VIO46 VDD3VIO14 47 VDDCELL C242 GVSS2 C241 48 VDDCELLB... - Page 65 BB-HCM547A TO LENS Board TO MAIN Board 100p C297 0.1u C296 10V10u C295 10V10u C292 C291 B601 L248 C289 B601 L247 C288 C287 0.1u C283 C282 0.1u 0.1u C280 C281 6.3V10u C277 0.1u 6.3V10u C276 R239 C274 100p 6.3V10u C273 C270 0.1u...
-
Page 66: Lens Board
BB-HCM547A 10.2.3. Lens Board MAICO Board 100p 100p C322 C323 0.1u 0.1u C320 C321 6.3V10u 6.3V10u C318 C319 0.1u C317 100p 0.1u C315 C327 C314 R326 C326 0.1u R312 0.1u 5.6K C325 C313 220p C328 10V33u R311 L308 C312 5 +5... -
Page 67: Tilt Board
BB-HCM547A 10.2.4. Tilt Board TO TILT Motor C426 C425 C424 C423 16V47u 0.1u C420 C419 100p C418 0.1u C417 0.01u 100p C415 C414 R409 R408 C410 0.1u C409 C408 R407 R404 R406 R405 5.6K R403 C404 100p R401 R402 C403... -
Page 68: Io Board
NCP_1 152 L541 NCP_2 SP_1 SP_2 R558 L546 C572 C575 2KV1000p 100V0.068u R557 C573 Primary 100V0.068u L543 (17) CN502 T531 (18) TPTX+ TPTX- L544 TPRX+ (19) (20) TPRX- L545 (21) L539 LAN RJ45 L542 C574 0.1u BB-HCM547A IO BOARD No.1(1/2) - Page 69 R551 (13) 0.47u 3.3k TP_MICAMP2 (14) (15) TP_EXMICAMP2 TP_EXMICAMP1 C563 R552 (16) 0.47u 3.3k +A3.3V +12V +A3.3V +A3.3V IC534 R554 1 Vcc Output L538 CN509 2 DET Input IC533 C557 TX_CP (17) (18) (19) (20) (21) BB-HCM547A IO BOARD No.1(2/2)
- Page 70 ITH/RUN 200V/1.8A PGND PGND F501 L501 NGATE SENSE SP_1 63V/0.75A R511 PVCC VPORTP SP_2 10K 5% SIGDISA RCLASS NCP_1 nPWRGD NCP_2 VPORTN POUT D502 30V/2.1A R510 Q502 10K 5% D516 C503 2200p PC501 200V/1A C508 2KV2200p BB-HCM547A IO BOARD No.2(1/2)
- Page 71 TP_DCIN CN501 D519 F502 L505 L504 6.8u 24V/5A D521 L508 D517 60V/3A D518 60V/3A R514 C512 15 0.5W 50V680p unmounting +3.3V Q503 L507 L506 C510 R518 470n IC504 R521 IC503 Vout R519 47K 1% W601 PQUP11550ZA-GW BB-HCM547A IO BOARD No.2(2/2)
-
Page 72: Led Board
BB-HCM547A 10.2.6. LED Board MIC901 DGND CN901 +3.3V +3.3V MIC_IN TP_LED_G LED901 R901 39 3.3V LED_G Q901 LED_R TP_LED_R DGND R902 75 Q902 DGND BB-HCM547A LED BOARD... -
Page 73: Waveform
BB-HCM547A 10.3. Waveform (CSDA) (CSDL) - Page 74 BB-HCM547A Power ON Start...
- Page 75 BB-HCM547A C1 - C2 E1 - E2...
- Page 76 BB-HCM547A...
- Page 77 BB-HCM547A...
- Page 78 BB-HCM547A...
-
Page 79: Printed Circuit Board
L174 TP_CPUAD0 C670 R624 D601 R626 +1.2V IC101 R623 C161 D602 C144 C123 R625 R107 C121 C622 R108 C623 TP_CPUWE3B C140 C118 R121 TP_GP107 TP_CPUCS4 C119 C167 IC103 TP_RD/nBY C166 C165 C168 R151 CN603 C148 TP_VDDQ C159 BB-HCM547A MAIN BOARD... -
Page 80: Main Board (Bottom View)
R176 R179 C114 C192 C180 IC604 L667 C683 C178 C672 L669 C185 C621 L172 R679 IC608 L668 C175 C110 IC171 R678 C183 C678 L101 L105 C184 R675 BA653 BA652 R680 R673 L173 Q672 C619 C182 C126 R173 BB-HCM547A MAIN BOARD... -
Page 81: Video Board (Component View)
C212 C283 C205 C296 C203 C208 C289 C297 R210 C204 C288 L207 C291 C287 IC205 Q202 BB-HCM547A VIDEO BOARD 11.4. Video Board (Bottom View) PQUP11560Z C237 C226 L204 L206 GND2 +3.1V C239 C235 C232 C224 PCLK C223 C236 C233 C225... -
Page 82: Lens Board (Component View)
11.5. Lens Board (Component View) R315 R326 C313 R322 CN303 R316 C316 C318 +1.6VI C309 R308 C311 R312 R310 R309 CN301 BB-HCM547A LENS BOARD 11.6. Lens Board (Bottom View) PQUP11550Z L308 C326 C325 IC208 R323 R314 Q301 Q302 CN302 BB-HCM547A LENS BOARD... -
Page 83: Tilt Board (Component View)
11.7. Tilt Board (Component View) IC401 C403 C402 Verf R402 R401 R408 C410 PQUP11550Z Q403 R409 C404 R404 IC403 C419 +12V_M C418 C414 CN403 R413 R412 BB-HCM547A TILT BOARD 11.8. Tilt Board (Bottom View) L405 L406 L408 L407 BB-HCM547A TILT BOARD... -
Page 84: Io Board (Component View)
L540 D520 L544 C589 L549 T531 L550 L545 R566 L535 R565 R563 L534 C575 L532 C579 D532 DA531 DA532 R539 C578 DA533 L551 CN506 D531 CN504 CN503 F502 L558 C580 C577 L557 L556 L555 L554 R534 L536 BB-HCM547A IO BOARD... -
Page 85: Io Board (Bottom View)
C541 C542 L548 D533 C544 TP_12V L543 TP_EXMICAMP1 C536 R547 C533 C534 R538 C554 C596 C532 L542 SA505 TP_EXMICAMP2 SA502 C574 SA504 R552 C540 IC533 TP_EXMIC R550 R542 C559 TP_MICS C583 C581 TP_IOGND1 TP_IOGND2 TP_DCIN 11 G1 BB-HCM547A IO BOARD... -
Page 86: Led Board (Component View)
BB-HCM547A 11.11. LED Board (Component View) LED901 MIC901 BB-HCM547A LED BOARD 11.12. LED Board (Bottom View) LED_G Q902 Q901 LED_R R901 R902 PQUP11550Z CN901 BB-HCM547A LED BOARD... -
Page 87: Appendix Information Of Schematic Diagram
BB-HCM547A 12 Appendix Information of Schematic Diagram 12.1. Terminal Guide of ICS, Transistors and Diodes... - Page 88 BB-HCM547A...
-
Page 89: Exploded View And Replacement Parts List
BB-HCM547A 13 Exploded View and Replacement Parts List 13.1. Cabinet and Electrical Parts Location MAC address label caution When you replace the Main board, you must attach the new MAC address label. -
Page 90: Accessories And Packing Materials
BB-HCM547A 13.2. Accessories and Packing Materials... -
Page 91: Replacement Parts List
BB-HCM547A 13.3. Replacement Parts List Safety Ref. Part No. Part Name & Descrip- Remarks tion Note: XUC3FJ RETAINING RING 1. RTL (Retention Time Limited) PQMD10113Z FRAME, TILT PLATE PNWQ2HCM527A TILT MOTOR The marking (RTL) indicates that the Retention Time is... -
Page 92: Main Board Parts
BB-HCM547A Safety Ref. Part No. Part Name & Descrip- Remarks Safety Ref. Part No. Part Name & Descrip- Remarks tion tion PNPE1010Z RUBBER PARTS L668 J0JYC0000052 COIL XZB05X08A03 PROTECTION COVER L669 J0JYC0000052 COIL XZB32X41A05 PROTECTION COVER L670 J0JBC0000107 IC FILTER... - Page 93 BB-HCM547A Safety Ref. Part No. Part Name & Descrip- Remarks Safety Ref. Part No. Part Name & Descrip- Remarks tion tion C154 ECUE1C104ZFQ C669 ECUE1C104ZFQ C155 ECUE1C104ZFQ C670 ECUE1C104ZFQ C156 ECUE1C104ZFQ C671 ECUE1C104ZFQ C157 ECUE1C104ZFQ C672 ECUE1C104ZFQ C158 ECUE1H101JCQ 100p...
-
Page 94: Lens Board Parts And Video Board Parts
BB-HCM547A Safety Ref. Part No. Part Name & Descrip- Remarks Safety Ref. Part No. Part Name & Descrip- Remarks tion tion R136 ERJ2GEJ470 R676 ERJ2GEJ223 R137 ERJ2GEJ470 R677 ERJ2GEJ223 R138 ERJ2GE0R00 R678 ERJ2GE0R00 R139 ERJ2GE0R00 R679 ERJ14BQF1R0U R140 ERJ2GEJ102 R680... - Page 95 BB-HCM547A Safety Ref. Part No. Part Name & Descrip- Remarks Safety Ref. Part No. Part Name & Descrip- Remarks tion tion L207 G1C100KA0066 COIL C240 ECUE1A104KBQ L208 G1C100KA0066 COIL C241 ECUE0J105KBQ L209 J0JYC0000052 COIL C242 ECUE0J105KBQ L210 J0JYC0000052 COIL C243...
-
Page 96: Tilt Board Parts
BB-HCM547A 13.3.5. Tilt Board Parts Safety Ref. Part No. Part Name & Descrip- Remarks tion R243 ERJ2GE0R00 R261 ERJ2GEJ331 Safety Ref. Part No. Part Name & Descrip- Remarks R262 ERJ2GEJ331 tion PCB3 PNWP4HCM527A TILT BOARD ASS'Y (RTL) (CRYSTAL OSCILLATOR) X201... - Page 97 BB-HCM547A Safety Ref. Part No. Part Name & Descrip- Remarks Safety Ref. Part No. Part Name & Descrip- Remarks tion tion (TRANSISTORS) C540 F1G1C473A081 0.047 IC502 B1CFMM000001 TRANSISTOR(SI) C541 F1J0J1060006 C542 ECUE1C104ZFQ (TRANSISTORS) C543 F1J0J1060006 Q501 B1ABBL000006 TRANSISTOR(SI) C544 ECUV1A224KBV 0.22...
-
Page 98: Led Board Parts
BB-HCM547A Safety Ref. Part No. Part Name & Descrip- Remarks Safety Ref. Part No. Part Name & Descrip- Remarks tion tion F502 K5H5021A0014 FUSE R533 ERJ2GEJ222 2.2k F551 D4FBR200A003 FUSE R534 ERJ8GEYJ750 R535 ERJ2GEJ102 (COILS,CERAMIC FIL- R536 ERJ3GEYJ561 TERS AND IC FILTERS) - Page 99 BB-HCM547A BBHCM547A...
Need help?
Do you have a question about the BB-HCM547A and is the answer not in the manual?
Questions and answers