Advertisement
Quick Links
General information
Reading and storing the
user manual
User Manual
start-up and use.
Before using the bicycle comput-
er, read the user manual carefully.
WIRELESS BICYCLE
This particularly applies to the
safety instructions. Failure to fol-
COMPUTER
low this user manual may result
in severe injury, or damage to the
bicycle computer. Store the user
manual for further use. If you pass
the bicycle computer on to third
parties, please be absolutely sure
to include this user manual.
Explanation of symbols
The following symbols and signal
words are used in this user man-
ual, on the bicycle computer or on
the packaging.
USA
DISTRIBUTED BY:
This signal symbol/word desig-
ALDI INC., BATAVIA, IL 60510
nates a hazard with moderate
degree of risk which may lead
WWW.ALDI.US
to death or severe injury if not
avoided.
3
This signal word warns against
potential damages to property.
YEAR
WARRANTY
ID: #07177
AFTER SALES SUPPORT
95698
866-558-8096
USA
service@801service.net
MODEL:
22967
05/2018
A
13
12
11
10
9
8
7
B
C
5
12
6
11
13
13
D
11
E
This symbol pro-
vides you with use-
ful supplementary
information about
assembly or use.
This user manual ac-
companies this wireless
FCC Conformity
solar bicycle computer.
It contains important
This bicycle computer complies
information about
with part 15 of the FCC rules. Op-
eration is subject to the following
two conditions: (1) This device
may not cause harmful interfer-
ence, and (2) this device must
accept any interference received,
including interference that may
cause undesired operation.
Please take attention that chang-
es or modification not expressly
approved by the party responsi-
ble for compliance could void the
user's authority to operate the
equipment.
The operating frequency is be-
tween 120 kHz and 125 kHz.
Safety
Proper use
The bicycle computer is designed
WARNING!
exclusively for displaying and col-
lecting information when using
a bicycle. It is only intended for
private use and not suitable for
commercial purposes.
Only use the bicycle computer
as described in this user manu-
al. Using it in any other way is
NOTICE!
deemed improper and may result
in damage to property or even
personal injury. The bicycle com-
puter is not a children's toy.
The manufacturer or vendor
accepts no liability for damage
caused by improper or incorrect
use.
F
1
2
G
3
4
5
1
5
H
6
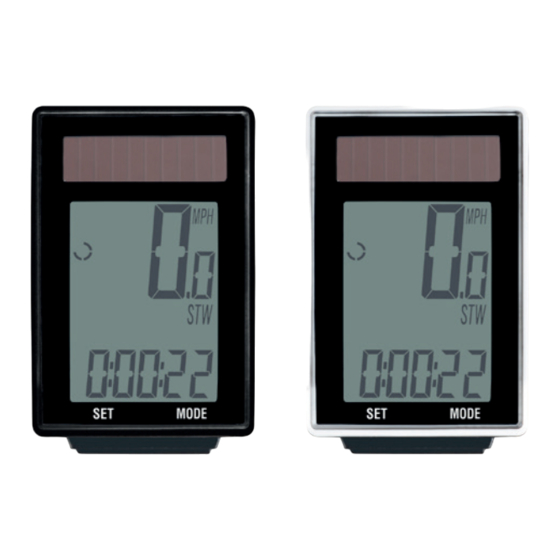
Package contents/
device parts
Bicycle computer (example)
1
Display
2
Right button
3
Left button
4
Bicycle computer mounting
5
bracket
7
Rubber pad (bicycle
6
computer)
8
2 mm max.
Magnet
7
Magnet holder
8
CR2016 battery
9
CR2032 battery
10
Sensor
11
Rubber pad (sensor)
12
14
Cable ties, 6×
13
10
Battery compartment cover
14
11
Safety instructions
− Avoid dust, heat and con-
WARNING!
− Never try to repair the bicy-
Danger for children and per-
sons with impaired physical,
sensory or mental capaci-
ties (e.g. partially disabled
persons, older persons with
reduced physical and mental
Information about
capacities) or lack of experi-
solar cells
ence and knowledge (e.g.
This bicycle computer is equipped
older children).
with solar cells that transform
− This bicycle computer may
light energy into electricity. This
be used by children ages
extends the useful life of the
eight and over as well as
battery. However, batteries are
persons with impaired
needed for the sensor and also to
physical, sensory or
supply energy when it is dark.
mental capacities or those
lacking experience and
Checking the bicycle
knowledge, if they are
computer
supervised or have been
1. Take the bicycle computer
instructed in how to safely
use the bicycle computer
2. Remove the protective foil
and understand the risks
associated with operating
3. Check to make sure the bicy-
it. Children must not play
with the bicycle computer.
Cleaning and user mainte-
nance must not be per-
formed by unsupervised
children.
− Keep children under eight
years of age away from the
Assembly
bicycle computer.
Assembling the bicycle
computer mounting
WARNING!
bracket and bicycle com-
Danger of suffocation!
puter
The bicycle computer contains
1. Attach the bicycle computer
small parts. Children could
swallow them when playing
and choke.
− Keep small parts away from
children.
• If you attach the bicycle com-
WARNING!
Battery hazards!
• If you attach the bicycle com-
The bicycle computer and the
sensor each contain a battery.
Improper handling of the bat-
teries may result in explosion or
serious internal injury.
1
− Store both new and used
2. Slide the bicycle computer
batteries so that they are
not accessible to children.
− If you suspect that a battery
has been swallowed or
11
3. Turn the bicycle computer so
otherwise incorporated,
promptly consult a physi-
cian.
− Only replace the batteries
Assembling the sensor
with the same battery type.
and magnet
− Do not touch leaky bat-
1. Attach the sensor
teries. If you do come into
contact with battery acid,
wash the affected area
thoroughly and rinse it with
plenty of water. If leaked
battery acid comes into
contact with your eyes or
causes skin irritation, also
tance between the bicycle com-
seek medical attention.
puter and the sensor should be
− If it is no longer possible to
no more than max. 23" (60 cm)
securely close the battery
(see Fig. F).
compartment, dispose of
2. Unscrew the magnet
the bicycle computer as
described in the chapter
3. Attach the magnet to a spoke
"Disposal".
− Do not charge or reactivate
batteries, do not disassem-
ble them, do not throw
them in fire and do not
short circuit them.
− Dispose of batteries at your
local collection point.
mark on the sensor (see Fig. D).
NOTICE!
Start-up
Risk of damage!
Switching on the bicycle
− Improper handling of the
computer
bicycle computer may
Before starting the bicycle com-
result in damage to the
puter, a few settings must be
bicycle computer.
made.
− You can use the bicycle
− To switch on the bicycle com-
computer at ambient
temperatures between
14 °F and 122 °F (-10 °C and
+50 °C).
− Do not expose the bicycle
computer to permanent
moisture.
Selecting kilometers/
tinuous exposure to direct
miles
sunlight.
The selection for the units of
measure kilometers (KM/H) or
cle computer yourself. For
miles (MPH) will appear as the
technical problems, contact
first indicator.
the service address indicat-
− Press the right button
ed on the warranty card.
switch between the units of
measure.
− Confi rm your selection by
pressing the left button
Setting tire circumference
the tire circumference:
1. Turn the front tire valve to the
lowest position and mark the
position of the valve on the
floor.
1
out of the packaging.
2. Move the bicycle forward for
one front wheel revolution
until the valve has returned to
from the bicycle computer.
the lowest position.
3. Measure the distance covered
cle computer is complete and
in inches.
undamaged (see Fig. A).
This is the tire circumference.
If it is not, do not use the
bicycle computer. Contact the
The display shows the default
service address indicated on
setting for a "2155" tire circumfer-
the warranty card.
ence (=mm). The thousands digit
2 flashes. The thousands digit can
be set to either 1 or 2. The remain-
ing numbers can assume a value
between 0–9.
− Press the right button
until the correct number
appears.
The thousands digit is set.
mounting bracket
and the
− Confi rm your entry by pressing
5
rubber pad
to the handle-
the left button
6
bar with two cable ties
.
13
− Repeat the steps for the hun-
There are two options:
dreds, tens and ones.
Setting the total distance
puter mounting bracket to the
handlebar tube, thread the
The display shows the default
cable ties vertically from the
setting for a total distance of
front (see Fig. B, bottom).
"00000".
− Press the right button
puter mounting bracket to the
increase the number by one.
stem of the handlebar, thread
− Confi rm your entry by pressing
the cable ties horizontally
the left button
from the side
The ones, tens, hundreds, thou-
(see Fig. B, middle).
sands and ten thousands can as-
1
sume a value between 0–9.
from the front into the bicycle
computer mounting bracket
Setting the inspection
until it clicks into place
interval
(see Fig. G).
The display will show the default
setting of "000.00" for the total
that it is at a 90° angle to the
distance. This corresponds to the
sensor
.
11
remaining distance until the next
bike inspection.
− Press the right button
to increase the ones, tens or
and the
11
hundreds by one.
rubber pad
to the middle
12
of the fork with two cable
− Confi rm your entry by pressing
ties
(see Fig. C).
13
the left button
Make sure that the
Setting weight
bicycle computer
and the sensor are
The display will show a default
at a 90° angle to one
setting of "065" for weight.
another. The dis-
− Press the right button
increase the hundreds, tens or
ones by one.
− Confi rm your entry by pressing
the left button
and
7
the magnet holder
.
8
Setting the CO₂ savings
This function calculates the CO₂
on the front wheel and screw
savings. This determines how
the magnet holder onto the
much CO₂ would have been
magnet (see Fig. D).
produced if the journey had
Ensure that the
been made by car rather than
magnet passes the
by bicycle. Look in the technical
sensor at a distance
documents of your car to find its
of approx. 0.08"
emissions value in g/km. Or use
(2 mm) at the arrow
the default setting of 160 g/km.
The default value of "160" appears.
− Press the right button
increase the hundreds, tens or
ones by one.
− Confi rm your entry by pressing
the left button
Setting the time
The hour display flashes.
puter
, press one of the
1
− Press the right button
two buttons
or
on the
until the correct number
3
4
bicycle computer.
appears.
The hour display is set.
− Confi rm your entry by pressing
the left button
to
3
.
4
Necessary after new
battery insertion or
reboot.
How to determine
3
.
4
to
3
.
4
3
.
4
to
3
.
4
to
3
.
4
3
.
4
Advertisement

Related Manuals for bikemate 22967


Summary of Contents for bikemate 22967
-
Page 1: Safety Instructions
The bicycle computer and the MODEL: puter mounting bracket to the increase the number by one. sensor each contain a battery. 22967 05/2018 stem of the handlebar, thread − Confi rm your entry by pressing Improper handling of the bat-... - Page 2 The hour display flashes. Maximum measuring range: 3. Insert a new battery so that Model: 22967 999.99. − Press the right button the positive pole (+) is facing Operating voltage: until the correct number − Press the left button to switch upward.
Need help?
Do you have a question about the 22967 and is the answer not in the manual?
Questions and answers