Table of Contents
Advertisement
Advertisement
Table of Contents

Related Manuals for Carestream CS 7600


Summary of Contents for Carestream CS 7600
- Page 1 CS 7600 User Guide...
- Page 2 The CS 7600 is intended for digital dental radiography using an imaging plate (storage phosphor screen) for radiographic diagnostic intraoral images. The CS 7600 in addition, optionally provides the Scan & Go technology to enable dental practitioners prior to acquisition to record the dental imaging plates with exam acquisition data.
-
Page 3: Table Of Contents
Introduction ..........3 CS 7600 System CS 7600 Components Overview ......4 Overview Scanner Overview . - Page 4 Working with the Scanner .......42 Turning on the Scanner......42 Image Acquisition .
- Page 5 Appendix: CS 7600 Consumables & Accessories ..... 77 Scanner Manager ........78 Accessing the Scanner Manager .
-
Page 7: Conventions In This Guide
Conventions in this Guide Conventions in this Guide The following special messages emphasize information or indicate potential risk to personnel or equipment: WARNING: Warns you to avoid injury to yourself or others by following the safety instructions precisely. CAUTION: Alerts you to a condition that might cause serious damage. Important: Alerts you to a condition that might cause problems. - Page 8 Chapter 1 Conventions in this Guide...
-
Page 9: Introduction
CS 7600 is a scanner system for intraoral X-ray exposed imaging plates. The CS 7600 is intended for digital dental radiography using an imaging plate (storage phosphor plate) for radiographic diagnostic intraoral images. The CS 7600 system is used to scan and review intraoral dental X-ray images. -
Page 10: Cs 7600 Components Overview
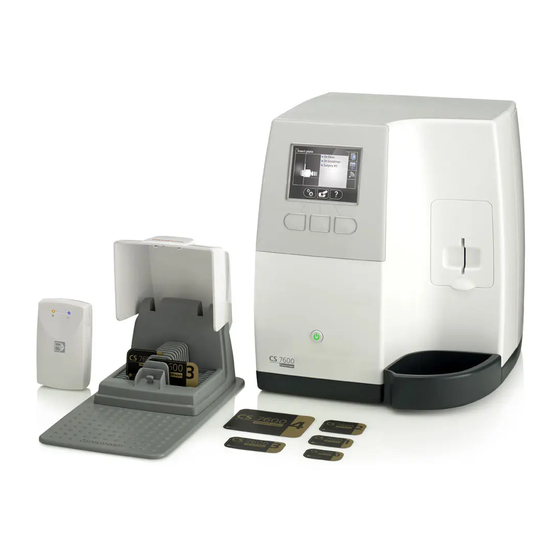
CS 7600 Components Overview Scanner Overview The CS 7600 scanner performs the functions necessary for scanning and acquiring images from the imaging plates. Figure 1 CS 7600 Front View 3.5" QVGA color LCD (320 X 240 pixels, landscape matrix) Function buttons for scanner use and menu navigation... - Page 11 Figure 2 CS 7600 Rear View Service door Base Cables compartment for power supply connection and interface ports (RJ-45 Ethernet port) Back cover Figure 3 Cables Compartment in Detail Power supply inlet RJ-45 Ethernet port (Ethernet activity LEDs: yellow indicates speed, green...
-
Page 12: Smart Imaging Plates Overview
Smart Imaging Plates Overview The CS 7600 works with five imaging plate sizes: 0 to 4. The scanned image file size depends on the imaging plate size and the scanning resolution set by the user. The smart function of the imaging plates is utilized when using the Scan & Go device. -
Page 13: Hygienic Sheaths
Active side Orientation dot Inactive side Important: Use only Carestream imaging plates and hygienic sheaths! Hygienic Sheaths For each imaging plate size there is a corresponding one-time use, disposable, hygienic sheath for preventing cross contamination. The transparent side allows you to see the orientation mark for positioning the imaging plate correctly in the patient’s mouth while the opaque side protects the active side of the... - Page 14 Figure 4 Hygienic Sheath (front view) Adhesive strip (for sealing the hygienic sheath) Foam stopper Sheath, transparent on one side and with a light protection barrier on the other side Chapter 2 CS 7600 System Overview...
-
Page 15: Scan & Go Overview
Scan & Go Overview Scan & Go is an optional device that enables you to link the imaging plate to a specific exam acquisition (for example, patient) prior to acquisition.When the plate is inserted into the scanner, the information which was tagged onto the plate is retrieved by the scanner and the imaging plate is scanned automatically according to this information (resolution, target workstation, etc). -
Page 16: Scan & Go Generation 2 (Models Released From June 2012)
(Not during Tagging) Tagging OK: One flash (long) & 1 bleep (long) Tagging Fail: One Red flash (long) & 1 bleep (long) Connected to USB: LED status indicator (green) Recording surface for imaging plate 10 Chapter 2 CS 7600 System Overview... -
Page 17: Connecting The Scan & Go Device
Scanner Shelf The CS 7600 can be optionally mounted on the wall using a shelf bracket. The CS 7600 is attached to the shelf by a single central tightening nut. - Page 18 12 Chapter 2 CS 7600 System Overview...
-
Page 19: Computer System Requirements
CS 7600 Image Acquisition Interface Overview The CS 7600 image Acquisition interface is a user-friendly application designed and developed specifically for the CS 7600 intraoral imaging system. It provides a rich array of image processing options in addition to the acquisition functions. -
Page 20: Image Acquisition Interface Main Window
Image Acquisition Interface Main Window Figure 1 Image Acquisition Interface - Image Acquisition Mode Toothpicker Child Adult Note: If a tooth is not selected, an available frame becomes populated during the next scan. 14 Chapter 3 Software Overview... - Page 21 Figure 2 Image Acquisition Interface - Full Mouth Series Mode Scanner List Tip: Selected and active options are highlighted in blue. CS 7600_User Guide (8J4071)_Ed04...
- Page 22 Table 1 Image Acquisition Interface Key Exit Click to exit the CS 7600 image Acquisition interface. Settings Click Settings to customize the default settings. See “Working with Settings” on page Scan & Go The Scan & Go’s active connection status (white color indicates connection, red indicates Status no connection).
- Page 23 (To clear the selection, click the tooth again.) Imaging Clicking the CS 7600 Icon provides the imaging software details. Software Details Scan The scan resolution to apply when tagging information on an imaging plate with the Scan Resolution &...
- Page 24 Table 1 Image Acquisition Interface Key Comments & Click to add a comment to the image (The comments will be added to the Exposure DICOM tags of the image and can be viewed later using the Imaging Software Values or DICOM viewer.) Click to enter custom X-ray exposure values.
- Page 25 Imaging Software. CS 7600 image Acquisition mode, examples of the icons • CS 7600 FMS mode (Template mode), examples of the icons • When you open the image Acquisition interface for the first time, the following window opens.
- Page 26 Click OK. The Image Processing Adjustment Mode window opens. Click the Demo icon in the top left corner of the screen. A set of the nine combinations Perio, Endo, DEJ with Soft, Standard, Sharp of the demo image of a scanned plate appears in the Images Display Area and an image appears in the Preview area.
- Page 27 Select Soft, Standard, or Sharp for DEJ. This sets the default filter for DEJ. Note: The last selection, which appears with a blue frame, will be the default filter, Perio, Endo, or DEJ. To choose which is going to be your default filter, Perio, Endo, or DEJ, make sure that your desired selection is with a blue frame by clicking again on your desired selection.
-
Page 28: Working With The Image Acquisition Interface
Imaging Software. CS 7600 image Acquisition mode, examples of the icons • CS 7600 FMS mode (Template mode), examples of the icons • Using the Toothpicker To use the Toothpicker in Image Acquisition mode, follow these steps: Before taking an X-ray, click the tooth picker icon. -
Page 29: Working With Settings
To allocate a tooth to a frame in the Images Display area with the Toothpicker: Select a frame in the Images Display area. Select a tooth in the Toothpicker. If you wish to allocate another frame in the Images Display area: Close the Toothpicker. -
Page 30: General Settings Tab
General Settings Tab In the General Settings tab you are able to set the defaults for image Acquisition. 24 Chapter 3 Software Overview... - Page 31 Table 2 Image Acquisition Interface General Settings Key Tooth Numbering System Set the tooth numbering system (European or American). When using individual tooth selection, the tooth number is stored in the image’s DICOM tags. Default Scan Resolution Set the default scan resolution for images to be scanned. Note: This does not change the scanner’s default resolution, which is for images scanned when the image Acquisition interface is not connected to the scanner (No ID images).
-
Page 32: Working With The General Settings Tab
Table 2 Image Acquisition Interface General Settings Key Demo Mode This option puts the Demo Mode icon in the top left corner of the Image Acquisition Window and populates one frame in the images display area with a demo image each time the icon is selected. Tip: Use for setting default presets in Adjustment mode. - Page 33 To select the default scan resolution from a selection of different preview images, click the Adjustment Mode checkbox and click OK. The Image Processing Adjustment Mode window opens. Click the Demo icon in the top left corner of the screen or scan an image. A set of the nine combinations Perio, Endo, DEJ with Soft, Standard, Sharp of the demo image of a scanned plate appear in the Images Display Area and an image appears in the Preview area.
- Page 34 Select Soft, Standard, or Sharp for Perio. This sets the default filter for Perio. Select Soft, Standard, or Sharp for Endo. This sets the default filter for Endo. Select Soft, Standard, or Sharp for DEJ. This sets the default filter for DEJ. Note: The last selection, which appears with a blue frame, will be the default filter, Perio, Endo, or DEJ.
- Page 35 To display the SMPTE screen, in the Monitor calibration area click SMPTE. The SMPTE window appears. Use the monitor brightness & contrast controls until you clearly see the 5% and 95% calibration squares located in the in the 0% and 100% areas (indicated by red arrows in the picture above). In the Settings tab, when you have finished selecting your general settings, click one of the following: Click Apply to apply your settings.
-
Page 36: Scan & Go Tab
Scan & Go Tab The Imaging plate Scan & Go information fields are populated with the imaging plate’s identifying information when it is placed upon the Scan & Go device. Figure 3 Scan & Go Tab The Scan & Go tab contains the following information: Serial Number •... - Page 37 Beep on Device checkbox (for Scan & Go Generation 2), when the Beep on Device checkbox is • selected, the Scan & Go makes a sound each time an imaging plate is tagged. If the Beep in PC checkbox is selected, a sound is made on the PC each time an imaging plate is tagged. Note: The Imaging plate Scan &...
-
Page 38: Scanners Connections Tab
Scanners Connections Tab In the Scanners Connections tab, you are able to perform the following: Delete a scanner connection that is no longer being used (after a scanner has been replaced) • Pair / Unpair a Peer to Peer link between a Scanner and the Workstation •... -
Page 39: About Peer To Peer Connection
In the image Acquisition interface, click one of the following: Click Apply to apply your settings. • Click Cancel to exit to the main screen without saving changes. • Click OK to save the changes and exit to the main screen. About Peer to Peer Connection A Peer to Peer connection (P2P) creates a dedicated link between one, or more, scanners to a dedicated workstation. -
Page 40: Creating A Peer To Peer Connection
Creating a Peer to Peer Connection A Peer to Peer connection makes a scanner dedicated to a Workstation. This saves time by not having to select a scanner each time you make a scan. To create a Peer to Peer connection, follow these steps: In the Scanners Connections tab, click the Pair button on the scanner you wish to pair with the image Acquisition interface. -
Page 41: Disconnecting A Peer To Peer Connection
The Peer to Peer icon appears in the scanner. Note: If you change the resolution on the Scanner LCD, the change in resolution will only take place upon next scan or image acquisition. Disconnecting a Peer to Peer Connection Disconnecting a Peer to Peer Connection may be done from the image Acquisition interface or from the Scanner interface. -
Page 42: Retrieving No Id Images
(Images Gallery) To retrieve a No ID image, follow these steps: Access the CS 7600 image Acquisition interface from the patient file in the imaging software. In the Scanner List, select the desired scanner and click the small arrow. -
Page 43: Clearing Scanner Memory
Place the mouse over the image to preview the image and see details of date and time. Important: Make sure you have correctly identified the image before retrieving it to a specific patient file. Click to select the correct image from the No ID list and drag and drop it to a frame of your choice. The exam acquisition’s data is now associated to the image and the image is no longer “No ID”. - Page 44 To clear the scanner’s memory, follow these steps: Open the exam acquisition to which the images belong, or alternatively create a new temporary exam acquisition in which you will save these images. Select the scanner; it is indicated by the following full memory/error state icon: In the Scanner List, select the desired scanner and click the small arrow.
-
Page 45: Computer System Requirements
CS 7600 Scanner Interface Overview The CS 7600 scanner interface is used primarily for scanning the exposed imaging plates and provides easy-to-understand prompts. The scanner interface also provides the option of changing the scanner default settings as described in the CS 7600 installation guide. -
Page 46: Scanner Interface Icons
Scanner Interface Icons Figure 1 Example of Insert Plate screen The following table lists the icons that are part of the various LCD screens. Stored images counter and available memory status. Blue background indicates available scanner memory. Stored images counter and available memory status. Red background indicates scanner memory is either nearing its full capacity or is already used up. - Page 47 Scan The image scan resolution resolution High speed (HS) High resolution (HR) Super high resolution (SHR) Press the scanner’s left function button to access the Settings menu. For information about Settings, See “Scanner Settings” on page 45 Press the scanner’s middle function button to manually erase the imaging plate, See “Erasing the Imaging Plates”...
-
Page 48: Working With The Scanner
Working with the Scanner The following procedures are explained here: Turning on the Scanner,See “Turning on the Scanner” on page 42 • Image Acquisition, See “Image Acquisition” on page 43 • Scanner Info, See “Scanner Info” on page 43 • Erasing the Imaging Plates, See “Erasing the Imaging Plates”... -
Page 49: Image Acquisition
Erase Imaging Plate, See “Erasing the Imaging Plates” on page 44 • Scanner Settings, See “Scanner Settings” on page 45 • Image Acquisition When image acquisition is performed without a Paired status or Scan & Go: Press to select a patient. Press to select a scan resolution. -
Page 50: Erasing The Imaging Plates
Erasing the Imaging Plates The imaging plates are automatically erased and ejected after they are scanned. If the imaging plate is exposed to light for an extended period of time (one week or more) or to strong light for even a short amount of time, the plate will need to be manually erased before use. -
Page 51: Scanner Settings
Repeat steps for any other imaging plates that need erasing. Scanner Settings To open the scanner settings, press Settings. The Scanner Settings menu opens. In Scanner Settings menu you are presented with the following menu: Brightness Control, See “Brightness Control” on page 45 •... -
Page 52: Ip Setup
IP Setup Important: Do not perform any action in the IP Setup without direct supervision from dental service engineer or Carestream representative To manually set the scanner’s IP address, follow these steps: Press to access the Settings menu. The Settings screen is displayed. -
Page 53: Viewer
Press to find the DHCP checkbox, and press to check / un check the DHCP checkbox. Press to reach the digit you wish to change, and press The digit is ready to be modified and is highlighted in blue. Press to increase / decrease the value of the selected digit, and press The digit is modified. -
Page 54: Disconnecting A Peer To Peer Connection
If you reach an image that you wish to delete, press the delete icon A Delete Image confirmation window appears. To delete, press • To cancel the deletion, press • To close the Viewer, press Disconnecting a Peer to Peer Connection Disconnecting a Peer to Peer Connection may be done from the image Acquisition interface or from the Scanner interface. -
Page 55: Clearing Scanner Memory
Press to select Pairing, and press The Pairing status screen opens and shows a Paired status. Press and press The Pairing status screen shows an Unpaired status. Clearing Scanner Memory The scanner’s storage capacity is 25 images. Images are stored in the scanner’s memory in the following cases: When No ID is selected in the scanner’s Select patient screen. - Page 56 When memory is full, error 071: Memory full. Retrieve images from workstation is displayed. To clear the scanner’s memory, follow these steps: Start the CS 7600 image Acquisition interface. Open the exam acquisition to which the images belong, or alternatively create a new temporary exam acquisition in which you will save these images.
-
Page 57: Introduction
Acquiring Images Introduction This chapter describes the acquisition procedure for configurations with and without the optional Scan & Go device. Note: Using the Scan & Go option streamlines and shortens the scanning process. The scanned image reaches its destination automatically; no need to select the destination workstation when scanning the imaging plate. -
Page 58: Acquiring Images
Click the Imaging window icon. (Alternatively, double-click the selected patient name.) The patient’s imaging window opens. To access the Image Acquisition Interface, select one of the following two modes: CS 7600 FMS mode (Template mode), examples of the icons • CS 7600 image Acquisition mode, examples of the icons •... -
Page 59: Preparing The Imaging Plates
To prepare the intraoral imaging plate, follow these steps: Choose an imaging plate of the right size for your examination. Important: Use only CS 7600 intraoral imaging plates from Carestream and hygienic sheaths from Carestream. The use of plates or hygienic... -
Page 60: Performing The X-Rays
In the image Acquisition interface, select the frame to which the image exposed on this imaging plate should be routed to. Note: If no frame is selected, the scanned image will be routed to the first available frame in the selected template. Place the imaging plate near, or close to, the Scan &... - Page 61 Important: Make sure the active side of the imaging plate is facing the patient’s teeth. CS 7600_User Guide (8J4071)_Ed04...
-
Page 62: Scanning The Imaging Plates
Scanning the Imaging Plates Remove the imaging plate from the patient’s mouth. Do not remove the imaging plate from its hygienic sheath. Wipe and disinfect the exposed imaging plate’s hygienic sheath ( See “Disinfecting the Hygienic Sheath and the Imaging Plates” on page 63). - Page 63 Important: If the user inserts the plate incorrectly, there is a possibility of the plate falling into the scanner. If the plate falls into the scanner, See “Retrieving a Fallen Imaging Plate” on page 58 Dispose of the used protective hygienic sheath (D). If the scanner is linked Peer to Peer with a workstation the image is sent automatically to the workstation which it is linked with.
-
Page 64: Retrieving A Fallen Imaging Plate
Retrieving a Fallen Imaging Plate Important: Do not insert any tools into the scanner. If any tool is inserted into the scanner all warranties are null and void. To retrieve a fallen imaging plate, follow these steps: Turn off the scanner and disconnect the scanner from the mains power source. Disconnect the scanner from the network. -
Page 65: Acquisition Related Procedures
Acquisition Interface Overview” on page Click Close (top-right corner) to exit the image Acquisition interface and return to the Imaging Software. Images are transferred from the CS 7600 image Acquisition interface to the Imaging Software automatically. CS 7600_User Guide (8J4071)_Ed04... -
Page 66: Storing The Images
When the CS 7600 image Acquisition interface is open at the designated workstation, the scanned imaging plate image is automatically routed to the correct exam acquisition. If the CS 7600 image Acquisition interface is closed, the scanned imaging plate image is stored in the scanner’s memory. The scanner’s storage capacity is 25 images. -
Page 67: Imaging Plate Care
Maintenance Imaging Plate Care If used with care, Carestream Health imaging plates can be used imaging plates can be used indefinitely until physically damaged. However, the imaging plates will show wear over time due to continuous use. Inspect the imaging plates regularly and replace them if they are scratched and/or show signs of excessive wear. -
Page 68: Cleaning The Imaging Plate
Cleaning Materials Clean, dry non-abrasive, lint-free wipes or cloths • Carestream Screen Cleaner P/N 1030428 (Ask your Carestream Health representative) • Cleaning Method To clean the imaging plates, follow these steps: Fold a non-abrasive, lint-free wipe or cloth and dampen with a small amount of the solution. Be careful not to pour the solution directly on the imaging plate. -
Page 69: Disinfecting The Hygienic Sheath And The Imaging Plates
Disinfecting the Hygienic Sheath and the Imaging Plates CAUTION: Do not soak the hygienic sheath in any cleaning or disinfecting solutions. Do not autoclave; autoclaved hygienic sheaths must be discarded. Frequency of Disinfection The hygienic sheath is the primary means of infection control and protection from contaminated imaging plates. -
Page 70: Scanner Care
Cleaning the Detachable Insertion Panels The CS 7600 makes use of three insertion panel sizes according to the inserted plates size (0, 0–3, and 4). The maintenance procedure is identical for both insertion panels. - Page 71 The scanner displays a prompt to put in place an insertion panel, either a size 0 (left figure in prompt), size 0-3 (middle figure in prompt) or a size 4 (right figure in prompt) insertion panel. Install the cleaned and disinfected insertion panel by positioning the insertion panel at a 45 degree angle to the right side of the insertion panel’s housing (A) and pressing the insertion slot panel in from right to left (B) until it’s completely inserted (C).
- Page 72 If insertion Panel 4 is inserted, the scanner displays the following insertion confirmation. For size 4, press the middle function button to confirm and return to the main screen. 66 Chapter 6 Maintenance...
-
Page 73: Cleaning The Scanner Rollers
Cleaning the Scanner Rollers Note: Before you perform this procedure, make sure you have the rollers cleaning plate. The scanner rollers should be cleaned in the following cases: When the scanner prompts to clean the rollers (after every 1000 cycles). •... - Page 74 Press the middle function button to confirm the Rollers Cleaning message. The Rollers Cleaning screen appears. Peel the adhesive protective sheet from the rollers cleaning plate. 68 Chapter 6 Maintenance...
- Page 75 Insert gently the rollers cleaning plate into the size 4 insertion slot with the adhesive side first and the black stripe facing downwards until the rollers draw the rollers cleaning plate in. When the cleaning procedure is completed the scanner displays a message that the roller cleaning is done.
-
Page 76: Scan & Go Device Care
For Scan & Go Generation 1 models released before June 2012. Scan & Go devices after June 2012 do not have a battery. Important: Replace only with a Carestream genuine BL-5C battery. To replace the Scan & Go battery, follow these steps: Press the On/Off button for 5 seconds to turn off the Scan &... - Page 77 Open the battery compartment by carefully pressing the clip outwards and lifting out the cover (A, B). Extract the battery as shown in the figure above (C, D) using the removal depression to lift the battery out. Insert the new battery by first pressing its contacts against the battery housing terminals (A) and then place it in the housing (B).
- Page 78 Charge for 3 hours. Verify the device operates: press the On/Off button for 1 second and verify that the LEDs function as described in the “Scan & Go Overview” on page Dispose of the old battery in accordance with all applicable federal, state, and local regulations. 72 Chapter 6 Maintenance...
-
Page 79: Quick Troubleshooting
Troubleshooting Quick Troubleshooting The quick troubleshooting guides you through actions you need to take to correct malfunctions you may encounter and that do not require authorized technical support. For errors and malfunctions not detailed in this section, contact technical support. The following table lists the malfunctions that are displayed on the scanner’s LCD and in the image Acquisition interface, and details the corrective action. - Page 80 Table 1 Quick Troubleshooting (Continued) Malfunction Possible Cause Action Imaging plate loading Scanner Error # 073 failure. Press the middle function button to eject the • imaging plate and then reinsert the imaging plate again. Replace imaging plate if reinsertion does not •...
- Page 81 Table 1 Quick Troubleshooting (Continued) Malfunction Possible Cause Action Make sure you are using Carestream imaging • plates. Make sure you follow the preparations and • Either imaging plate scanning instructions in the Acquiring Images inserted incorrectly, or procedures to prevent incorrect insertion of the the imaging plate imaging plates.
- Page 82 76 Chapter 7 Troubleshooting...
-
Page 83: Appendix
CS 7600 slot panel size 4 1014497 CS 7600 wall mount adapter 1018894 CS 7600 Roller cleaning plate CS 7600 battery for Scan & Go device, for Scan & GO released 1020338 before June 2012 Carestream X-Omat screen cleaner 1030428... -
Page 84: Scanner Manager
Scanner Manager The scanner manager is mainly for use by technicians or under direct supervision of a dental service technician. Note: For information on the Scanner Manager for technicians, see the CS 7600 Service Guide. Accessing the Scanner Manager To access the Scanner Manager, perform the following steps: On the desktop, double-click on the Scanner Manager icon. -
Page 85: Scanner Info
• from the work station for inspection Scanner Info You may provide this information to your Carestream distributor upon request. To open the Scanner Info screen: In the Settings Screens area, select the Scanner Info checkbox. Click Open Selected Screen. -
Page 86: Scanner Setup
Scanner Setup To open the Scanner Setup screen: In the Settings Screens area, select the Scanner Setup checkbox. Click Open Selected Screen. The Scanner Setup screen opens. Figure 3 Setup screen Note: Scanner serial number cannot be changed. The Scanner Setup screen enables you to set the following: Scanner Serial Number, Scanner Name, and LCD User Interface language •... -
Page 87: Update Scanner
Not all USB devices are recognized by the scanner. Copy the file Reader_Embedded_xxx.upgrade from the Installation disc located in the UPGScanner folder or from CS 7600 folder at http://infotec.carestreamdental.com to USB storage device. Make sure to use only the relevant file from the installation disc. -
Page 88: Updating The Scanner Using The Scanner Manager Tool
Updating the Scanner using the Scanner Manager Tool The Scanner version (Embedded software) can be updated by the scanner manager tool by selecting the Update Scanner tab. To upgrade the scanner perform the following steps: Select the scanner and click Update Scanner. Wait while the scanner updates. -
Page 89: Collect Info
After the scanner is restarted, the scanner has been updated. By pressing the right navigation button sign with “?”, the scanner info screen with the new version appears. After the update process is completed, the scanner is ready for scanning If the scanner is already up to date, the following message appears, click OK. -
Page 90: Diagnose Connection
Click on the folder and press OK. The process begins and takes few minutes until it is completed. Upon completion you are able to send the file for inspection. The zip file that was created by this tool is called "CollectInfo.tar.gz" Select a destination folder for the information to be stored and click OK.
Need help?
Do you have a question about the CS 7600 and is the answer not in the manual?
Questions and answers
What is the hygienic protocol for re-sheathing the imaging plate. For example, should the processor be gloved when placing the plate in a new sheath? Thanks!
To re-sheath the Carestream CS 7600 imaging plate, follow this hygienic protocol:
1. Disinfect the Imaging Plate and Hygienic Sheath: Ensure the imaging plate is disinfected according to the instructions provided (refer to "Disinfecting the Hygienic Sheath and the Imaging Plates" on page 69). Do not soak or autoclave the hygienic sheath.
2. Insert the Imaging Plate into the Hygienic Sheath: Place the disinfected imaging plate into its protective hygienic sheath with the inactive side facing the adhesive strip. Ensure the size number of the plate is visible through the transparent side of the sheath, and the orientation dot is in the bottom corner.
3. Seal the Hygienic Sheath: Peel the adhesive strip and seal the sheath to ensure proper hygiene and protection of the imaging plate.
This answer is automatically generated