
Related Manuals for Lewmar V1


Summary of Contents for Lewmar V1
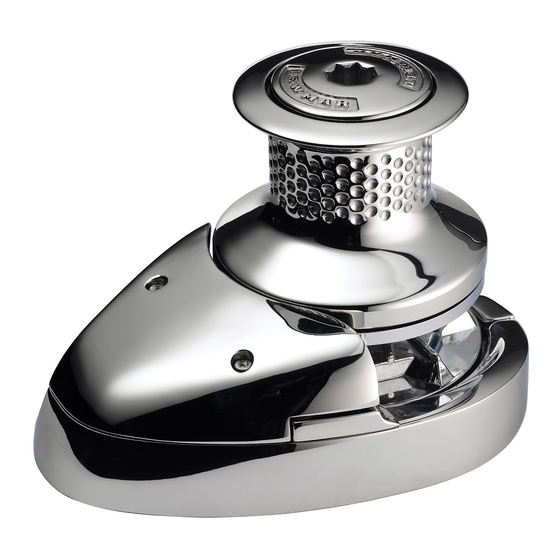
- Page 1 Lewmar V1-6 Windlass 65001201 Issue 8 Owners Installations, Operation & servicing manual...
- Page 2 Product support Lewmar products are supported by a worldwide network of distributors and Authorised Service Representatives. If you encounter any difficulties with this product, please contact your national distributor, or your local Lewmar dealer. Details are available at: www.lewmar.com CE Approvals For CE approval certificates contact Lewmar.
- Page 3 ‣ Boating, like many other activities can be hazardous. Even the correct selection, maintenance and use of proper equipment cannot eliminate the potential for danger, serious injury or death. ‣ Lewmar windlasses are designed and supplied for anchor control in marine applications and are not to be used in conjunction with any other use.
- Page 4 ‣ Crimping Pliers / Wire Stripper ‣ Suitable electrical cable and crimp terminals 4.2 Accessories Use only genuine Lewmar parts and accessories to ensure top performance and eliminate the risk of voiding your warranty. For replacement parts, please visit your dealer or www.lewmar.com...
- Page 5 4.3 Gypsy Suitability Gypsies fitted to the V1-5 range of windlasses are ideally suited to handling our factory made Rope/Chain com- bination rodes, which consist of rope spliced to a chain tail. The V6 range is chain only. See Specifications section for details.
- Page 6 25 - 60 mm 1” - 21/4” 1. Models V1-3 Lewmar recommends a minimum deck thickness of 25 mm (1”), M8 Studs suit deck and packing thickness of 25-50 mm (1” - 2”). NOTE: An optional extended version can be used on decks up to 127 mm thick.
- Page 7 Chain from the roller should be fed horizontally back to the top of the gypsy and along its centre line within ±5˚. There must be sufficient vertical fall for the chain when hauling in. 300 mm (12”) Lewmar V1-6 Windlass ref 65001201 iss.8...
- Page 8 4.7 V1-6 Above deck fitting 1. Using your template and after you have checked all 4.7-1 the above and below deck requirements cut the fol- lowing holes. Model V1-3 Using a 10 mm (3/8”) diameter drill, make the five holes for the mounting studs and sensor. With a 75 mm (3”) diameter hole saw, make two holes for the...
- Page 9 M8 4.9-2 Nyloc nut. NOTE: If using silicone or other rubbery type sealant, it 43 Nm is advisable to allow curing of the sealant before final tightening of the mounting nuts. Lewmar V1-6 Windlass ref 65001201 iss.8...
- Page 10 ⚠ WARNING! Isolate the wind- 4.11-5 4.11-4 lass using circuit breaker/ isolator. For safety and performance Lewmar recommends the 4. Replace cover. Release control arm and wrap rope/ use of matched Lewmar anchor rodes. chain around gypsy. 1. Remove cover.
- Page 11 5.1 Electric cable selection Lewmar recommends the installer source and install cable that meets the requirements of the standards and regulations relevant to the installation and codes of practice. The cable table gives recommended cable sizes based on total length of cable required, from the battery, following the route of the cables.
- Page 12 As a minimum the installer should conform ISO 10133. Lewmar recommends the installer use cable with insulation rated at 90°C or higher. Length = Length of cable from battery ‘+’ terminal and back to battery ‘-’ terminal including breaker and switch gear if fitted Cable size guide given is for guidance only.
- Page 13 5.5 V1-6 Wiring diagram Installation instructions are supplied separately with any accessories. 1. NOTE: Motor connections D1 = F1 D2 = F2 2. Switch wire thickness: 1.5 mm2 (16 AWG) BATT +VE Lewmar V1-6 Windlass ref 65001201 iss.8...
- Page 14 BATT +VE BATT +VE...
- Page 15 BATT +VE Lewmar V1-6 Windlass ref 65001201 iss.8...
- Page 16 NOTE: Hydraulic system installation is NOT covered in this publication. Fig 6.1 ‣ Lewmar hydraulic windlasses have been designed for ease of installation and follow a straightforward hydraulic and mechanical installation procedure. ‣ Windlass unit should be connected to a hydraulic powerpack with directional control valve installed to control the windlass movement.
- Page 17 2. Adjust rate of fall with handle. Once paid out fully tighten gypsy drive cap. Gypsy/drum ⚠ 3. Place a Lewmar handle into the drum top nut and operate as gypsy version above. 7.1-4 7.1-5 ⚠ WARNING! Always remove winch handle after use.
- Page 18 ‣ When safe, operate the UP control. When anchor has been retrieved and stowed, the fall-safe pawl should be left engaged. NOTE: Remember, on models V1-3 the fall-safe does need to be disengaged before anchor can be let go again. ‣ Once anchor is retrieved, ensure it is adequately secured to an independent strong point.
- Page 19 ‣ Sport versions: These units have no manual recovery. 1. Engage fall safe pawl. 2. Place a Lewmar winch handle into gypsy drive cap/drum top nut and rotate anti-clockwise by half a turn. 3. Remove handle and place into the bi-square in the cap and rotate clockwise.
- Page 20 Engage fall safe pawl. Models V4-5 Check pawl is in disengaged position. 3. Place a Lewmar winch handle into top nut. Disengage clutch by turning anti-clockwise by half a turn. Remove handle. 4. When safe, operate the drum. If warping speed is too fast, ease tension in rope.
- Page 21 The rode should be secured directly to a bollard, sampson post or cleat and a chain secured by a chain stopper. 7.5-2 7.5-1 Lewmar V1-6 Windlass ref 65001201 iss.8...
- Page 22 When re-assembling the cone and gypsy, add a small smear of grease to the contact surfaces. ‣ Check mounting studs after first two or three recoveries and regularly thereafter. 8.2 V1-6 Gypsy replacement/service Illustrations based on V1-3. 8.2-1 8.2-2 8.2-3...
- Page 23 ⚠ WARNING! Ensure rode is adequately secured to an independent strong point. 8.6 V1-3 Fall-safe pawl and lever replacement/service NOTE: V-Sport & V4-6 do not have fall-safe. 8.6-1 Remove gypsy, proceed as sec. 8.2. 1. Turn fall-safe lever so it is horizontal and remove shoulder screw.
- Page 24 8.7 V1 Exploded view...
- Page 25 V Range Gypsy & Stripper Kit (000) 31(1), Magnet(1) 68000361 V Range Gypsy & Stripper Kit (001) 31a(1), Magnet(1) 68000362 V Range Gypsy & Stripper Kit (002) 31b(1), Magnet(1) 68000840 V Range Gypsy & Stripper Kit (006) 31c(1), Magnet(1) Lewmar V1-6 Windlass ref 65001201 iss.8...
- Page 26 8.8 V2 & V3 Exploded view...
- Page 27 24V V2 M/O Ride Motor Gearbox Assembly 30(1), 36(1), 37(1) 68000819 12V V3 M/O Ride Motor Gearbox Assembly 30(1), 36(1), 37(1) 68000820 24V V3 M/O Ride Motor Gearbox Assembly 30(1), 36(1), 37(1) 66840056 V2/V3 Gypsy/Drum Manual Recovery Kit Not Shown Lewmar V1-6 Windlass ref 65001201 iss.8...
- Page 28 8.9 V4 & V5 Parts list 'G' SHAFT 'GD' SHAFT 66810031 CONTROL ARM KIT 66200076 SENSOR & MAGNET KIT SENSOR MAGNET SENSOR HOUSING SENSOR...
- Page 29 17(1), 18(1), 19(1), Hex Key 5 mm 66000079 Spacer 3B(1), 30(1), 31(1), 32(4), 33(8) 34(1), 35(1), 36(1), 66810031 Control Arm Kit Hex Keys 4, 5 & 6 mm 66200076 Optional Sensor & Magnet Sensor(1), Magnet(1) & Housing(1) Lewmar V1-6 Windlass ref 65001201 iss.8...
- Page 30 8.10 V6 Parts list 20 21 22...
- Page 31 18(1), 15(1), 16(1), 17(2) 66000678 Mainshaft (Gypsy/Drum) 14(1), 15(1), 16(1), 17(2) 66000677 R/H Chain Cover 13(1), 12(2) 66000676 L/H Chain Cover 11(1), 12(2) 66000675 Mounting 7(6), 8(1), 9(6), 10(6) 66000674 Base 1(1), 2(1), 3(1), 4(6), 5(1), 6(1) Lewmar V1-6 Windlass ref 65001201 iss.8...
- Page 32 9. Specifications 9.1 V1-3 Dimensions IP68 MODEL MODEL...
- Page 33 MODEL MODEL 41/4 87/16 47/16 147/16 75/16 41/4 87/16 415/16 147/8 67/8 Lewmar V1-6 Windlass ref 65001201 iss.8...
- Page 34 9.3 V6 Dimensions MODEL...
- Page 35 68000362 10mm DIN 766, Campbell 3/8" S4, 5/16" G40 12–16 3-strand and 8-plait (5/8 only) – 68000363 10mm ISO, Campbell 3/8" S3, Lewmar 9.5mm G40 3-strand and 8-plait V4/5 68000356 8mm DIN 766, 8mm ISO 4565, 5/16" G40, 5/16" 12–14...
- Page 36 9.5 V1-6 Deck template guide...
-
Page 37: Trouble Shooting
‣ Ensure electrical cable size is large enough to handle the current draw and keep voltage drop within acceptable limits. ‣ Check control switches, connections, battery condition, isolator switch, fuse and motor for operation failure. Lewmar V1-6 Windlass ref 65001201 iss.8... - Page 38 ‣ Check unit is switched on hydraulic oil flow. ‣ Check electrical connections to Commander ‣ Refer to lewmar Commander fault finding. ‣ Check fuses & safety cut-outs 2. Hydraulic pipes connected to the wrong motor port. 2. Insufficient hydraulic fluid ‣...
- Page 39 Where applicable law does not permit a statutory or iii Lewmar shall not be liable in any way for Product failure, or implied warranty to be excluded, then such warranty, if any resulting loss or damage that arises from: permitted by that state or country’s law, shall be limited to...
- Page 40 Fax: +44 (0)23 9248 5720 Email: info@lewmar.com Lewmar 351 New Whitfield Street Guilford, CT 06437 Tel: +1 203 458 6200 Fax: +1 203 453 5669 Email: info@lewmarusa.com www.lewmar.com Part No 65001201 iss.8 © Copyright 2018 Lewmar Ltd. All rights reserved.
Need help?
Do you have a question about the V1 and is the answer not in the manual?
Questions and answers
V3 windlass, trying to remove shaft assembly for access to sensor