Table of Contents
Advertisement
Advertisement
Table of Contents

Related Manuals for Miroir M200A


Summary of Contents for Miroir M200A
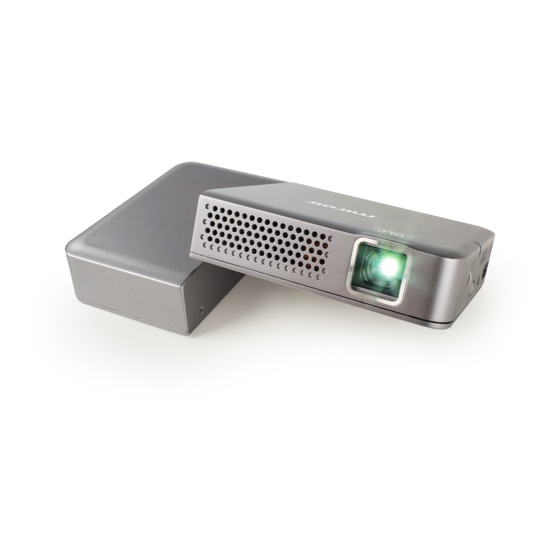
- Page 1 Smart tilt mini Projector M200A...
-
Page 2: Table Of Contents
contentS Caution . . . . . . . . . . . . . . . . . . . . . . . . . . . . . . . . . . . . . . . . . . . . . . . . . . . . . . . . . . . . . . . . . . . . . . . . . . . . . 2 Warning! . -
Page 3: Caution
caution • TO REDUCE THE RISK OF ELECTRIC SHOCK, DO NOT REMOVE COVER . THERE ARE NO SERVICEABLE PARTS INSIDE • TO REDUCE THE RISK OF FIRE OR ELECTRIC SHOCK, DO NOT EXPOSE THIS UNIT TO RAIN OR MOISTURE . The lightning flash with arrow-head symbol within an equilateral triangle is intended to alert the user to the presence of uninsulated “dangerous voltage”... - Page 4 Danger To reduce the risk of electric shock, burns, fire or injury: Do not use while bathing or in a shower . Do not place or store unit where it can fall or be pulled into a tub or sink . Do not place in, drop or submerge in water or other liquid .
- Page 5 The unit should be situated away from direct sunlight or heat sources such as radiators, electric heaters, heat registers, stoves, or other units (including amplifiers) that produce heat . Avoid placing on top of stereo equipment that radiates heat . Never block the air openings of the unit with materials such as clothing, plastic bags or papers, or place it on a soft surface such as a bed or couch, where the air openings may be blocked .
-
Page 6: Warning
Warning! This producT conTains a rechargeable baTTery • Do not store this product in high temperatures, damp areas, or in direct sunlight . • Never disassemble the product . • Never dispose of the product in fire or water, which may result in explosion and/or injury . •... -
Page 7: Fcc Information
fcc information This device complies with part 15 of the FCC rules . Operation is subject to the following two conditions: 1) This device may not cause harmful interference, and 2) This device must accept any interference received including interference that may cause undesired operation . - Page 8 can be determined by turning the equipment off and on, the user is encouraged to try and correct the interference by one or more of the following measures: • Reorient or relocate the receiving antenna . • Increase the separation between the equipment and receiver . •...
-
Page 9: Parts And Controls
PARTS AND CONTROLS Lens Focus wheel Device status light Power button 3.5mm audio out HDMI Input Reset button Power indicator light DC input 10. Volume down button DC IN 11. Volume up button... -
Page 10: Specifications
SPecificationS Product Dimensions 5 . 4 ˝ x 3 . 2 ˝ x 0 . 9 ˝ Brightness Up to 200 Lumens* Lamp Life LED lamp with up to 20,000 hours Image Size Up to 80˝ Throw Ratio 1 . 3 Contrast Ratio 400:1* Native Resolution... -
Page 11: Charging The Battery
charging the Battery The built-in battery is charged using the included USB 2 . 0 Type C cable . The power indicator light on the projector will illuminate red to indicate the battery is charging . Once fully charged, the power indicator light will turn green . When powered on, the projector will also display the charging icon on the home screen status bar when plugged into power . -
Page 12: Operating The Remote Control
[eco Power] Turn ECO power mode on/off [up] or [Down], Move up or down; [left] or [right] Move left or right [home] Return to the Miroir home screen [mouse] Use the remote as a mouse [volume down] Decrease volume [mute] Mute audio... -
Page 13: Operating The Projector
oPerating the Projector seTup Install included (2) AAA batteries in the remote control . • Turn the remote control over and locate the battery door on the rear of the unit . • Press on the remote door arrow and slide in the direction indicated by the arrow . •... -
Page 14: Connecting The Projector To A Wireless Network
projector’s DC in port and the power adapter into an outlet . Once connected, the power indicator light will illuminate on the projector . • To power the projector with the built-in battery, simply turn the projector on . • To power the projector with a battery bank or computer, connect the USB 2 . 0 Type C charging cable to the projector’s DC port and the other end to the USB power source . -
Page 15: Projecting Content
Press the “Home” button on the remote to return to the projector’s home screen . The wireless icon will be displayed in the projector’s home screen status bar if the connection setup was successful . The number of blue shaded bars on the icon depicts the strength of the wireless signal . - Page 16 IMPORTANT: Some apps require payment or a subscription to access content. App availability can change. Streaming speeds will vary based on your internet connection. Connect the projector to a wireless network (see the “Connecting the Projector to a Wireless Network” on page 13 of this manual). Downloading apps Select the App Center icon from the projector’s home screen.
-
Page 17: Hdmi Connection
HDMI CONNECTION The projector can be connected to a variety of devices such as smart phones, tablets, laptops, media streamers, and digital cameras via HDMI . imPortant: Devices that do not have an HDMI port will require an adapter to connect or may need to be connected wirelessly . - Page 18 What do i need to connect? Source Device needed to connect Apple iPad , iPhone and iPod touch devices Apple digital AV adapter (not included) and HDMI ® ® ® ® cable (included) Android™ devices with SlimPort SlimPort to HDMI adapter (not included) and HDMI ®...
-
Page 19: Wireless Connection
AirPlay and wireless screen mirroring are not supported on iOS devices . Wireless iOS viewing is limited to certain files types such as native video, photos, . P PTX files, . K EY files, and . P DF files through the Miroir Wireless app . - Page 20 The iOS device and your projector must be on the same wireless network to establish a wireless connection with the Miroir Wireless App . Select the content to project from the folders inside the Miroir Wireless app on the iOS device .
-
Page 21: Image Adjustments
image adjusTmenTs ADjUSTINg IMAgE ELEVATION Place the projector on a hard flat surface . Stabilize the battery side of the projector with one hand and gently lift the lens side of the projector with your other hand . ADjUSTINg IMAgE FOCUS Simply roll the focus wheel control upwards and downwards to fine-tune the image . -
Page 22: Adjusting The Volume
ADjUSTINg THE VOLUME The volume level of the projector can be adjusted using the volume controls on the projector, or the volume controls on the included remote control . Press the “Vvolume up” button or the “Volume down” button to adjust to the preferred volume level . CONNECTINg AN EXTERNAL SPEAKER External speakers can be connected to the projector through the 3 . -
Page 23: Eco Power Mode
eco poWer mode ECO power mode will decrease the projector’s brightness to maximize the projector’s battery life . Turn ECO power mode on or off by pressing the ECO power mode button on the remote . ViVid mode Vivid mode enhances image contrast and brightness, ideal for movie watching . Turn vivid mode on or off: Select the settings icon from the projector’s home screen . -
Page 24: Cleaning The Lens
cleaning the lenS An optical lens cleaning solution can be used to clean the projector’s optical lens . Apply a small amount of the cleaning solution to a clean soft cleaning cloth and gently wipe the lens in a circular motion . imPortant: Do not apply cleaning solution directly to the lens . -
Page 25: Troubleshooting
trouBleShooting the projected image is blurry. • Adjust the focus wheel on the projector to fine-tune the picture . • Check that the surface you are projecting on is smooth . • Check that the projector’s lens is free of dust and debris . the projected image is too small. - Page 26 the projector is not connecting to your wireless network. • Check that you have selected the correct wireless router name in the setup menu . • Check that you are inputting the correct password if your network is security enabled (passwords are case sensitive) .
- Page 27 the projector’s remote control isn’t functioning. • If the status light on the remote flashes each time your press a button on the remote, the problem is not with your remote . • Try moving closer to the projector with the remote . •...
- Page 28 • If connected to the projector with a wireless connection to an ioS device: - Check that you have downloaded, installed and launched the Miroir Wireless app on your device . - Check that your projector and your iOS device are connected to the same wireless network .
-
Page 29: One (1) Year Limited Warranty
To obtain warranty service for any Product that is subject to the foregoing warranty, Consumer must contact Miroir at info@miroirusa . c om, providing proof of purchase from an authorized dealer and a description of the issue . Consumer shall bear the cost of returning the Product for repair or replacement under this limited warranty . - Page 30 PRODUCT IS ERROR FREE OR THAT IT WILL FUNCTION WITHOUT INTERRUPTION . To the extent Miroir may not, as a matter of applicable law, disclaim certain implied warranties, the duration of any such implied warranty shall be limited to the shorter of the one (1) year limited warranty period or the minimum time period permitted under such law .
- Page 31 Information contained herein is subject to change without notice . © 2016 Miroir USA . All rights reserved . Miroir is a registered trademark of Miroir USA in the US and other countries . All other trademarks are the property of their respective owners .
Need help?
Do you have a question about the M200A and is the answer not in the manual?
Questions and answers
Necesito el diagrama electrico para conectar los clabes de alimentación que se me desoldo
The Miroir M200A projector can be powered in two ways:
1. Using AC Power:
- Connect the power adapter to the USB 2.0 Type-C charging cable.
- Plug the USB 2.0 Type-C end into the projector’s DC-in port.
- Plug the power adapter into an electrical outlet.
- The projector’s power indicator light will illuminate when connected.
2. Using the Built-in Battery:
- Simply turn the projector on without connecting it to an external power source.
No electrical diagram is provided in the available information.
This answer is automatically generated