Table of Contents
Advertisement
Advertisement
Table of Contents

Related Manuals for RoyalTek RBT-1000


Summary of Contents for RoyalTek RBT-1000
- Page 1 RoyalTek BT GPS mini (RBT-1000) User Manual V.1.5...
-
Page 2: Table Of Contents
1. Product Introduction ... 1 1.1. Overview...1 1.1.1. Wireless GPS receiver: ...1 1.2. Main Features...1 1.3. Product Notification...2 1.4. Application...2 2. Quick Start ... 3 2.1. Control Switch, Power Jack & Antenna Port...3 2.2. LED Display ...4 2.3. Hardware Features ...5 2.3.1. - Page 3 4.1.6.Factory Reset: ...15 4.1.7. Disconnect...15 4.2. Navigation Page ...16 4.2.1. NMEA Mode / SiRF Mode ...16 4.2.2. Degraded Mode...16 4.2.3. Elevation mask...16 4.2.4. DOP Mask...16 4.2.5. SBAS Mode ...16 4.2.6. Default...16 4.2.7. OK...16 4.3. Mode: ...17 4.3.1. Maximum Navigation Performance:...17 4.3.2.
- Page 4 5.4.1. Maximum Navigation Performance:...24 5.4.2. Optimal Battery Use: ...24 5.4.3. Intelligent Switch ...24 5.4.4. Manual Setting:...24 5.5. Configuration: ...25 5.5.1. Change Password ...25 5.6. About...26 6. Palm Software Application User Manual ... 27 6.1. Connection Page ...27 6.1.1. Device Name:...27 6.1.2.
- Page 5 7.2.3. About:...33 7.2.4. Action:...33 7.2.5..33 7.3. Cold/Warm/Hot Start ...33 7.4. About...34 7.5. Next Screen...34 8. GPS Test on PC... 35 8.1. Execute GPS Demo Program...35 8.2. GPS Demo Screen...35 8.2.1. GPS Port: ...35 8.2.2. Baud Rate:...35 8.2.3. About:...35 8.2.4. Action:...36 8.2.5.
-
Page 6: Product Introduction
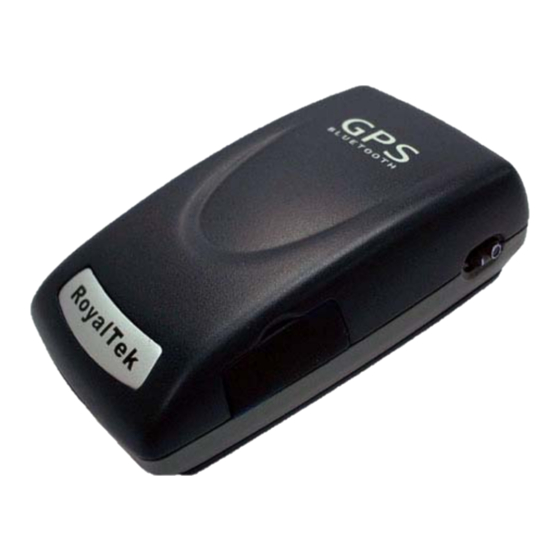
1.1. Overview BT GPS mini (RBT-1000)-A compact combo-device with Bluetooth and GPS technology 1.1.1. Wireless GPS receiver: BT GPS mini, a multi-wireless GPS consumer product, is the smallest and most cost-effective Bluetooth GPS receiver in the world. It has a built-in replaceable and rechargeable Lithium-ion battery just using the same battery of Nokia 6100 cell phone. -
Page 7: Product Notification
1.3. Product Notification Operating temperature range -20 ºC to +60 ºC Charger operating temperature range 0 ºC to +40 ºC Battery Storage temperature range -20 ºC to +50 ºC Lithium-ion battery lasts more than 8 hours in continuous operation mode. Humidity range up to 95% no condensing 1.4. -
Page 8: Quick Start
2.1. Control Switch, Power Jack & Antenna Port Power Switch External Antenna Power Jack Port... -
Page 9: Led Display
2.2. LED Display Battery Status • Blinking Blue light indicates Bluetooth in connection • Green light grows indicates power on • Blinking Green light indicates GPS position fixed • Yellow light indicates charging • Blinking red light indicates low power GPS Status Bluetooth Status... -
Page 10: Hardware Features
2.3. Hardware Features 2.3.1. Power Switch Power ON / Power OFF 2.3.2. Power Jack The power jack allows you to connect to either a DC (included) or AC power charger to recharge the internal battery. 2.3.3. External Antenna Port If you have an external antenna with a male MCX connector (available separately), you can use it instead of the BT GPS mini receiver’s internal antenna. -
Page 11: Getting Started
2.4. Getting Started 2.4.1. STEP 1: Charge the Battery Before you use the Bluetooth GPS Receiver, the battery must be charged. Connect the power charger to the power jack, and then plug into an electrical outlet. As the device is charging, the Battery Status LED will show a yellow light. -
Page 12: Installation
Click the Software for Palm OS to install Palm software application. Click the User Manual to open the user manual of Bluetooth GPS. Click the View Our Website to link our http://www.RoyalTek.com, please make sure your PC connects to Internet first. -
Page 13: Install Pda Software Application
3.1. Install PDA Software Application Before you click the “Software for Pocket PC 2002; Software for Pocket PC 2003” to install the PDA software application from CD, you have to synchronize the PDA and your system. Then the following window will show in your system as below: Click “Yes>”... - Page 14 You can also see the “Installing RoyakTek BT GPS mini ” message box. Note: About to install the software application to your PDA, please refer to your user manual of your PDA manufacture.
-
Page 15: Install Pc Software Application
3.2. Install PC Software Application Install the pc software application from CD. When screen shows the installation window as follows: Click “Cancel” to give up installation. Then you will get into the Bluetooth GPS welcome page Click “Next> to next page” , or click”<Back” to back last stage or “Cancel” to give up installation. - Page 16 To the License Agreement page: Click “ I accept the terms of the license agreement” then click “Next>” to next page, or click”<Back” to back last stage or “Cancel” to give up installation. Click “Install” to start installation. Or click”<Back” to back last stage or “Cancel”...
- Page 17 Then start installation. And finish installation will ask you to restart your computer as follow window. Please click “Finish” to finish the Installation. And your desktop will appear the Bluetooth GPS icon. Or click”<Back” to back last stage or “Cancel” to give up installation.
-
Page 18: Install Palm Software Application
You can double click the Bluetooth GPS icon to execute the Bluetooth GPS software application. 3.3 Install Palm Software Application Note: To execute this Palm Software Application, please install Palm software in advance. -
Page 19: Software Application User Manual For Pda
4.1. Connection Page User has to set up a connection with BT GPS mini device by this dialog. 4.1.1. Device Name When connection is successful, it will show the Device’s ID Name automatically. 4.1.2. Change When connection is successful, the “Change” Button will be workable. If you want to change the Device’s Name, please enter the new Device’s ID Name in the BT GPS mini ID field, then click “Change”... -
Page 20: Connect
4.1.4. Connect Connect to the BT GPS mini Bluetooth enabled device, the window will pop up a “Connection” dialogue box with “Waiting” message. And it means connecting successful when seeing a “BT GPS mini” dialogue box with “Set up connection with device” message. If the window is shown a “BT GPS mini”... -
Page 21: Navigation Page
4.2. Navigation Page You can set GPS-relative parameters by this dialog. 4.2.1. NMEA Mode / SiRF Mode Display (or change) the mode of device. Setup the parameters of in NMEA Mode or SiRF Mode. 4.2.2. Degraded Mode Enable or disable degraded mode. 4.2.3. -
Page 22: Mode
4.3. Mode: Use this page for power mode setting. 4.3.1. Maximum Navigation Performance: Select for best system performance. 4.3.2. Optimal Battery Use: Select to optimize the battery usage. 4.3.3. Intelligent Switch: Select for switching power mode automatically. When position keeps still, it enters power save mode. When position is in high speed updating, it enters max performance mode. -
Page 23: Configuration
4.4. Configuration Use this page to set the system configuration values. 4.4.1. Change Password Display the “ Change Password” dialog screen. 4.5. About This page shows the software version and the copyright claim. -
Page 25: Software Application User Manual For Pc
5.1. Application User Interface Click the icon as right in your desktop to run the software after install the BT GPS mini software. Then you can see the BT GPS mini window as Figure 1. You can choose the button in the left side to open the dialogs for each function setting such as Connection, Navigation, Mode, Configuration, About. -
Page 26: Connection Page
5.2. Connection Page User has to set up a connection with BT GPS mini device by this dialog. 5.2.1. Device Name When connection is successful, it will show the Device’s ID Name automatically. 5.2.2. Change When connection is successful, the “Change” Button will be workable. If you want to change the Device’s Name, please enter the new Device’s ID Name in the BT GPS mini ID field, then click “Change”... -
Page 27: Auto Scan
5.2.5. Auto Scan Automatically scans the BT GPS mini COM Port and baud rate in order to connect BT GPS mini device. 5.2.6. Factory Reset: Factory reset to the device. To reset all parameters and to disconnect Bluetooth. 5.2.7. Disconnect Disconnect to the BT GPS mini device. -
Page 28: Degraded Mode
5.3.2. Degraded Mode Enable or disable degraded mode. 5.3.3. Elevation mask To set the parameter of the Elevation mask. 5.3.4. DOP Mask DOP mask type and DOP mask value setting. 5.3.5. SBAS Mode Enable or disable SBAS function. 5.3.6. Default Reset values of this dialog into default value. -
Page 29: Mode
5.4. Mode Use this page for power mode setting. 5.4.1. Maximum Navigation Performance: Select for best system performance. 5.4.2. Optimal Battery Use: Select to optimize the battery usage. 5.4.3. Intelligent Switch Select to switch power mode automatically. When position keeps still, it enters power save mode. When position is in high speed updating, it enters max performance mode. -
Page 30: Configuration
5.5. Configuration: Use this page to set the system configuration values. 5.5.1. Change Password Display the “ Change Password” dialog screen. -
Page 31: About
5.6. About This page shows the software version and the copyright claim. -
Page 32: Palm Software Application User Manual
6.1. Connection Page User has to set up a connection with BT GPS mini device by this dialog. 6.1.1. Device Name: When connection is successful, it will show the Device’s ID Name automatically. 6.1.2. Change: When connection is successful, the “Change” Button will be workable. If you want to change the Device’s Name, please enter the new Device’s ID Name in the BT GPS mini ID field, then click “Change”... -
Page 33: Connect
6.1.4. Connect: Set up the connection with BT GPS mini device. it again. 6.1.5. Factory Reset: Factory reset to the device. To reset all parameters and to disconnect Bluetooth. 6.1.6. Disconnect: Disconnect to the BT GPS mini device. Note: When performing the Auto Scan, the user has to wait for a while because it will get necessary system information from BT GPS mini. -
Page 34: Navigation Page
6.2. Navigation Page You can set GPS-relative parameters by this dialog. 6.2.1. NMEA Mode / SiRF Mode: Display (or change) the mode of device. Setup the parameters of in NMEA Mode or SiRF Mode. 6.2.2. Degraded Mode: Enable or disable degraded mode. 6.2.3. -
Page 35: Mode
6.3. Mode: Use this page for power mode setting. 6.3.1. Maximum Navigation Performance: Select for best system performance. 6.3.2. Optimal Battery Use: Select to optimize the battery usage. 6.3.3. Intelligent Switch: Select for power mode automatically switch. When position keeps still, it enters power save mode. When position is in high speed updating, it enters max performance mode. -
Page 36: Configuration
6.4. Configuration: Use this page to set the system configuration values. 6.4.1. Change Password: Display the “Change Password” dialog. 6.5. About: This page shows the software version and the copyright claim. -
Page 37: Gps Test On Pda
7.1. Execute GPS Demo Program Execute RoyalTek GPS Demo program by double clicking RoyalTek GPS Demo icon on Programs menu. 7.2. GPS Demo Screen Satellite View GPS Data View Signal View... -
Page 38: Gps Port
7.2.1. GPS Port: GPS port searching automatically by GPS port first or using COM1 as the default com port. 7.2.2. Baud Rate: Sole baud rate : 57600. 7.2.3. About: Version displays.. 7.2.4. Action: GPS action selection. 7.2.5. Switch to next screen shot. 7.3. -
Page 39: About
7.4. About This page shows the software version and the copyright claim. 7.5. Next Screen Clicking > to switch GPS bar chart image to have more GPS data. -
Page 40: Gps Test On Pc
8.1. Execute GPS Demo Program ExecuteGPS Demo program by double clicking GPS Demo icon on Programs menu. 8.2. GPS Demo Screen Satellite View 8.2.1. GPS Port: GPS port searching automatically by GPS port first or using COM1 as the default com port. 8.2.2. -
Page 41: Action
8.2.4. Action: GPS action selection. 8.2.5. Switch to next screen shot. 8.3. Cold/Warm/Hot Start Selecting Cold/Warm/Hot Start in function scroll bar, then click Action to initialize Cold/Warm/Hot Start function. -
Page 42: About
8.4. About This page shows the software version and the copyright claim. 8.5. Next Screen Clicking to switch GPS bar chart image to have more GPS Data. >... -
Page 43: Gps Test On Pda Of Palm Os
9.1. Execute GPS Demo Program Execute RoyalTek GPS Demo program by double clicking RoyalTek GPS Demo icon on Programs menu. 9.2. GPS Demo Screen Satellite View Signal View 9.2.1. GPS Port: GPS port searching automatically by GPS port first or using COM1 as the default com port. -
Page 44: Baud Rate
9.2.2. Baud Rate: Sole baud rate : 57600. 9.2.3. About: Version displays.. 9.2.4. Action: GPS action selection. 9.2.5. Switch to next screen shot. 9.3. Cold/Warm/Hot Start Selecting Cold/Warm/Hot Start in function scroll bar, then click Action to initialize... -
Page 45: About
Cold/Warm/Hot Start function. 9.4. About This page shows the software version and the copyright claim. 9.5. Next Screen Clicking to switch GPS bar chart image to have more GPS data. >... -
Page 46: Explanation Of Gps Terminology
It is the operation mode that uses 2 SVs or 1 SV for positioning output. The effect of degraded mode in GPS receiver is to have more position fix than none of it. It would sometimes have the situation of position drifting when this mode is enabled. -
Page 47: Revision History
Note: RoyalTek provides two types of firmware. One is enhanced sensitivity and the other is Xtrac. Please refer to the following items as the difference between them when using Software Application. 1. If the Device’s firmware is Xtrac, the function of SBAS is unavailable. -
Page 48: Contact Information
1071 Chung Cheng RD., Suite 9F-1 Tao Yuan City, Taiwan, R.O.C. Tel: 886-3-256-9666 FAX: 886-3-358-0050 Branch Office – Sales Department 8F, 256, Yang Guang St., Nei Hu Chiu, Taipei, Taiwan, R.O.C. Tel: 886-2-7721-5000 FAX: 886-2-7721-5666 Http://www.royaltek.com Sales: sales@royaltek.com FAE: fae@royaltek.com...
Need help?
Do you have a question about the RBT-1000 and is the answer not in the manual?
Questions and answers