Table of Contents
Advertisement
Advertisement
Table of Contents

Related Manuals for GE GDF510PSJSS


Summary of Contents for GE GDF510PSJSS
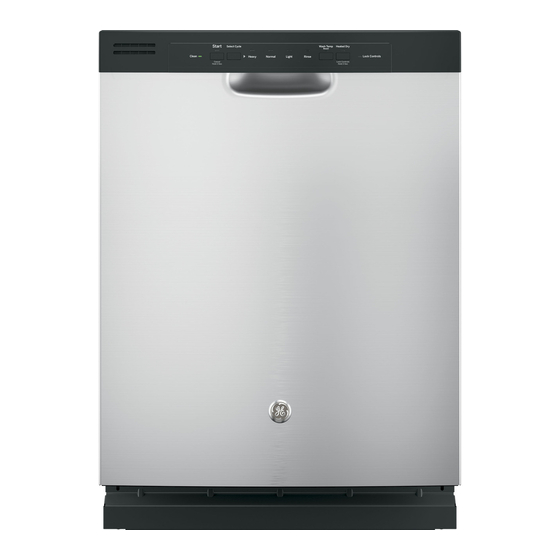
- Page 3 GE® Dishwasher with Front Controls Model# GDF510PSJSS FEATURES Style Built-In Tub and Door Liner American Gray Plastic Tub Interior Tub Type Tall Tub Door Liner Clean Design with Plastic Tub Liner Plastic Control Type Front Controls Electronic Tactile Buttons 4 Touchpads...
- Page 4 • Top or side mount installation brackets - Enjoy flexible installation options with brackets that can be used to mount the dishwasher under the countertop or to the cabinets on the side • Two-pump system - One efficient pump for washing/ rinsing and one powerful low-energy pump to remove soils provide excellent wash performance with reduced sound...
- Page 5 GE® Dishwasher with Front Controls Model# GDF510PSJSS APPROXIMATE DIMENSIONS (HxDxW) • 34 in x 24 in x 23 3/4 in Claims & Certifications • ENERGY STAR® Qualified • CEE Tier I • NSF Certified • MADE IN AMERICA: 70 to 90% U.S. Content WARRANTY •...
- Page 6 U.S. Government Federal law prohibits removal of this label before consumer purchase. Dishwasher GE Appliances Capacity: Standard Models: ADT5****J, CDT8****J, DDT5****J, GDF5****J, GDT5****J, GDF6****J, GDT6****J, GDT7****J, PDF8****J, PDT8****J, ZDT9****J Estimated Yearly Energy Cost (when used with an electric water heater)
-
Page 7: Installation Instructions
Installation Instructions Built-In Dishwasher If you have questions, call 800.GE.CARES (800.432.2737) or visit our Website at: GEAppliances.com. In Canada, please call 1.800.561.3344 or visit www.geappliances.ca FOR YOUR SAFETY BEFORE YOU BEGIN Read these instructions completely and carefully. Read and observe all WARNINGS and CAUTIONS shown throughout these instructions. -
Page 8: Installation Preparation
• Hand shut-off valve (recommended) • Hot water line–3/8" minimum, copper tubing (including ferrule, compression nut) or Coupler for Optional Hose Clamps GE Part # WX28X326, flexible braided hose optional drain Strain Relief 12' Drain Hose hose Air Gap • WD24X10065 drain hose (12' long), if needed... -
Page 9: Drain Requirements
Installation Preparation PREPARE DISHWASHER ENCLOSURE WARNING: installer must ensure that the dishwasher is completely enclosed at the time of installation. ADVERTENCIA: This Wall Area must be Free Para reducir el riesgo de descarga eléctrica, incendio o lesiones a of Pipes or personas, el instalador debe asegurarse de que el lavaplatos esté... -
Page 10: Prepare Electrical Wiring
Installation Preparation PREPARE ELECTRICAL WIRING Alternate Receptacle WARNING: Location in Adjacent Cabinet • Remove all power leading to the appliance from the circuit breaker or fuse box before beginning installation. Failure to do 18" so can result in a risk of electrical shock. 1-1/2"... -
Page 11: Prepare Hot Water Line
PREPARE HOT WATER LINE Water Line Connection • If using a flexible braided supply hose, label the hose with the NOTE: GE recommends copper tubing for the water line, but if installation date to use as reference. Flexible braided hoses, WX28X326 elbows and gaskets should be replaced every 5 years. -
Page 12: Dishwasher Installation
Dishwasher Installation STEP 1: PREPARATION STEP 3: REMOVE WOOD BASE, INSTALL LEVELING LEGS Locate the items in the installation package: • Screws • Junction box cover CAUTION: • Drain hose and clamp Do not remove wood base until you are ready to install the •... -
Page 13: Step 5: Install 90° Elbow
Dishwasher Installation STEP 5: INSTALL 90° ELBOW STEP 7: POSITION WATER LINE AND HOUSE WIRING • Thread 3/4" GHT 90° Front of dishwasher elbow onto water valve. • Position water supply line and house wiring on the floor of Ensure rubber gasket is the opening to avoid interference with base of dishwasher located between valve and components under dishwasher. -
Page 14: Step 10: Install Trim Pieces
Bend and break supplied here if necessary Fully seat to tub flange Do not pinch If you would like to order the Trim Kit from GE Service, please the latch wires in call 800.GE.Cares and request part number WD08X10094 for #8 bracket BB models or WD08X10096 for WW or CC models. -
Page 15: Step 12: Push Dishwasher Into Final Position
Dishwasher Installation STEP 12: PUSH DISHWASHER INTO • Open and close the dishwasher door to be sure it operates smoothly, and does not rub on the adjacent cabinet. FINAL POSITION Tip: Prevent unnecessary service charges for panel damage • Check the tub insulation blanket, if equipped, to be sure it is or wash performance. -
Page 16: Step 13: Level Dishwasher
Dishwasher Installation STEP 13: LEVEL DISHWASHER Tip: Prevent unnecessary service charges. Verify dishwasher is leveled. IMPORTANT – Pull the dish racks half way out. They should stay put. Open Dishwasher must be level for proper dish rack operation, wash performance and door operation. without hitting the side of the tub. -
Page 17: Step 15: Connect Water Supply
Dishwasher Installation STEP 14: POSITION DISHWASHER, SECURE Method 2 Secure dishwasher to cabinet sides. TO COUNTERTOP OR CABINET • Recheck alignment of the dishwasher in the cabinet. Refer to Steps 12 and 13. Door panel and/or control panel must not In this step you will need the 2 Phillips special head screws hit cabinets or countertop. -
Page 18: Step 16: Connect Drain Line
Dishwasher Installation STEP 16: CONNECT DRAIN LINE • Connect drain line to air gap, waste tee or disposer using the previously determined method. Secure hose with a screw- The molded end of the drain hose will fit 5/8" through 1" type clamp. -
Page 19: Step 17: Connect Power Supply
Dishwasher Installation STEP 17: CONNECT POWER SUPPLY STEP 18: PRETEST CHECKLIST If a power cord with plug is already installed proceed to Review this list after installing your dishwasher to avoid Step 18. charges for a service call that is not covered by your warranty. -
Page 20: Step 19: Dishwasher Wet Test
Dishwasher Installation STEP 19: DISHWASHER WET TEST STEP 20: POSITION SOUND BARRIER AND INSULATION • Turn on power supply or plug power cord into outlet, if equipped. (on some models) • Select a cycle to run and push the Start/Reset pad. Skip this step if the sound barrier is assembled to the dishwasher. -
Page 21: Step 21: Install Toekick
Dishwasher Installation STEP 21: INSTALL TOEKICK • Place toekick against the legs of the dishwasher. T o e k ic k Attachment Screws • Align the toekick with the bottom edge and make sure it is • Insert and tighten the 2 toekick attachment screws. The •... - Page 22 SPECIFICATIONS SUBJECT TO CHANGE WITHOUT NOTICE Appliance Park Louisville, KY 40225...
-
Page 23: Safety Instructions
GDT535-635 Series Loading and Place Settings ..8-10 ® Includes GE and GE Artistry ™ Series products Loading the silverware baskets ..11 Using the Dishwasher ....6-7... -
Page 24: Important Safety Information
IMPORTANT SAFETY INFORMATION SAVE THESE INSTRUCTIONS For your safety, the information in this manual must be followed to minimize the risk WARNING! of fire, explosion, electric shock, and to prevent property damage, personal injury, or death. WARNING! WATER HEATER SAFETY Under certain conditions, hydrogen gas may be produced in a water heater that has not been used for two or more weeks. -
Page 25: Risk Of Child Entrapment
5-10 seconds after turning the Detergent, and Cascade Rinse Aid™ rinse agents have ® switch on before touching Start to allow the control been approved for use in all GE dishwashers. to initialize. READ AND FOLLOW THIS SAFETY INFORMATION CAREFULLY. SAVE THESE INSTRUCTIONS... -
Page 26: Getting Started
Getting started! Features and appearance will vary throughout this manual Load Dishwasher For best dishwashing results, follow the rack loading guidelines found in the Loading the dishwasher racks section. No pre-rinsing of normal food soil is required. Scrape off hard soils, including bones, toothpicks, skins, and seeds. Remove leafy vegetables, meat trimmings, and excessive amounts of grease or oil. - Page 27 GEAppliances.com Select Options (Continued) Steam For use with heavily soiled and/or dried-on, baked-on soils. This option MUST be selected PRIOR to (Prewash) starting the cycle. The Steam option adds approximately 30 minutes to the cycle time. This option is (on some models) available with Heavy, AutoSense, and Normal cycles.
-
Page 28: Rinse Aid Setting
Using the dishwasher. Check the Water Temperature The entering water should be at least 120°F (49°C) and nearest the dishwasher, place the thermometer in a glass not more than 150°F (66°C) for effective cleaning and to and let the water run continuously into the glass until the prevent dish damage. -
Page 29: Filling The Detergent Dispenser
You may purchase a hard water While there will be no lasting damage to the dishwasher, your test strip from GE. Call 1-877-959-8688 and ask for part dishes will not get clean using a dishwashing detergent that is number WD01X10295. -
Page 30: Loading And Place Settings
Loading and place settings. For best dishwashing results, follow these loading guidelines. Features and appearance of racks and silverware baskets may vary from your model. Upper Rack The upper rack is primarily for glasses, cups, and To add flexibility in loading, the utility saucers. - Page 31 GEAppliances.com Upper Rack - 8 Place Settings Upper Rack - 10 Place Settings Upper Rack - 12 Place Settings GDF510-610, GDT535-545, GDT625 GDF510-610, GDT535-545, GDT625 GDF510-610, GDT535-545, GDT625 & ADT521 & ADT521 & ADT521 Upper Rack - 8 Place Settings Upper Rack - 10 Place Settings Upper Rack - 12 Place Settings GDF620 &...
-
Page 32: Lower Rack
Loading and place settings (cont.). Lower Rack The lower rack is best used for plates, saucers and It is important to ensure that items do not protrude cookware items. Large items, such as broiler pans through the bottom of the rack or the silverware and baking racks should go along the sides of the basket where they will block the rotation of the lower rack. -
Page 33: Silverware Basket
Loading the silverware baskets… For best dishwashing results, follow these loading guidelines. Features and appearance of racks and silverware baskets may vary from your model. Silverware Basket The accessory basket (on some models) may be Silverware positioned by placing the hooks on the back of the Basket Place flatware in the removable silverware and basket over the top wire on the sides of the lower... -
Page 34: Care And Cleaning
GEApplianceparts.com. In Canada, call 1-800-661-1616. You can purchase Lemi Shine at your local grocery store or by calling GE at the numbers above and ask for WX10X10019. Stainless Steel Inner Door The stainless steel used to make the dishwasher inner door provides the highest reliability available in a GE dishwasher. -
Page 35: Cleaning The Filters
GEAppliances.com Cleaning the Filters Inspect and clean the filters periodically. This should be done every other month or so depending on usage. If there is a decrease in wash performance or dishes feel gritty, this is also an indication the filters need to be cleaned. Ultra-Fine Filter Fine Filter To clean the Ultra-Fine Filter, remove the bottom... -
Page 36: Troubleshooting Tips
Before you call for service… Troubleshooting Tips Save time and money! Review the charts on the following pages, or visit GEAppliances.com. In Canada visit www.GEAppliances.ca. You may not need to call for service. Problem Possible Causes What To Do Start Status The door was opened or the •... - Page 37 • Run dishwasher with citric acid to remove mineral deposits. Citric acid (Part number: WD35X151) can be ordered through GE Parts. See back cover for ordering information. Dishwasher won’t run Fuse is blown or circuit breaker •...
- Page 38 Before you call for service… Problem Possible Causes What To Do Control panel lights Time too long between • Each pad must be touched within 30 seconds of the others. go off when you’re touching of selected pads To relight, touch any pad again or open the door and setting controls unlock (top control).
-
Page 39: Dishwasher Warranty
This warranty is extended to the original purchaser and any succeeding owner for products purchased for home use within the USA. If the product is located in an area where service by a GE Authorized Servicer is not available, you may be responsible for a trip charge or you may be required to bring the product to an Authorized GE Service location for service. -
Page 40: Schedule Service
In the US: GEAppliances.com In Canada: GEAppliances.ca If you are not satisfied with the service you receive from GE, contact us on our Website with all the details including your phone number, or write to: General Manager, Customer Relations GE Appliances, Appliance Park...