Table of Contents
Advertisement
Quick Links
Download this manual
See also:
Setup Manual
Advertisement
Table of Contents

Related Manuals for Vello Flashboss


Summary of Contents for Vello Flashboss
- Page 1 FLASHBOSS TTL TRANSCEIVER FOR NIKON (FB-TTL-N) USER MANUAL...
- Page 2 THANK YOU FOR CHOOSING VELLO The FlashBoss TTL Transceiver As a transmitter, the FlashBoss channels assure you of trouble- functions as both a TTL gives you control over your free shooting without any transmitter and receiver that lighting setup. Each group...
-
Page 3: Table Of Contents
Firmware Upgrade ......25 Box Contents.........9 Transmitter Operation ....18 FCC Compliance......25 Installing the Batteries ....10 Master Mode ........19 Specifications .......26 Powering on the FlashBoss ..11 Controlling Flash Coverage Troubleshooting ......28 Mounting the FlashBoss on a (Zoom) ..........21 Camera ..........12 One-Year Limited Warranty ..30 Slave Mode ........22... -
Page 4: Precautions
PRECAUTIONS • Please read the full manual • Do not use in the presence • Turn off immediately should before using this device. of flammable gases. Failure to a malfunction occur. Should observe this precaution could smoke or any unusual smell •... - Page 5 • Observe precautions when • Do not put batteries in a fire, • If fluid from damaged handling batteries. Batteries or apply direct heat to them. batteries comes into contact may leak or explode if with skin or clothing, rinse improperly handled.
-
Page 6: Overview
OVERVIEW Device 1. Status indicator 2. Battery compartment 3. Power switch 4. + button 5. − button 6. Set button 7. Zoom/Function button 8. Group/Channel button 9. Mode button... - Page 7 10. Test flash/shutter 11. PC/USB ports 12. AF Assist light 13. Hot shoe 14. Locking wheel 15. Mounting foot...
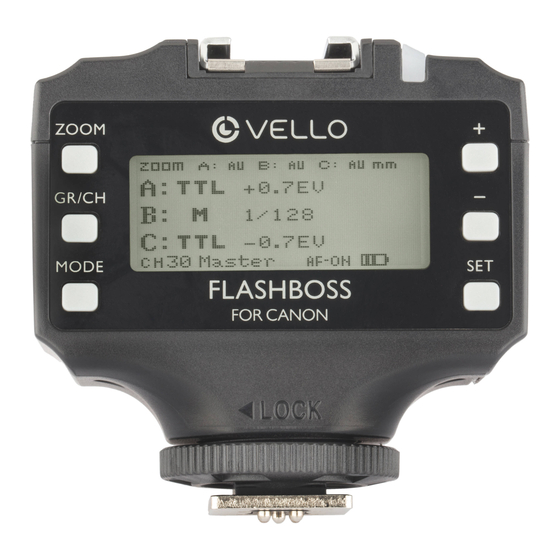
- Page 8 Transmitter Display 1. Zoom indicator 2. Group mode indicator 3. Output/exposure compensation/ delay time 4. Channel indicator 5. Transmitter/receiver mode indicator 6. Camera communication indicator 7. AF assist beam indicator 8. Battery indicator 9. Sync mode Receiver Display 10. Zoom indicator 11.
-
Page 9: Box Contents
BOX CONTENTS • FlashBoss Transceiver • Mini stand • Setup guide Also Available • FlashBoss cable for Nikon 10-pin (FB-N1) • FlashBoss cable for Nikon DS-2 (FB-N2) -
Page 10: Installing The Batteries
INSTALLING THE BATTERIES The FlashBoss is powered by two AA batteries. 1. Press down, and slide the battery compartment door in the direction of the arrow to open. 2. Insert the batteries according to the illustration inside the battery compartment, and... -
Page 11: Powering On The Flashboss
POWERING ON THE FLASHBOSS To turn on the FlashBoss, move the power switch to the On position. The FlashBoss switches to standby mode after a selected amount of time, and the LCD screen goes blank. To resume operation, press the camera’s shutter button or the test button on the FlashBoss. -
Page 12: Mounting The Flashboss On A Camera
MOUNTING THE FLASHBOSS ON A CAMERA When mounted to a camera’s 1. Loosen the locking wheel, and hot shoe, the FlashBoss can insert the FlashBoss into the be used as a transmitter. camera’s hot shoe. Make sure the FlashBoss 2. Make sure the Flashboss is... -
Page 13: Mounting The Flashboss To A Stand
MOUNTING THE FLASHBOSS TO A STAND The Mini Stand Mounting to a Light Stand 1. Loosen the locking wheel, and 1. Screw the 1/4-inch receiver then insert the mounting foot on the bottom of the mini into the mini stand’s cold- stand onto the light stand’s... -
Page 14: Mounting A Flash To The Flashboss
FlashBoss, to function properly with the and directly to the flash. FlashBoss’s operating modes. Refer to your flash’s manual for enabling A flash and FlashBoss can also be TTL mode. used for remote operation with the FlashBoss in receiver mode. -
Page 15: The Settings Menu
THE SETTINGS MENU Navigating the Settings Menu • Press and hold the Set button • Use the + or − button to The Settings menu can be accessed from any screen. to access the Settings Menu. select the new value in the submenu. - Page 16 Settings Menu Items Menu Item Submenu options Function Reset Select RS and press the Set button to return to the factory presets. Model SP700 Profile 1 (Nikon only) 551EX Profile 2 SP690I/II Profile 3 Others Optimized for Nikon speedlights. Backlight On/Off Turns the LCD backlight on or off.
- Page 17 Menu selection determines the length of time before sleep mode 45 min./Off activates. LCD Light 5/4/3/2/1/0 Sets the LCD display’s contrast. 5 is maximum contrast, and 0 is minimum contrast. Version Displays the version number of the FlashBoss’s firmware. Number (Ver) Adjust -2, -1, 0, 1, 2...
-
Page 18: Transmitter Operation
TRANSMITTER OPERATION Setting the Master Channel To use the FlashBoss as a The master channel Make sure all FlashBoss transmitter, mount it to setting can be accessed in units that are operating in a camera’s hot shoe. The any operating mode. -
Page 19: Master Mode
MASTER MODE Group Mode settings 1. Press the Gr/Ch to navigate Master mode allows you to set each group’s operating to the group you want to mode individually. Each group adjust. can be set to TTL, Manual, Delayed Time (DT), or Off. 2. - Page 20 • When a group is set to TTL • When a group is set to mode, the flash exposure Delayed Time (DT mode), the compensation (EV) can be delay time can be adjusted adjusted from −3 to +3 in from 0 to 5 seconds in 1/3-stop increments.
-
Page 21: Controlling Flash Coverage (Zoom)
CONTROLLING FLASH COVERAGE (ZOOM) Setting Focal Length (Zoom) in Any Mode The angle of coverage can be 1. Press Zoom repeatedly to adjusted, or zoomed, so you can control the light spread for highlight each group. your image. When the flash 2. -
Page 22: Slave Mode
SLAVE MODE 1. To enable Slave Mode, press Note: Zoom cannot be changed in and hold the Mode button slave mode. The Zoom value is set until the Slave Mode screen by the transmitter. appears. 2. Press the Gr/Ch button to Slave Mode select the designated slave group. - Page 23 Setting the Channel in slave mode 1. Press and hold the Gr/Ch button until the master channel icon is highlighted. Slave channel 2. Press the + or − buttons to to select the channel. 3. Press Set to confirm the selection.
-
Page 24: Remote Shutter Release Function
With this configuration, a third 3. Mount a remote flash to Note: Make sure that all flash FlashBoss can be used to trigger a FlashBoss that’s set to settings are entered on the camera- a camera and a remote flash. -
Page 25: Firmware Upgrade
Part 15 of the FCC Rules. firmware version. Operation is subject to the following two conditions: Connect the FlashBoss’s USB port to a computer, 1. This device may not cause and follow instructions for harmful interference. -
Page 26: Specifications
SPECIFICATIONS TTL compatible i-TTL Channels and groups 30 Channels, 1 auto channel Groups TTL modes: 3 groups (A, B, C) Frequency 2.4 GHz EV range ±3 EV Antenna Built-in Maximum range Up to 328 ft. (100 m) Mounting Hot shoe, 1/4 in. socket... - Page 27 Connections Threaded PC sync terminal USB port for firmware upgrades Max sync speed 1/8000 sec. Flash mode TTL, Manual, DT Sync mode Front-curtain sync, FP sync Power requirements AA batteries (×2) Battery life Approximately 120 hr. (in standby) Dimensions (H × W × D) 2.25 ×...
-
Page 28: Troubleshooting
Do not use • Make sure all units— • Make sure each FlashBoss is different brands or types of FlashBosses and lights—are operating in the correct mode batteries.) powered on. - Page 29 The picture is underexposed or overexposed. • If the subject looks too dark or light, change the exposure compensation value (EV). • If shooting in HSS mode, the effective flash range is shorter. Position the light closer to the subject.
-
Page 30: One-Year Limited Warranty
To obtain warranty coverage, contact the Vello Customer Service Department to obtain a return merchandise authorization (“RMA”) number, and return the defective product to Vello along with the RMA number and proof of purchase. Shipment of the defective product is at the purchaser’s own risk and expense.
Need help?
Do you have a question about the Flashboss and is the answer not in the manual?
Questions and answers