Table of Contents
Advertisement
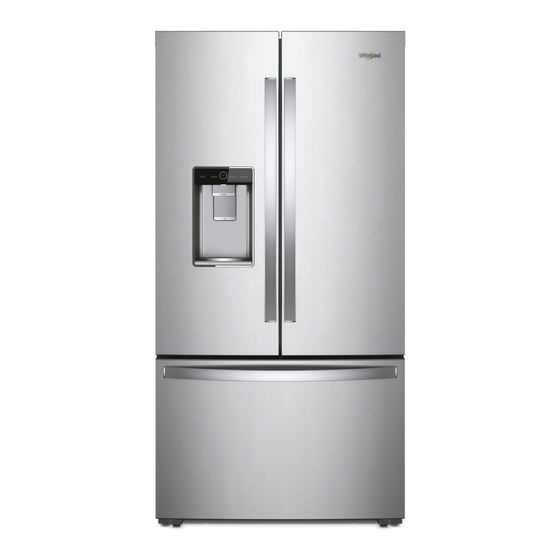
FRENCH DOOR REFRIGERATOR
Use & Care Guide
For questions about features, operation/performance,
parts or service, call: 1-800-253-1301
In Canada, call for assistance 1-800-807-6777
or visit our website at
www.whirlpool.com or www.whirlpool.ca
RÉFRIGÉRATEUR À DOUBLE PORTE
Guide de l'utilisateur
Pour des questions à propos des caractéristiques, du fonctionnement/rendement,
des pièces ou du service, composer le : 1-800-253-1301
Au Canada, pour assistance composez le 1-800-807-6777
ou visitez notre site Web au
www.whirlpool.ca
REFRIGERADOR DE DOS PUERTAS
Manual de uso y cuidado
Si tiene preguntas respecto a características, funcionamiento, operaciones,
rendimiento, piezas, accesorios o servicio técnico, llame al: 1-800-253-1301
Para obtener asistencia en Canadá, llame al: 1-800-807-6777
o visite nuestro sitio web en
www.whirlpool.com o www.whirlpool.ca
Table of Contents/Table des matières/Indice....2
W10913647B
Advertisement
Table of Contents

Related Manuals for Whirlpool WRF954CIHV


Summary of Contents for Whirlpool WRF954CIHV
-
Page 1: Manual De Uso Y Cuidado
For questions about features, operation/performance, parts or service, call: 1-800-253-1301 In Canada, call for assistance 1-800-807-6777 or visit our website at www.whirlpool.com or www.whirlpool.ca RÉFRIGÉRATEUR À DOUBLE PORTE Guide de l’utilisateur Pour des questions à propos des caractéristiques, du fonctionnement/rendement, des pièces ou du service, composer le : 1-800-253-1301... -
Page 2: Table Of Contents
Table of Contents REFRIGERATOR SAFETY ..............3 Install FreshFlow™ Air Filter ............20 PARTS AND FEATURES ..............4 Install Produce Preserver ............20 What’s New Behind the Doors? ...........5 Accessories ................21 GETTING STARTED ...............6 REFRIGERATOR USE ..............21 Installation Checklist ..............6 Opening and Closing Doors ............21 Water Filter Installation ..............6 Using the Controls ..............22 Door Alignment ................7... -
Page 3: Refrigerator Safety
REFRIGERATOR SAFETY Your safety and the safety of others are very important. We have provided many important safety messages in this manual and on your appliance. Always read and obey all safety messages. This is the safety alert symbol. This symbol alerts you to potential hazards that can kill or hurt you and others. All safety messages will follow the safety alert symbol and either the word “DANGER”... -
Page 4: Parts And Features
Proper Disposal of Your Old Refrigerator WARNING Suffocation Hazard Remove doors from your old refrigerator. Failure to do so can result in death or brain damage. IMPORTANT: Child entrapment and suffocation are not problems of the past. Junked or abandoned refrigerators are still dangerous—even if they will sit for “just a few days.”... -
Page 5: What's New Behind The Doors
What’s New Behind the Doors? Your Whirlpool French door refrigerator comes equipped with various ® innovative storage and energy-efficient features. Energy and Normal Operating Sounds Your new French door bottom-mount refrigerator has been Your new Infinity slide shelf or shelves (on some models) is designed with a linear compressor to optimize energy efficiency... -
Page 6: Getting Started
GETTING STARTED ✔ Final Checks WARNING Install air filter according to instructions in corresponding ■ packaging. Remove all shipping material. ■ Set temperature controls to the recommended setting. ■ Save instructions and other literature. ■ Send in Registration Card or register your product online. ■... -
Page 7: Door Alignment
Door Alignment Energy Saver Mode and Normal Operating Sounds Align Refrigerator Doors Your new French door bottom mount refrigerator has been designed to optimize energy ef ciency and better regulate ✔ If doors are uneven: temperatures to match cooling demand. Ensure the refrigerator is level. -
Page 8: Installation Instructions
INSTALLATION INSTRUCTIONS Unpack the Refrigerator Location Requirements WARNING WARNING Excessive Weight Hazard Use two or more people to move and install refrigerator. Failure to do so can result in back or other injury. Explosion Hazard Refrigerator Delivery Keep flammable materials and vapors, such as gasoline, away from refrigerator. -
Page 9: Remove And Replace Refrigerator Doors
Remove and Replace Refrigerator Doors NOTE: Measure the width of your house door opening to see whether or not you need to remove the refrigerator doors to move the refrigerator into your home. If refrigerator door removal is necessary, see the following instructions. IMPORTANT: If the refrigerator was previously installed and you are moving it out of the home, before you begin, turn the refrigerator control off. - Page 10 3. Insert the bottom hinge and bushing into the corresponding slot in the bottom of the door. WARNING NOTE: Make sure that the base of the hinge is parallel to the bottom of the door. Excessive Weight Hazard Use two or more people to move and install refrigerator.
- Page 11 Remove Refrigerator Doors WARNING Excessive Weight Hazard WARNING Use two or more people to lift the refrigerator door. Failure to do so can result in back or other injury. 5. Open the door until it is at a 90° angle to the front of the cabinet.
- Page 12 3. Disconnect the wiring plug located on top of the door hinge. 5. Lift the refrigerator door from the bottom hinge pin. The top hinge will come away with the door. Grasp each side of the wiring plug. With your left thumb, ■...
-
Page 13: Remove And Replace Freezer Drawer Fronts
3. Tighten the 2 screws at the top of the drawer front (1 on the Remove and Replace left-hand side and 1 on the right-hand side) and install the 2 screws on the bottom. Freezer Drawer Fronts Final Steps Freezer Drawer WARNING Remove Drawer Front 1. -
Page 14: Electrical Requirements
Reverse Osmosis Water Supply Electrical Requirements IMPORTANT: The pressure of the water supply coming out of a reverse osmosis system and supplying the water inlet valve of the refrigerator needs to be between 35 and 120 psi (241 and WARNING 827 kPa). - Page 15 5. Place the free end of the tubing into a container or sink and Connect to Water Line turn on main water supply to ush out tubing until water is clear. Turn off shut-off valve on the water pipe. IMPORTANT: If you have turned the refrigerator on before the NOTE: Always drain the water line before making the final water was connected, turn off the ice maker.
-
Page 16: Handle Installation And Removal
2. Open a refrigerator compartment door. On the closed Complete the Installation door, place a handle onto the shoulder screws so that the setscrews are facing the adjacent door. WARNING Electrical Shock Hazard Plug into a grounded 3 prong outlet. Do not remove ground prong. -
Page 17: Refrigerator Leveling And Door Closing
8. Repeat steps 2 through 7 to install the other handle onto Remove the Handles the adjacent refrigerator door. Freezer Drawer 1. While holding the handle, insert the short end of the hex key into a setscrew hole and slightly rotate the hex key until it is 1. -
Page 18: Filters And Accessories
3. Move the refrigerator to its nal location. FILTERS AND 4. Using the 1/4" hex driver, lower the brake feet. Turn them clockwise until the rollers are off the oor and both brake feet are snug against the oor. This keeps the refrigerator from ACCESSORIES rolling forward when opening the refrigerator doors or freezer drawer. - Page 19 7. Twist the water lter and turn 90° clockwise until it locks into 3. Pull the lter out of the housing. place and the arrows are aligned. 4. Remove the water lter cap from the water lter being replaced. 8. Push the water lter door closed. 5.
-
Page 20: Install Freshflow™ Air Filter
Replacing the FreshFlow™ Air Filter Install FreshFlow™ Air Filter An air filter is 15 times more powerful than baking soda at The disposable air filter should be replaced every 6 months. reducing common food odors inside the refrigerator. Some air filters have an indicator that replacement is needed. On some models, your refrigerator’s accessory packet includes To order a replacement air filter, contact us. -
Page 21: Accessories
The following accessories are available for your refrigerator. To order an accessory, contact us and ask for the part number. In the U.S.A., visit our website www.whirlpool.com/accessories or call 1-800-901-2042. In Canada, visit our webpage www.whirlpool.ca or call 1-800-807-6777. affresh ® Stainless Steel Cleaner: In U.S.A., order Part #W10355016... -
Page 22: Using The Controls
Using the Controls The touch-activated controls are located above the external View Temperature Set Points dispenser and on the side of the left inner refrigerator door. Touch [▼]/[▲] for refrigerator or [▼]/[▲] for freezer to toggle through temperature set points. NOTE: To view temperature in degrees Celsius, touch and hold the [°F-°C] button for 3 seconds and the temperature display will change. - Page 23 Max Cool Energy Saver Mode The Max Cool feature assists with periods of high refrigerator A selectable feature that turns off the heaters around the use, full grocery loads, or temporarily warm room temperatures. refrigerator doors and dispenser. When this feature is enabled, condensation may form on the front of the refrigerator cabinet, To turn on the Max Cool feature, press the Max Cool button.
-
Page 24: External Dispenser Controls
Showroom Mode Lighting the Refrigerator The refrigerator has an interior light that comes on any time the This mode is used when the refrigerator is on display in a retail door is opened. store or if you want to turn the cooling off and deactivate all other functions except interior lighting. - Page 25 Save Favorite Fill Calibrate Measured Fill Household water pressure may affect the accuracy of the Household water pressure may affect the accuracy of the Favorite Fill feature. So, for optimum performance of your water Measured Fill feature. So, for optimum performance of your water dispenser, you must first calibrate Measured Fill.
- Page 26 Measured Fill options are listed in the following chart: Dispensing Water Units IMPORTANT: Ounces Dispense at least 1 qt (1 L) of water every week to maintain ■ a fresh supply. Cups If the flow of water from the dispenser decreases, it could Liters ■...
- Page 27 To Dispense Ice—Paddle Dispensing NOTES: 1. Select the desired type of ice by pressing CUBED ICE or The Favorite Fill dispenser will automatically time out after ■ CRUSHED ICE. 1 minute of inactivity. You can refill several glasses with the same measurement by ■...
-
Page 28: Ice Maker And Storage Bin
The Dispenser Light Style 1: Ice Maker in the Refrigerator The ice maker is located on the left door behind the bins. Ice 1. When you use the dispenser, the light will automatically cubes are ejected into the ice storage bin located on the left- turn on. -
Page 29: Shelves, Bins, And Drawers
Turn off the ice maker before removing the ice storage bin Remove and Replace the Ice Storage Bin ■ to serve ice or to clean the bin. This will keep the ice cubes Remove the ice storage bin by inserting your fingers into the ■... - Page 30 3. Apply pressure to the top of the shelf to ensure the shelf is 3. Push the clip up from the bottom with your nger. properly seated on the shelf mounts. 4. After both clips have been disengaged, carefully remove the pull-out platter toward the front of the refrigerator.
-
Page 31: Freezer Drawers
Refrigerator Door Bins Audio Reference The bins on your refrigerator door are adjustable to meet your Tone Assignment individual storage needs. The gallon-size bins make it easy to customize door storage to hold gallon containers. Tone Name Usage Examples Door Bin Divider (on some models) POWER ON Cooling system is turned on every time This divider fits in the door bin to divide the bin and elevate... -
Page 32: Refrigerator Care
Style 2: Stainless Steel REFRIGERATOR CARE IMPORTANT: Use recommended stainless steel cleaners and cloths ■ only. Damage to stainless steel finish due to improper use of cleaning products or using non-recommended cleaning Cleaning products is not covered under the warranty. Avoid exposing stainless steel appliances to caustic or ■... -
Page 33: Lights
4. Turn off the Temperature controls. See the “Using the Condenser Cleaning Controls” section. 5. Clean refrigerator, wipe it, and dry well. There is no need for routine condenser cleaning in normal home operating environments. If the environment is particularly 6. -
Page 34: Troubleshooting
TROUBLESHOOTING First try the solutions suggested here. If you need further assistance or more recommendations that may help you avoid a service call, refer to the warranty page in this manual, visit producthelp.whirlpool.com, or call 1-800-253-1301. In Canada, visit www.whirlpool.ca. - Page 35 TROUBLESHOOTING First try the solutions suggested here or visit our website at producthelp.whirlpool.com If you experience Possible Causes Solution Refrigerator Operation (cont.) The motor seems to run High-efficiency compressor and fans Larger, more efficient refrigerators run longer at lower, more too much.
- Page 36 TROUBLESHOOTING First try the solutions suggested here or visit our website at producthelp.whirlpool.com If you experience Possible Causes Solution Unusual Noise (cont.) Rattling/Banging Movement of the water lines against Move excess water line away from the refrigerator cabinet or the refrigerator cabinet or of items fasten excess tubing to the cabinet.
- Page 37 TROUBLESHOOTING First try the solutions suggested here or visit our website at producthelp.whirlpool.com If you experience Possible Causes Solution Temperature and Moisture (cont.) There is frost/ice The drawer is opened often or left Minimize drawer openings and close drawer completely buildup in the freezer open.
- Page 38 TROUBLESHOOTING First try the solutions suggested here or visit our website at producthelp.whirlpool.com If you experience Possible Causes Solution Ice and Water (cont.) Off-taste, odor, or gray Newly installed refrigerator requires Flush the water system. See the “Water and Ice Dispensers”...
- Page 39 TROUBLESHOOTING First try the solutions suggested here or visit our website at producthelp.whirlpool.com If you experience Possible Causes Solution Ice and Water (cont.) The water and ice The refrigerator door or freezer Close the door or drawer firmly. If it does not close completely, dispenser will not drawer is not closed completely.
- Page 40 TROUBLESHOOTING First try the solutions suggested here or visit our website at producthelp.whirlpool.com If you experience Possible Causes Solution Ice and Water (cont.) Crushed or cubed ice The glass is not held close enough to Hold the glass close to where the ice exits the chute.
-
Page 41: Performance Data Sheet
PERFORMANCE DATA SHEET Water Filtration System Model P9WB2L/P9RFWB2L Capacity 200 Gallons (757 Liters) System tested and certified by NSF International against NSF/ANSI Standard 42, Standard 53, Standard 401, and CSA B483.1 for the reduction of contaminants specified on the Performance Data Sheet. -
Page 42: Warranty
Please take a few minutes to review the Troubleshooting section of the Use and Care Guide or visit producthelp.whirlpool.com. 2. All warranty service is provided exclusively by our authorized Whirlpool Service Providers. In the U.S. and Canada, direct all requests for...