
Related Manuals for Arjohuntleigh Malibu Sovereign


Summary of Contents for Arjohuntleigh Malibu Sovereign
- Page 1 Malibu/Sovereign (2011) Maintenance And Repair Manual For internal use only! ...with people in mind 09.AZ.03_4GB • 08/2015 XXX.XXX Rev A • 12/2014...
-
Page 2: Table Of Contents
Index MRM Malibu/Sovereign NOTE Before using this Manual you must have taken part of and understood the Safety Precautions 09.NE.01. Index Preventive Maintenance Schedule (PMS) ........3 Service Procedures, not included in PMS ........5 Service Procedures..............6-44 Lockings, Lubrication and Torques ........... 47 Tools ..................... -
Page 3: Preventive Maintenance Schedule (Pms)
MRM Malibu/Sovereign Preventive Maintenance Schedule (PMS) Preventive Maintenance Schedule (PMS) The US-version of Sovereign is named Malibu Contour. NOTE All caregiver obligations according to Instructions for Use are to be checked when performing the Qualified personnel Service WARNING The points on this checklist are the minimum the manufacturer recommends. In some cases due to heavy use of the product and exposure to aggressive environment, more frequent inspections should be carried out. - Page 4 Preventive Maintenance Schedule (PMS) MRM Malibu/Sovereign WARNING The following actions must be carried out by qualified personnel, using correct tools and knowledge of procedures.Failure to meet these requirements could result in personal injuries and/or unsafe product. Qualified personnel actions PMS Malibu/Sovereign Every Every Every...
-
Page 5: Service Procedures Not Included In Pms
MRM Malibu/Sovereign Service Procedures not included in PMS Service Procedures not included in PMS SP 26. Replace actuator SP 29. Generic glue in lift arm, page repair instruction page SP 27. Replace PCB in outer profile, page 28. Replace MPA pump page... -
Page 6: Service Procedures
Service Procedures MRM Malibu/Sovereign Service Procedures SP 1. Check That the Latest Updates Have Been TECHNICAL ADVISORY NOTICE B Implemented Date: 2007-08-31 Case No: Author: Marie Masseck, Issue: marie.masseck@arjo.se Subject Care Raiser Document number: SE1507 Product group: Carendo Carendo - Care Raiser Carendo - Care Raiser Check if there are any Field Safety Notices or Background... -
Page 7: Check All Vital Parts For Corrosion And Dam- Age
MRM Malibu/Sovereign Service Procedures SP 2. Check all Vital Parts for Corrosion and Damage This check is to preserve the safety and performance of the product. Check: (a) Lift arm and hook (b) Safety catch (c)Top bushing (d) Control panel (e) Tub with legs/attachments, logos and warning sign (f) Shut-off valves... -
Page 8: Check Mechanical Attachments
Service Procedures MRM Malibu/Sovereign SP 3 Check Mechanical Attachments This check is to preserve the safety and performance of the product. Check: (a) Lift arm and hook (b) Safety catch (c) Drain, overfill cover (d) Tub foots, floor attachment (e) Internal framework and actuators, especially the swing actuator connection to lift (f) Air jets (with air-spa) (g) Chassis (chair) Shall not unhook from the... -
Page 9: Check Hoses And Connections For Leaks And Damage
MRM Malibu/Sovereign Service Procedures SP 4 Check Hoses and Connections for Leaks and Damage This check is to preserve the safety and performance of the product. Check: (a) Inlet hoses and connection to mixer (b) Mixer (c) Hose connections MPA, disinfection, shower hose (d) Drain (e)Air-Spa system (option) -
Page 10: Check/Clean Filters, Incoming Water
Service Procedures MRM Malibu/Sovereign SP 5. Check/Clean Filters Incoming Water The shut-off valve has a hex lid covering the filter. The valve is designed to let the water pass the filter from inside to outside to avoid clogging. The same shut-off valve is used on System 2000, Freedom Bath. -
Page 11: Check Valves Replace If Necessary
MRM Malibu/Sovereign Service Procedures SP 6. Check Valves, Replace if Necessary NOTE Before replacements and service, shut off all water supply. RPE SOLENOID VALVES These valves are replaced complete if not functioning. They have an expected lifetime of 100000 openings and closings. -
Page 12: Check/Replace Flow Restrictors
Service Procedures MRM Malibu/Sovereign SP 7. Check Flow Restrictors If the water regulation of the MPA is disturbed check: 1. That the flow and pressure of incoming wa- ter is sufficient. a)Fill valve 2. If the flow and pressure of the incoming water is OK then measure the flow from the shower, (default 4,9-5,7 l/min) by filling a vessel with known volume... -
Page 13: Thermostatic Unit
MRM Malibu/Sovereign Service Procedures SP 8. Check/Adjust Mixer Including Seal Kit/Complete Thermostatic Unit For mixers installed in any UK National Health Service Installation. Please refer to document 10.AR.03. If the mixer does not provide sufficient amount of water or if the temperature regulation/stability is poor: •... - Page 14 Service Procedures MRM Malibu/Sovereign 5. Unscrew the PEX pipes to the mixer. NOTE Hot water may come out of the mixer 6. Slightly loosen the two screws (a) holding the mixer to the u-bar and remove the screw (b) holding the bracket (e) to the chassis 7.
- Page 15 MRM Malibu/Sovereign Service Procedures Test of the electronic scalding protection (fill, shower, tub) 1. Remove the plug (a), loosen the screw (b), remove the knob (c) 2. Activate the filling 3. Turn the plastic part (v) anti-clockwise until the fill temperature exceeds the scalding protection temperature 45°C and shuts off.
- Page 16 Service Procedures MRM Malibu/Sovereign Setting of the mechanical scalding protection. 1. Remove the plug (a) loosen the screw (b) and remove the knob (c). 2. Activate fill. 3. Turn the plastic part (d) counterclockwise until the correct temperature is measured. (see page 26 for set values).
-
Page 17: Check Dosage Disinfection
MRM Malibu/Sovereign Service Procedures SP 9. Check Dosage Disinfection Perform the procedure in a room temperature between 20-25°C (68-77°F) to obtain correct set values. 1. Open the panel lid and remove the disinfec- tion bottle 2. Fill a graduated 50 ml cylinder with your used disinfection fluid. - Page 18 Service Procedures MRM Malibu/Sovereign 14.Calculate the ratio in ml/l which is 30ml divided with the mixed volume, for example 30 ml/1,86 l = 16 ml/l. Compare with approved value in ml/l according to table. The mixed volume must not give a too low concentration but it is acceptable if the calculated value is 5% higher.
-
Page 19: Check Shower/Disinfection Handle
Service Procedures MRM Malibu/Sovereign SP 10. Check Shower/ Disinfection Handle Shower handle Check shower handle for bad flow, leaks/ damage and replace if necessary. 1. Turn the adjuster ring (a), fully anti clock- wise 2. Unclip and remove the adjuster ring (a) 3. - Page 20 Service Procedures MRM Malibu/Sovereign 3. Replace old valve (c) and spring (d) with new ones. 4. Unscrew the hose connection and pull out the plastic insert (e), replace the two o-rings (f). 5. Unscrew the shower strainer, replace the big o-ring (g) and the plastic valve (h).
-
Page 21: Lubricate Moving Parts
MRM Malibu/Sovereign Service Procedures SP 11. Lubricate Moving Parts Lubrications see “Lockings, Lubrication and Torques” on page 47 Chassis 1. Raise the system to its top position and re- move the panels. 2. Use nipples on each of the four legs (a) to lubricate. -
Page 22: Check The Safety Cut-Out Switch
Service Procedures MRM Malibu/Sovereign SP 12. Check the Safety Cut- out Switch When something comes between the lift arm and the tub during lowering, the lift actuator will lift itself (a) and release the safety-cut switch (b). The lowering stops immediately but it is still possible to raise the lift arm. -
Page 23: Check The Earth Wiring Connections
MRM Malibu/Sovereign Service Procedures SP 13. Check the Earth Wiring Connections The potential equalization is done in order to make sure that all metal parts have the same electrical voltage potential. Difference in potential between accessible parts means that a current can be lead through a person with risk of injury. - Page 24 Service Procedures MRM Malibu/Sovereign With the test equipment connected to the potential equalization connection point in the building, measure with the probe from the test equipment on the following parts: 1. Potential equalization connector on chas- sis foot end 2. Chassis lift-end (both movable (a) and fixed part (b)) 3.
-
Page 25: Test Control Box Batteries
MRM Malibu/Sovereign Service Procedures SP 14 Test Control Box Batteries The batteries shall be tested during load and this is done by running a complete lift cycle (from floor down into the tub and back down to the floor) without mains connection. The bath must have been connected to the mains prior to the test allowing the batteries to charge fully. -
Page 26: Perform Full Feature Functionality Test
Service Procedures MRM Malibu/Sovereign SP 15 Perform a Full Feature Functionality Test Final service check Function Activation Demands for approval Shower handle and holder No leaks or cracks Activation/deactivation Buttons on tub and All functions hand control Hi/lo full stroke No noise or "jumps"... -
Page 27: Check Emergency Stop
MRM Malibu/Sovereign Service Procedures SP 16 Check Emergency Stop To test the emergency stop: 1. With mains on - push and release the stop button (a) a few times to be sure the tub func- tions are interrupted. WARNING When the mains is shut off by the emergency stop there is still power connected in the con- trol box. -
Page 28: Check/Replace Safety Catch On Lift Arm
Service Procedures MRM Malibu/Sovereign SP 17 Check/replace safety catch on lift arm Lift arm If the safety catch moves sluggishly or the spring tension is poor/the spring is broken - replace. Use safety catch kit. Safety catch removal: 1. Remove the plastic plugs (a) 2. -
Page 29: (Local Requirement)
Applicable load test: • Model: Malibu • SWL: 130 kg (287 lbs.) • Test load: 130 kg (287 lbs.) Use the ArjoHuntleigh load test equipment and refer to SP 015 for general information on load testing. NOTE Do not make adjustments to exceed the above limits 1. -
Page 30: Check Actuator Lifetime
Service Procedures MRM Malibu/Sovereign SP 19. Check Actuator Lifetime There is a built in counter for the lift arm actu- ator showing the number of strokes performed. The number of strokes can be read out on the 8 LED display (a) on the Control Box PCB. The counter can be reset with switch SW2 (b). -
Page 31: Inspect Castors On Chassis For Chair
MRM Malibu/Sovereign Service Procedures SP 20. Inspect Castors on Chassis Do a validation concerning wear, movement of every swivel/ wheel and appearance as follows. NOTE The castors must be properly cleaned according to the customer obligations before starting. 1. Lie the product down onto a flat surface. Protect areas in contact with the ground so as avoid damage to sensitive components. - Page 32 Service Procedures MRM Malibu/Sovereign the technician must state in the service notes that the castors will remain safe until the next scheduled service. NOTE All castors must be of the same brand. It´s not permitted to use different versions of castors on the same product.
-
Page 33: Replace Safety Belt
MRM Malibu/Sovereign Service Procedures SP 21. Replace Safety Belt Old version: The safety belt is replaced by unscrewing the two slide buttons (a) on the chair back frame. Be sure to fit the belt parts (b) in correct position and tighten the two slide buttons firmly by hand. -
Page 34: Replace Filter Air-Blower (Air-Spa
Service Procedures MRM Malibu/Sovereign SP 22. Replace Filter Air- blower 1. Remove the tub front 2. Raise the tub to top position 3. Loosen the two screws for the bracket (a) slightly 4. Disconnect the blower from the air line (b) 5. -
Page 35: Spa)
MRM Malibu/Sovereign Service Procedures SP 23. Replace Air Jet Caps and Diaphragms (Air Spa) 1. Remove the old cap with diaphragm from the air jet, do not scratch the tub surface 2. Fit the new rubber diaphragm to the pin on the underside of the new chrome cap and push it fully into position 3. -
Page 36: Replace All Pressurized Hoses
Service Procedures MRM Malibu/Sovereign SP 24. Replace All Pressurized Hoses Every fifth year the 5/8" pressurized water connection hoses (a) before the shut-off valve shall be exchanged in order to prevent a burst. -
Page 37: Replace Control Box Batteries
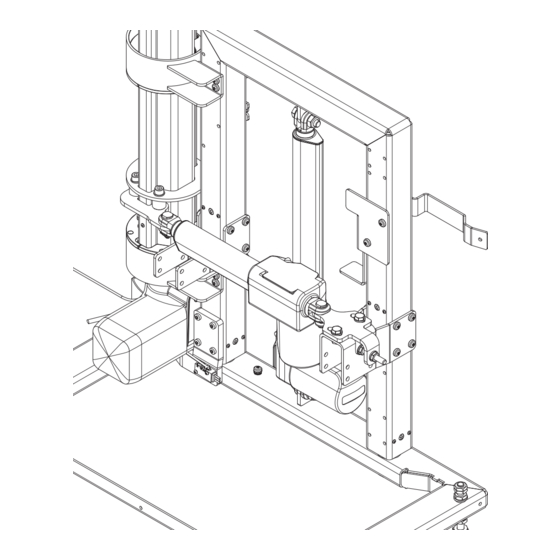
MRM Malibu/Sovereign Service Procedures SP 25 Replace Control Box Batteries 1. Cut the mains supply 2. Remove the front panel 3. Cut the straps holding battery pack and cable (a) CAUTION To protect the PCB from static electricity (ESD); Ground yourself before starting to work. - Page 38 Service Procedures MRM Malibu/Sovereign SP 26. Replace Actuator Lift Special tool needed to loosen screws on e.g. actuator attachment: Flexible 1. Remove the tub front and inner cover on lift arm side 2. Remove the chair from lift arm 3. Remove screws (a) holding the lift arm 4.
- Page 39 MRM Malibu/Sovereign Service Procedures 14.Remove microswitch to prevent it from damage (q) 15.Remove three (m) of four screws for the actuator attachment (n) (special tool needed) One screw is left to keep the actuator from dropping into the floor. These screws are longer (16mm) than the rest of the screws, do not mix them up! 16.Disconnect cabling from liftarm PCB (o).
- Page 40 Service Procedures MRM Malibu/Sovereign Assembly of lift arm For specification of lubrication and torques see page 47 and page 52 1. Lubricate bearings (a) and inside outer pro- file (b) if necessary. Attach the top rotation bearing with the bottom rotation bearing in the lower attachment (c) and push up outer profile with actuator in a vertical position, be sure not to scratch the painting of the out-...
- Page 41 MRM Malibu/Sovereign Service Procedures 7. Remove tape (p) 8. Attach the o-ring (q) from top through the hole on the tub 9. Attach the bearing (r) to the tub, might be necessary to flex the tub a little 10.Attach screw and new locking nut (s) with top attachment (t) 11.Lubricate surface of lift arm (u) (below bushings)
- Page 42 MRM Malibu/Sovereign Service Procedures SP 27. Replace PCB in Outer profile A wooden pin (1000x20x10mm) is needed to attach the lower screw for the PCB. If a wooden pin is missing the lift actuator must be lowered according to SP26 to be able to attach the lower screw for the PCB.
- Page 43 Service Procedures MRM Malibu/Sovereign without wire.) Note front/back position of 2. Support the PCB with tape (i), try to centre the hole in the PCB (j) as close as possible as the exact position is important 3. Take the wooden pin (1000x20x10mm), use the old PCB and position the centre of the lower attachment in line with the end of the pin (k) and make a line (l) according to...
- Page 44 Service Procedures MRM Malibu/Sovereign SP 28. Replace MPA pump 1. Shut off power and water supply Right hand 2. Remove panels and inner cover version 3. Remove the earth connection (a) on pump 4. Pull off T-connection from nipple (b) 5.
- Page 45 MRM Malibu/Sovereign Service Procedures SP 29. Generic Glue Repair Instruction his instruction is a generic glue instruction when parts / brackets has separated from the glass fiber and the technician performing the procedure must therefore adapt these generic instructions to their specific repair. Repair Material The following tools and components are needed:...
- Page 46 Service Procedures MRM Malibu/Sovereign dispensing step within 30 seconds. Assemble the adhesive gun and dispense a continuous line on the cardboard, discard the first 2 inches of adhesive to ensure that mixing is taking place, go to the next step immediately or the adhesive starts curing in the dosing pipe.
-
Page 47: Lockings, Lubrication And Torques
MRM Malibu/Sovereign Lockings, Lubrication and Torques Lockings, Lubrication and Torques To order lubrication, sealants and lockings please refer to the Parts List: Service Articles and Special Tools. NOTE Locking nuts and Dri-Loc screws can only be used once and must be replaced with new. Lift arm transfer with chair and chassis Loctite 243 Shell Cassida RLS2... - Page 48 Lockings, Lubrication and Torques MRM Malibu/Sovereign Liftarm fixed with chair Loctite 243 Shell Cassida RLS2 on this surface Locking nuts on both sides Shell Gadus S3 A1300C Loctite 243 Tape KS5669 1. Clean with isopropanol 2. Apply one stripe of tape along the whole length so it enters the tube 3.
- Page 49 MRM Malibu/Sovereign Lockings, Lubrication and Torques Chassis All screws within circles use torque 12-17 Nm Shell Gadus S3 A1300C on Screw and nut these surfaces can be replaced by clevis pin and cotter pin Locking nuts for actuator or fixed bar (not Foot end illustrated) Tighten with max.
- Page 50 Lockings, Lubrication and Torques MRM Malibu/Sovereign Mixing unit Berulub Sihaf 2 is used on all o-rings Coupling must be hold still when tightening nut to pipe. Use special tool Conex.303 20-35Nm for all nipples Berulub Sihaf 2 on Berulub Sihaf 2 on the threads for shut-off valve cartridge pushers Berulub Sihaf 2 on o-...
- Page 51 MRM Malibu/Sovereign Lockings, Lubrication and Torques Air-Spa Disinfection Berulub Sihaf 2 on o-ring Locking nuts Control Box Locking nut Tighten airjet Locking nuts with 2,7 Nm Loctite 5776 Locking nuts 9 Nm± 10%...
-
Page 52: Tools
Tools MRM Malibu/Sovereign Tools For specification of tools refer to the Parts List: Service Articles and Special Tools. -
Page 53: Trouble Shooting
MRM Malibu/Sovereign Trouble shooting Trouble shooting Before starting to trouble shoot check: Power supply, Water supply, LED:s on Panel and in Control box and emergency stop Service Problem Cause Action procedure CONTROL PANEL Nothing happens Overlay defect, no Check control box when pressing any connection J16 in Replace control panel... - Page 54 Trouble shooting MRM Malibu/Sovereign Before starting to trouble shoot check: Power supply, Water supply, LED:s on Panel and in Control box and emergency stop Service Problem Cause Action procedure Tub will not lower Electric fault Check hand control and SP 26 cables to J15 Check control box Check Hi/Lo actuators and...
- Page 55 MRM Malibu/Sovereign Trouble shooting Before starting to trouble shoot check: Power supply, Water supply, LED:s on Panel and in Control box and emergency stop Service Problem Cause Action procedure Lift arm "down" does Electric fault Check hand control and not work cables to J15 SP 12 Check the safety cut-out...
- Page 56 Trouble shooting MRM Malibu/Sovereign Before starting to trouble shoot check: Power supply, Water supply, LED:s on Panel and in Control box and emergency stop Service Problem Cause Action procedure SHOWER -LED 1 in Service Mode shows if shower gets signal from PCB No or bad flow Water supply Check incoming water...
- Page 57 MRM Malibu/Sovereign Trouble shooting Before starting to trouble shoot check: Power supply, Water supply, LED:s on Panel and in Control box and emergency stop Service Problem Cause Action procedure DISINFECTION - LED 3 on in Service mode shows if disinfection gets signal from PCB No function when Overlay defect, no Check cabling/control box...
- Page 58 MRM Malibu/Sovereign Before starting to trouble shoot check: Power supply, Water supply, LED:s on Panel and in Control box and emergency stop Service Problem Cause Action procedure Only scalding protec- No connection from Check cable to J10 tion tub working control box J10 to Replace thermometer Temp display: --.-...
- Page 59 AUSTRALIA FRANCE POLSKA ArjoHuntleigh Pty Ltd ArjoHuntleigh SAS ArjoHuntleigh Polska Sp. z o.o. 78, Forsyth Street 2 Avenue Alcide de Gasperi ul. Ks Piotra Wawrzyniaka 2 O’Connor CS 70133 PL-62-052 KOMORNIKI (Poznan) FR-59436 RONCQ CEDEX Tel: +48 61 662 15 50...
- Page 60 Getinge Group is a leading global provider of products and systems that contribute to quality enhancement and cost ef ciency within healthcare and life sciences. We operate under the three brands of ArjoHuntleigh, Getinge and Maquet. Getinge provides solutions for infection control within healthcare and contamination prevention within life sciences. Maquet specializes in solutions, therapies and products for surgical interventions, interventional cardiology and intensive care.
Need help?
Do you have a question about the Malibu Sovereign and is the answer not in the manual?
Questions and answers
Hi i have a Malibu bath not sure what model it is but i have a problem the water cannot be shut off once i press the button to fill the bath but there is a black pipe coming off of the water mixing assembly that doesnt appear to be connected to anything could you possibly advise me as to what this pipe does and where it is meant to be connected? many thanks.