Tennant M20 Service Manual
S/n 008000-, sweeper scrubber, es extended scrub system, tennant true parts, iris a tennant technology, pro-panel controls, insta-fit adapter, ec h2o an orbio technology
Hide thumbs
Also See for M20:
- Operator's manual (94 pages) ,
- Instruction bulletin (14 pages) ,
- Operator's manual (90 pages)
Table of Contents
Advertisement
Quick Links
ES
Extended Scrub System
®
Tennant True
IRIS
a Tennant Technology
®
Pro-Panel™ Controls
Insta-Fit™ Adapter
North America / International
For the latest Parts Manuals and other
language Operator Manuals, visit:
www.tennantco.com/manuals
Parts
®
M20/M30
(S/N 008000-
Sweeper Scrubber
Service Manual
Rev. 01 (03-2017)
*9016006*
)
9016006
Advertisement
Table of Contents

Related Manuals for Tennant M20


Summary of Contents for Tennant M20
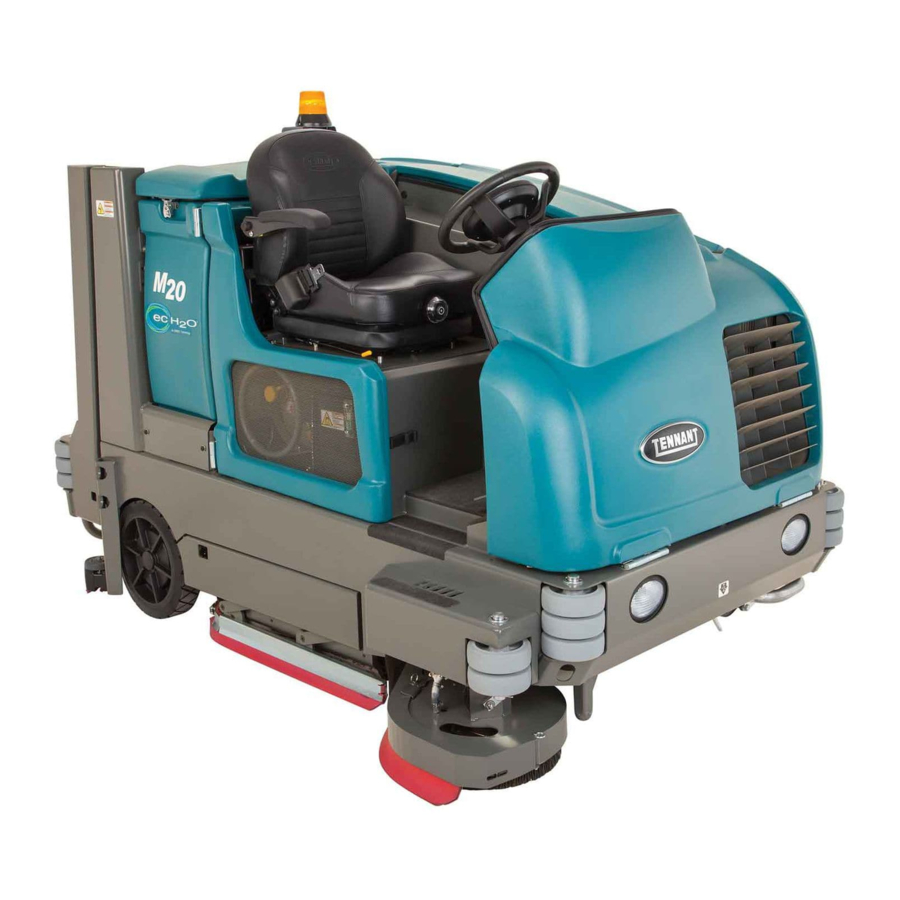
- Page 1 Sweeper Scrubber Service Manual Extended Scrub System ® Tennant True Parts ® IRIS a Tennant Technology ® Pro-Panel™ Controls Insta-Fit™ Adapter North America / International 9016006 For the latest Parts Manuals and other Rev. 01 (03-2017) language Operator Manuals, visit: *9016006* www.tennantco.com/manuals...
- Page 2 DFS (Dual Force Sweeping), PerformanceView, Pro-ID, Pro-Check, Perma-Filter, ShakeMax, Zone Settings, SmartRelease, QA Controls, 1−Step, Dura−Track, Touch−N−Go, Duramer, are trademarks of Tennant Company. Specifications and parts are subject to change without notice. Original Instructions, copyright © 2017 TENNANT Company, Printed in U.S.A.
-
Page 3: Table Of Contents
M30 General Machine Dimensions / Fuel Pump And Speed Control Output ..65 Specifications ..........7 Fuel Pump ..........66 M20 General Machine Dimensions / Engine Speed Control ........ 67 Specifications ..........12 M_series Enable / Disable Chart ....68 Electrical Component Locator ...... - Page 4 Hydraulic Solenoid Valve Details ..... 104 M20_m30 Fault Codes (Propanel And Standard Panel) ... 105 M Series Maintenance ......112 Troubleshooting ..........147 M20/M30 Membrane Panel Service Modes 147 Service Mode .......... 147 Manual Mode ........... 148 Configuration Mode ......... 149 Additional Water Level Setting Information: ..........
- Page 5 CONTENTS M20/M30 9016006 - 3-2017...
- Page 6 CONTENTS M20/M30 9016006 - 3-2017...
-
Page 7: Specifications
Values determined as per IEC 60335- 2- 72 Measure Sound pressure level L 84 dB(A) Sound uncertainty K 3.0 dB(A) Sound power level L + Uncertainty K 106 dB(A) Vibration - Hand- arm < 2.5 m/s@ Vibration - Whole body < 0.5 m/s@ M20/M30 9016006 - 3-2017... - Page 8 Radiator: 3.8 L (1 gal) Idle speed, no load (Fast) governed speed, under load Engine lubricating oil without filter 1350 + 50 rpm 2800 + 50 rpm 6 L (6.35 qt) API diesel classification CF or better M20/M30 9016006 - 3-2017...
- Page 9 Low solution flow rate 2.7 LPM (0.7 GPM) High solution flow rate 5.4 LPM (1.4 GPM) Low concentrate flow rate 2.6 CC/Minute (0.085 Liquid Ounces/Minute) High concentrate flow rate 5.2 CC/Minute (0.17 Liquid Ounces/Minute) M20/M30 9016006 - 3-2017...
- Page 10 Item Measure Solution pump 12 Volt DC, 11A, 0.7 GPM & 1.4 GPM flow, (2 speeds), 75 psi high- pressure shutdown Solution flow rate 2.65 LPM (0.7 GPM) - Low 5.30 LPM (1.4 GPM) - High M20/M30 9016006 - 3-2017...
- Page 11 1475 mm (58 in) 1500 mm (59 in) Width (with side brush) 1625 mm (64 in) 1475 mm (58 in) Wheel base 1422 mm Track (at rear wheels) (56 in) 1473 mm 2745 mm (58 in) (108 in) 1014751 M20/M30 9016006 - 3-2017...
-
Page 12: M20 General Machine Dimensions / Specifications
SPECIFICATIONS M20 GENERAL MACHINE DIMENSIONS / SPECIFICATIONS M20 SPECIFICATIONS M20 GENERAL MACHINE DIMENSIONS/CAPACITIES Item Dimension/capacity Length 2410 mm (95 in) Height 1470 mm (58 in) Height (with overhead guard) 2120 mm (83.5 in) Width/frame (roller to roller) 1270 mm (50 in) - Page 13 SPECIFICATIONS M20 GENERAL MACHINE DIMENSIONS / SPECIFICATIONS - (CONTINUED) M20 GENERAL MACHINE PERFORMANCE Item Measure Minimum aisle turn 2790 mm (110 in) Travel speed forward (maximum) 12.9 Km/h (8 mph) Travel speed reverse (maximum) 4.8 Km/h (3 mph) Maximum ramp incline for loading - Empty tanks...
- Page 14 SPECIFICATIONS M20 GENERAL MACHINE DIMENSIONS / SPECIFICATIONS - (CONTINUED) M20 HYDRAULIC SYSTEM System Capacity ISO Grade Viscosity Index Ambient Air Temperature Ranges Hydraulic reservoir 38 L (10 gal) ISO 100 VI 126 or higher 19_ C (65_ F) or higher...
- Page 15 SPECIFICATIONS M20 GENERAL MACHINE DIMENSIONS / SPECIFICATIONS - (CONTINUED) M20 BRAKING SYSTEM Type Operation Service brakes Mechanical drum brakes (2), one per rear wheel, cable actuated Parking brake Utilize service brakes, cable actuated M20 TIRES Location Type Size Front (1) Solid 140 mm x 460 mm (5.5 in x 18 in)
- Page 16 SPECIFICATIONS M20 GENERAL MACHINE DIMENSIONS / SPECIFICATIONS - (CONTINUED) M20 MACHINE DIMENSIONS Frame (roller to roller) Rear 1270 mm (50 in) Squeegee 1300 mm (51 in) Width (with side brush) 1470 mm (58 in) 1470 mm (58 in) Wheel base...
-
Page 17: Electrical Component Locator
ELECTRICAL COMPONENT LOCATOR ELECTRICAL COMPONENT LOCATOR M20/30 - Series Electrical Component Locator M SERIES ELECTRICAL COMPONENT LOCATOR Hopper Latch Shaker Motor Solenoid SOL-9 Hopper Down Recovery Tank Sense Switch Full Switch S-15 M20/M30 9016006 - 3-2017... - Page 18 ELECTRICAL COMPONENT LOCATOR M SERIES ELECTRICAL COMPONENT LOCATOR - (CONTINUED) M20/30 Series Electrical Component Locator Solution Tank Switch S-14 Solution Tank Empty Switch (S-15) Auto Fill Solenoid Valves Sol-1 and 2 M20/M30 9016006 - 3-2017...
- Page 19 ELECTRICAL COMPONENT LOCATOR M SERIES ELECTRICAL COMPONENT LOCATOR - (CONTINUED) M20/30 Series Electrical Component Locator Battery Fuse / Relay Panel Horn ES Equipped Machines Recovery Tank Half Full Switch S-16 ES (Extended Scrub Pump M20/M30 9016006 - 3-2017...
- Page 20 ELECTRICAL COMPONENT LOCATOR M SERIES ELECTRICAL COMPONENT LOCATOR - (CONTINUED) M20/30 Series Electrical Component Locator Shaker Motor Hopper Thermal Sentry Switch S-9 Sweeper Filter Clogged Switch S-18 (Viewed Behind Bumper M20/M30 9016006 - 3-2017...
- Page 21 ELECTRICAL COMPONENT LOCATOR M SERIES ELECTRICAL COMPONENT LOCATOR - (CONTINUED) M20/30 Series Electrical Component Locator M20/M30 9016006 - 3-2017...
- Page 22 ELECTRICAL COMPONENT LOCATOR M SERIES ELECTRICAL COMPONENT LOCATOR - (CONTINUED) M20/30 Series Electrical Component Locator Back of Engine Cam Sensor Front of Engine ECT - Engine Coolant Temperature Sensor Front of Engine Crank Position Sensor ECM / ECU Engine Control Module...
- Page 23 ELECTRICAL COMPONENT LOCATOR M SERIES ELECTRICAL COMPONENT LOCATOR - (CONTINUED) M20/30 Series Electrical Component Locator Back of Engine CAM Sensor HEGO 1 Heated Exhaust Gas Front of Engine Oxygen Sensor M20/M30 9016006 - 3-2017...
- Page 24 ELECTRICAL COMPONENT LOCATOR M SERIES ELECTRICAL COMPONENT LOCATOR - (CONTINUED) M20/30 Series Electrical Component Locator M20/M30 9016006 - 3-2017...
- Page 25 ELECTRICAL COMPONENT LOCATOR M SERIES ELECTRICAL COMPONENT LOCATOR - (CONTINUED) M20/30 Series Hydraulic Component Locator Side Brush Motor Sweep Fan Motor Propel Motor Main Brush Motor (Rear) Left Side Squeegee Lift Cylinder M20/M30 9016006 - 3-2017...
- Page 26 ELECTRICAL COMPONENT LOCATOR M SERIES ELECTRICAL COMPONENT LOCATOR - (CONTINUED) M20/30 Series Hydraulic Component Locator Hopper Lift Cylinder Scrub Head Side Brush Lift Cylinder Extend Cylinder Right Side Squeegee Lift Cylinder Main Brush Side Brush Motor (Front) Cylinder M20/M30 9016006 - 3-2017...
- Page 27 ELECTRICAL COMPONENT LOCATOR M SERIES ELECTRICAL COMPONENT LOCATOR - (CONTINUED) M20/30 Series Hydraulic Component Locator Hopper Door Cylinder Side Brush Manifold SV-8, SV-10, SV-11, SV-12, PR-1, PR-12, PC-8 Steering Cylinder Rear Squeegee Lift Cylinder (Viewed Behind Bumper) M20/M30 9016006 - 3-2017...
- Page 28 ELECTRICAL COMPONENT LOCATOR M SERIES ELECTRICAL COMPONENT LOCATOR - (CONTINUED) M20/30 Series Hydraulic Component Locator Hydraulic Valve SV-1, SV-2, SV-3, SV-4, SV-6, SVC-7, SV-13A, SVC-14B, SV-15 RV-1, RV-2, OR-1, OR-4, CV-1, PC-1, PC-2, PC-5, PC-6, PCV-7, G-1,. G-2, G-5, G-6, G-11, C-11...
- Page 29 ELECTRICAL COMPONENT LOCATOR M SERIES ELECTRICAL COMPONENT LOCATOR - (CONTINUED) M20/30-Series Hydraulic Component Locator Hydraulic Manifold Details P/N #1072995 SV-1 RV-1 SV-6 SV-7 RV-2 SV-3 SV-4 SV-13A SV-13B PC-7 OR-4 G-11 SV-15 M20/M30 9016006 - 3-2017...
- Page 30 ELECTRICAL COMPONENT LOCATOR M SERIES ELECTRICAL COMPONENT LOCATOR - (CONTINUED) M20/30-Series Hydraulic Component Locator Hydraulic Manifold Details P/N #1072997 SV-11 G-10 SV-11 PR-1 SV-12 PR-2 SV-8 M20/M30 9016006 - 3-2017...
- Page 31 * Call Technical Services if Diagnostic Time Exceeds One Hour With Unknown Cause or Course of Action. NOTE: Troubleshooting charts may be shown with optional equipment. The optional equipment may not be specified in these charts. Some machines may not be equipped with all components shown. M20/M30 9016006 - 3-2017...
-
Page 32: Electrical
SW – Switch Example of Wiring Numbers & Colors: Wiring Color Codes (Unless otherwise marked) Right Most Digit Color of Wire of WireNumber Pink Brown Orange 1 RED 13 BLK Yellow Green Blue Purple Gray White M20/M30 9016006 - 3-2017... -
Page 33: Electrical Option Components
High Flow Valve (SOL-5), FaST Side Recovery Tank Half Full Switch S-16 Brush Valve (SOL-6) Detergent Pump ES Pump Spray Hose Pump Spray Hose Relay Spray Hose Switch S-25 E = Electrical Component H = Hydraulic Component M20/M30 9016006 - 3-2017... -
Page 34: Key Power Distribution
Run Position Start Position Spring Loaded-Returns to “RUN” Unless Held Switch Terminal Markings GLOW PLUG NO CONNECTIONS START “ Indicates a common connection Common connections in various switch positions should be less than one (1) ohm resistance. M20/M30 9016006 - 3-2017... -
Page 35: Key Power Distribution
Battery voltage is always present, even with Key OFF Pin P2-3 supplies power to the on-board clock only. Disconnecting battery, removing Fuse 10, or removing connector P2 from Control Board will require the clock to be reset. M20/M30 9016006 - 3-2017... -
Page 36: Key On Power Distribution
RELAY Wiring Color Codes HARNESS (Unless otherwise marked) Color of W ire Right Most Digit 1/RED 30 1/RED of W ire Number TO FUSES 7 & 8 Pink Brown Orange Yellow Green Blue Purple Gray White M20/M30 9016006 - 3-2017... -
Page 37: Main Brushes On
LED indicators for Brush down pressure. Brown Orange Yellow Green Blue SV-2 is controlled by PWM; a higher duty cycle Purple (more Brush Pressure LED’s lit on Touch Panel) will result in more brush down pressure. Gray White M20/M30 9016006 - 3-2017... -
Page 38: Hopper Lift
ON to help “jog” the hopper latch. HOPPER Hopper Latch Solenoid (SOL-9) is an electro- mechanical device. Hopper Latch Solenoid (SOL-9) turns ON for 3 to 5 seconds with each activation of Hopper Lift Switch. M20/M30 9016006 - 3-2017... -
Page 39: Hopper Lower
Hopper Latch solenoid (SOL-9) is an electro-mechanical device. Wiring Color Codes (Unless otherwise marked) Right Most Digit Color of Wire of WireNumber HOPPER LIFT/LOWER Pink SWITCH Brown Orange PUSH TO LOWER HOPPER Yellow Green Blue Purple Gray White M20/M30 9016006 - 3-2017... -
Page 40: Scrub Vacuum Fan On & Squeegee Down
Maximum Amp Draw Readings Component Max Amp Draw Any condition that cancels the scrub functions will SV-1 1.7 A also turn OFF the scrub vacuum fan and raise SV-4 1.7 A squeegees. SV-7 1.7 A M20/M30 9016006 - 3-2017... -
Page 41: Hopper Door Open
Hopper Door Open Valve (SV15) is OFF, the hopper White door will close. Activating the Hopper Door Switch to open or close the door will cancel the sweep or scrub systems and automatically selects HIGH engine speed. M20/M30 9016006 - 3-2017... -
Page 42: Side Brush On
Panel LED indicators for Brush Down Pressure. Yellow Green Blue Purple SV-10 is controlled by PWM; a higher duty cycle Gray (More Brush Pressure LED’s lit on Touch Panel) will White result in more Brush Down pressure. M20/M30 9016006 - 3-2017... -
Page 43: Side Brush On
If the shaker system is manually selected when Sweep Vacuum Fan is ON, the fan is turned OFF during the shaker cycle, and turned back ON when shaker cycle is complete. M20/M30 9016006 - 3-2017... -
Page 44: Shaker Motor On
If the shaker system is manually selected when Sweep Vacuum Fan is ON, the fan is turned OFF during the shaker cycle, and turned back ON when shaker cycle is complete. M20/M30 9016006 - 3-2017... -
Page 45: Solution & Recovery Float Switches
OPEN = LESS THAN HALF FULL CLOSED = HALF FULL OR MORE The Tank Level Switches must be S-14, SA-15, & S-19 are Float Switches. closed for five (5) seconds before any S-16 is a Pressure Tube Switch. output is affected. M20/M30 9016006 - 3-2017... -
Page 46: Forward Propel
(reverse adjustment). Front FRONT Wiring Color Codes (Unless otherwise marked) Color of W ire Right Most Digit of W ire Number Reverse Pink REVERSE Adjustment Brown ADJUSTMENT Orange Yellow Green Blue Purple Gray White M20/M30 9016006 - 3-2017... -
Page 47: Auto Fill Solenoids
Machine must be in neutral and Recovery Tank Half Full Switch OPEN (tank less than half full) to activate Recovery Tank Auto Fill Valve (SOL-2). The Tank Level Switch must be closed for five (5) seconds before any output is affected.. M20/M30 9016006 - 3-2017... -
Page 48: Conventional Detergent Pump
ES Pump. If the Recovery Tank is still at least half full after the cycle, another 30 second cycle will begin. If a full Solution Tank is sensed, the ES Pump will turn OFF before completing 30 second cycle. M20/M30 9016006 - 3-2017... -
Page 49: Horn
CLOSED = HORN ON Wiring Color Codes (Unless otherwise marked) Color of W ire Right Most Digit of W ire Number Pink Horn Location Brown Membrane Panel Orange Yellow Green Blue Purple Gray White Horn Location Pro Panel M20/M30 9016006 - 3-2017... -
Page 50: Hopper Door Closed
SWITCH is OFF, the hopper door will close. PUSH TO CLOSE DOOR Activating the Hopper Door Switch to open or close the door will cancel the sweep or scrub systems and automatically selects HIGH engine speed. M20/M30 9016006 - 3-2017... -
Page 51: Reverse Propel
Pink Brown Orange Yellow See Forward Propel page for information on Green adjusting Propel Pedal Position Sensor. Blue Purple Gray Reverse propel will turn OFF SV-4 (Pin P2-6) and White raise the side and rear squeegees. M20/M30 9016006 - 3-2017... -
Page 52: Shutdown Relay
The Shutdown system is used to turn OFF the Pink engine under certain conditions on machines with Brown certain optional equipment. Orange Yellow Green Blue When control board turns ON M6A, the engine ECM Purple loses power, and the engine shuts OFF. Gray White M20/M30 9016006 - 3-2017... -
Page 53: Shutdown Relay
The Shutdown system is used to turn OFF the Pink engine under certain conditions on machines with Brown certain optional equipment. Orange Yellow Green Blue When control board turns ON M6A, the engine ECM Purple loses power, and the engine shuts OFF. Gray White M20/M30 9016006 - 3-2017... -
Page 54: Shutdown Relay (Shutdown Mode)
The Shutdown system is used to turn OFF the Brown engine under certain conditions on machines with Orange certain optional equipment. Yellow Green Blue Purple When control board turns ON M6A, the engine ECM Gray loses power, and the engine shuts OFF. White M20/M30 9016006 - 3-2017... -
Page 55: Shutdown Relay (Shutdown Mode)
The Shutdown system is used to turn OFF the Yellow engine under certain conditions on machines with Green certain optional equipment. Blue Purple Gray White When control board turns ON M6A, the engine ECM loses power, and the engine shuts OFF. M20/M30 9016006 - 3-2017... -
Page 56: Starting System On
13/BLK Wiring Color Codes (Unless otherwise marked) TO FUSES 1, 9, & 12 Right Most Digit Color of Wire of WireNumber KEY SWITCH START Pink Brown Orange Yellow Green Blue Purple Gray White M30 9003947 (6--08) M20/M30 9016006 - 3-2017... -
Page 57: Starting System On
Pink J-11 Brown SWITCHED BATTERY POSITIVE TO FUEL PUMP RELAY Orange FROM SHUTDOWN RELAY M6C M10 & GOVERNOR Yellow Green ENGINE HARNESS CONNECTOR Blue Purple Gray The Starter Timer creates a delay between start attempts. White M20/M30 9016006 - 3-2017... -
Page 58: Glow Plugs On
Color of W ire Right Most Digit of W ire Number Pink The Glow Plugs are ON ONLY when ignition switch Brown is in the “Glow Plug” or “Start” Position. Orange Yellow Green Blue Purple Gray White M20/M30 9016006 - 3-2017... -
Page 59: Solution Valves
Less OFF time (more Solution Orange LED’s lit on Touch Panel) will result in more solution Yellow applied to floor. Green Blue Purple The Solution Valves will function only while Gray propelling forward or reverse during scrub operation. White M20/M30 9016006 - 3-2017... -
Page 60: Fast System On
Wire 79/White, High Flow is selected. Brown Orange Yellow One or two Solution LED’s lit selects Low FaST output. Green Blue Purple Gray FaST High Flow Valve is ON only when all 3 Solution LED’s are lit. White M20/M30 9016006 - 3-2017... -
Page 61: Fuel Level Sensor (Gas / Lp / Diesel)
OPEN = MORE THAN 70 PSI CLOSED = 70 PSI OR LOWER Wiring Color Codes (Unless otherwise marked) Color of W ire Right Most Digit of W ire Number Pink Brown Orange Yellow Green Blue Purple Gray White M20/M30 9016006 - 3-2017... -
Page 62: Impact, Hydraulic Temperature & Filter Sensors
Impact Sensor S-23 is used only on machines with certain optional equipment. Wiring Color Codes (Unless otherwise marked) Color of W ire Right Most Digit of W ire Number Pink Brown Orange Yellow Green Blue Purple Gray White M20/M30 9016006 - 3-2017... -
Page 63: Engine Oil Pressure, Temperature, And Mil System
W ire Number BATTERY POSITIVE Pink FROM FUSE 1 Brown Refer to the Engine Orange J-11 Controller schematics Yellow MIL SIGNAL Green LT.BLUE/BLK FROM ECM Blue PIN 26 ENGINE HARNESS Purple MIL (CHECK CONNECTOR ENGINE LAMP) Gray White M20/M30 9016006 - 3-2017... -
Page 64: Engine Oil Pressure And Temperature Sensor
Color of Wire NEGATIVE Touch Panel / of WireNumber Control Board HIGH ENGINE TEMPERATURE Pink SWITCH 13/BLK Brown PIN P1-18 Orange Yellow Green ENGINE Blue OPEN = BELOW 220°F HARNESS CLOSED = ABOVE 220°F Purple CONNECTOR Gray White M20/M30 9016006 - 3-2017... -
Page 65: Fuel Pump And Speed Control Output
2400 +/- RPM 2800 +/- 50 RPM Yellow Green Idle 1350 +/- 50 RPM 1350 +/- 50 RPM 1350 +/- 50 RPM Blue LP / Gas Run 2300 +/- 50 RPM 2300 +/- 50 RPM 2300 +/- 50 RPM Purple Gray White M20/M30 9016006 - 3-2017... -
Page 66: Fuel Pump
Wiring Color Codes (Unless otherwise marked) Right Most Digit Color of W ire of W ire Number B&C CLOSED = LOW OIL PRESSURE A&B CLOSED = OIL PRESSURE OK Pink Brown Orange Yellow Green Blue Purple Gray White M20/M30 9016006 - 3-2017... -
Page 67: Engine Speed Control
Run 2300 +/- 50 RPM 2300 +/- 50 RPM 2300 +/- 50 RPM INPUT – Engine Speed Sensor OUTPUT – Throttle Actuator (PWM) OUTPUT – Throttle Actuator INPUT – Engine Speed Selection “A” INPUT – Engine Speed Selection “B” M20/M30 9016006 - 3-2017... -
Page 68: M_Series Enable / Disable Chart
ELECTRICAL M_Series Enable / Disable Chart T20 Enable/Disable Chart SABLE uired M20/M30 9016006 - 3-2017... -
Page 69: M_Series Control Board Connectors
SV-1 Scrub Vacuum Fan Valve P2-29 182 brown output Audible Alarm P2-30 empty P2-31 empty P2-32 empty P2-33 black ground Unswitched Battery Negative P2-34 black ground Unswitched Battery Negative P2-35 black ground Unswitched Battery Negative M20/M30 9016006 - 3-2017... -
Page 70: M_Series Fault Condition Chart
High Hydraulic F9: HIGH HYD TEMP Indicates excessive hydraulic Temperature temperature Low Fuel F10: LOW FUEL Low fuel indicator (blinking lowest fuel gauge block). Squeegee F11: OPEN SCB VAC Indicates squeegee may have broken free. Disconnected (Option) M20/M30 9016006 - 3-2017... -
Page 71: M_Series Condition And Warning Indicators
ON the ES FaST option. or FaST system. Side Brush button is C6: NO SIDE BRUSH The T20 machine is NOT activated alone without 1- programmed to operate with STEP Sweep/Scrub. only the side brush ON. M20/M30 9016006 - 3-2017... - Page 72 HYDRAULICS M20 / M30 SERVICE INFORMATION Hydraulic Troubleshooting HYDRAULIC Troubleshooting Information • BEFORE CONDUCTING TESTS: * Read and Follow ALL Safety Warnings and Precautions as mentioned at the beginning of this manual * Engine & Hydraulic Oil Must Be At Normal...
-
Page 73: General Information
Orifice Reservoir Heat Exchanger With Bypass EXAMPLES Non-Energized Energized Coils Coils SV14 Arrow indicates a PWM (Pulse Width Modulated) valve SV19 SV25 Circled envelope is valve position for indicated Indicates Energized Solenoid Valve Coil hydraulic circuit M20/M30 9016006 - 3-2017... - Page 74 Switch Load Sens e Throttle Valve Motor (Com bus tion) Volts Typical Hydraulic Manifold Port Markings Hydraulic Cylinder Connection Hydraulic Motor Connection Test Port Pump Connection Load Sense Port R or T Return Port (To Tank) M20/M30 9016006 - 3-2017...
-
Page 75: M20_M30 Operational Matrix
HYDRAULICS M20_M30 Operational Matrix M20 / M30 Operating Matrix M20/M30 9016006 - 3-2017... -
Page 76: M20_M30 Option Components
HYDRAULICS M20_M30 Option Components M20 / M30 Option Components M20/M30 9016006 - 3-2017... -
Page 77: M20_M30 Hydraulic Component
HYDRAULICS M20_M30 Hydraulic Component Locator M20 / M30 Hydraulic Component Locator Side Brush Motor - Sweep Fan Motor - Scrub Fan Motor Side Brush Motor – Sweep Fan Motor – Scrub Fan Motor Propel Motor – Main Brush Motor – Side Sq. Lift Cyl. -
Page 78: Main Brush Motor
HYDRAULICS M20_M30 Hydraulic Component Locator M20 M30 Hydraulic Component Locator Hopper Cylinder - Scrub Head Cylinder - Side Brush Extend Hopper Cyl. – Scrub Head Cyl.- Side Brush Extend Cyl. Side Sq. Cyl. – Main Brush Motor – Side Brush Lift Cyl. -
Page 79: Sweep Manifold
HYDRAULICS M20_M30 Hydraulic Component Locator M20 M30 Hydraulic Component Locator Sweep Fan Valve - Scrub Manifold - Sweep Manifold Sweep Fan Valve – Scrub Manifold – Sweep Manifold Accessory Pumps – Side Brush Manifold – Propel Pump SWEEP FAN VALVE SV9... -
Page 80: M20_M30 Hydraulic Component Locator Steering Cylinder - Hopper Door Cylinder
HYDRAULICS M20_M30 Hydraulic Component Locator Steering Cylinder - Hopper Door Cylinder - M20 M30 Hydraulic Component Locator Rear Squeegee Lift Cylinder Steering Cylinder – Hopper Door Cylinder – Rear Sq. Lift Cyl. STEERING CYLINDER FRONT REAR SQUEEGEE LIFT CYLINDER HOPPER DOOR CYLINDER... -
Page 81: M20_M30 Hydraulic Component Locator Hose Group - Steering And Propel
HYDRAULICS Hose Group: Steering and Propel M20_M30 Hydraulic Component Locator Hose Group - Steering and Propel M20/M30 9016006 - 3-2017... -
Page 82: M20_M30 Hydraulic Component Locator Hose Group - Pump And Vacuum Fan
HYDRAULICS M20_M30 Hydraulic Component Locator Hose Group - Pump and Vacuum Fan Hose Group: Pump and Vacuum Fan M20/M30 9016006 - 3-2017... -
Page 83: M20_M30 Hydraulic Component Locator Hose Group - Brush And Hopper
HYDRAULICS M20_M30 Hydraulic Component Locator Hose Group - Brush and Hopper Hose Group: Brush and Hopper M20/M30 9016006 - 3-2017... -
Page 84: M20_M30 Hydraulic Component Locator Hose Group - Squeegee Lift
HYDRAULICS M20_M30 Hydraulic Component Locator Hose Group - Squeegee Lift Hose Group: Squeegee Lift M20/M30 9016006 - 3-2017... -
Page 85: M20_M30 Scrub/Sweep Head Lower
HYDRAULICS M20_M30 Scrub/Sweep Head Lower M20/M30 Scrub/Sweep Head Lower Engine speed: High Pressure / Flow Line Suction Line Gray items are Return or Low Pressure Line MAIN VALVE MANIFOLD energized Active Pilot Port Line or activated Inactive Pilot Port Line... -
Page 86: M20_M30 Scrub/Sweep Head Lift
HYDRAULICS M20_M30 Scrub/Sweep Head Lift M20 / M30 Scrub/Sweep Head Lift Engine speed: High Pressure / Flow Line Suction Line Gray items are Return or Low Pressure Line MAIN VALVE MANIFOLD energized Active Pilot Port Line or activated Inactive Pilot Port Line Case Drain Line 0.140 in... -
Page 87: M20_M30 Squeegee Lower
HYDRAULICS M20_M30 Squeegee Lower M20 / M30 Squeegees Lower Engine speed: High Pressure / Flow Line Suction Line Gray items are Return or Low Pressure Line MAIN VALVE MANIFOLD energized Active Pilot Port Line or activated Inactive Pilot Port Line Case Drain Line 0.140 in... -
Page 88: M20_M30 Squeegee Lift
HYDRAULICS M20_M30 Squeegee Lift M20 / M30 Squeegees Lift Engine speed: High Pressure / Flow Line Suction Line Gray items are Return or Low Pressure Line MAIN VALVE MANIFOLD energized Active Pilot Port Line or activated Inactive Pilot Port Line Case Drain Line 0.140 in... -
Page 89: M20_M30 Main Brushes On
HYDRAULICS M20_M30 Main Brushes On M20 / M30 Main Brushes ON Engine speed: High Pressure / Flow Line Suction Line Gray items are Return or Low Pressure Line MAIN VALVE energized Active Pilot Port Line MANIFOLD or activated Inactive Pilot Port Line... -
Page 90: M20_M30 Side Brush On
HYDRAULICS M20_M30 Side Brush On M20 / M30 Side Brush ON Engine speed: High Pressure / Flow Line Gray items are Suction Line MAIN VALVE MANIFOLD Return or Low Pressure Line energized Active Pilot Port Line or activated Inactive Pilot Port Line... -
Page 91: M20_M30 Scrub Vacuum Fan On
HYDRAULICS M20_M30 Scrub Vacuum Fan On M20 / M30 Scrub Vacuum Fan ON Engine speed: High Pressure / Flow Line Gray items are Suction Line MAIN VALVE MANIFOLD Return or Low Pressure Line energized Active Pilot Port Line or activated... -
Page 92: M20_M30 Scrub Vacuum Fan & Side Brush On
HYDRAULICS M20_M30 Scrub Vacuum Fan & Side Brush On M20 / M30 Scrub Vacuum Fan & Side Brush ON Engine speed: High Pressure / Flow Line Gray items are Suction Line MAIN VALVE MANIFOLD Return or Low Pressure Line energized... -
Page 93: M20_M30 Scrub Vacuum Fan On
HYDRAULICS M20_M30 Scrub Vacuum Fan On M20 / M30 Sweep Vacuum Fan ON Engine speed: High Pressure / Flow Line Gray items are Suction Line MAIN VALVE MANIFOLD Return or Low Pressure Line energized Active Pilot Port Line or activated... -
Page 94: M20_M30 Scrub Vacuum Fan & Side Brush On
HYDRAULICS M20_M30 Scrub Vacuum Fan & Side Brush On M20 / M30 Sweep Vacuum Fan & Side Brush ON Engine speed: High Pressure / Flow Line Gray items are Suction Line MAIN VALVE MANIFOLD Return or Low Pressure Line energized... -
Page 95: M20_M30 Pressure Washer On
HYDRAULICS M20_M30 Pressure Washer On M20 / M30 Pressure Washer ON Engine speed: High Pressure / Flow Line Gray items are Suction Line MAIN VALVE MANIFOLD Return or Low Pressure Line energized Active Pilot Port Line or activated Inactive Pilot Port Line... -
Page 96: M20_M30 Hopper Lift
HYDRAULICS M20_M30 Hopper Lift M20 / M30 Hopper Lift Engine speed: High Pressure / Flow Line Suction Line Gray items are MAIN VALVE MANIFOLD Return or Low Pressure Line energized Active Pilot Port Line or activated Inactive Pilot Port Line Case Drain Line 0.140 in... -
Page 97: M20_M30 Hopper Lower
HYDRAULICS M20_M30 Hopper Lower M20 / M30 Hopper Lower Engine speed: High Pressure / Flow Line Suction Line Gray items are MAIN VALVE MANIFOLD Return or Low Pressure Line energized Active Pilot Port Line or activated Inactive Pilot Port Line Case Drain Line 0.140 in... -
Page 98: M20_M30 Hopper Door Open
HYDRAULICS M20_M30 Hopper Door Open M20 / M30 Hopper Door Open Engine speed: High Pressure / Flow Line Suction Line Gray items are MAIN VALVE MANIFOLD Return or Low Pressure Line energized Active Pilot Port Line or activated Inactive Pilot Port Line Case Drain Line 0.140 in... -
Page 99: M20_M30 Hopper Door Close
HYDRAULICS M20_M30 Hopper Door Close M20 / M30 Hopper Door Close Engine speed: High Pressure / Flow Line Suction Line MAIN VALVE MANIFOLD Gray items are Return or Low Pressure Line energized Active Pilot Port Line or activated Inactive Pilot Port Line Case Drain Line 0.140 in... -
Page 100: M20_M30 Side Brush Lower
HYDRAULICS M20_M30 Side Brush Lower M20 / M30 Side Brush Lower Engine speed: High Pressure / Flow Line Suction Line MAIN VALVE MANIFOLD Gray items are Return or Low Pressure Line energized Active Pilot Port Line or activated Inactive Pilot Port Line... -
Page 101: M20_M30 Side Brush Lift
HYDRAULICS M20_M30 Side Brush Lift M20 / M30 Side Brush Lift Engine speed: High Pressure / Flow Line Suction Line MAIN VALVE MANIFOLD Gray items are Return or Low Pressure Line energized Active Pilot Port Line or activated Inactive Pilot Port Line Case Drain Line 0.140 in... -
Page 102: M20_M30 Side Brush Extend
HYDRAULICS M20_M30 Side Brush Extend M20 / M30 Side Brush Extend Engine speed: High Pressure / Flow Line Suction Line MAIN VALVE MANIFOLD Gray items are Return or Low Pressure Line energized Active Pilot Port Line or activated Inactive Pilot Port Line... -
Page 103: M20_M30 Side Brush Retract
HYDRAULICS M20_M30 Side Brush Retract M20 / M30 Side Brush Retract Engine speed: High Pressure / Flow Line Suction Line MAIN VALVE MANIFOLD Gray items are Return or Low Pressure Line energized Active Pilot Port Line or activated Inactive Pilot Port Line... -
Page 104: Hydraulic Solenoid Valve Details
*PWM* Enable Valve Side Brush Motor Sweep Fan Motor Side Brush Lift/Lower Actuator SV13 SV11 SV12 SOL1 SV15 Side Brush Side Brush Hopper Door Pressure Washer Lift/Lower Actuator Extend/Retract SV14 Actuator Motor Actuator Hopper Lift/Lower Actuator M20/M30 9016006 - 3-2017... -
Page 105: M20_M30 Fault Codes (Propanel And Standard Panel)
FAULT CODES M20_M30 Fault Codes (ProPanel and Standard Panel) M20/M30 9016006 - 3-2017... - Page 106 FAULT CODES M20_M30 Fault Codes (ProPanel and Standard Panel) M20/M30 9016006 - 3-2017...
- Page 107 FAULT CODES M20_M30 Fault Codes (ProPanel and Standard Panel) M20/M30 9016006 - 3-2017...
- Page 108 FAULT CODES M20_M30 Fault Codes (ProPanel and Standard Panel) M20/M30 9016006 - 3-2017...
- Page 109 FAULT CODES M20_M30 Fault Codes (ProPanel and Standard Panel) M20/M30 9016006 - 3-2017...
- Page 110 FAULT CODES M20_M30 Fault Codes (ProPanel and Standard Panel) M20/M30 9016006 - 3-2017...
- Page 111 FAULT CODES M20_M30 Fault Codes (ProPanel and Standard Panel) M20/M30 9016006 - 3-2017...
-
Page 112: M Series Maintenance
MAINTENANCE M Series Maintenance MAINTENANCE M20/M30 9016006 - 3-2017... - Page 113 TennantTrue premium hydraulic fluid or equivalent ° ° Water and ethylene glycol anti-freeze, -34 C (-30 SPL ... Special lubricant, Lubriplate EMB grease (Tennant part number 01433-1) NOTE: More frequent maintenance intervals may be required in extremely dusty conditions. M20/M30 9016006 - 3-2017...
- Page 114 HYDO . TennantTrue premium hydraulic fluid or equivalent ° ° Water and ethylene glycol anti-freeze, -34 C (-30 SPL . . . Special lubricant, Lubriplate EMB grease (Tennant part number 01433-1) NOTE: More frequent maintenance intervals may be required in extremely dusty conditions. M20/M30 9016006 - 3-2017...
- Page 115 Fill the engine with oil until the oil is between the indicator marks on the dipstick. DO NOT fill past the top indicator mark. The engine oil capacity for Mitsubishi engines is 4. 7 L (5 qt) with oil filter. M20/M30 9016006 - 3-2017...
- Page 116 Lubricate the torque tubes after every 200 hours and repack and adjust every 400 hours of of operation. The torque tube grease fittings on operation. Use Lubriplate EMB grease (Tennant the operator side of the machine are located part number 01433-1).
- Page 117 Drain and refill the hydraulic fluid reservoir with TennantTrue premium hydraulic fluid after every 2400 hours of operation. WARNING: Burn hazard. Hot surface. Do .. NOT touch. Replace the hydraulic strainer outlet after every 2400 hours of operation. M20/M30 9016006 - 3-2017...
- Page 118 MAINTENANCE M20/M30 9016006 - 3-2017...
- Page 119 800 hours of operation. Check the radiator hoses and clamps after every 200 hours of operation. T ighten loose clamps. Replace damaged hoses and clamps. Check the radiator hoses for cracks and deteriation after every 1000 hours of operation. M20/M30 9016006 - 3-2017...
- Page 120 5 kg (8 to 1 O lb) applied at the mid-point of the hours of operation. longest span. FOR SAFETY: When servicing machine, keep flames and sparks away from fuel system service area. Keep area well ventilated. WA RNING: Moving belt and fan. Keep .. away. M20/M30 9016006 - 3-2017...
- Page 121 Replace the spark plugs after every 1000 hours of operation. FOR SAFETY: When servicing machine, avoid contact with battery acid. CAMSHAFT AND BALANCE SHAFT BELTS Replace the camshaft and balance shaft belts after every 5000 hours of operation. M20/M30 9016006 - 3-2017...
- Page 122 � D � D � D � D � D � D � D 12VDC, 40A Auxiliary 2 12VDC, 40A Shaker 12VDC, 40A Reverse 12VDC, 40A Horn � ,---.. 12VDC, 40A Shutdown 12VDC, 40A Starter 1.18 12VDC, 40A Auxilliary 3 12VDC, 40A Spare M20/M30 9016006 - 3-2017...
- Page 123 690 kPa (100 psi) of air pressure and press the reset button to manually reset the never hold the nozzle closer than 50 mm (2 in) to breaker. the filter. This may be done with the dust filter in the machine. M20/M30 9016006 - 3-2017...
- Page 124 1 . Raise the scrub head. automatically resets after cooling down. FOR SAFETY: Before leaving or servicing machine, stop on level surface, set parking brake, turn off machine, and remove key. 2. Open the outer brush doors. M20/M30 9016006 - 3-2017...
- Page 125 After 8. Reinstall the brush idler plates. 9. Close the inner and outer brush doors. 10. Check the brush pattern and adjust if needed after rotating them. Refer to CHECKING AND ADJUSTING THE MAIN BRUSH PATTERN. M20/M30 9016006 - 3-2017...
- Page 126 6. Observe the brush patterns. If the brush pattern is the same width across the entire length of each brush and both brushes are the same width, no adjustment is necessary. M20/M30 9016006 - 3-2017...
- Page 127 3. Tighten the mounting bolts. 4. Recheck the pattern. Readjust if necessary. 2. Recheck the pattern. Readjust if necessary. M20/M30 9016006 - 3-2017...
- Page 128 3. Squeeze the spring handles and let the side brush drop to the floor. M20/M30 9016006 - 3-2017...
- Page 129 5. Slide the FaST-PAK carton into the FaST -PAK bracket. 6. Connect the FaST supply hose to the FaST-PAK hose connector. 7. Scrub with the FaST system for a few minutes to allow the detergent to reach maximum foaming. M20/M30 9016006 - 3-2017...
- Page 130 FOR SAFETY: Before leaving or servicing machine, stop on level surface, set parking brake, turn off machine. 1 . Remove both flush hoses from the storage bag located behind the operator seat. 2. Lock the operator seat cover open. M20/M30 9016006 - 3-2017...
- Page 131 Reconnect ec-H20 intake and outlet hoses. If ec-H20 system indicator light continues to flash, repeat the flush procedure. If the problem persists, contact an Authorized Service Center. 11 . Close the operator seat cover. M20/M30 9016006 - 3-2017...
- Page 132 7. Remove the rear squeegee. 3. Remove both mounting knobs from the rear squeegee assembly. 4. Turn on the machine, raise the scrub head, and turn off the machine. 5. Remove the rear squeegee assembly from the machine. M20/M30 9016006 - 3-2017...
- Page 133 9. Reinstall the rear retaining band aligning the onto the tabs. tabs with the holes. 10. Tighten the rear retaining band tension latch. 11 . Loosen the front retaining band tension latch and open the retaining band. M20/M30 9016006 - 3-2017...
- Page 134 17. Check and adjust the rear squeegee if necessary. Refer to ADJUSTING THE REAR SQUEEGEE BLADE DEFLECTION and LEVELING THE REAR SQUEEGEE sections of this manual. 4. Remove the retaining band from the side squeegee assembly. M20/M30 9016006 - 3-2017...
- Page 135 Discard the squeegee blade if both edges are worn. 9. Close the outer brush door. 6. Install the new or rotated squeegee blades. 7. Reattach the side squeegee retaining band to the side squeegee assembly. M20/M30 9016006 - 3-2017...
- Page 136 3. Open the retaining band tension latch. 6. Reinstall the retaining band tension latch. 7. Reinstall the squeegee bumper and reinsert the pins. M20/M30 9016006 - 3-2017...
- Page 137 5. Drive the machine forward with the squeegee down to recheck the squeegee blade deflection if adjustments were made. 6. Readjust the squeegee blade deflection if necessary. M20/M30 9016006 - 3-2017...
- Page 138 12 mm (0.50 in) for scrubbing smooth floors and 15 mm (0.62 in) for rough floors. 12mm (0.50 in) 3. To adjust the overall squeegee blade deflection, turn the adjustment knobs counterclockwise to increase deflection or clockwise to decrease deflection. M20/M30 9016006 - 3-2017...
- Page 139 The skirts should be between to 6 mm (Oto 0.25 in) from the floor when the scrub head is down. RECOVERY TANK SEAL Check the recovery tank cover seal for damage and wear daily. M20/M30 9016006 - 3-2017...
- Page 140 Torque the shaft nut to 508 Nm (375 ft lb) lubricated, 644 Nm (475 ft lb) dry, after every 800 hours of operation. TIRES Check tires for damage and wear after every 100 hours of operation. M20/M30 9016006 - 3-2017...
- Page 141 AND is 380 mm (15 in) or less from the ground. 4. To winch the machine onto the truck or trailer, attach the winching chains to the holes in the rear jacking brackets behind the rear tires. M20/M30 9016006 - 3-2017...
- Page 142 FOR SAFETY: When unloading machine off truck or trailer, use winch. Do no t drive the machine off the truck or trailer unless the loading surface is horizontal AND 380 mm (15 in) or less from the ground. M20/M30 9016006 - 3-2017...
- Page 143 FOR SAFETY: When servicing machine, block machine tires before jacking machine up. Use a hoist or jack that will support the weight of the machine. Jack machine up at designated locations only. Support machine with jack stands. M20/M30 9016006 - 3-2017...
- Page 144 11 . The remaining RV antifreeze does not need to be drained from the solution tank. NOTE: Storing or transporting machines equipped with the ES or the FaST system in freezing temperatures requires special procedures. Consult a TENNANT representative for more information. M20/M30 9016006 - 3-2017...
- Page 145 12. Return the intake flush hose to the storage bag behind the operator seat. M20/M30 9016006 - 3-2017...
- Page 146 8. Disconnect the outlet flush hose from the ec-H20 system outlet hose and return the flush hose to the storage bag. 9. Reconnect the ec-H20 system outlet hose to the hose to the scrub head. M20/M30 9016006 - 3-2017...
-
Page 147: Troubleshooting
TROUBLESHOOTING 3. When you see the mode you want to enter, press the Orange Down Pressure Button to enter that mode. M20/M30 MEMBRANE PANEL SERVICE MODES SERVICE MODE The Service Modes are designed for Service Technician use only. A qualified Service... -
Page 148: Manual Mode
TROUBLESHOOTING 5. When a component is turn on, the amperage being M20/M30 PROPANEL SERVICE MODES output to that component, or the RPM of that component is displayed and testing can be done. MANUAL MODE 1. Enter the Service Mode (See SERVICE MODE) and if needed, press the right arrow to scroll to the ,MANUAL MODE screen. -
Page 149: Configuration Mode
3. The C1: MainBrushHead choice feature is not used 7. To configure other options on the machine, on the M20 / M30 machines, as only Cylindrical Scrub continuously press the right arrow to scroll to the Heads are available on these models. -
Page 150: Additional Water Level Setting Information
The machine will return to normal operational mode when the key switch is turned on again. 3. The self test will automatically begin. CAUTION: Many of the machine functions will automatically turn on. Stay clear of the machine during the self test. M20/M30 Service Information... - Page 151 26:Alt High Flow Tests the High Flow Rate function of FAST. (If Configured) 27:Alt Side Brush Tests the valve which controls alternative solution (FAST/ECH2O) to the Side Brush. (If Configured) 28:Shutdown Relay Tests the emergency engine shutdown relay. M20/M30 Service Information...
-
Page 152: Throttle Adjust Mode
THROTTLE ADJUST MODE 1. Enter the Service Mode (See SERVICE MODE) and press the right arrow to scroll to the THROTTLE ADJUST MODE screen. 2. To enter the THROTTLE ADJUST MODE, press the ‘Orange Down Pressure Button’. M20/M30 Service Information... - Page 153 ‘Exit Throttle Adjust Mode’ , then press system will react to forward direction movement. Press the Orange Down Pressure Button Twice, or turn off the Orange Down Pressure Button’ to make your ‘N’ the key switch. New value the ‘C’ Current value. M20/M30 Service Information...
-
Page 154: Down Pressure Adjust Mode
Main Scrub Brushes, press the ‘Orange Down Pressure Button’ to move backwards, then the ‘Right Arrow’ to move to the Main Scrub Exit. 9. Press the ‘Orange Down Pressure Button’ to Exit the Main Scrub Down Pressure Setting Mode. M20/M30 Service Information... -
Page 155: Membrane Test Mode
NOTE: If you delay too long prior to pressing the required button, this delay may be reported with a ‘Failed’ message, in the display. If this happens, turn off the key switch and restart all testing procedures. M20/M30 Service Information... -
Page 156: Service Mode
TROUBLESHOOTING 3. Press the ‘Gears’ icon. M20/M30 ProPanel Service Modes SERVICE MODE The Service Modes are designed for Service Technician use only. A qualified Service Technician can interface with the machine to configure the machine and to test specific components. -
Page 157: M20/M30 Propanel Service Modes
TROUBLESHOOTING M20/M30 PROPANEL SERVICE MODES Note: If a component is not installed on the machine, the message ‘Not Installed’ is displayed. 1. Enter the Service Mode (See SERVICE MODE) and press the right arrow to scroll to the ,MANUAL MODE 4. -
Page 158: Configuration Mode
2. To enter the CONFIG MODE, press the ‘Check Mark’ icon. 3. The C1: MainBrushHead choice feature is not used on the M20 / M30 machines. 4. Press the right arrow to scroll to the next configuration option and the ‘Check Mark’ icon to change settings. - Page 159 C8: IRIS Module Additional Water Level Setting Information: There are three water level range setting options. • Economy • Normal • Heavy When a settings is chosen, the operator can adjust three flow rate settings within that range. M20/M30 Service Information...
- Page 160 4. When the self test is completed, faults found will be displayed as an open or shorted load. 5. If faults exist, continually press the right arrow icon to display all faults found. M20/M30 Service Information...
- Page 161 Tests the valve which controls alternative solution (FAST/ECH2O) to the Side Brush. 28:ShutdownRelay Tests the emergency engine shutdown relay. 29:ScrubControlA Tests CAN communication to node A on the Main Board. 30:ScrubControlB Tests CAN communication to node B on the Main Board. M20/M30 Service Information...
- Page 162 I23: Fuel Sender • I24: Hyd Temp 3. The display will indicate the switch or sensor being tested. When the position of the switch or the state of the sensor is changed, the results of that change is displayed. M20/M30 Service Information...
- Page 163 Press the right arrow to proceed to the Forward the quicker the system will react to reverse direction Threshold voltage value. movement. Once the desired setting is achieved, press the ‘Check Mark’ to accept the change and confirm proper machine operation. M20/M30 Service Information...
- Page 164 Adjust Mode and again for the Side Sweeping Brush Down Pressure Adjust Mode. Follow the same adjustment procedures outlined for the Main Scrub Brush Down Pressure Settings. NOTE: Refer to the ‘Default Down Pressure List’ below, for the factory default down pressure settings. M20/M30 Service Information...
- Page 165 If a button fails to function as designed, you will receive the message ‘FAILED’ in the display window. 5. To exit the Service Modes, turn off the key switch and then turn it on again. M20/M30 Service Information...
- Page 166 TROUBLESHOOTING M20/M30 Service Information...
Need help?
Do you have a question about the M20 and is the answer not in the manual?
Questions and answers
M20 with kubota diesel engine. Starts, runs for 1 second then dies. Serial no: M204080316
A Tennant M20 with a Kubota diesel engine that starts and then dies after one second could be caused by the following issues:
1. Fuel Supply Problem – Low fuel level, clogged fuel filter, or air in the fuel lines can cause the engine to stop running shortly after starting.
2. Fuel Pump or Relay Issue – If the fuel pump or its relay is malfunctioning, the engine may not receive enough fuel to stay running.
3. Glow Plug or Starting System Fault – A faulty glow plug system may allow the engine to start but not run smoothly, leading to a shutdown.
4. Electrical System Fault – A short circuit, open circuit, or faulty sensor could interrupt engine operation.
5. Shutdown Relay Activation – If the machine’s shutdown relay is faulty or receiving incorrect signals, it could cut power to the engine.
6. Governor or Control Module Issue – A malfunctioning engine governor or control module may prevent the engine from maintaining operation.
Checking the fuel system, electrical connections, and diagnostic codes should help identify the exact cause.
This answer is automatically generated