Table of Contents
Advertisement
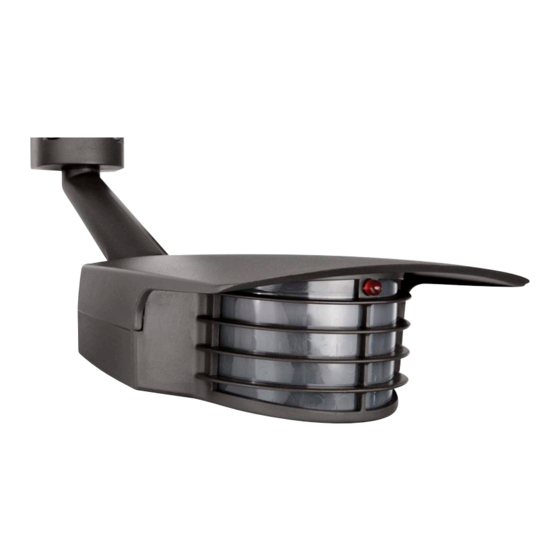
STEALTH
STL200/277 Installation Manual
Switching Capacity:
Voltage:
Time Adjustment:
Power Consumption:
Surge Protection:
UL Listing:
STL200/277
8 amps
277 volts
1000 watts incandescent
50' x 200°
5 seconds to 12 minutes
1 watt
I.E.C. specs
Raintight Photoelectric Switch
Advertisement
Table of Contents

Related Manuals for RAB Lighting Stealth STL200


Summary of Contents for RAB Lighting Stealth STL200
- Page 1 STEALTH STL200/277 Installation Manual STL200/277 Specifications: Switching Capacity: 8 amps Voltage: 277 volts 1000 watts incandescent Detection Pattern: 50’ x 200° Time Adjustment: 5 seconds to 12 minutes Power Consumption: 1 watt Surge Protection: I.E.C. specs UL Listing: Raintight Photoelectric Switch...
- Page 2 CAUTIONS: TURN OFF ALL POWER AT CIRCUIT BREAKER/FUSE PANEL. • Read entire Installation Manual before proceeding. • All wiring should comply with local electrical codes and requires a qualified electrician • The total lighting load connected to a STEALTH must not exceed 8 amps (1000 watts incandescent).
- Page 3 How does the STEALTH work? STEALTH’s infrared sensor “sees” small temperature changes caused by the motion of people or cars within its protection zone and turns on lights auto- matically. It welcomes visitors and may deter intruders. How long do the lights stay on? Time, Sensitivity, and Photocell Lights remain on as long as there adjustments...
- Page 4 Always keep the sensor level to ensure full coverage. To reduce coverage tilt the sensor down. 30’ STEALTH STL200 comes with a stan- dard “Double Look Down” Lens. This lens has one “Look Out” zone and two “Look Down” zones for excellent detection at both long and short range.
- Page 5 Kit Wiring 1. Attach the Universal Mounting 3. Bring power leads and sensor kit bar to the junction box with leads through holes in all gaskets the bar screws (provided). To and into junction box. attach the STL200 kit to a surface mount weatherproof box, you 4.
- Page 6 Wiring Diagrams Basic Wiring Diagram Multiple Fixtures White Ground Power In Black Sensor Basic Kit Wiring Diagram • Multiple fixtures may be wired to Note: Pigtail is only used to switch a single sensor remote or additional light fixtures. • To handle loads greater than (pigtail) 1,000 watts, a qualified electrician should install a relay.
- Page 7 Aiming and Walk Testing Walk Test: 3. Adjust the sensor aiming as The purpose of the Walk Test is needed to improve coverage. to check and adjust the coverage 4. To adjust sensitivity, turn knob pattern. STEALTH has a 5 minute Test gently.
- Page 8 Technical Tips: Lights Do Not Turn Off 1. Make sure the sensor is not in 3. Make sure sensor and lights are mounted firmly and do not move, Manual Override Mode. Turn even slightly, when touched. If power OFF for 10 seconds and they move, tighten all screws.
- Page 9 Technical Tips: Lights Turn On and Off Incorrectly 1. Make sure the sensor is installed 6. Make sure sensor is not aimed on its own dedicated circuit, free within 20 ft of a road or sidewalk. of motor loads such as HVAC Passing cars will activate sensor.
- Page 10 Technical Tips: Lights Turn Off Too Quickly Lights Do Not Turn On 1. Check that lamps and fixtures 1. Check if the sensor is being work. Compare wiring to the “tricked” by reflected light. If Wiring Diagram in this manual. lights controlled by the sensor Check that the power is on.
- Page 11 Technical Tips: Range Appears Limited 3. Check that movement is not 1. Check that the sensor is level directly towards sensor. Sensor from side to side and pointed will see movement across its at desired area. If unit is tilted, pattern more quickly.
- Page 12 Technical Tips: Lights Turn On for Unknown Reasons 1. Lights may turn on occasionally 3. You may not be aware of animals during rain, snow and windstorms triggering the sensor. Create an because the sensor detects “Animal Alley” by aiming sensor changes in temperature.
- Page 13 $30.00 (made out to RAB Lighting). We will repair or replace your unit. For repair or replacement, return the product, freight prepaid and insured,...
- Page 14 Contents: STL200/277 • Indoor Switchplate Label • Wire Nuts (3) • Lens Mask (2) • Crossbar with Green Ground • Finishing Cap Screw • O-ring Gasket • Hanging Hook • Center Mounting Screws • 1/2” Close Up Plugs (3) • CU4 Plate •...
- Page 15 Easy Installation & Product Help Tech Help Line rabweb.com email ©2016 RAB LIGHTING Inc. Call our experts 888 RAB-1000 Visit our website for product info Answered promptly sales@rabweb.com Northvale, New Jersey 07647 USA STL200/277V IN 1016...
- Page 16 STEALTH STL200-LED Installation Manual STL200-LED Specifications: Switching Capacity: 8 amps Voltage: 120 volts 300W on LED fixture Detection Pattern: 50’ x 2000 Time Adjustment: 5 seconds to 12 minutes Power Consumption: 1 watt Surge Protection: I.E.C. specs UL Listing: Raintight Photoelectric Switch SUITABLE FOR WET LOCATIONS...
- Page 17 CAUTIONS: TURN OFF ALL POWER AT CIRCUIT BREAKER/FUSE PANEL. • Read entire Installation Manual before proceeding. • All wiring should comply with local electrical codes and requires a qualified electrician • The total lighting load connected to a STEALTH must not exceed 8 amps (300W on LED fixture).
- Page 18 How does the STEALTH work? STEALTH’s infrared sensor “sees” small temperature changes caused by the motion of people or cars within its protection zone and turns on lights auto- matically. It welcomes visitors and may deter intruders. How long do the lights stay on? Time, Sensitivity, and Photocell Lights remain on as long as there adjustments...
- Page 19 Always keep the sensor level to ensure full coverage. To reduce coverage tilt the sensor down. 30’ STEALTH STL200-LED comes with a standard “Double Look Down” Lens. This lens has one “Look Out” zone and two “Look Down” zones for excellent detection at both long and short range.
- Page 20 Wiring Diagrams Multiple Fixtures Basic Wiring Diagram White Ground Power In Black Sensor Basic Kit Wiring Diagram • Multiple fixtures may be wired to Note: Pigtail is only used to switch a single sensor remote or additional light fixtures. • To handle loads greater than 300 (pigtail) watts, a qualified electrician should install a relay.
- Page 21 Aiming and Walk Testing Walk Test: 3. Adjust the sensor aiming as The purpose of the Walk Test is needed to improve coverage. to check and adjust the coverage 4. To adjust sensitivity, turn knob pattern. STEALTH has a 5 minute Test gently.
- Page 22 Technical Tips: Lights Turn On for Unknown Reasons 1. Lights may turn on occasionally 3. You may not be aware of animals during rain, snow and windstorms triggering the sensor. Create an because the sensor detects “Animal Alley” by aiming sensor changes in temperature.
- Page 23 Technical Tips: Lights Do Not Turn Off 1. Make sure the sensor is not in 3. Make sure sensor and lights are Manual Override Mode. Turn mounted firmly and do not move, power OFF for 10 seconds and even slightly, when touched. If then ON again.
- Page 24 Technical Tips: Lights Turn On and Off Incorrectly 1. Make sure the sensor is installed 6. Make sure sensor is not aimed on its own dedicated circuit, free within 20 ft of a road or sidewalk. of motor loads such as HVAC Passing cars will activate sensor.
- Page 25 Technical Tips: Lights Do Not Turn On Lights Turn Off Too Quickly 1. Check that lamps and fixtures 1. Check if the sensor is being work. Compare wiring to the “tricked” by reflected light. If Wiring Diagram in this manual. lights controlled by the sensor Check that the power is on.
- Page 26 Technical Tips: Range Appears Limited 3. Check that movement is not 1. Check that the sensor is level directly towards sensor. Sensor from side to side and pointed will see movement across its at desired area. If unit is tilted, pattern more quickly.
- Page 27 $30.00 (made out to RAB Lighting). We will repair or replace your unit. For repair or replacement, return the product, freight prepaid and insured,...
- Page 28 • Wire Nuts (3) Easy Installation & Product Help Tech Help Line rabweb.com email ©2016 RAB LIGHTING Inc. Call our experts 888 RAB-1000 Visit our website for product info Answered promptly sales@rabweb.com Northvale, New Jersey 07647 USA STL200LED IN 0616...
- Page 29 STEALTH STL200-LED/277 Installation Manual STL200-LED/277 Specifications: Switching Capacity: 8 amps Voltage: 277 volts 300W on LED fixture Detection Pattern: 50’ x 2000 Time Adjustment: 5 seconds to 12 minutes Power Consumption: 1 watt Surge Protection: I.E.C. specs UL Listing: Raintight Photoelectric Switch SUITABLE FOR WET LOCATIONS...
- Page 30 CAUTIONS: TURN OFF ALL POWER AT CIRCUIT BREAKER/FUSE PANEL. • Read entire Installation Manual before proceeding. • All wiring should comply with local electrical codes and requires a qualified electrician • The total lighting load connected to a STEALTH must not exceed 8 amps (300W on LED fixture).
- Page 31 How does the STEALTH work? STEALTH’s infrared sensor “sees” small temperature changes caused by the motion of people or cars within its protection zone and turns on lights auto- matically. It welcomes visitors and may deter intruders. How long do the lights stay on? Time, Sensitivity, and Photocell Lights remain on as long as there adjustments...
- Page 32 Always keep the sensor level to ensure full coverage. To reduce coverage tilt the sensor down. 30’ STEALTH STL200 comes with a stan- dard “Double Look Down” Lens. This lens has one “Look Out” zone and two “Look Down” zones for excellent detection at both long and short range.
- Page 33 Wiring Diagrams Multiple Fixtures Basic Wiring Diagram White Ground Power In Black Sensor Basic Kit Wiring Diagram • Multiple fixtures may be wired to Note: Pigtail is only used to switch a single sensor remote or additional light fixtures. • To handle loads greater than 300 (pigtail) watts, a qualified electrician should install a relay.
- Page 34 Aiming and Walk Testing Walk Test: 3. Adjust the sensor aiming as The purpose of the Walk Test is needed to improve coverage. to check and adjust the coverage 4. To adjust sensitivity, turn knob pattern. STEALTH has a 5 minute Test gently.
- Page 35 Technical Tips: Lights Turn On for Unknown Reasons 1. Lights may turn on occasionally 3. You may not be aware of animals during rain, snow and windstorms triggering the sensor. Create an because the sensor detects “Animal Alley” by aiming sensor changes in temperature.
- Page 36 Technical Tips: Lights Do Not Turn Off 1. Make sure the sensor is not in 3. Make sure sensor and lights are Manual Override Mode. Turn mounted firmly and do not move, power OFF for 10 seconds and even slightly, when touched. If then ON again.
- Page 37 Technical Tips: Lights Turn On and Off Incorrectly 1. Make sure the sensor is installed 6. Make sure sensor is not aimed on its own dedicated circuit, free within 20 ft of a road or sidewalk. of motor loads such as HVAC Passing cars will activate sensor.
- Page 38 Technical Tips: Lights Do Not Turn On Lights Turn Off Too Quickly 1. Check that lamps and fixtures 1. Check if the sensor is being work. Compare wiring to the “tricked” by reflected light. If Wiring Diagram in this manual. lights controlled by the sensor Check that the power is on.
- Page 39 Technical Tips: Range Appears Limited 3. Check that movement is not 1. Check that the sensor is level directly towards sensor. Sensor from side to side and pointed will see movement across its at desired area. If unit is tilted, pattern more quickly.
- Page 40 $30.00 (made out to RAB Lighting). We will repair or replace your unit. For repair or replacement, return the product, freight prepaid and insured,...
- Page 41 • Wire Nuts (3) Easy Installation & Product Help Tech Help Line rabweb.com email ©2016 RAB LIGHTING Inc. Call our experts 888 RAB-1000 Visit our website for product info Answered promptly sales@rabweb.com Northvale, New Jersey 07647 USA STL200LED/277V IN 0216...
- Page 42 STEALTH STL200-LED Installation Manual STL200-LED Specifications: Switching Capacity: 8 amps Voltage: 120 volts 300W on LED fixture Detection Pattern: 50’ x 2000 Time Adjustment: 5 seconds to 12 minutes Power Consumption: 1 watt Surge Protection: I.E.C. specs UL Listing: Raintight Photoelectric Switch SUITABLE FOR WET LOCATIONS...
- Page 43 CAUTIONS: TURN OFF ALL POWER AT CIRCUIT BREAKER/FUSE PANEL. • Read entire Installation Manual before proceeding. • All wiring should comply with local electrical codes and requires a qualified electrician • The total lighting load connected to a STEALTH must not exceed 8 amps (300W on LED fixture).
- Page 44 How does the STEALTH work? STEALTH’s infrared sensor “sees” small temperature changes caused by the motion of people or cars within its protection zone and turns on lights auto- matically. It welcomes visitors and may deter intruders. How long do the lights stay on? Time, Sensitivity, and Photocell Lights remain on as long as there adjustments...
- Page 45 Always keep the sensor level to ensure full coverage. To reduce coverage tilt the sensor down. 30’ STEALTH STL200-LED comes with a standard “Double Look Down” Lens. This lens has one “Look Out” zone and two “Look Down” zones for excellent detection at both long and short range.
- Page 46 Wiring Diagrams Multiple Fixtures Basic Wiring Diagram White Ground Power In Black Sensor Basic Kit Wiring Diagram • Multiple fixtures may be wired to Note: Pigtail is only used to switch a single sensor remote or additional light fixtures. • To handle loads greater than 300 (pigtail) watts, a qualified electrician should install a relay.
- Page 47 Aiming and Walk Testing Walk Test: 3. Adjust the sensor aiming as The purpose of the Walk Test is needed to improve coverage. to check and adjust the coverage 4. To adjust sensitivity, turn knob pattern. STEALTH has a 5 minute Test gently.
- Page 48 Technical Tips: Lights Turn On for Unknown Reasons 1. Lights may turn on occasionally 3. You may not be aware of animals during rain, snow and windstorms triggering the sensor. Create an because the sensor detects “Animal Alley” by aiming sensor changes in temperature.
- Page 49 Technical Tips: Lights Do Not Turn Off 1. Make sure the sensor is not in 3. Make sure sensor and lights are Manual Override Mode. Turn mounted firmly and do not move, power OFF for 10 seconds and even slightly, when touched. If then ON again.
- Page 50 Technical Tips: Lights Turn On and Off Incorrectly 1. Make sure the sensor is installed 6. Make sure sensor is not aimed on its own dedicated circuit, free within 20 ft of a road or sidewalk. of motor loads such as HVAC Passing cars will activate sensor.
- Page 51 Technical Tips: Lights Do Not Turn On Lights Turn Off Too Quickly 1. Check that lamps and fixtures 1. Check if the sensor is being work. Compare wiring to the “tricked” by reflected light. If Wiring Diagram in this manual. lights controlled by the sensor Check that the power is on.
- Page 52 Technical Tips: Range Appears Limited 3. Check that movement is not 1. Check that the sensor is level directly towards sensor. Sensor from side to side and pointed will see movement across its at desired area. If unit is tilted, pattern more quickly.
- Page 53 $30.00 (made out to RAB Lighting). We will repair or replace your unit. For repair or replacement, return the product, freight prepaid and insured,...
- Page 54 • Wire Nuts (3) Easy Installation & Product Help Tech Help Line rabweb.com email ©2016 RAB LIGHTING Inc. Call our experts 888 RAB-1000 Visit our website for product info Answered promptly sales@rabweb.com Northvale, New Jersey 07647 USA STL200LED IN 0616...
Need help?
Do you have a question about the Stealth STL200 and is the answer not in the manual?
Questions and answers