
Related Manuals for OpeMed OT200


Summary of Contents for OpeMed OT200
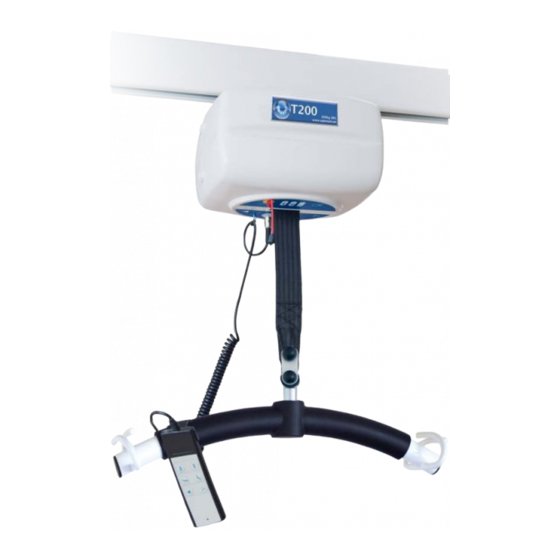
- Page 1 Technical Manual: OT200 Compact Ceiling Hoist OpeMed (Europe) Ltd www.opemed.net +44 (0)1252 758858 January 2017 | Ref 1120 | OT200 Compact Ceiling Hoist User Manual...
-
Page 2: Table Of Contents
5.1.2 Clip Slings (depends on clip sling used – please refer to sling instructions) .. 1 2 USING THE OT200 CEILING HOIST .................. 1 2 6.1.1 Before Use Checks ...................... 1 2 ... - Page 3 FOR TRAINED AND CERTIFIED OPEMED PARTNERS ONLY +44 (0)1252 758858 / info@opemed.net .................... 2 0 OARD A ND IAGNOSIS CREEN ....................... 2 1 EPLACING T HE ...
-
Page 4: About This Manual
+44 (0)1252 758858 / info@opemed.net 1 About this Manual The aim of this user manual is to enable qualified personnel to operate the OT200 and to instruct them on how to carry out small (preventive) maintenance jobs. This manual deals with the following aspects related to operating the OT200 and OT400: Parts description •... -
Page 5: The Ot200 Ceiling Hoist
Next to this the hoist can be used for transfers to and from the floor. With this the OT200 also complies to the demands set by the European Standards, ISO 10535 and the GQ-quality mark T-02, cluster UTT. -
Page 6: Attention
Working Load (SWL) in combination with an appropriate sling rated same or higher, the OT200 can only be used for this purpose. Any other form of use is not allowed. It is not allowed to lift more than 200kg (440lbs) with the OT200, unless otherwise stated •... - Page 7 10 years (100,000 transfers) for maintenance according to specifications. Use of the OT200 in a humid environment or in an environment with aggressive vapours are not “normal circumstances” and can shorten the life of components. If the motor is used in such environment please ask for our Humid Environment Upgrade.
-
Page 8: Summary Of Parts
+44 (0)1252 758858 / info@opemed.net Summary of Parts The ‘OT200’ ceiling hoist system consists of a number of components that are discussed in this handbook. In Figure 1 shows the main components. These are described in a separate section. 1 ... -
Page 9: Lights
The display on the OT200 is the battery status. The orange/yellow light on the display lights up when charging and turns off when the batteries are full. The light flashes when the battery is low. -
Page 10: Using The Rail System
An XY rail system is a system where two rails are put, where a movable rail angles below will be hung from the ceiling. The OT200 will charge at the end of the moving rail and the moving rail needs pushing normally to the end of the fixed rail for charging to commence. -
Page 11: Hanger Bar Options
4 Hanger Bar Options 4.1 Hanger Bar The OT200 is provided with a hanger bar. The hanger bar is a construction to which the sling (in which the patient/user will take place) can be attached. Several types of hanger bars are available, of which the balanced and the powered hanger bar are the most important types. -
Page 12: Slings
• Always refer to the sling user guide. • Always check the weight capacity of the sling and ensure it is not more than the OT200. • 5.1.2 Clip Slings (depends on clip sling used – please refer to sling... -
Page 13: Lifting From A Chair
FOR TRAINED AND CERTIFIED OPEMED PARTNERS ONLY +44 (0)1252 758858 / info@opemed.net Always make clear to the patient/user what is happening with every step of the process! • • Pay attention to the danger of getting entangled between the hinging points of the hanger bar. -
Page 14: Step 1A Lifting Towards A Bed
FOR TRAINED AND CERTIFIED OPEMED PARTNERS ONLY +44 (0)1252 758858 / info@opemed.net 6.1.5 Step 1a Lifting Towards a Bed Bring the patient/user into a lying position. Position the patient as good as possible • above the bed. Lower the patient/user onto the bed until he or she completely lies flat on the bed. -
Page 15: Maintaining The Ot200 Ceiling Hoist
+44 (0)1252 758858 / info@opemed.net 7 Maintaining the OT200 Ceiling Hoist If any doubt occurs about the condition or functioning of the OT200 always contact the technical service department before use. OpeMed hoists should ONLY be serviced by an authorised OpeMed partner or OpeMed themselves. -
Page 16: Cleaning Instructions
Alarm the technical service department 7.4 6 Monthly Checks Maintenance list that must be carried out every six months to the OT200, according to manufacturer’s instructions, LOLER and ISO10535. This is to be carried out by an approved, trained and competent technician, documented and recorded. -
Page 17: Aintenance
The safety factor indicates the number of times that it would be necessary to multiply the If maintained by an authorised person the OT200 hoist should have a sticker that maximum device loading before the rail becomes unsafe and damaged. -
Page 18: Preventative Maintenance
In addition please refer to the Troubleshooting Guide 7.8 Disposal • For disposal the OT200 can be returned to OpeMed. This is also possible with batteries, chargers, slings etc. If you choose to dispose the batteries yourself, be aware of the fact that these batteries are chemical waste. -
Page 19: Troubleshooting
Top Left Button, Middle Button, Bottom Right Button OT200 Lifting Belt descends down To prevent that the OT200 (with weight) slowly with little or no weight applied. descending, a small current is applied to the motor. -
Page 20: Service P Rocedures
This can cause serious injury! 9.2 PCB Board and Diagnosis Screen When the cover of the OT200 has been removed, you can see the PCB control board. On this PCB there is a LC display and on which the letters correspond to the control functions of the cassette. -
Page 21: Replacing The Battery
To prevent failure of the hoist it is recommended to replace the batteries every two years. The exchange must be done by authorized persons who are familiar with the product. Use only original OpeMed batteries. Below is a description of how the batteries must be exchanged. -
Page 22: Maintenance
ü Remind the user on correct operation. TIP - These parts are operated with a magnet switch that operates when the OT200 motor is in the vicinity. The magnetic sensor is on the outside of the rail (in a turntable inside the rotatable middle rail). -
Page 23: Parts L Ist O T200
FOR TRAINED AND CERTIFIED OPEMED PARTNERS ONLY +44 (0)1252 758858 / info@opemed.net 10 Parts L ist O T200 art.nr. naam art.nr. naam 17107190 Cover OT200 II 17107290 Battery Securing band 17107200 Bottom Cover OT200 II 17105130 Toggle switch for emergency... - Page 24 FOR TRAINED AND CERTIFIED OPEMED PARTNERS ONLY +44 (0)1252 758858 / info@opemed.net Charging S trip o n t op o f H oist Geel/Yellow o r B lue ...
- Page 25 FOR TRAINED AND CERTIFIED OPEMED PARTNERS ONLY +44 (0)1252 758858 / info@opemed.net 10.1 Charging System Parts List art.nr. Name art.nr. Name 17106990 Charger 17106740 Sticker ‘charging position’ 17106700-E Plug (Europa) 17400210 Interface sensor 17106700-U Plug (UK) 3 & 17400200 Charging Station...
- Page 26 FOR TRAINED AND CERTIFIED OPEMED PARTNERS ONLY +44 (0)1252 758858 / info@opemed.net 10.2 Parts List: Gate art.nr. naam art.nr. naam 17400680 Electrical moving gate kit 17104190 Magnetic switch for gate 17400690 Mechanical gate kit 17104180 Magnet slide 17400700 Moving “male” block...
-
Page 27: Electric S Chematic G Ate
FOR TRAINED AND CERTIFIED OPEMED PARTNERS ONLY +44 (0)1252 758858 / info@opemed.net 10.2.1 Electric S chematic G ate Geel = Y ellow Groen = G reen Bruin = B rown ... -
Page 28: Arts List : Turntable
FOR TRAINED AND CERTIFIED OPEMED PARTNERS ONLY +44 (0)1252 758858 / info@opemed.net 10.3 Parts List: Turntable art.nr. naam art.nr. naam 17104250 Gearmotor 17106990 Magnet switch 17104260 Gear 17104981 Flat cable 17106762 Turntable PCB 17106210 Spring 10100290 Micro switch Turntable 17104370... -
Page 29: Wiring S Chematic T Urntable
FOR TRAINED AND CERTIFIED OPEMED PARTNERS ONLY +44 (0)1252 758858 / info@opemed.net 10.3.1 Wiring S chematic T urntable Geel = Y ellow Groen = G reen Bruin = B rown ... -
Page 30: Cradles
FOR TRAINED AND CERTIFIED OPEMED PARTNERS ONLY +44 (0)1252 758858 / info@opemed.net 10.4 Parts List: Spreader Bars and Cradles 10.4.1 Electric a nd M anual C radle O ption Electric C radle ... -
Page 31: Parts L Ist: 2 P Oint S Preader B Ar ( Standard O N O T200)
FOR TRAINED AND CERTIFIED OPEMED PARTNERS ONLY +44 (0)1252 758858 / info@opemed.net 10.4.2 Parts L ist: 2 P oint S preader B ar ( Standard o n O T200) art.nr. -
Page 32: Arts List : Track
FOR TRAINED AND CERTIFIED OPEMED PARTNERS ONLY +44 (0)1252 758858 / info@opemed.net 10.5 Parts List: Track Page 32 of 35 OT200 Compact Technical Manual.docx 12/05/15... -
Page 33: Warranty S Tatements
• on any parts that are exposed to wear, such as wheels, slings, hoisting belts or batteries. This warranty does not apply to damage or failure of the OT200/OT400 which is caused • by improper or un-professional use or repairs done by others than OpeMed. The judgement on this part lies with OpeMed or an by OpeMed appointed representative. -
Page 34: About Opemed
• Other transfer aids • Accessories for transfer aids • Training and advise • The vision, services and products of OpeMed make OpeMed the perfect partner for carers and patient/users. 13.1.1 Contact D etails OpeMed (Europe) Ltd Dogflud Way... -
Page 35: Eg - Statement Of Conformity
GU9 7UD Hereby declare under our own responsibility that the: The OT200/ OT400 ceiling hoist system and all attached parts to which this declaration relates and which fall within Class I of the European Medical Devices Directive, in accordance with the provisions of the following directive:... - Page 36 FOR TRAINED AND CERTIFIED OPEMED PARTNERS ONLY +44 (0)1252 758858 / info@opemed.net Page 36 OT200 Compact Technical Manual.docx 12/05/15...
Need help?
Do you have a question about the OT200 and is the answer not in the manual?
Questions and answers