Table of Contents
Advertisement
Advertisement
Table of Contents

Related Manuals for rainforest EAGLE-200


Summary of Contents for rainforest EAGLE-200
- Page 1 ™ EAGLE-200 Intelligent Control Gateway User Manual Version 1.00 Oct 2017...
- Page 2 Rainforest Automation may have patents, patent applications, trademarks, copyrights, or other intellectual property rights covering subject matter in this document. Except as expressly provided in any written license agreement from Rainforest Automation, the furnishing of this document does not give you any license to these patents, trademarks, copyrights, or other intellectual property.
-
Page 3: Table Of Contents
Quick Setup ........................6 Step 1: Prerequisite software and hardware ..............6 Step 2: Register your EAGLE-200 ................6 Step 3: Power up your EAGLE-200 ................6 WiFi Setup ........................8 Step 1: Power up your EAGLE-200 ................8 Step 2: Enable the WiFi radio ..................9 Step 3: Connect to WiFi .................... -
Page 4: Regulatory Information
™ EAGLE-200 User Manual Regulatory information FCC Notices This device complies with part 15 of the FCC Rules. Operation is subject to the following two conditions: (1) This device may not cause harmful interference, and (2) this device must accept any interference received, including interference that may cause undesired operation. -
Page 5: Introduction To Your Eagle-200
Rainforest Cloud. Your EAGLE-200 will help you track the energy consumption of your home – whether you are home or not. This will help you take control of your usage, and allow you to save energy and lower your utility bills. -
Page 6: Quick Setup
3) A utility meter with a certified Zigbee radio less than 100 feet from the EAGLE-200. Step 2: Register your EAGLE-200 Your EAGLE-200 device must be registered with your utility to connect to the smart meter. You will need to contact your utility with two numbers (MAC... - Page 7 Plug the AC adapter into a nearby wall outlet, and plug the other end into the power socket on the EAGLE-200. It is important that only the included 5v adapter is used to power your EAGLE-200. If another adapter is used, it may cause permanent damage to the unit.
-
Page 8: Wifi Setup
User Manual WiFi Setup Sometimes it is not possible to use the Ethernet cable to connect the EAGLE-200 to your router. For instance, if the router is too far away from your utility meter, it may be beyond the range of the meter’s Zigbee radio. Or, there may not be an available port on your router. -
Page 9: Step 2: Enable The Wifi Radio
Your EAGLE-200 is shipped from the factory with the WiFi radio disabled. To enable the WiFi radio, insert a pen or paperclip wire into the small hole labeled “1” on the far left of the back of the EAGLE-200 and press and hold the internal switch for 5 seconds. -
Page 10: Step 4: Configure Wifi
EAGLE-200 User Manual c) To login, enter username = the Cloud ID and password = Install Code (both can be found on the EAGLE-200 label). Step 4: Configure WiFi a) After logging in, you will see the “Wi-Fi Configuration” page. - Page 11 ™ EAGLE-200 User Manual c) Select your home WiFi network from the list, and you will see a prompt for your WiFi password. d) Enter the password for your home WiFi network, and click the “Join” button.
- Page 12 Wait for the EAGLE-200 WiFi LED light ( ) to go from blinking to constantly At this point, your EAGLE-200 is connected to your home router via WiFi. Now go to the Connect to the Cloud section of this manual.
-
Page 13: Connect To The Cloud
EAGLE you are using. Select the EAGLE-200 (with five lights). b) This will bring up the Rainforest Login page. Click on the word “Register” in the top right of the screen. c) You will see the “Account Registration” form. (1) Fill in your email address, (2) check the box to agree to our EULA, (3) click the “I’m not a robot”... -
Page 14: Step 2: Connect To Your Eagle-200
™ EAGLE-200 User Manual d) Check your email to find the message from Rainforest Automation with the subject line “EAGLE Cloud Account activation”. Click the red box in the email with the “SETUP PASSWORD FOR MY ACCOUNT” link. e) This link will take you to the first “Account Registration” page. Set up your password and click “Next”. - Page 15 EAGLE-200 User Manual d) Enter the 6-digit Cloud ID and 16-digit Install Code (with no spaces) from the label of your EAGLE-200, and click “Add EAGLE”. You should see the EAGLE-200 appear on the “Your EAGLEs” list. e) Click “Home” at the top of the page to see your real-time data form your...
-
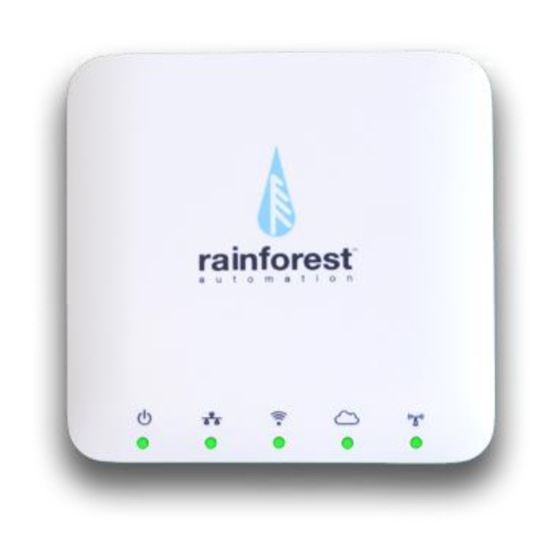
Page 16: Eagle-200 Status Led Lights
User Manual EAGLE-200 Status LED Lights The EAGLE-200 has five LED lights at the front of the top of the device. These lights are a quick way to check the status of the device. Power LED – shows that the device is powered on. The light should always be on when the unit is plugged in. -
Page 17: Eagle-200 Hardware Ports
This should be plugged in first before plugging the power in. • USB – This socket can be used to expand the functions of the EAGLE-200. Nothing should be plugged into this socket. -
Page 18: Using Your Cloud Account
Your Cloud Account on rainforestcloud.com makes it easy for you to connect to your EAGLE-200 from anywhere. When you first log in, you are in the Home screen, which shows a graph of your last 5 minutes of electrical usage. -
Page 19: Troubleshooting Guide
EAGLE-200, as described in item #3 below. 2. The EAGLE-200 is not connected to the meter. If the Zigbee radio connection to the meter is not active, then the EAGLE-200 will not be receiving data to send up to the cloud. -
Page 20: Technical Support
Please contact Rainforest Technical Support for assistance with this. 3. The EAGLE-200 needs to be rebooted. To reboot the EAGLE-200 gateway, unplug the power cord, wait 10 seconds, and plug it back in again. Allow three minutes for the gateway to boot up. Technical Support Contact us at: http://support.rainforestautomation.com...
Need help?
Do you have a question about the EAGLE-200 and is the answer not in the manual?
Questions and answers