Advertisement
Quick Links
its Space. its Budget
Approx. 30 minutes
Recomm. 2 Person
Tools Required
Customer Service
Tel/Fax: 281.500.9372
Toll Free: 773.299.8111 (Mon - Fri 9am - 5pm)
Email: support@furinno.com
www.furinno.com
STEP 1
Insert Dowel(2)and Cam-Lock Nut(4)into the pre-drilled holes on Panel(C,D,E,F,G,H).
(4)x2pcs
(2)x2pcs
Arrow on Cam-Lock
Nut(4) should be polnting
4
towarcls holes.
STEP 2
Install Nail Leg(3)to the bottom of
Panel(C)(D)&(H)using hammer.
(3)x2pcs
Assembly Instruction
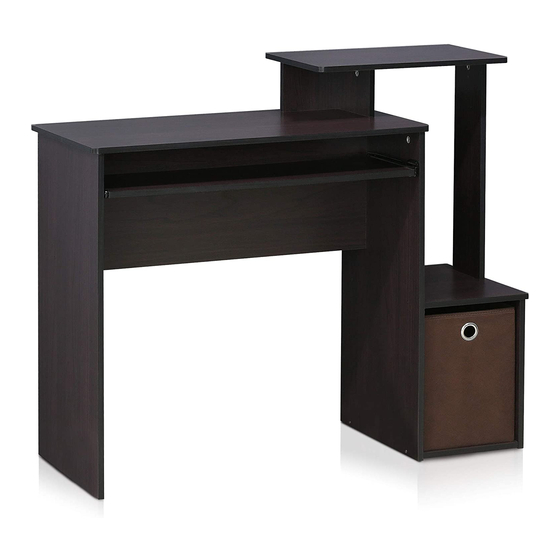
Furinno Econ Multipurpose Home Office
Computer Writing Desk w/Bin
12095
MODEL
:
DIMENSION :
39.4"(W) x 34.1"(H) x 15.8"(D)
1209520140523
STEP 3
Screw Cam-Lock Screw(5)into the
pre-drilled holes on Panel(A)(B)&(I).
(5)x7pcs
No
Hardware List
Screw
1
2
Wooden Dowel
Nail Leg
3
Cam-Lock Nut
4
5
Cam-Lock Screw
6
Power Pin
7
Drawer Slide
Keyboard Screw
8
9
Non-Wooven Bin
B
F
G
E
A
L
L
M
K
D
C
USEFUL HINTS BEFORE YOU START:
1. Read each step carefully before starting.
2. It is important that each step is performed in correct order to avoid difficulties.
3. Identify, sort and count the parts before assembly.
4. Assemble your furniture on packaging cardboard to prevent scratch or damage.
5. Clean the product with mild cleanser using soft damped cloth. Do not use harsh or abrasive cleanser.
6. Using uncompatible hardware might cause damage to product.
STEP 4
Fix Drawer Slide(7)to Panel(L)using Screw(8).
Note: Please make sure L&R Side of Drawer Slide(7) before attach it.
(8)x4pcs
STEP 5
Fix Drawer Slide(7)to Panel(C)&(D)using Screw(8).
Note: Please make sure L&R Side of Drawer Slide(7) before attach it.
Qty
No
Parts List
Top Panel 1
A
18pcs
B
Top Panel 2
12pcs
C
Left Side Panel
6pcs
Right Side Panel
7pcs
D
7pcs
E
Side Support Panel
12pcs
F
Top Support Panel 1
Top Support Panel 2
1pcs
G
8pcs
H
Bottom Side Panel
1pcs
I
Shelf Panel
J
Bottom Panel
K
Back Panel
Keyboard Panel
L
M
Back Cover
I
H
J
9
Front Side
(8)x4pcs
Qty
1pcs
1pcs
1pcs
1pcs
1pcs
1pcs
1pcs
1pcs
1pcs
1pcs
1pcs
1pcs
1pcs
Advertisement

Related Manuals for Furinno 12095


Summary of Contents for Furinno 12095
- Page 1 Nail Leg Left Side Panel 1pcs 6pcs Assembly Instruction Cam-Lock Nut Right Side Panel 7pcs 1pcs Furinno Econ Multipurpose Home Office Cam-Lock Screw 7pcs Side Support Panel 1pcs Computer Writing Desk w/Bin Power Pin 12pcs Top Support Panel 1 1pcs...
- Page 2 STEP 6 STEP 7 STEP 9 Attach Panel(E)to Panel(I)using Screw(1). Attach Panel(J)to Panel(H)using Screw(1) Attach Panel(C)to the assembled unit using Screw(1). and tighten Cam-Lock Nut(4)on Panel(H) using screwdriver. (1)x2pcs (1)x4pcs (1)x2pcs STEP 8 STEP 10 Attach the assembled unit to Panel(D)&(K) using Screw(1),as shown. 10.1 Attach Panel(G)to Panel(F)using Screw(1).
Need help?
Do you have a question about the 12095 and is the answer not in the manual?
Questions and answers