Table of Contents
Advertisement
Quick Links
®
Tower Hobbies
guarantees this kit to be free
from defects in both material and workmanship
at the date of purchase. This warranty does not
cover any component parts damaged by use or
modification. In no case shall Tower Hobbies' liability
exceed the original cost of the purchased kit. Further, Tower
Hobbies reserves the right to change or modify this warranty
without notice.
In that Tower Hobbies has no control over the final assembly or
material used for final assembly, no liability shall be assumed nor accept-
ed for any damage resulting from the use by the user of the final user-assem-
bled product. By the act of using the user-assembled product, the user accepts
all resulting liability.
If the buyer is not prepared to accept the liability associated with the use of this
product, the buyer is advised to return this kit immediately in new and unused condition
to the place of purchase.
To make a warranty claim, contact: airsupport @hobbico.com
WARNING! This product may use a lithium polymer (LiPo) battery. Improper handling may result in FIRE! You are responsible for
following all safety precautions as outlined in this instruction manual.
®
© 2018 Tower Hobbies.
A subsidiary of Hobbico, Inc.
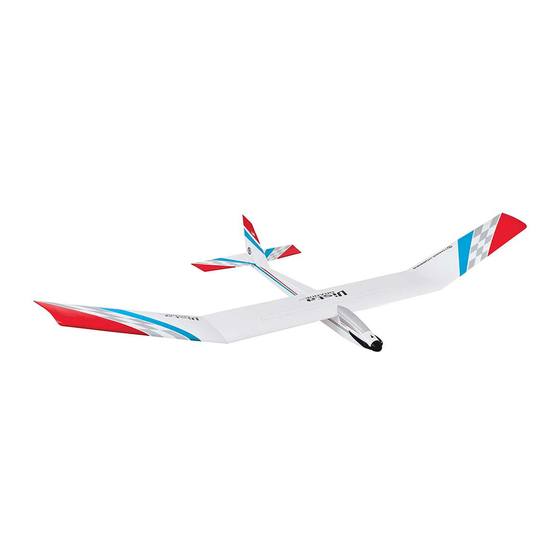
WINGSPAN
100 in [2540 mm]
LENGTH
49.5 in [1257mm]
INSTRUCTION MANUAL
WING AREA
616 sq in [39.7 dm
WING LOADING
14.1–15.7 oz/ft
2
[43.0 – 47.9 g/dm
READ THROUGH THIS MANUAL
BEFORE STARTING CONSTRUCTION.
INSTRUCTIONS AND WARNINGS
CONCERNING THE ASSEMBLY
AND USE OF THIS MODEL.
1
2
]
3.8 – 4.2 lb [1724 – 1905g]
2
]
IT CONTAINS IMPORTANT
TOWER HOBBIES
WEIGHT
RADIO
4+ Channel
TOWA2045 v1.1
Advertisement
Table of Contents

Related Manuals for Tower Hobbies VISTA GRANDE EP


Summary of Contents for Tower Hobbies VISTA GRANDE EP
-
Page 1: Instruction Manual
INSTRUCTIONS AND WARNINGS without notice. CONCERNING THE ASSEMBLY In that Tower Hobbies has no control over the final assembly or material used for final assembly, no liability shall be assumed nor accept- AND USE OF THIS MODEL. ed for any damage resulting from the use by the user of the final user-assem- bled product. -
Page 2: Table Of Contents
Vista Grande powered glider! The Vista Grande is the largest groups of people. of the Tower Hobbies Vista sailplane series. The Grande boasts a long 100" wingspan with a dedicated spoiler and comes equipped with the powerful RimFire .32 (42-50-800) SAFETY PRECAUTIONS brushless outrunner motor, 13.5 x 7 folding propeller and... -
Page 3: Safety Precautions
6. You must check the operation of the model before every fl ight to ensure that all equipment is operating and that the NEVER touch the motor during or right after operation. The model has remained structurally sound. Be sure to check motor gets HOT! clevises or other connectors often and replace them if they NEVER switch off the transmitter with the motor batteries... -
Page 4: Required Items
At least 4 channels are needed to operate the Vista Grande Epoxy Brushes (GPMR8060) controls. Because the spoiler needs to be operated by a Tower Hobbies Build-It CA Thin Glue (TOWR3800) switch, dial, or slider, we recommend the Tactic TTX610 Tower Hobbies Build-It CA Medium Glue (TOWR3801) -
Page 5: Optional Supplies And Tools
Vista Grande, TopFlite MonoKote offers colors that are a close match and are readily available from Tower Hobbies or your local R/C hobby supplier. The You will see this symbol anytime rolls are sold in either 6' or 25' lengths (part numbers for epoxy is recommended. -
Page 6: Contents
CONTENTS 1. Center Wing w/ Spoiler 2. Outer Wing Panels 3. Fuselage 4. Canopy Hatch 5. Horz. Stab w/Elevator 6. Vert. Fin w/Rudder 7. Wing Joiners 8. ESC 9. Spinner Cone 10. Folding Prop Blades 11. Spoiler Servo Tray 12. Wing Dowels, Bolt Plate, Alignment Pins 13. - Page 7 Any epoxy that squeezes out can be wiped away with a paper to confi rm the anti-rotation pins fi t properly into the holes towel dampened with denatured alcohol. Use a few clamps in the outer panels. If necessary, make adjustments to the to hold the pieces together while the epoxy hardens.
- Page 8 6. Peel the covering from the wing. Glue the wing bolt 8. Use sand paper to roughen the underside of the spoiler plate onto the wing. servo tray (180 or 220 grit is fi ne). Glue the servo tray with medium (or thick) CA or epoxy into the center wing section at the location shown.
- Page 9 10. A roll of clear tape is included to hinge the spoiler to the wing center section (if you ever need to replace the hinge tape, regular, clear offi ce tape will work fi ne). Center the spoiler in the opening on the wing and confi rm the fi t. The spoiler should lay fl at in the opening and the leading edge must be tight to the sheeting.
-
Page 10: Fuselage Assembly
13. Use sand paper to round one end of each wing dowel. Glue the dowels into the holes in the leading edge of the wing center section. The dowels should protrude beyond the leading edge approximately 1/2" [13mm]. The dowels should be perpendicular to the leading edge of the wing. - Page 11 beneath the gussets like you did with the wing bolt plate. The short gusset should be installed on the left side toward the aft end of the fi n. 4. Use 30-minute epoxy to glue the vertical fi n in place. Ensure the fi n is perpendicular to the stab while the epoxy cures.
- Page 12 BUILDER TIP MUST-HAVE ACCESSORY Installing clevises onto pushrods can be tedious using pliers and your fi ngers. Using a wrench is a little easier but it has a tendency to slip off the hexagonal base and is awkward to use. Picking up a clevis installation tool will make short work of getting clevises threaded onto pushrods and is way easier on your fi ngers.
- Page 13 installing the recommended Tactic servo, drill the holes with bend at your mark. Cut off the excess pushrod 1/4" [6mm] a 1/16" [1.6mm] drill bit. Threading a servo mounting screw beyond the bend. Fit the bent end of the pushrod wire into into each hole and then removing it, followed by a drop of the servo arm hole and secure it with a 90 degree pushrod thin CA in the hole, will harden the surrounding wood for a...
- Page 14 1" [25mm]. Be sure the strap will be long enough to wrap through the slots in the battery tray and around your battery. Apply the hook side from the self-adhesive hook and loop material to the battery tray. 14. Mix up a small batch of epoxy (6-minute is fi ne) and apply a thin coating in the dashed areas shown here.
-
Page 15: Get The Model Ready To Fly
FAIL SAFE AND BRAKE FUNCTION GET THE MODEL READY TO FLY While you have your radio operational and Check the Control Directions without the propeller mounted, set and check the Fail Safe function in your transmitter. Refer to DO NOT INSTALL THE PROPELLER UNTIL the instructions that came with your radio control system INSTRUCTED TO. -
Page 16: Preparing To Balance The Model
Preparing to Balance the Model LESS Pushrod Farther Out THROW Pushrod Closer In 1. Assemble the folding propeller as shown. Fit the propeller MORE blades into the hub and then install the pins. The locknuts THROW should be just tight enough so the blades still rotate freely on the pins. -
Page 17: Balance The Model Laterally
the spinner cone using the included 2.5 x 22mm fl at head Recommended C.G machine screw. Confi rm that the spinner backplate does 3 -1/2" [ 89 mm ] not contact the fi rewall. If it does, remove the assembly and from wing leading edge back the collet prop adapter away from the fi rewall slightly. -
Page 18: Ground Check And Range Check
ALWAYS follow the charging instructions included with your CAUTION: Unless the instructions that came with your radio charger for charging LiPo batteries. LiPo batteries can cause system state differently, the initial charge on new NiMH serious damage if misused. transmitter batteries should be done for 15 hours using the slow-charger that came with the radio system. -
Page 19: Flying
AND to teach you how to fl y. No matter how stable or “forgiving” FLYING the Vista Grande is, attempting to learn to fl y on your own is dangerous and may result in destruction of your model CAUTION: (THIS APPLIES TO ALL R/C AIRPLANES): If, or even injury to yourself and others. -
Page 20: Landing
(avoid using motor power with the spoiler up). Be sure you have the motor off before the Vista is near the ground. © 2018 Tower Hobbies. ® TOWA2045 v1.1 A subsidiary of Hobbico, Inc. ...
Need help?
Do you have a question about the VISTA GRANDE EP and is the answer not in the manual?
Questions and answers