Table of Contents
Advertisement
Quick Links
See also:
Service Notes
Owner's Manual
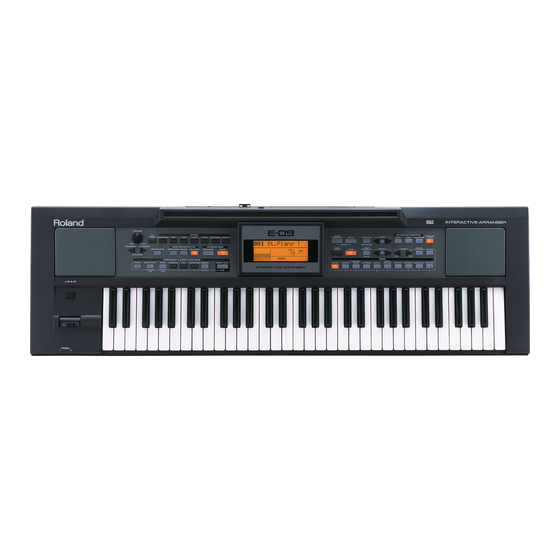
Thank you, and congratulations on your choice of the Roland E-09.
Before using this unit, carefully read the sections entitled: "USING THE UNIT SAFELY" and "IMPORTANT
NOTES" (pp. 2–3; p. 4). These sections provide important information concerning the proper operation of
the unit. Additionally, in order to feel assured that you have gained a good grasp of every feature provided
by your new unit, Owner's manual should be read in its entirety. The manual should be saved and kept on
hand as a convenient reference.
Conventions Used in This Manual
Operating buttons are enclosed in square brackets; e.g., [PIANO].
Page references are given as (p. **).
The special symbols have the following meanings.
This indicates an important note you must read.
This indicates a memo regarding settings or functionality. Read it as necessary.
This indicates a hint for operation. Read it as necessary.
This indicates a reference to related information. Read it as necessary.
This explains a term that may be unfamiliar. Read it as necessary.
Glossary of Terms
"Tones" are the sounds you will normally play on the E-09. If we use the analogy of an orchestra, a "tone"
corresponds to an instrument held by a musician. Each tone also includes parameters (settings) such as
effects. (p. 10)
The "Arranger" is the E-09's automatic accompaniment function. (p. 13)
"Music Styles" are musical templates used by the arranger. The E-09 contains a variety of built-in music
styles, such as rock, dance, Latin, and jazz. (p. 14)
"Music Assistant" settings specify the type of tone and music style, together with other settings such as the
keyboard part and various additional parameters. The E-09 contains a variety of built-in music assistant
settings. (p. 15)
"User Programs" specify the type of tone and music style, together with other settings such as the keyboard
part and various additional parameters. You can edit the settings and save them as a user program. (p. 16)
"Songs" are recordings you make of your own performances using the 16-track recorder. You can create a
song by adding the arranger to your own keyboard performance. (p. 19)
Copyright © 2005 ROLAND CORPORATION
All rights reserved. No part of this publication may be reproduced in any form without the written
permission of ROLAND CORPORATION.
Advertisement
Table of Contents

Related Manuals for Roland E-09


Summary of Contents for Roland E-09
-
Page 1: Conventions Used In This Manual
Glossary of Terms “Tones” are the sounds you will normally play on the E-09. If we use the analogy of an orchestra, a “tone” corresponds to an instrument held by a musician. Each tone also includes parameters (settings) such as effects. -
Page 2: Using The Unit Safely
• When using the unit with a rack or stand recommended by Roland, the rack or stand must be carefully placed so it is level and sure to remain stable. If not using a rack or stand, you still need to make sure that any location you... - Page 3 The unit and the AC adaptor should be located so their location or position does not interfere with their proper ventilation. 101c • This (E-09) for use only with Roland stand KS-12. Use with other stands is capable of resulting in instability causing possible injury. 102c •...
-
Page 4: Important Notes
• Unfortunately, it may be impossible to restore the contents of data that was stored in the unit’s memory, or in another MIDI device (e.g., a sequencer) once it has been lost. Roland Corpo- ration assumes no liability concerning such loss of data. -
Page 5: Table Of Contents
Turning the Power On...8 Turning the Power Off ...9 Listening to the Demo Songs...9 Adjusting the Display Contrast ...9 Returning the E-09 to Its Factory-Set State ...9 Playing the Sounds from the Keyboard ...10 Playing the Main Part ...10 Playing the Main Part and Split Part...10 Playing the Main Part and Dual Part ...10... -
Page 6: Introduction
The headphone volume may decrease if you connect two sets of headphones. VOLUME Knob Adjusts the overall volume of the E-09. BALANCE (ARRANGER and KEYBOARD) Buttons These buttons adjust the volume balance between the accompaniment (or song) and the part you’re playing on the keyboard. -
Page 7: Attaching The Music Rest
12. MUSIC ASSISTANT Button Selects music assistants. (p. 15) 13. ONE TOUCH Button Selects one-touch settings. This will recall settings that are appropriate for the selected music style. (p. 14) 14. STYLE Button Selects music styles. (p. 14) 15. TONE Button Selects tones. -
Page 8: Rear Panel
Connecting an External Device If you want to record your performance (or a song recorded on the E-09) to a cassette tape or other media, connect the E-09’s rear panel OUTPUT jacks to the input jacks of your external recording device. -
Page 9: Turning The Power Off
Press the top panel power button once again to turn off the power. If you’ve connected the E-09 to a keyboard amp or audio amp, switch off the power to your amp before you switch off the E- 09’s power. -
Page 10: Playing The Sounds From The Keyboard
Playing the Sounds from the Keyboard Immediately after you’ve turned on the power, the E-09 is set up so that you can play a piano sound across the full extent of the keyboard. The E-09’s keyboard provides the following three “parts.”... -
Page 11: Selecting Tones
You can’t assign a drum set to the split part or dual part. Sound Effects (SFX) The E-09 contains numerous sound effects, drum, and percussion tones (551–614). You can assign these tones to a keyboard part and play them. These tones can be assigned to the main, split, or dual part and played across the entire range of the keyboard. -
Page 12: Transposing
Playing the Sounds from the Keyboard Transposing You can shift the pitch of your performance without changing the position at which you’re playing the keyboard. For example, if a song is in a difficult key containing numerous sharps or flats, you can transpose it so that it’s easier to play. -
Page 13: Performing With An Accompaniment (Arranger)
Performing with an Accompaniment (Arranger) Using the Arranger Press [ARRANGER] so it’s lit. The keyboard will be divided into left and right parts; “split” and “main.” In the left-hand side, hold down notes to specify a chord. In the right-hand side, play along with the accompaniment. -
Page 14: Selecting A Music Style
Performing with an Accompaniment (Arranger) Selecting a Music Style Press [ARRANGER] so it’s lit. Press [STYLE] so it’s lit. Use FAMILY [ ] to select one of the following groups. ROCK (001–006), DANCE (007–023), 8BEAT (024–036), 16BEAT (037–047), JAZZ (048–053), LATIN (054–063), TRADITIONAL (064–079), BALLROOM (080–097), WORLD (98–130) Use SELECT [... -
Page 15: Performance Functions And Effects
You can specify the range of pitch bend that will occur. For details, refer to “PB Range” (p. 22). Foot Switch You must connect the foot switch while the E-09’s power is switched off. Connect a separately available foot switch (Roland DP series unit or BOSS FS-5U) to the rear panel FOOT SWITCH jack. -
Page 16: User Program
Reverb simulates the ambience you experience when performing in a concert hall or other spacious location. When you switch on the E-09’s power, reverb will be applied to all keyboard parts (main, dual, split) as well as to the arranger and song parts. -
Page 17: Chorus
You can choose from eight types of chorus effect. When you switch on the E-09’s power, the amount of chorus applied to the keyboard parts (main, dual, split) is set to “0,” meaning that chorus will not be applied to the keyboard parts. - Page 18 Performance Functions and Effects Distortion 1–4 Produces a more intense distortion than Overdrive. You can choose from four types. Combines the original sound with a phase- Phaser shifted sound, and modulates it to pro- duce a twisting, swishing effect. AutoWah Cyclically moves a filter to create a repeat- ing wah effect (cyclic change in tone).
-
Page 19: Song Functions
Rec PunchI/O Re-record a specified region of a certain track. (punch-in/out) The E-09 can handle only one song. This song will not be erased even if you turn off the power. “Single” will be automatically selected after you perform the first recording. -
Page 20: Single Recording Mode
Song Functions Press [ ] to stop recording. ] and [● REC] go out. 10. When you stop recording, the screen prompts “Save Song?,” asking you whether you want to save your performance. To save your performance, press TEMPO [ If you don’t want to save your performance, press TEMPO (NO)]. -
Page 21: Playing The Song
Using a Foot Switch to Punch In/Out You can use a separately available foot switch (Roland DP series unit or BOSS FS-5U) to start or stop recording. This lets you use both hands for your performance; for example, allowing you to use your left hand to operate the pitch bend/modulation lever while you use your right hand to play the melody. -
Page 22: Function Menu
Function Menu The Function menu lets you make a variety of different settings. Parameters marked by “*” can be saved in a user program. (p. 16) Setting a Function Menu Parameter Here’s the basic procedure for setting a parameter of the Function menu. Press [FUNCTION] so it’s lit. -
Page 23: Metronome Parameters
Parameter Value Explanation Sustain, Assigns the function performed by a separately available foot switch connected to the rear panel FOOT Sostenuto, SWITCH jack. Soft, Sustain: Rotary S/F, Start/Stop, Sostenuto: The foot switch will function as a Sostenuto pedal, sustaining only the notes that had already BassInv, PunchI/O (default: Sus-... -
Page 24: Arr Set Parameters
OFF: When you take your hand off the left side of the keyboard, the arranger part instrumental sounds other ON: The chord you were playing in the left hand will be remembered. The arranger will continue playing * This parameter will be turned on each time you switch on the E-09’s power. Educational OFF, ON This is a function provided for educational purposes. -
Page 25: Kbd Scale Parameters
Parameter Value Explanation Pan DUAL * RND, L63–0–R63 Adjusts the stereo location (the position between the left and right speakers) of the Dual part. If you select (default: 0) “RND,” the stereo location will change randomly for each note you play. Values beginning with “L” po- sition the sound toward the left speaker, a value of “0”... -
Page 26: Midi Functions
MIDI Functions You can connect the E-09 to an external MIDI device and control each device from the other by transmitting and receiving performance data. For example, you can use one device to select or play sounds on the other device. -
Page 27: Midi Parameters
Turns transmission/reception of velocity data on/off. This applies only to note messages received via MIDI. (default: ON) If this is “ON,” the E-09 will use the velocity values that it receives. Otherwise, the E-09 will use the fixed ve- locity value (1–127) you specify here. -
Page 28: Bulk Dump
MIDI device back into the E-09 to restore (overwrite) the data via MIDI. Once you carry out the Bulk Load procedure, the user programs and song data in the E-09 will be overwritten. If there is any data in the E-09 that you want to keep, make sure to save it to an external MIDI device before you proceed. -
Page 29: Other Functions
Other Functions Transpose Lock Hold down [NUMERIC] and press [TRANSPOSE]. Once locked this way, the set transposition will remain in effect no matter what you do on the instrument. * To release the lock, once again hold down [NUMERIC] and press [TRANSPOSE]. Tempo Lock Hold down [NUMERIC] and press [MELODY INTELLIGENCE]. - Page 30 MEMO...
-
Page 31: Appendices
Power does not turn on Are the supplied AC adaptor and power cable correctly connected to the E-09 and to an electrical outlet? (p. 8) -> Use only the supplied AC adaptor and power cable. Use of any other adaptor or cable may cause malfunctions. -
Page 32: Tone List
Appendices Tone List Button Tone Category PIANO St.Piano 1 PIANO EuropeanPf PIANO Piano 2 PIANO Honkytonk PIANO Piano 1 PIANO St.Piano 2 PIANO Piano 3 PIANO EG+EP 1 PIANO EG+EP 2 PIANO St.Piano 3 PIANO OldUpright PIANO E.Piano 1 ELECTRIC PIANO St.Soft EP ELECTRIC PIANO Dyno EP... - Page 33 Button Tone Category GUITAR/ Jazz Gt 2 ELECTRIC GUITAR BASS Clean Gt 1 ELECTRIC GUITAR Open Hard ELECTRIC GUITAR Chorus Gt ELECTRIC GUITAR Clean Gt 3 ELECTRIC GUITAR Mt Dist Bs ELECTRIC GUITAR Funk Pop ELECTRIC GUITAR Funk Gt ELECTRIC GUITAR Jazz Man ELECTRIC GUITAR Gt Pinch...
- Page 34 Appendices Button Tone Category SAX/ XP AltoSax BRASS Tenor Sax1 XP Tnr Sax Baritn Sax Sop Sax 2 Alto Sax 2 Hyper Alto Tenor Sax2 Velo Tenor Flute Vib WIND Piccolo WIND Oboe WIND Bassoon WIND Clarinet WIND Pan Flute WIND Sad Pipe WIND...
- Page 35 Button Tone Category SYNTH ResoPanner StarTheme1 Horn Pad Sine Pad BowedGlass Metal Pad Halo Pad Converge CelestlPad Ancestral Prologue Goblin 50s Sci-Fi Echo Drops Echo Bell Echo Pan 1 Echo Pan 2 Big Panner WaterPiano StarTheme2 WORLD 1 SitarDrone WORLD 1 Sitar 3 WORLD 1 Sarod...
- Page 36 Appendices Button Tone Category WORLD 2 RevCymbal1 PERCUSSION RevCymbal2 PERCUSSION Rev Snare1 PERCUSSION Rev Snare2 PERCUSSION Rev Kick PERCUSSION RevCncrtBD PERCUSSION Rev Tom 1 PERCUSSION Rev Tom 2 PERCUSSION Thunder Wind Bird 1 Bird 2 HorseGallp Telephone2 Helicopter Car Engine Car-Pass Siren Train...
-
Page 37: Drum Set List
Drum Set List PC: 1 [CC32: 2] PC: 33 [CC32: 2] PC: 31 [CC32: 2] Standard 1 Jazz Kit 1 New TR-909 ------------ ------------ ------------ ------------ ------------ 909 Kick 3 ------------ ------------ House Kick ------------ ------------ TR-808 Kick C0 12 ------------ ------------ HipHop Kick... - Page 38 PC: 44 [CC32: 4] PC: 94 [CC32: 4] PC: 75 [CC32: 4] China Perc India Kit Std Latin ------------ ------------ ------------ ------------ ------------ ------------ ------------ ------------ Mix HH Cl 4 ------------ ------------ Mix HH Cl 1 C0 12 ------------ ------------ Mix HH Cl 2 ------------ ------------...
- Page 39 PC: 70 [CC32: 4] PC: 71 [CC32: 4] PC: 72 [CC32: 4] PC: 69 [CC32: 4] TR909 Asia HipHopAsia R&B Asia TechnoAsia ------------ ------------ ------------ ------------ 909 Kick 3 909 Kick 3 909 Kick 909 Kick 3 House Kick House Kick House Kick 909 Kick2 TR-808 Kick...
- Page 40 PC: 82 [CC32: 4] PC: 83 [CC32: 4] PC: 102 [CC32: 4] D'n'B OR2 Std OR1 Jazz OR1 ------------ ------------ ------------ 909 Kick 3 ------------ ------------ House Kick Mix HH Cl 4 Mix HH Cl 4 909 Kick Mix HH Cl 1 Mix HH Cl 1 C0 12 HipHop Kick...
- Page 41 PC: 90 [CC32: 4] PC: 103 [CC32: 4] PC: 92 [CC32: 4] MxKt&India MxKit&OR2 MxKit&OR1 Mix Rev 5 Mix Rev 5 Mix Rev 5 Mix Rev 4 Mix Rev 4 Mix Rev 4 Mix Rev 3 Mix Rev 3 Mix Rev 3 Mix Rev 2 Mix Rev 2 Mix Rev 2...
- Page 42 PC: 50 [CC32: 2] Ethnic ------------ C1 24 Finger Snap Tambourine Castanets Crash Cym.1 Snare Roll Concert Snr Concert Cym. Concert BD Jingle Bell Bell Tree Bar Chimes Wadaiko C2 36 Wadaiko Rim Shimedaiko Atarigane Hyoushigi Ohkawa H kotsuzumi L Kotsuzumi Ban Gu Big Gong Small Gong...
-
Page 43: Music Style List
Music Style List Category Name Tempo ROCK SteadyRk PowerRck ElecRock DynoRock ThumpRck USBallad DANCE DJ_Grove SmothDnc FeverDnc 80sTekno EuroDnce IbizaDnc KeepOnDc 90sTekno HrdTekno 90sHouse ClubHous Hip’nHop NowHipHp Cool Rap PianoRap 70sDance EasyHop 8BEAT Time_Pop FriendBt PianoBal Soul Bal ClassBal SimpleBl AlClapBl LayBakBl PoppinBl... -
Page 44: Specifying Chords
Appendices Specifying Chords ● = Constituent notes of this chord. ★ = Keys you need to press to hear this chord. C#M7 C#m7 CmM7 C#mM7 Cdim C#dim Cm7 ( 5 ) C#m7 ( 5 ) Caug C#aug Csus4 C#sus4 C7sus4 C#7sus4 E M7 E m7... - Page 45 ● = Constituent notes of this chord. ★ = Keys you need to press to hear this chord. F#M7 F#m7 F#mM7 GmM7 F#dim Gdim F#m7 ( 5 ) Gm7 ( 5 ) F#aug Gaug F#sus4 Gsus4 F#7sus4 G7sus4 A M7 A m7 A mM7 AmM7...
-
Page 46: Midi Implementation Chart
Appendices MIDI Implementation Chart Interactive Arranger Model E-09 Function... Basic Default Channel Changed Default Mode Messages Altered Note Number : True Voice Note On Velocity Note Off After Key's Touch Channel's Pitch Bend 0, 32 6, 38 Control Change 98, 99... -
Page 47: Specifications
Specifications E-09: Interactive Arranger Keyboard 61 keys (with velocity) [Sound Generator] Maximum Polyphony 64 voices Parts 16 parts + Keyboard part Wave Memory 32 M bytes (16-bit linear equivalent) Tones Tones: 614 + 256 (GM2) Drum Sets: 61 + 9 (GM2) -
Page 48: Index
Index Numerics 2PitchShift 3Tap Delay 4Tap Delay AC Adaptor Acc Bass Acc Drum Accomp Arr Hold ARR SET ARRANGER Arranger bass Arranger drums Auto Bass AutoWah BAND ORCHESTRATOR Bass Inv Bulk Dump? Bulk Load Cho/Delay Cho/Flanger Cho>Delay Cho>Flanger ChordInt CHORUS Chr DUAL Chr MAIN Chr SPLIT... - Page 49 MIDI MIDI cable MIDI channel MIDI TxRx Minus-One Mod Delay Modulation Multi-Effects Music Assistant Music Rest Music Style Muted Track NTA Rx14 Numeric Octave OD>Chorus OD>Delay OD>Flanger One-Touch ORIGINAL OUTPUT Overdrive Pan DUAL Pan MAIN Pan SPLIT PanDelay Part PB Range Performance Phaser PHONES...
- Page 50 MEMO...
-
Page 51: Federal Communications Commission Radio Frequency Interference Statement
This product complies with the requirements of European Directive 89/336/EEC. FEDERAL COMMUNICATIONS COMMISSION RADIO FREQUENCY INTERFERENCE STATEMENT This equipment has been tested and found to comply with the limits for a Class B digital device, pursuant to Part 15 of the FCC Rules. - Page 52 Information When you need repair service, call your nearest Roland Service Center or authorized Roland distributor in your country as shown below. PHILIPPINES AFRICA G.A. Yupangco & Co. Inc. 339 Gil J. Puyat Avenue EGYPT Makati, Metro Manila 1200, Al Fanny Trading Office...
Need help?
Do you have a question about the E-09 and is the answer not in the manual?
Questions and answers
I want to go reverb effects but my screen is not visible
If the screen on the Roland E-09 is not visible, adjusting reverb effects becomes difficult because the process involves using the screen to select menu options and confirm settings. The steps normally require:
1. Press [FUNCTION] to turn it on.
2. Use the FAMILY [▲][▼] buttons to select “EFFECTS.”
3. Use SELECT [◄][►] to choose “REVERB.”
4. Use TEMPO [–][+] to change the reverb type.
5. Press TEMPO [ (YES)] to confirm and save.
Without screen visibility, you would need to rely on memorizing the button sequence and audio feedback, but precise adjustments are not guaranteed.
This answer is automatically generated