
Related Manuals for weistek RS IdeaWerk Pro


Summary of Contents for weistek RS IdeaWerk Pro
- Page 1 Dyson Centre For Engineering Design User manual for RS IdeaWerk Pro 3D printer Created/edited by Version Date Diana Thomas‐McEwen V2 17/05/2016 Diana Thomas‐McEwen V3 30/08/2016 Diana Thomas‐McEwen V4 27/01/2016 ...
-
Page 2: Table Of Contents
Table of Contents 1.0 Machine Familiarisation ......................... 2 1.1 Basic machine exterior set up .................... 2 1.2 How do they work? ......................... 3 2.0 Materials ............................ 4 2.1 PLA ............................ 4 2.2 ABS ............................ 4 2.3 Other material available ...................... 5 3.0 Where can I get the design? ...................... 5 3.1 Obtaining an STL File ....................... 5 3.2 ... -
Page 3: Machine Familiarisation
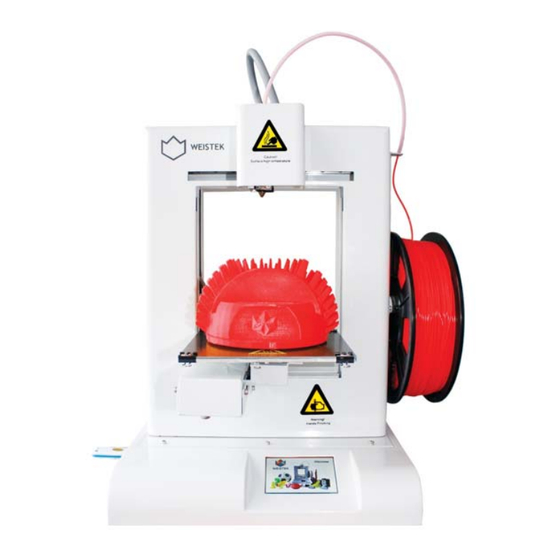
RS IdeaWerk Pro 3D printer User Manual 1.0 Machine Familiarisation 1.1 Basic machine exterior set up 2 ... -
Page 4: How Do They Work
1.2 How do they work? Extruder Head Filament is drawn through low friction Moves side‐to‐side tube into the extruder Mechanism to draw head filament in. Then heats filament above melting point Small nozzle out of which Reel of 1.17mm diam. molten plastic is forced Filament spools off the reel USB Stick Platform USB sticks are provided for Moves front‐and‐ using the printers back also up‐and‐ Used for file transferring to down printer Can be heated Thin removable sheet (bed) is ... -
Page 5: Materials
2.0 Materials There are a variety of different materials that this 3D printer can be use due to its range in temperatures. 2.1 PLA PLA (polyester called polylactic acid or polylactide) is derived from renewable sources such as corn starch. This makes it biodegradable and recyclable therefore easier to dispose of and with no harmful gases given off when used. The extruder melts the PLA at a temperature of 220°C, by heating the bed to a temperature of 70°C for print of anything of significant size or height can maintain adhesion to the bed. The Dyson Centre currently stocks natural (off white), red, blue, orange, yellow, black and grey at a price of around £25 per kg (for reasonable quality filament). Other colours can be ordered such as white, clear, grey, green, purple. Also (for up to twice the cost) fluorescent colours, gold colour, translucent filament, thermochromatic and photochromatic colours wood colours, filaments ... -
Page 6: Other Material Available
ABS emits around 10 times as many UFPs (Ultra Fine Particles) as PLA when heated, again making ABS more likely to affect our health than PLA.” Taken from http://3dprinthq.com/desktop‐3d‐printer‐safety/ 2.3 Other material available Many other options are available including: Metal laden filaments Wood laden filament (sometimes referred to as wood) Flexible filaments HIPS (High Impact Polystyrene)‐ dissolvable so might be useful for making a mould which can later be dissolved away. ... -
Page 7: Designing A File
Simply go to the website type in the item or theme that you are interested in downloading, search through of thousands listed designs and download the files needed to create it. 3.2 Designing a file The STL file generates very sensitive settings so the user will need to check the STL file provides closed (watertight) surfaces. Still worth checking even in the case 6 ... -
Page 8: Checking The Stl File For Errors
of Thingiverse STL files, or if file has been 3D printed before as different printer software processes STL files differently. If drawing in any of the 3D drawing packages below please see, www.dysoncentre.eng.cam.ac.uk/stl for help outputting STL files. [formerly Google’s] Sketchup Creo (Pro‐Engineer) Solidworks AutoDesk Inventor Catia IronCAD McNeel Rhino Solid Edge UGS NX Note that molten plastic has to be supported, so consider adding supports in your model (please see section‐‐‐ for further details) 3.3 Checking the STL file for errors A quick check of STL files can be done with a viewer e.g. go to www.viewstl.com ... - Page 9 Maybe something odd going on here Version 2 of file and here Definitely a problem here. Version 2 of file The thin horizontal surface has vanished when viewed from this side This user then re‐exported their STL file using different settings, and the problem seems fixed in this view. NOTE: it takes seconds to check in this way. The file won’t print properly with ‘issues’ so tends to waste a few hours of printing time. 8 ...
- Page 10 WARNING: Also important to keep an eye on the size of your model, the IdeaWerk machine can print at most 150mm x 150mm x 140mm high. Note that you can print long thin parts diagonally. In this case, we could scale down the size of the part (see later on using DoraWare‐P). Also note that excessive scaling down can reduce part thicknesses beyond what is practically printable/durable. Version 3 of file 9 ...
-
Page 11: Processing The Stl File Using Doraware
3.3.1 Fixing the STL file errors Once the errors have been found in the STL file web sites such as the one below can be used to fix these errors. https://netfabb.azurewebsites.net/ Sign in using I windows account (if you don’t have an account you can create one here too) upload your STL file and click ‘Repair’ the site will go through your file and fix the errors, then you can down load the file. It is recommended that the file be viewed again in the STL checker. If errors still remain the file will need to be corrected in the program originally created in. 3.4 Processing the STL file using DoraWare‐P To process the STL file into a WTK file which can be fed into the IdeaWerk machine, we use a package called DoraWare‐P . You can install this on your own PC at your own risk from: www.dysoncentre.eng.cam.ac.uk/DoraWare or it is installed on the machine/s indicated near the 3D printers. The software takes the arrangement of triangles in 3D space, which represent your surface/s and turns them into instructions for making 2D layers. Instructions for such 10 ... - Page 12 machines (including CNC milling machines) is known as G‐code, which is instructions such as move X by so many millimetres, or move in an arc in the XY plane, centred on this point, etc. DoraWare‐P modifies the G‐code slightly into a WTK file format. Other 3D printers have other file formats (such as makerbot, etc). Use this button to import your STL file Purple means it will fit within what the IdeaWerk machine can print. Green means that is it outside of this space and may need scaling down, or may just need relocating, or maybe both. x, y, z Manipulate the translations object (may need to click on your object first to ...
-
Page 13: Fill Density
When you’re ready to start producing G‐code for your item, click on G and the above option interface will open. Fill density 3D printed objects are rarely solid usually they consist of a honeycomb centre and a solid shell the drop down for fill density allows you to vary the amount of material in the honeycomb. Layer Height and Print speed How thick a layer (in mm) the printer tries to lay down at once, and how fast it is ... -
Page 14: Shell
Shell Enables you to vary the thickness of the solid shell. What to pick will vary a little depending on what you want the part for, but the default setting for both is not a bad start point. Raft Raft produces a layer under your item, which helps it to stay stuck to the print bed, whilst the item is being printed. It will easily peel away from your item, and we do not recommend you untick this option. The raft also helps to compensate for any misalignment and/or irregularity in the bed. Exterior Supports This refers to temporary (break away) vertical columns which the printer prints under your item, to help the printer print runs of material which would otherwise constitute it trying to lay down molten plastic in mid‐air, which wouldn’t work. Our two options are: Exterior support (i.e. underneath it, between it and the bed/raft). OR Full support (where all overhangs further up are also supported. Raft Only (self‐ Raft + exterior Raft + full supporting support support design) ... -
Page 15: Platform Temperature
Platform temperature (°C) For PLA printing, set the platform temperature to 70°C if your item is more than about 4cm in diameter, otherwise you could leave it at 20°C. By raising the temperature this avoids shrinkage causing larger items to warp off the bed during printing. NOTE: These temperature settings will also be entered into the machine to avoid an issue with the way in which it operates. 3.4.1 Generating the GCode Click to generate the G‐code, the progress bar will then start to show a green bar as it processes each lay of the design. Note that this is computationally fairly complex and that time taken may vary from a few minutes for something simple to about half an hour for the example item with no support to a few hours for a ... - Page 16 Tracking the problem with the G‐code Sometime when producing the G‐code through DoraWare, the print does not turn out the way you expect i.e. holes in gears are filled in. You can check that the problem is not with the G‐code via GCODE ANALYZER, go to http://gcode.ws/ a. Upload your G‐Code 15 ...
- Page 17 b. Looking at the 2D tab will show the root the raft will been created. c. Looking at the 3D tab will show the model being created. 16 ...
- Page 18 Other information included is Progress indicator, Model info, Layer Info, 2D Rendering options, GCode analyser options and Printer Info. d. Looking at the GCode tab will show the code of the model being created. 17 ...
-
Page 19: Producing The Wtk File From Doraware-P
By looking through these options you are able to see the problem with your design (if any) and check the setting are correct before creating the WTK file to use on the printers. You can then also modify the G‐Code file to be create the desired WTK file. 3.4.2 Producing the WTK file from DoraWare‐P Select the upload icon at the top of the window Use this button to export a WTK file to a USB memory stick, select where you would like to save to file, on the Dyson centre USB stick the file needs to be saved under ‘3DMODEL’. There are some peculiar requirements and restrictions: 1. Memory stick not larger than 32GB 2. WTK file must be in a directory called 3DMODEL, and this directory must not be within any other directory. 3. The model name of the WTK file before the .WTK must be no more than 8 characters long: e.g. E:\3DMODEL\Richitem.WTK fine E:\3DMODEL\Richardsitem.WTK won’t work ... -
Page 20: Setting Up The Rs Ideawerk Pro 3D Printer
4.0 Setting up the RS IdeaWerk Pro 3D printer Now that the WTK file has been obtained the printer itself now needs to be set up, before using please check: The printer is on (at the wall and at at back). Also that a black bed is clipped with four clips to the aluminium platform. Check that the printer is loaded with the correct filament (both type of plastic and colour) and that there is enough filament to complete the print 4.1 Setting up the printer When the printer is first powered up the start‐up screen will appear as shown below Touch the screen to access the main menu and other tabs. Now insert your memory stick and select the file you wish to print, touch to select. ... -
Page 21: Starting To Print
Remember for PLA, extruder 220°C and platform either room temperature or 70°C for anything over about 4cm in diameter. 4.2 Starting to print Now select the ‘Print’ tab again. Observe for 20 to 30 seconds to check is changing. When you’re happy, start the print using the ‘Start’ button on the ‘Print’ tab. If it is still heating up it will tell you, and autostart ... -
Page 22: Finished Printing
The print should start to look like the example below. 4.3 Finished printing Once the print is complete it will drop the bed down to the lowest position and start cooling down, you may want to touch the touch screen (to wake it up) and see what the current temperature of extruder and platform are. WARNING: The extruder and bed should be cooling down, if not, set them to zero in the ‘Move’ tab and go back to the ‘Print’ tab. If they still aren’t cooling down, ask for help or switch the printer off at the wall. NOTE: that throughout the print you can touch the touch‐screen to wake it up and see what the percentage progress is. When you are happy the bed is cool enough (so as not to burn you, but also so that your component isn’t still soft and pliable) unclip the four clips and remove the bed. When the printed item is cooled to room temperature, it should be possible to pull it off the bed, or gently flex the bed slightly if need be, taking care not to permanently bend it. Please then replace the bed and clips and don’t forget to pay what is owed for the cost of materials. ... -
Page 23: Charge Forms
5.0 Charge forms We have funds to buy 3D printers for undergraduate use but we do not (yet) have funds to buy materials, so we ask you to pay for these, but the cost is relatively low. We do not have funds to pay for 3D printing for research, except for 4th year projects (or have enough printers for this additional use). If you are a postgraduate/post‐doc researcher or a member of staff reading this – please contact the Dyson Centre Manager to discuss further. 5.1 How does it work? Please use the electronic scales to work out the mass of PLA used, include any scrap, rafts, supports and all failed attempts (these are at your cost). The charge is £1 per 30g of part there‐of, for example. 25g is £1 40g is £2 60g is £2 61g is £3 ... -
Page 24: Health And Safety
6.0 Health and Safety As with many such machines in workshops, these machines are not default safe to use, you can cause harm to yourself and others and to the machine if you don’t understand how to use it correctly. An appreciation of the risks and what to do about them is important 6.1 What could go wrong Could get burnt by extruder or by molten plastic coming out of it – usually between 200 and 280°C (significantly hotter than boiling water). Don’t touch extruder, or molten plastic coming out of extruder, even if it looks cool. Please wear protective gloves provided (to be sufficiently insulated). Make sure you know where nearest sink is and get burns under cold water promptly and keep them there for 10 to 20 minutes! Could get burnt by the platform/bed or item recently printed: if the bed is still being heated, it could be around 100°C Don’t touch bed until you are sure it has cooled down – touch screen will tell you current temperature (be careful not to get mixed up with target temperature or same for extruder/nozzle). ... - Page 25 If you do find a fire: 1. immediately raise the alarm. 2. if safe to do so, use a fire extinguisher to try to put the fire out, and if possible disconnect the printer from the mains (assuming the electricity cables aren’t now damp) 3. if in doubt, leave the building and raise the alarm. 4. be careful of breathing in any fumes from the fire. Also seek help from a first aider – ask at reception if you can’t find one, or if outside normal hours, call security on 31818 from the phone on the Manager’s desk, or 01223 331818 on your mobile phone. Further details at Manager’s desk. 24 ...
-
Page 26: Appendix A -Trouble Shooting
Appendix A ‐Trouble shooting Problem: My Print keeps coming away from the bed. Solution: This could be one of four problems 1. The bed is not heating up Check the temperature setting for the bed Check the current setting to ensure it is heating 2. The extruder head is too far away from the bed Ask a technician to adjust the Z value for the extruder head 3. The design being printed is at an angle that requires additional exterior or full supports to complete the printing. 4. The bed is not level (please report this to a technician to be fixed) Problem: My design won’t print; it heats up but then says that my print is complete Solution: The WTK file might have been interrupted or did not fully save on to the USB, redo the G‐code and resave the file on to USE making sure that the computer tells you that the file has been save successfully. ... -
Page 27: Notes
NOTES 26 ...
Need help?
Do you have a question about the RS IdeaWerk Pro and is the answer not in the manual?
Questions and answers