Advertisement
Advertisement
Table of Contents

Related Manuals for Reliant Rebel 700 1967


Summary of Contents for Reliant Rebel 700 1967
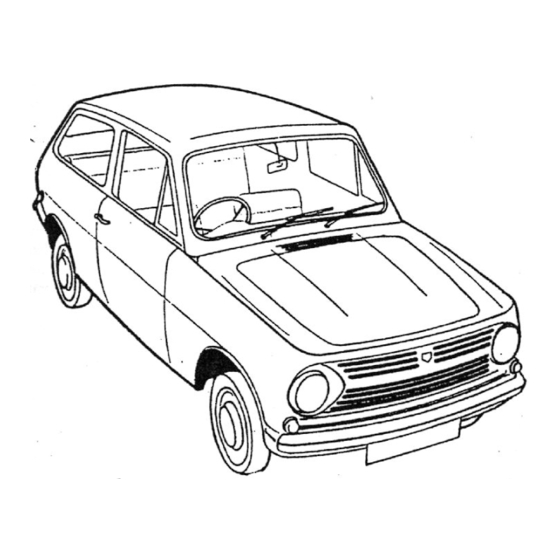
- Page 1 RELIANT REBEL 700 & 750 Saloon, Estate and Van Workshop Manual ©The Reliant Motor Company Limited July 1967 Remastered June 2012 by Atodini Page 1...
-
Page 2: Table Of Contents
A comprehensive stock of spare parts are Rear Suspension page12 available from Reliant Dealers. a spare parts list is available for use when ordering. Only genuine Reliant Steering pages13-17 "R" parts should be used. Cooling System... -
Page 3: General Specification Pages3-4
General Specification 700cc Engine Number of Cylinders 4 in-line Bore of cylinders 60.45 mm (2.38 in) Stroke of crankshaft 60.96 mm (2.40in) Cubic capacity 700 cc (42.72 cu in) Compression ratio 8.4 to 1 Valve clearance - Inlet 0.25 mm (0.010 in) Hot 0.152 mm (0.006 in) Cold Exhaust 0.25 mm (0.010 in) Hot... - Page 4 Rear axle Type Spiral bevel gear semi floating Ratio: saloon/estate/van 4.375:1 Brakes System Girling hydraulically operated internal expanding to all wheels Size - Front 203.2 x 31.75 mm (8 in x 1.25 in) Rear 177.8 x 31.75 mm (7 in x 1.25 in) Handbrake Lever type operating rear brakes mechanically by cable linkage Suspension...
-
Page 5: Lubrication And Maintenance Pages5-7
Lubrication and maintenance Front Hubs Grease Rear axle filler plug Gearbox filler/level plug Front suspension plugs Grease or dipstick/filler plug Oil Filter Replace Generator rear bearing 10. Master Cylinder(s) Brake fluid Steering idler box 11. Rear leaf springs Spray oil Steering Box 12. - Page 6 General Weekly Check Check oil level and top-up if necessary. Check level of electrolyte in battery. Check water level of radiator. Check tyre pressures. Every 5,000 miles (8,000 km) Check battery electrolyte level. Lubrication At First 500 Miles (800 km) (Free Service) Change engine oil and fit new filter.
- Page 7 Approved Lubricants (Winter & Summer) Mobil Castrol Esso Shell Petrofina Duckhams Texaco Mobiloil super Castrolite Esso Extra BP Super Shell Fina Q20-50 Havoline Engine or Mobiloil Castrol GTX Motor Oil Viscostatic Super Multigrade Motor Oil motor oil special 10w/30 or 10w/40 or Motor Oil motor oil...
-
Page 8: Chassis Frame Pages8-9
Section A Chassis Frame Page 8... - Page 9 Page 9...
-
Page 10: Front Suspension Pages10-11
Section B Front Suspension Figure 1 Front suspension exploded view Vertical link – RH Front hub Plug Stud Shim Upper ball joint assembly Inner bearing Upper ball housing Outer bearing Upper wishbone assembly front Ball Pin Hub cap Upper wishbone assembly rear Lower socket Split pin Bush... - Page 11 Description The independent front suspension comprises upper and lower wishbone assemblies and vertical links assisted by coil spring and damper units. The upper wishbones are bolted to a ball joint on the vertical link and secured and pivoted to the vehicle chassis suspension tower. The lower wishbone assembly, secured to a trunnion attached to the vertical link, supports the coil spring and damper unit.
-
Page 12: Rear Suspension
Section C Rear suspension Remove ½”UNF lower shackle nut and bolt and lower Description the rear of the leaf spring to the ground. Rear suspension is provided by damper assisted four leaf springs. The rear of the springs are suspended and pivoted on shackles attached to Unscrew ½”UNF nut and bolt securing the front eye of the chassis frame. - Page 13 Section D Steering Description The steering mechanism comprises a single-stage worm on the lower Dismantling of steering box (Figure 1) end of the steering column supported by two ball races located in the steering box. Engaging the single-stage worm is a recirculating ball If the correct oil level is maintained in the steering box, no attention steering nut assembly secured in position by a rocker shaft which, in to the internal components should be necessary.
- Page 14 Page 14...
- Page 15 Lock stop adjustment Idler shaft assembly: remove and dismantle Turn the wheels until on full lock and check that the drop arm is Disconnect outer and centre tie rods from idler shaft abutting the lock stop, which is screwed in to a boss on the chassis assembly drop arm as previously described.
- Page 16 Track adjustment Centralise the steering by turning the steering wheel from lock to lock, counting the turns necessary, then turning back exactly half the number to ensure the steering box is fully centred. The steering wheel spokes should be in a horizontal position. Using Dunlop or similar wheel alignment equipment measure the front wheel alignment.
- Page 17 Using template when turntables are not available To avoid the possibility of the wheel rotating on its axle between setting the gauge and taking the reading apply the footbrake hard. Place template against one of the front wheels and draw a line on With the footbrake still applied, centre the bubbles in the level (E) the ground parallel to the wheel.
-
Page 18: Cooling System Pages18-23
Note: During summer months, if no anti-freeze is used a solution of effective in adverse conditions. water plus 3.35 fluid oz of Reliant Coolant Inhibitor "R" part number 10374 MUST be used to maintain the system free of corrosion. Do not over fill the radiator. The correct level of the coolant in the... - Page 19 Page 19...
- Page 20 Start the engine and run until normal working temperature is attained. This will remove air locks from the system. Slacken the hose clips and remove the heater and bypass hoses. Replace the filler cap. Water leaks Remove four 5/16” UNF nuts and washers and withdraw Run the engine to normal operating temperature to allow the system the pump assembly from the studs on the cylinder block.
- Page 21 Fan Belt A single “V” belt is used to drive the dynamo/alternator and water pump from the crankshaft pulley. Correct fan belt tension is important otherwise the belt itself could be damaged or undue strain placed on the dynamo/alternator or water pump bearings.
- Page 22 To remove Slacken the dynamo/alternator adjustment locking bolt and lower mounting bolts. Drain the cooling system as previously described and remove the top hose Pivot the assembly towards or away from the engine as necessary to achieve the correct tension. Unscrew the three bolts from the thermostat housing and remove with lock washers.
- Page 23 The thermostat should start to open at 86-89°C (187-193°F) and be fully open when the water reaches boiling point. If faulty readings are suspected check the unit as follows: If the thermostat does not function correctly replace it with a new With the ignition on, disconnect the wire from the sender unit one.
- Page 24 Section F Engine Page 24...
- Page 25 Remove the nut and washer securing the exhaust Description The 700cc and 750cc engines are both four cylinder in line units support bracket to the bell housing allowing the having a die-cast aluminium cylinder head with cast iron valve guides exhaust system to hang clear of the engine.
- Page 26 Refit heater hoses. Reconnect starter motor, dynamo/alternator, oil and water temperature sensors, coil high and low tension leads. Refit radiator and hoses and refill the cooling system. Refit stabiliser bar taking care to fit the rubber Reconnect fuel pipe to pump. grommets correctly.
- Page 27 Operation 2 Flywheel and ring gear removal and replacement Figure 5 Centralising the clutch Flywheel removal Refitting Remove the gearbox (see Section G) Unscrew the six set screws, complete with lock washers, Heat up the new ring gear uniformly to a temperature of and remove the clutch cover and driven plate from the flywheel.
- Page 28 Unscrew the single retaining bolt at the securing the Operation 3 Sump removal and replacement distributor clamp to the cylinder block, complete with washer and lock Drain engine oil. washer, and remove the distributor. Do not disturb the actual clamp nut and bolt unless the ignition timing is to be reset.
- Page 29 Locate the two dowels of the rear cover in the cylinder Extract the oil seal from the cover using special tool no. RT block and then secure the cover with the six set screws and lock 7480 and drive handle part no. 550 (Figure 10). washers.
- Page 30 Remove the petrol supply pipe from the carburettor plug to Fit new timing chain to crankshaft and camshaft sprocket which can be secured to the camshaft with the two bolts and the avoid dirt ingress. Remove the pipe from the clip on the side of locking plate.
- Page 31 Figure 14 Cylinder head and manifolds - exploded view Cylinder head Rocker cover Manifold nut Stud Rocker cover gasket Lock washer Stud "P" clip Stud Stud Support bracket Washer Stud Washer Gasket Drip tray Oil way plug Oil filler cap Heat exchanger Core plug "O"...
- Page 32 Figure 15 Cylinder head nuts Figure 16 Valve guide removal and replacement tightening sequence Valve guide removal Valve guide replacement Clean the face of the cylinder head and remove all trace of Valve guide protection sleeve carbon and high spots. Clean out the waterways.
- Page 33 Locate the upper half of the thrust washer in the register on the inside face of the crankshaft main bearing bore in the crankcase. Position the front main bearing cap and locate the lower half of the thrust washer in the register on the cap inside face. Note: The thrust washer is fitted so that the thrust face, identified by oil grooves, bears against the crankshaft ground face.
- Page 34 Figure 18 Engine, crankshaft and camshaft - exploded view Crankshaft Pulley Rocker LH Flywheel assembly Rocker RH Flywheel Spacer Rocker shaft Flywheel ring gear Bolt Bracket Dowel Washer Bracket Spigot bearing Lock washer Screw Flywheel tab washer Main bearing shell Washer Set screw Camshaft...
- Page 35 To Replace Re-assemble in the reverse order, fitting new gaskets where applicable. Note: When refitting the distributor drive shaft, ensure the large "D" of the driving gear offset dog is facing towards the block at No. 1 piston, i.e. slot in a "5 minutes past 7 o'clock" position. Take the opportunity of checking the camshaft end-float which should be within 0.64 to 0.16 mm (0.0025 to 0.0065 in).
- Page 36 Figure 24 Replacing camshaft centre bearing Figure 22 Removing camshaft front bearing Pilot Horseshoe Bearing Mandrel Mandrel Bearing Small "D" washer Pilot Horseshoe Figure 25 Replacing camshaft front bearing Figure 23 Replacing camshaft rear bearing Horseshoe Pilot Large "D" washer Mandrel Bearing Bearing...
- Page 37 Figure 29 Fitting cylinder liners Using a tool similar to that shown in Figure 29, insert the liners in to the block and ensure that they stand 0.050 to 0.152 mm (0.002 to 0.006 in) proud of the cylinder block face. Check that there is 0.381 mm (0.015 in) clearance between liners.
- Page 38 Figure 30 Valve clearance - tappet adjustment Feeler gauge Figure 31 Tappet adjustment tool Adjusting screw Lock nut Refit front engine plate with a new gasket, to the engine block and secure with three nuts and washers. Fit the crankshaft outer thrust washers with the oil slots facing forward, followed by the steel thrust washer with its countersunk aperture facing rearwards.
- Page 39 Operation 17 Valve clearance - tappet adjustment Tappet clearances are:- 0.152mm (0.006 in) cold, When adjustment is made the valve must be in the fully closed 0.254 mm (0.010 in) hot position (figure 30). To adjust Refit spark plugs and reconnect HT leads in the correct Remove rocker cover.
- Page 40 Oil scraper ring 0.254 mm (0.010 in) Gudgeon pin Diameter 14.283-14.288 mm (0.5623-0.5625 in) Small end bush Bore 14.292-14.298 mm (0.562-0.563 in) Camshaft Bearing diameter 38.66-38.67 mm (1.521-1.522 in) Bearing clearances 0.0254-0.0889 mm (0.0010-0.0035 in) End float 0.064-0.16 mm (0.0025-0.0065 in) Chain pitch 9.525 mm (0.375 in) Number of pitches...
- Page 41 Section G Gearbox Early Models prior to Chassis No 941001 – 3 Synchro Page 41...
- Page 42 10. Adjust the clutch. Gearbox removal and replacement (Figure 1) To remove 11. Remove the stands and lower the vehicle. Disconnect battery leads. 12. Reconnect the battery. Remove gear lever gaiter. Gearbox dismantling (removed from vehicle) Jack up the vehicle and place securely on axle stands. To separate extension and remote control assembly from gearbox.
- Page 43 Page 43...
- Page 44 there is a retaining clip on the front of the primary bearing. 12. Turn the 1 fork lever through 180° and remove the 5/16”UNF cone screw. Ensure that it is fitted when the bearing is replaced. Using a suitable extractor, remove the primary bush. 13.
- Page 45 Remove the rubber grommet from rear of remote housing Using a suitable press tool or drift remove rear bearing from and carefully withdraw the gear change shaft. the housing. Examine all components for wear, replacing if necessary. Reassemble in reverse order. Reassembly of selector forks Fit coupling washer, tab washer and 7/16”UNF bolt, tightening to a torque of 6.91kg/m (50lb/ft).
- Page 46 Replace top cover plug and remote control housing All synchromesh gearbox (from chassis No. 941001) grommet. Gearbox removal and refitting (Figures 5 & 6) Gearbox extension assembly Using a suitable internal extractor tool, remove the gearbox To remove extension rear seal. Check for wear and replace if Disconnect battery leads.
- Page 47 Page 47...
- Page 48 Lift out the laygear assembly and the two thrust washers. Fit the gearbox mounting bolt and reconnect the earth Withdraw the reverse gear shaft through the rear of braid. the gearbox and lift out the reverse gear. Reconnect speedometer drive cable. Remove the rear cover from the mainshaft assembly.
- Page 49 Using tool No. RT 7490 press the rear cover on to the Locate the first/second synchro body on the mainshaft and press in to position. mainshaft. Primary gear assembly - dismantling and re-assembly To facilitate further assembly, position the mainshaft in an assembly "pot"...
- Page 50 Line up the reverse selector shaft in the selector fork Reverse idler gear assembly and shaft and drive home the mills retaining pins. Check reverse idler gear teeth and renew assembly if Ensuring the interlock pin is in position, replace necessary.
- Page 51 Section H Clutch The clutch assembly comprises a spring pressure plate assembly and a Unscrew the 5/18”UNF nut and bolt, detach the fork from single dry 158.75 mm (6.25 in) diameter clutch plate. its bracket and withdraw from the bell housing complete with the thrust bearing.
- Page 52 Page 52...
- Page 53 Bleeding the clutch hydraulic system Clutch adjustment (Figure 3) Adjustment is provided by a barrel type adjuster retained by a lock nut Clean the area surrounding the bleed screw on the slave cylinder and remove the rubber dust cap from the bleed on the threaded portion of the clutch rod.
- Page 54 To remove clutch master cylinder Ensuring that the clutch fork is correctly located with the Remove all superficial dirt from the assembly, particularly push rod, hook the return spring on to the fork and rear engine plate. around the connecting point for the fluid pipe line. Use a recommended cleaning agent and do not allow the solvent to contaminate internal parts.
- Page 55 Page 55...
- Page 56 Section J Prop Shaft (Drive Shaft) Description Tap the radius of the yoke with a hide mallet to release the The prop shaft (or drive shaft) comprises two universal joints plus a yoke bearings. Should this prove difficult then the bearings can be splined section (sleeve yoke) which slides in to the rear gearbox gently prised out from inside the yoke.
-
Page 57: Rear Axle Pages57-63
Section K Rear Axle Page 57... - Page 58 Reconnect rear brake flexible hose. Locate handbrake cable in its abutment bracket and Description reconnect to the compensator balance lever. The rear axle is of the spiral bevel gear, semi floating type, all models Refit the prop shaft. having a ratio of 4.375:1. Refit the rear wheels and lower the vehicle to the ground.
- Page 59 clearance from the outside face of the collar to the end of the half If the wheel studs are damaged they should be pressed out shaft taper. If on removing the hub, the hub key comes away with it, it and replaced.
- Page 60 Dismantling the rear axle Using a hand press, General tool No. 47, and collars RT 8764/1, with adapter RT 8764/2, remove the differential bearings as Remove the rear axle from the vehicle as previously follows: Feed the differential unit in to the hand press and fit into the described.
- Page 61 when determining the shims required, any figure stamped on the finally clamping the plate. The two round knurled gauging nuts should be screwed on to the push rod, which is facing the crown wheel or pinion itself, which represents any variation in manufacture from the pinion side of the crown wheel which, for convenience of explanation, nominal mounting distance i.e.
- Page 62 Screw in the left-hand side until a stop is felt, screw up Re-assembly - installation of pinion in axle case Add the collapsible spacer to the pinion assembly and place right-hand side until contact is made. Measure minimum backlash. the new oil seal in the pinion housing. Place the pinion assembly in the Unscrew left-hand rod and tighten right-hand rod at approximately half turn intervals until the correct backlash is obtained.
- Page 63 Final re-assembly of axle Tap both the differential bearing outer tracks in to the two Clean the taper of all grease and foreign matter. halves of the axle case. Position the hub key in its location and fit the hub. Secure the hub to the half shaft with the nyloc nut and Replace the correct shims on the differential unit.
- Page 64 Section L Brakes Description Check the lining material thickness. Linings that are bonded The Girling braking system employs two leading shoes on the front to the shoes must not be allowed to wear below 1.5 mm (1/16 in) in wheels and one leading, one trailing shoes on the rear wheels. The thickness.
- Page 65 Brake fluid is hygroscopic so will absorb moisture over time, lowering the boiling point leading to fade or even failure of the brakes. Front brakes - fitting new shoes (Figure 4) Always fit Reliant replacement shoes, including a new set of return springs. Figure 3 Handbrake compensator...
- Page 66 Refit the brake drum, making sure it is clean and free from dust or grease. Lift the other end of the shoe from the slot in the adjuster. Refit the road wheel and adjust the brake. Lever the second shoe from the piston and adjuster, Note: Brake shoes MUST be changed in axle sets.
- Page 67 Brake pedal assembly (Figure 7) Rear wheel cylinders - removal & replacement Remove split pin, clevis pin and washer and disconnect from the Faulty rear wheel cylinders will show similar symptoms to faulty front ones. If the vehicle has a tendency to gently pull to the left or right master cylinder.
- Page 68 Page 68...
-
Page 69: Wheels And Tyres
Section M Wheels and Tyres Maintain the tyres, including the spare, at the recommended pressures, as follows: Cross-ply tyres Tyre pressures - saloon and estate Normal load: Saloon Front 1.26 kg/cm² (18lb/in²) Rear 1.26 kg/cm² (18 lb/in²) Estate/ Van Front 1.41 kg/cm²... - Page 70 Wheel Removal Slacken the wheel nuts, jack the car up until the wheel is clear of the ground, remove the nuts and withdraw the wheel. Inspection Clean the rim and examine the rivets or welds securing the rim to the centre.
-
Page 71: Exhaust System
Exhaust System Section N Figure 1 Exhaust System Bolt Down Pipe Gasket Flexible Mounting Lock Washer Lock Washer Silencer Strap Clip Set Screw Bolt Washer Washer Tailpipe-Saloon 10. Tailpipe-Estate/Van 11. Clip Description To Remove (Estate/Van) The exhaust system on all Rebel vehicles comprises four main units. The manifold, the down pipe, the silencer and the tail pipe. -
Page 72: Fuel System Pages72-79
Section P Fuel System Page 72... - Page 73 Description Fuel Gauge Sender Unit Diagnosis Fuel is delivered to the carburettor by an engine driven AC diaphragm pump from a rectangular fuel tank mounted under the rear floor of If faulty or inaccurate readings are suspected on the fuel gauge, check the vehicle.
- Page 74 at first allowing the engine to warm. Push the choke control in eccentric lobe and the slotted aperture in the block. Remove the pump gasket. progressively as the engine warms through. Idling Before dismantling, clean the exterior of the pump and Idling and throttle adjustments must only be carried out when the mark the upper and lower halves adjacent to the tab on the diaphragm to ensure correct alignment on reassembly.
- Page 75 Page 75...
- Page 76 To remove the carburettor To reassemble the carburettor Remove the air cleaner from the air intake and the fuel pipe Before reassembly of the unit, ensure that all jets are correctly replaced. from the inlet boss on the float chamber Disconnect the throttle operating arm from the throttle lever and disconnect the choke cable by releasing the outer First lower the base of the plastic float into the float...
- Page 77 Check that the gasket between the inlet manifold and the carburettor Erratic slow running or stalling on deceleration is sound as an air leak here will seriously affect the way the engine runs. Make certain that the slow running jet is clean and tat the feed hole to Stalling is usually due to the idling speed being too low or the mixture being set too lean.
- Page 78 From inside the foot well, fit both split pins to prevent Inspect the economy device to ensure that the diaphragm is intact and the gasket in sound condition. Similarly check the accelerator lateral movement of the shaft. pump diaphragm. Secure the pivot bracket to the body using two ¼” UNF set screws, nuts and washers.
- Page 79 Fuel tank Capacity 27.3 litres (6 gallons) Fuel pump Type AC mechanical Fixing torque 2.07-2.49 kg/m (15-18 lb/ft) Carburettor Type Zenith 30IZ Jet sizes 700cc 750cc Main jet Compensating jet Slow running idling jet Slow running air bleed Accelerator pump jet Accelerator pump back bleed Economy jet Needle valve...
- Page 80 Section Q Body Figure 1 Side door Door frame assembly LH Regulator channel Window regulator Screw Seal, vent to door Door seal wedge Plate Screw Door casing Set screw Set screw Remote control mechanism Lock washer Lock washer Washer Screw Lock Washer Lock washer...
- Page 81 Carefully open the door and check that the wheel of the Window regulator mechanism (Figure 1) door lock makes a good seating on the dovetail. If spacers must be added or deleted, it will be necessary to To remove completely remove the striker plat to do so. The rear of this is accessible after removing a large rubber Unscrew two 2BA screws and remove both interior grommet.
- Page 82 Figure 2 Bonnet assembly Lock Bracket Backing plate Set screw Grommet Packing washer Set screw Washer Packing washer Lock washer Split pin Striker Retainer Lock washer Backing plate Bracket Washer Rivet Split Pin Badge Set screw Rivet Clip Washer Safety catch Data plate Lock washer Screw...
- Page 83 Doors Rear door – Estate and van (Figures 5 & 6) To remove door complete from vehicle To remove Remove four self-tapping screws and remove hinge Fully open the door and remove the single screw access panel from rear of front wheel arch (Figure 4). connecting the check link assembly lug.
- Page 84 Page 84...
- Page 85 Page 85...
- Page 86 Header rail, front Shim Washer Spring bracket Header rail RH Bonnet hinge Stud Header rail LH Packing washer Grommet Nylon washer Header rail, rear Packing washer Check link Rivet Wheel arch front Washer Hinge Wheel arch rear Lock washer Screw Rivet Cover panel Rubber washer...
- Page 87 21. emove body to chassis fixings as listed below Header rail, front Shim Washer Spring bracket Header rail RH Bonnet hinge Stud Header rail LH Packing washer Grommet Nylon washer Header rail, rear Packing washer Check link Rivet Wheel arch front Washer Floor panel Wheel arch rear...
- Page 88 Windscreen Weather strip ly firm pressure on the glass and seal assembly lip. Filler strip from inside the vehicle adjacent to the “B” post. Rear quarter glass Weather strip Filler strip Rear window Weather strip Filler strip 10. Seal 11. Rear quarter glass 12.
-
Page 89: Interior
Section R Interior Page 89... - Page 90 Tilt the squab and cushion as far forward as possible to gain Seats access to cushion hinge-to-body fixings. Remove two ¼” UNF set screws and lock washers from both hinges and lift the complete rear seat assembly from the Front seats (Figure 1) vehicle.
- Page 91 Leave the vehicle for a while to allow the adhesive to dry, Starting from the rear, carefully peel off the foam-backed then remove the temporary clips. headlining from the vehicle roof. Reconnect and refit the interior lamp. Clean the roof surface thoroughly to remove all trace of Refit the “A”...
- Page 92 Arm rest Rear LH floor carpet Listing rod Retainer Rear LH floor carpet Front trim fillet Trim panel Stud fastener Centre trim fillet Trim panel Rivet Rear trim fillet Prop shaft tunnel carpet Pronged fastener Rear view mirror Parcel shelf carpet Clinch plate Screw RH bulkhead carpet...
- Page 93 Reconnect the speedometer drive cable. 15. Remove six No 14 screws securing the fascia to the body. Four are located beneath the fascia and one at each side Refit the indicator flasher unit under the RH side of the securing the fascia to the “A” posts. The LH fixing bolt is fascia with a No 10 UNF set screw, plain and lock washers and hexagon nut.
- Page 94 Page 94...
- Page 95 Page 95...
-
Page 96: Heater
Section S Heater Heater Trunnion Clip Set screw Screw Heater flap Lock washer Push-pull control Heater flap outlet Washer Knob Rivet Hose – to cylinder head Demister nozzle Water valve Hose – to water pump Demister escutcheon Adapter Clip Screw Gasket Air tube to foot well Rubber washer... - Page 97 Section T Electrics Lubrication Distributor The cam and contact breaker pivots should be periodically 700cc Engines lubricated with petroleum jelly. The centrifugal weight spindles should be lightly oiled with engine The 41245 series distributor is mounted on the right-hand side of oil every 3000 miles (5000km).
- Page 98 Slacken the slotted head screw “A” in the contact plate Distributer Condenser (all models) (Figure 2) and adjust until the gap between the contacts is 0.38mm (0.015in) as shown in Figure 3. The condenser is fitted in parallel to the contact breaker points to Re-tighten the screw and check the setting again in case mitigate excessive arcing across the contacts.
- Page 99 Do not disturb the clamping bolt unless the ignition Turn off the ignition, remove the test lamp and reassemble all parts. timing is to be adjusted. Refit in reverse order. Method 2 - dynamic Ignition timing (700cc engines) Connect the leads of a "strobe" timing light in accordance with the maker’s instructions.
- Page 100 with the pointer. If the mark is to the left of the pointer the Measuring light running current ignition is too far advanced. Slacken the distributor and turn Clamp the motor in a vice and, using a 12 volt battery. with a moving slightly anti-clockwise to retard the ignition until the marks align.
- Page 101 regularly checked and topped-up if necessary. Keep the battery Check that the spade connectors on the back of the dynamo terminals clean and tight. are secure and clean. Disconnect the two leads and link the generator terminals The correct fan belt tension is important. A slack belt will slip and together with a short length of cable.
- Page 102 The warning light is connected in series with the field supply diodes Alternator (750 Van only, from chassis No 941001) and is extinguished when the voltage generated in the diodes equals the supply voltage from the battery.The only attention that the Description alternator is likely to require is the occasional checking of the brushes.
- Page 103 Figure 8 Alternator output test circuit Live side output diodes (3) 12 volt battery Earth side output diodes (3) 0-40 or 0-60 ammeter Field feed diodes 12 volt 2.2 watt lamp Stator winding 0-20 volt meter Field winding 0-15 ohms 35 amp variable resistor Slip-rings Link between regulator terminals "F"...
- Page 104 The Battery Battery voltage The battery is a 12 volt, negative earth, wet cell type and is located in By means of the tests already described the condition of the battery a tray on the RH side of the engine compartment (LH side on early has been ascertained and also its state of charge.
- Page 105 Page...
- Page 106 Horn Wheel boxes and rack tubing The high-tone horn is secured to the front RH of the engine To remove compartment by two ¼$ UNF set screws, washers and nuts. If defective the horn must be renewed. Remove the fascia (see Section R). Unscrew four self-tapping screws and remove the wheel Windscreen wiper and motor box cover plates.
- Page 107 Page...
- Page 108 Removal of light unit (Figure 11) Remove one self –tapping screw and detach the headlamp rim. Unscrew three self-tapping screws from the lamp retaining rim and remove the rim. Draw the lamp unit forward. The unit can now be disconnected from the cable adapters, either for replacement or simply to renew the pilot bulb.
- Page 109 Page...
- Page 110 Page...
- Page 111 Number plate lamp (Figure 19) Rear lights prior to chassis number 941001 Saloon (Figure 15) The chrome bezel of the number plate lamp is secured by two self- tapping screws. Access to the bulb is gained by removing the bezel The stop/tail and rear indicator lamps are housed within one unit and and carefully prising out the lamp lens.
- Page 112 Page...
- Page 113 Page...
-
Page 114: Windscreen Washer
Section U Windscreen Washer The windscreen washer is operated by a plunger button situated below the wiper motor switch. Water is directed onto the screen from a two-way jet, fixed to the bonnet and linked to a reservoir with plastic tubing. The reservoir is housed in a support bracket which is rivetted to the LH bulkhead near the engine manifold. - Page 115 Section V Tightening torques Front Suspension Upper wishbone to ball joint 5/16" UNF 3.46-4.15 kg/m 25-30 lb/ft Upper wishbone to chassis 3/8" UNF 4.15-4.84 kg/m 30-35 lb/ft Lower wishbone to trunnion 7/16" UNF 4.84-5.53 kg/m 35-40 lb/ft Lower wishbone to chassis 3/8"...
- Page 116 Rear axle Axle case nuts 5/16" UNF 2.77-3.46 kg/m 20-25 lb/ft Hub to half shaft nut 5/8" UNF 13.8-15.2 kg/m 100-110 lb/ft Coupling flange pinion nut 5/8" UNF 9.67-11.75 kg/m 70-85 lb/ft Axle filler/level plug 3/4" BSP 2.07-2.76 kg/m 15-20 lb/ft Brakes Hydraulic unions 0.97-1.10 kg/m...
Need help?
Do you have a question about the Rebel 700 1967 and is the answer not in the manual?
Questions and answers