Table of Contents
Advertisement
Advertisement
Table of Contents

Related Manuals for Brinsea Mini II Advance


Summary of Contents for Brinsea Mini II Advance
- Page 2 To register your new Brinsea product please visit www.brinsea.co.uk within 30 days of purchase and follow the link on the home page to qualify for your free 3 year guarantee. Sign up for the Brinsea Newsletter to receive the latest news and information.
-
Page 3: Table Of Contents
AB16 GB Issue 02 CONTENTS Setting Up Your Incubator Unpacking & Part Quantities Assembly Location & Installation Product Introduction – Functional Features Settings – Control Menu Display Temperature Humidity Eggs Periodic Incubation Cooling Hatching & Cleaning up Specifications... -
Page 4: Setting Up Your Incubator
Ensure you have the correct quantities of each part. If there are any parts damaged or missing please contact your retailer or Brinsea Products (at the address at the end of the document). Damaged appliances must not be used. -
Page 5: Assembly
AB16 GB Issue 02 1 SETTING UP YOUR INCUBATOR ASSEMBLY : Fit the water pot guard to prevent chicks from drowning. : Place the egg disc in the base of the incubator, ribbed side up. : Place the top onto the base. Check the top fits flush all the way around the base edge. -
Page 6: Location & Installation
AB16 GB Issue 02 1 SETTING UP YOUR INCUBATOR LOCATION AND INSTALLATION Your incubator will give best results in a heated room free from wide temperature variations and with generous ventilation – particularly if several incubators are running at the same time. Ensure that the room temperature cannot drop on a cold night. -
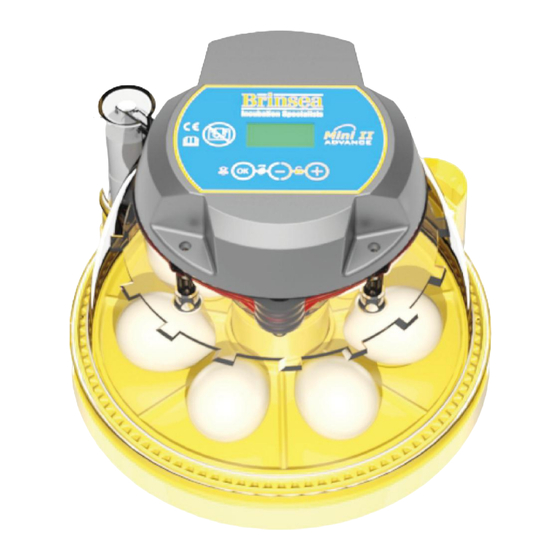
Page 7: Product Introduction - Functional Features
AB16 GB Issue 02 2 PRODUCT INTRODUCTION FUNCTIONAL FEATURES : Digital Display : Control Buttons : Egg Disc : External Fill Point... -
Page 8: Settings - Control Menu
AB16 GB Issue 02 INCUBATION TEMPERATURE 37.5C TEMP Range 20.0 – 40.0°C (68.0 – 104.0°F). Default 37.5°C (99.5°F). See section 5. 3 SETTINGS REMAINING DAYS DAYS DAYS The number of days left until the eggs are due to hatch. ... -
Page 9: Display
– Temperature, number of days remaining until the hatch is due and turn system status are continuously displayed. The Mini II Advance control system utilises a highly The asterisk “*” adjacent to the temperature reading shows when the heater power is on. When warming the asterisk will be... - Page 10 AB16 GB Issue 02 High Temperature Alarm Display (FIG 2) – If the measured temperature inside the incubator goes up by more than the 4 DISPLAY figure in the ALARM HI screen, the alarm will sound immediately and “H” will be displayed. Press OK to silence the alarm for 30 minutes.
-
Page 11: Temperature
Press the + button to select The Mini II Advance has a built-in temperature alarm which warns of high or low temperatures. See section 4 for details. °F or the – button to select °C. Press OK to return to the Main Menu and then scroll down to save. -
Page 12: Humidity
Poultry For more detailed information on all aspects of egg incubation including helpful advice on getting best results please visit our Waterfowl website at www.brinsea.co.uk/incubationhandbook. For more specific information on particular species’ requirements check the relevant literature. - Page 13 Increase the amount of water by using the fill point. Fit evaporating card strips, available from Brinsea or your stockist. High humidity is necessary to prevent membranes drying and hardening before the hatch fully emerges.
-
Page 14: Eggs
Before setting eggs ensure that the incubator has been running for several hours and has stabilised at the correct temperature. Press the - and + buttons The Mini II Advance is designed to accommodate eggs of different sizes from pheasant to duck eggs in the “standard” egg disc or smaller simultaneously to unlock the eggs using the alternative “small”... - Page 15 AB16 GB Issue 02 7 EGGS TURNING EGGS The Mini Advance turning system has three modes of operation: SETTING THE TURNING OPTIONS ON – The turning system will alternately roll the eggs left and right irrespective of the Day Countdown. A revolving line symbol “/” is Press the - and + buttons shown in the corner of the display.
-
Page 16: Periodic Incubation Cooling
SETTING THE COOLING PERIOD BACKGROUND INFORMATION ON PERIODIC COOLING The precise details of which days and what cooling period each day should be used for best effect are not known. Brinsea have assessed The cooling function is not essential. It’s an optional... -
Page 17: Hatching & Cleaning Up
Lay the eggs directly onto the mat. Don’t re-use hatching mats. Replacements are Following each hatch in the Mini II Advance remove and wash the egg discs, and base in Brinsea Incubation Disinfectant Solution and available from brinsea.co.uk, brinsea.com or your then rinse thoroughly. -
Page 18: Specifications
Electrical Supply: 100 - 230v, 50/60Hz, 0.5A max. brinsea.co.uk, brinsea.com or your local stockist (product code A0008). Used electrical and electronic products should not be mixed with general household waste. For proper treatment, recovery and recycling, please take this product to a designated collection point where it will be accepted free of charge. - Page 19 DECLARATION OF CONFORMITY Registered Community Design Application No 003007103 BRINSEA PRODUCTS LTD. 32-33 Buckingham Road Brinsea Products Ltd, 32-33 Buckingham Road, Weston Industrial Estate, Weston Industrial Estate Weston-super-Mare, N. Somerset, BS24 9BG Weston-super-Mare Tel: +44 (0) 845 226 0120 Fax: +44 (0) 1934 708177 North Somerset e-mail: sales@brinsea.co.uk, website:...
Need help?
Do you have a question about the Mini II Advance and is the answer not in the manual?
Questions and answers