
Related Manuals for Roberts RD-41


Summary of Contents for Roberts RD-41
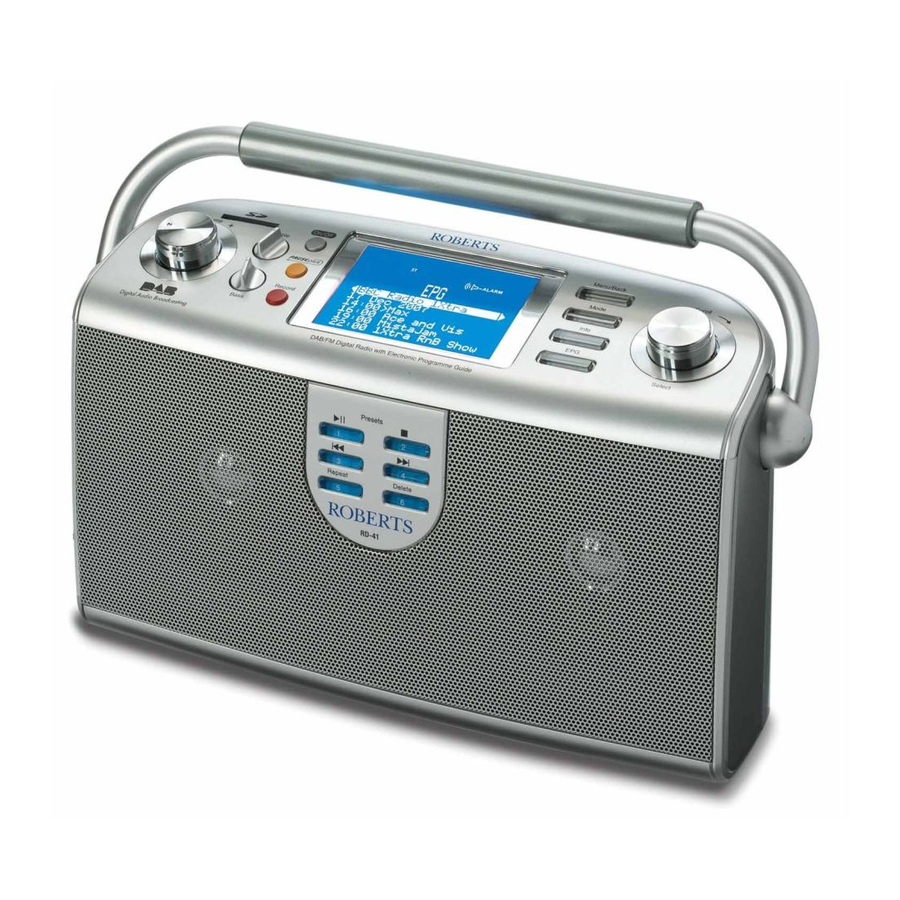
- Page 1 RD-41 DAB / FM RDS / MP3 / WMA / EPG digital radio with timed recording and Please read this manual before use...
-
Page 2: Table Of Contents
Contents Controls ... 2-3 Digital radio features ... 4 Battery operation ... 5 Using the AC adaptor ... 6 Using your radio for the fi rst time - DAB ... 7 Operation modes ... 8 Operating your radio - DAB ... 8 Selecting a station - DAB ... -
Page 3: Controls
Controls (top and front) 1. Volume control 2. SD card slot 3. Treble control 4. On/Off/Power button button 6. Telescopic aerial 7. LCD display If you need any further advice, please call our Technical Helpline on :- 020 8758 0338 (Mon-Fri) 8. -
Page 4: Controls (Back)
Controls (back) 21. Auxiliary input socket 22. USB connector 23. Line out socket 24. Headphone socket 25. DC input socket 26. Keylock switch 27. Battery compartment... -
Page 5: Rd-41 Digital Radio Features
Alarms The RD-41 has twelve alarms which can be set to wake you to either a radio station, playlist (SD card fi les) or a buzzer. If you need any further advice, please call our Technical Helpline on :-... -
Page 6: Battery Operation
Battery operation 1. Remove the Battery cover on the rear of the unit by pushing battery door in and downwards. 2. Insert six LR20 (D size) batteries into the spaces in the compartment. Take care to ensure all batteries are inserted with the correct polarity as shown inside the battery compartment. -
Page 7: Using The Ac Adaptor
1. Place your radio on a fl at surface and insert the adaptor plug into the DC socket located on the left side of your radio. The adpator for use with your RD-41 should provide 9 volts DC output at 1.2 amps, centre pin positive. -
Page 8: Using Your Radio For The Fi Rst Time - Dab
Using your radio for the fi rst time - DAB Your radio is supplied with a mains adaptor 1. Place your radio on a fl at surface. Insert the adaptor plug into the DC socket located on the rear of your radio. 2. -
Page 9: Operation Modes
Operation modes Your radio has 3 operation modes, DAB, FM and Playlist mode. 1. Press the Mode button to change the operation mode between DAB, FM and Playlist. • DAB mode is used for listening to Digital Radio broadcasts and for recording programmes to a memory card. -
Page 10: Selecting A Station - Dab
Selecting a station - DAB 1. Fully extend the telescopic aerial. 2. Press the Power/Standby button to switch on your radio. 3. Rotate the Tuning/Select control until the station list appears. 4. Continue to rotate the Tuning/Select control until the required station is highlighted on the display. -
Page 11: Finding New Stations - Dab
Finding new stations - DAB As time passes new stations may become available. To fi nd new stations proceed as follows:- 1. Press the Mode button until the DAB mode is selected. 2. Press the Menu/Back button to enter the main DAB menu. 3. -
Page 12: Manual Tuning - Dab
Manual Tuning - DAB Manual tuning allows you to tune directly to the various DAB Band III channels. UK DAB stations are currently located in the range 11B to 12D. 1. Press the Mode button until the DAB mode is selected. 2. -
Page 13: Secondary Services - Dab
Secondary services - DAB 1. When transmitted, secondary services will be added to the service list and will appear indented beneath their associated primary service. They can be selected by pressing the Tuning/Select control. 2. The secondary service icon will appear in the display. 3. -
Page 14: Using Your Radios Pause Plus Feature - Dab
Using your radio's Pause Plus feature - DAB How many times has your favourite radio station been interrupted by that phone call from a double glazing fi rm or someone selling that must have item? Sound familiar? With a single press of the button you can put your favourite station on hold while you answer that important call. - Page 15 Pause Plus Rewind and fastforward - DAB 1. As soon as you switch on your radio the working silently in the background so if, for example, you want to hear a news item again press the Pauseplus button. Press the Rewind or Fast Forward button or rotate the Tuning control to scroll forward or backward to the item you wish to listen to.
-
Page 16: Using An Sd Memory Card With Your Radio
(see page 28) Many different brands and capacities of SD card are available. Your RD-41 can use cards up to 2 GB. However, there are many different card variants available and not all cards can be guaranteed to work in the RD-41. -
Page 17: Recording A Radio Program (Dab Only)
Recording a radio program (DAB only) 1. Tune to the DAB station you want to record. 2. Press the Record button to start recording. The record icon will fl ash in the display. 3. Press the Record button to stop recording. The recording will be saved on your SD card. -
Page 18: Timed Recording - Dab
Timed recording - DAB Note: Timer record is only available on DAB via SD card and is provided for personal use only. Your radio has twelve recording timers which can be set to activate at different times and with fi ve different day options. 1. - Page 19 7. Rotate the Tuning/Select control until the day option is highlighted on the display. To adjust the day option setting press the Select/ Tuning control. By default, record timers are be set to "Off". • Each of the 12 timers can be set to one of the following modes:- - Will disable the timer Once - Will record at one time only...
- Page 20 4. Rotate the Tuning/Select control until the hour digits are highlighted on the display. Press and release the Tuning/Select control. 5. Rotate the Tuning/Select control to select the required hour. Press and release the Tuning/Select control. 6. Rotate the Tuning/Select control until the minute digits are highlighted on the display.
- Page 21 12. Rotate the Tuning/Select control until the station is highlighted on the display. Press and release theTuning/Select control. 13. Rotate the Tuning/Select control to select the required station. Press and release theTuning/Select control. 14. Press the Menu/Back button or select the "Back..." option to exit back a menu or screen.
- Page 22 6. Rotate the Tuning/Select control until the duration hour digits are highlighted on the display. Press and release the Tuning/Select control. 7. Rotate the Tuning/Select control to select the required hour. Press and release theTuning/Select control. 8. Rotate the Tuning/Select control until the duration minute digits are highlighted on the display.
- Page 23 Timer set to Weekly 1. Rotate the Tuning/Select control until "Weekly" is highlighted on the display. Press and release theTuning/Select control. 2. Rotate the Tuning/Select control until the week day is highlighted on the display. Press and release theTuning/Select control. 3.
- Page 24 8. Rotate the Tuning/Select control until the duration hour digits are highlighted on the display. Press and release the Tuning/Select control. 9. Rotate the Tuning/Select control to select the required hour. Press and release the Tuning/Select control. 10. Rotate the Tuning/Select control until the duration minute digits are highlighted on the display.
- Page 25 Timer set to Weekdays 1. Rotate the Tuning/Select control until "weekdays" is highlighted on the display. Press and release the Tuning/Select control. 2. Rotate the Tuning/Select control until the hour digits are highlighted on the display. Press and release the Tuning/Select control.
- Page 26 8. Rotate the Tuning/Select control until the duration minute digits are highlighted on the display. Press and release the Tuning/Select control. 9. Rotate the Tuning/Select control to select the required minute. Press and release the Tuning/Select control. 10. Rotate the Tuning/Select control until the station is highlighted on the display.
- Page 27 4. Rotate the Tuning/Select control until the minute digits are highlighted on the display. Press and release the Tuning/Select control. 5. Rotate the Tuning/Select control to select the required minute. Press and release the Tuning/Select control. 6. Rotate the Tuning/Select control until the duration hour digits are highlighted on the display.
- Page 28 10. Rotate the Tuning/Select control until the station is highlighted. Press and release the Tuning/Select control. 11. Rotate the Tuning/Select control to select the required station. Press and release the Tuning/Select control. 12. Press the Menu/Back button or select the "Back..." option to exit back a menu or screen.
-
Page 29: Sd Card Format
SD Card Format Formatting your SD card erases any previously recorded fi les. It also allows an SD card formatted on another device to be re-formatted for use on your radio. The SD card can be formatted in DAB, FM and Playlist mode. 1. -
Page 30: Sd Card Format
5. Rotate the Tuning Select control until "FORMAT MEMORY CARD" is highlighted on the display. 6. Press the Tuning/Select control, the screen will show "card formatting" and the disc will be formatted and the display will show "SD card formatted" and the radio will return to the previous screen. -
Page 31: Dynamic Range Control (Drc) Settings - Dab
Dynamic Range Control (DRC) settings - DAB DRC can make quieter sounds easier to hear when your radio is used in a noisy environment. 1. Press the Mode button until the DAB waveband is selected. 2. Press the Menu/Back button, the main Menu screen will be selected. -
Page 32: File Playback - Dab
3. All your playlist fi les will be played in list order from the fi rst selected fi le. Note: The RD-41 can playback MP3 and WMA fi les encoded at up to 192k bits per second. Files using higher rates may sometimes be playable. - Page 33 Repeat all fi les 1. Press the Play/Pause button. 2. Repeatedly press the Repeat mode button until " on the display. 3. All your playlist fi les will be played in list order. The entire list will be repeated from the selected fi le. Play fi...
- Page 34 Play single fi les 1. Press the Play/Pause button. 2. Repeatedly press the Repeat mode button until " shown on the display. The selected fi le will be played once. Repeat a single fi le 1. Press the Play/Pause button. 2.
- Page 35 Rewind fi les 1. Press the Rewind button to skip back to the previous track in the playlist. 2. While a track is playing press and hold down the Rewind button until the desired part of the track is reached. Stop playing fi...
-
Page 36: Using The (Electronic Programme Guide) Epg - Dab
Using the Electronic Programme Guide (EPG) The Electronic Programme Guide (EPG) provides start/stop times and program information similar to that provided for digital TV broadcasts. The EPG typically provides program information for up to seven days in advance. When used for the fi rst time your radio's EPG will be empty. After a few minutes use in DAB mode the guide will begin to fi... - Page 37 5. The EPG may contain additional information describing the program. To view this information press the Tuning/Select control. 6. If there is more text than can fi t onto the screen rotate the Tuning/Select control to scroll the display. 7. Press the Menu/Back button to view the program listing. 8.
-
Page 38: Operating Your Radio Fm - Auto Search
Operating your radio - FM auto search 1. Fully extend the telescopic aerial. 2. Press the Power/Standby button to switch on your radio. 3. Press the Mode button until the FM mode is selected. 4. Press the Menu/Back button, the main Menu screen will be selected. -
Page 39: Operating Your Radio Fm - Manual Tune
Operating your radio - FM manual tune 1. Fully extend the telescopic aerial. 2. Press the Power/Standby button to switch on your radio. 3. Press the Mode button until the FM mode is selected. 4. Press the Menu/Back button, the main FM Menu screen will be selected. -
Page 40: Presetting Stations Dab And Fm
Presetting stations - DAB and FM There are 6 memory presets for each of the 2 wavebands. 1. Press the Power/Standby button switch on the radio. 2. Tune to the required station as previously described. 3. Press and hold down the required Preset button until the display shows "Preset stored". -
Page 41: Clock Settings
Clock settings Your radio's clock and date is by default automatically set when fi rst tuned to a DAB station. The clock display will be 24hr format. You have two clock setting options, you can either select the clock to automatically update from DAB or FM broadcasts, or you can set the clock manually. -
Page 42: Setting The Clock Manually
Setting the clock manually 1. Press the Mode button until the desired waveband is reached. 2. Press the Menu/Back button, the main Menu screen will be selected. 3. Rotate the Tuning/Select control until "Settings" is highlighted on the display. Press and release the Tuning/Select control. 4. -
Page 43: Setting The Clock Manually
Setting the clock manually cont. 9. Rotate the Tuning/Select control to highlight the minute digits. Press and release the Tuning/Select control to adjust the min- utes. 10. Rotate the Tuning/Select control to select the required minute. Press and release the Tuning/Select control. 11. -
Page 44: Alarms
Alarms Your radio has twelve separate alarms which can be set to wake you to either radio, playlist or beep type alarm. Each alarm can be set to sound once, every day, weekly, weekdays or weekends. In the event of a power interruption your radio has a built in memory chip that will maintain all your alarm settings when the power is restored. - Page 45 Alarms cont. 4. Rotate the Tuning/Select control to select the required alarm (1 - 12). Press and release the Tuning/Select control. 5. Rotate the Tuning/Select control until the alarm day option is highlighted on the display. The default day option will be "Off". Press and release theTuning/Select control to enter setup.
- Page 46 Alarm set to Once 1. Rotate the Tuning/Select control until "Once" is highlighted on the display. Press and release the Tuning/Select control. 2. Rotate the Tuning/Select control until the date is highlighted on the display. Press and release the Tuning/Select control to enter date setup.
- Page 47 8. Rotate the Tuning/Select control until the alarm mode is high- lighted on the display. Press the Tuning/Select control. 9. Rotate the Tuning/Select control to select required alarm mode. Your alarm can be set to either buzzer, station name or track from playlist.
- Page 48 6. Rotate the Tuning/Select control until the alarm mode is highlighted on the display. Press the Tuning/Select control. 7. Rotate the Tuning/Select control to select required alarm mode. Your alarm can be set to either buzzer, station name or track from playlist.
- Page 49 6. Rotate the Tuning/Select control until the minute digits are highlighted on the display. Press and release the Tuning/Select control. 7. Rotate the Tuning/Select control to select the required minute. Press and release the Tuning/Select control. 8. Rotate the Tuning/Select control until the alarm mode is high- lighted on the display.
- Page 50 3. Rotate the Tuning/Select control to select the required hour. Press and release the Tuning/Select control. 4. Rotate the Tuning/Select control until the minute digits are highlighted on the display. Press and release the Tuning/Select control. 5. Rotate the Tuning/Select control to select the required minute. Press and release the Tuning/Select control.
- Page 51 Alarm set to Weekends 1. Rotate the Tuning/Select control until "Weekends" is highlighted on the display. Press and release the Tuning/Select control. 2. Rotate the Tuning/Select control until the hour digits are high- lighted on the display. Press and release the Tuning/Select control.
-
Page 52: Cancelling Alarms
Alarms cont. • Once an alarm has been set the radio alarm or buzzer alarm icon will appear in the display. The alarm will sound at the selected times and will sound for 60 minutes unless cancelled. While the alarm is sounding the alarm icon will fl ash in the display. Cancelling alarms 1. -
Page 53: Sleep Timer
Sleep timer Your radio can be set to turn off after a preset time has elapsed. The sleep timer can be adjusted between 5 and 90 minutes in 5 minute increments. 1. Press the Mode button until the desired waveband is selected. 2. -
Page 54: Clear Station List
Clear station list Clearing the station list will clear both the FM and DAB stations from the station data base. 1. Press the Mode button until the desired waveband is selected. 2. Press the Menu/Back button, the main Menu screen will be selected. -
Page 55: Audio Mode Fm
Audio mode FM On the FM band if a station being received is weak some hiss may be audible. This hiss can normally be eliminated or reduced by forcing the radio to play the station in mono 1. Press the Mode button until the FM waveband is selected. 2. -
Page 56: Display Settings Backlight
Display settings - Backlight Enables the backlight to be set to one of the following settings..-100%, 50%, 10% and off. 1. Press the Mode button until the desired waveband is selected. 2. Press the Menu/Back button, the main Menu screen will be selected. -
Page 57: Display Settings Contrast
Display settings - Contrast The display contrast can be changed if needed to suit lighting conditions. 1. Press the Mode button until the desired waveband is selected. 2. Press the Menu/Back button, the main Menu screen will be selected. 3. Rotate the Tuning/Select control until "Settings" is highlighted on the display. -
Page 58: Factory Reset
Factory reset This setting clears all station presets, service list, EPG and returns all variable settings to their factory defaults. 1. Press the Mode button until the desired waveband is selected. 2. Press the Menu/Back button, the main Menu screen will be selected. -
Page 59: Connecting To An External Amplifi Er Or Recorder
Connecting to an external amplifi er or recorder Your radio has a line-level audio output which you can use to connect your radio to an external amplifi er or recorder. This may be a stand-alone unit or it may be part of your existing hi-fi system. A signal is available from the line output whenever the radio is able to play from the loudspeaker or headphones, regardless of the volume control setting on the radio. -
Page 60: Auxiliary Input
Auxiliary input Your radio has an auxiliary (line-level) audio input which you can use to allow your radio to be used as an external amplifi er for MP3 players, compact disc players and similar devices. Simply connect the external audio source to the radio's line input socket (on the back of the radio) using a 3.5mm stereo plug. -
Page 61: Lock Switch
Lock Switch The lock switch located on the under-side of your radio is used to prevent unintentional operation. 1. Slide the Lock switch to the "locked position", the keylock symbol will appear in the display. The Power/Standby and all other buttons will be disabled. -
Page 62: Usb Connection
USB connection Your radio has a USB connection to connect your PC. The usb can be used to copy fi les to and from your SD card and also for any software updates available. When the USB connection is used to link your radio to your PC the SD card should appear as a removable disk drive. -
Page 63: General
General Do not allow this radio to be exposed to water, steam or sand. Do not leave your radio where excessive heat could cause damage. It is recom- mended that the DAB band be used wherever possible as better results in terms of quality and freedom from interference will usually be obtained than on the FM band. -
Page 64: Guarantee
In the event that it is not possible to return the instrument to the Roberts' dealer from whom it was purchased, please contact Roberts Radio Technical Services at the address shown on the rear of this manual.
Need help?
Do you have a question about the RD-41 and is the answer not in the manual?
Questions and answers