Advertisement
Available languages
Available languages
Quick Links
User's Manual
The EVO Next is built with integrated Bluetooth earbuds. Please follow these
for MIC-VRPB3
instructions on charging and connecting the earbuds to your device.
• Plug the micro USB cable into the micro USB port on the right side of the headset.
• Connect to any USB port or charger to start charging.
• The LED light will light up to indicate that the headset is charging.
• With the headset powered off, press the power button on the right side
of the headset for 2-3 seconds.
• After a few seconds the LED light will start to blink red and blue.
• On your smartphone, open the Bluetooth settings and start searching for devices.
• After a few seconds select "EVO VR VRPB3".
• The earbuds will connect and you are ready to go!
Note: If your smartphone asks for a passcode please enter "0000".
• You only need to pair the earbuds one time to each smartphone.
EVO NEXT PRO
• With your previously paired smartphone in range, press the power button
for 2-3 seconds to power on; the LED lights will flash red.
WITH BLUETOOTH
®
CONTROLLER
• After a few seconds the earbuds will automatically reconnect to your smartphone.
• If the earbuds do not auto-reconnect, open your Bluetooth settings on your
smartphone and select "EVO VR VRPB3".
IMPORTANT - GET STARTED
• Press and hold the power button for 5 seconds to power off the earbuds.
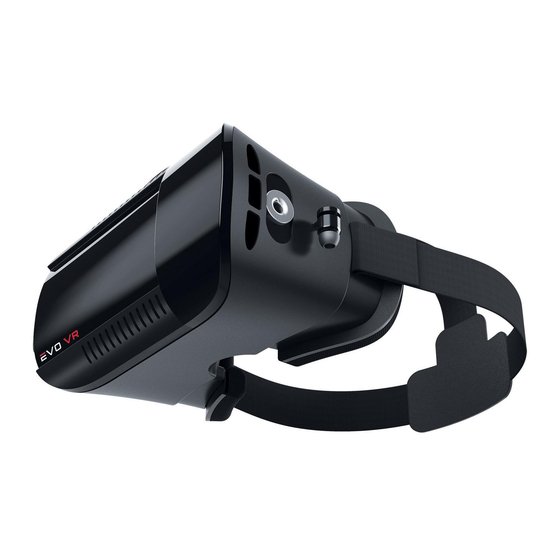
Thank you for purchasing the EVO Next Pro VR Headset with Bluetooth Gamepad.
This headset is designed to work with VR apps, games, and content on your
Headband Strap
iPhone
®
or Android
TM
device. Some game recommendations to get you started:
Attachment Loops
Space City Wars VR
InCell VR (Android / iOS)
(Android / iOS / Gamepad)
Lamper VR (Android / iOS)
Galaxy VR (Android / Gamepad)
YouTube (Android / iOS)
Magnet
Action Button
Hardcore VR Game (Android / Gamepad)
Within (Android / iOS)
Occupation VR (Android / iOS / Gamepad)
Jaunt VR (Android / iOS)
IMPORTANT NOTES:
Due to the continuous app updates and changes by app developers, some games
may not work properly with this gamepad. For iOS
®
(iPhone
®
/iPad
®
), please note
that this gamepad is designed to be used with "iCade compatible" games only.
Please search online for an updated list of these games.
Checkout www.merkuryinnovations.com
to see the latest VR app & game recommendations.
Installation & Usage
1 – On your smartphone: Launch your app store, search for and download
VR apps to use. (See below for easy-to-use QR code)
Charging
2 - Launch the app or game.
3 - Slide out the front tray of your EVO VR headset.
4 - Install the 3 mini rubber bumper pads into the tray to protect your phone.
5 - Place your phone into the tray making sure to align the center line of the
phone screen to the headset's midpoint mark.
6 - Slide the tray back into the headset.
Pair & Connect with a New Device
Note: Certain games and apps require the use of your smartphone's camera.
The front panel of the EVO VR Headset is removable, to allow camera access
for these types of games and apps.
Download Apps
with this QR Code:
Power On & Off / Reconnect to Bluetooth
- Download the
Google Cardboard App
to your smartphone.
- Launch the App.
- Scan this QR code to
optimize your viewer
Press: Play/Pause
Press & Hold: Power On/Off
Micro USB Port
Retractable Earbuds
Press: Adjust Volume
Press & Hold: Skip Tracks
6 – Adjust the headband straps so that the headset rests comfortably,
yet securely, on your head.
7 - Adjust Pupillary (Focal) Distance by moving the front portion of the headset
backwards or forwards until screen image becomes clearest.
8 - If necessary, minor adjustments can be made to the Left & Right Lenses by using
the two buttons located on the top of the headset.
(typically wider apart for adults, closer together for kids)
Note: If there is a double or blurry image, continue to make small adjustments
to the lenses (forward, backward/clockwise, counterclockwise) until the double
image disappears & the screen is in focus.
IMPORTANT:
Install Rubber Pads
9 - Press the arrow buttons on the right side of the headset to skips tracks; press
and hold to adjust volume. The built in magnet action button on the left side
of the headset allows you to interact with the screen in compatible apps & games.
10 - Enjoy!
Please Note
• Mobile phone size should not exceed 163mm (6.42 in.) x 83mm (3.27 in.)
• Do not use while charging mobile phone.
The front panel of the EVO VR Headset is removable
• For users that require eyeglasses with generally smaller prescriptions
(less than 600º of myopia), no eyeglasses are needed when using the EVO VR.
Specifications:
Make sure your
Fits Phone Sizes: 3.5"-6"
phone is centered
Adjustable for focal distance and pupil distance
in the phone dock
42mm Optical Lens
Field of View: 90 degrees
Weight: 15.8 ounces
Support for iOS
®
and Android
TM
L
R
Android
Button Functions:
Gamepad requires 2xAAA batteries (not included)
TM
1
2
7
3
4
9
10
8
6
5
4
"
@
" Function Switch Key
1
Analog Stick
5
Action Buttons
2
Indicator Light
"
"
6
Android
TM
/ iOS
®
Switch
3
-On-Off (Press & hold to power on/off)
"A" - Music/Video Mode
7
- Press @ + A to activate Music (& in some smartphone brands, video mode also).
- Press to pause/play music/videos.
- Press & hold to fast-forward in video mode
- Use the Analog Stick to control volume in "Standard" mode.
- Press C to raise volume, D to lower volume.
"B" - Game Mode (Landscape Mode)
8
- Press @ + B to activate Game (Landscape) Mode.
- Press D to shoot.
- Press A to lift-off.
- Use the Analog Stick to control direction. (Controls may vary due to phone type/brand.)
"C" - VR, Self-Timer & Video Modes
9
- Press @ + C to activate VR mode.
- Press @ + C to switch to Self-Timer Mode (*not supported by all phone brands.
In this case, use Mouse Mode Self-Timer; see below).
- Press @ + C to switch to Video Mode. Use the Analog Stick to fast-forward & rewind.
-Use the Analog Stick to control direction.
163mm / 6.42in
-Use the two keys on the front of the remote to shoot & lift-off.
10
"D" - Mouse Mode, Self-Timer Mode
-Press @ + D to switch to Mouse Mode.
Maximum
-Use the Analog Stick to control the mouse.
Smartphone
-Press C/D to raise/lower volume.
-Press A/B to confirm/quit.
Size
NOTE: For iOS devices this gamepad only supports "iCade" compatible games.
Pair & Connect to the Gamepad
• With the gamepad powered off, press the power button 2-3 seconds.
• After a few seconds the LED light will start to blink.
• On your smartphone, open the Bluetooth settings and start searching for devices.
• After a few seconds select "VR BOX".
• The gamepad will connect and you are ready to go!
Note: If your smartphone asks for a passcode please enter "0000".
Play
• Phone Selector
- Slide the switch on the side of the gamepad to iOS or Android
• Gaming Mode
- Android/iOS: Press @ + B to initial gaming mode.
Important: This gamepad is designed to work with most Android games
with gamepad support, and iOS games with iCade compatibility only.*
• Music & Video Control Mode
- Press @ + A
• Mouse & Multimedia Mode (for Android)
- Press @ + D
* NOTE: This gamepad will not work with iOS games that only have MFi gamepad
compatibility. Due to continuous app developer updates, some games may not
work properly.
Remote Troubleshooting:
• If the batteries are low, the Analog Stick may lose sensitivity. Replace batteries.
• If the remote won't connect over Bluetooth, restart your smartphone to reconnect.
• Using WiFi on your smartphone may affect Bluetooth connection.
• This remote works best with Android and iOS (iCade) supported smartphones.
If you have another brand of smartphone, press @ + A to test if the remote matches
with your phone.
• If the remote freezes, please remove and reinsert batteries.
Technical Support:
If you are experiencing problems, do not attempt to fix the product yourself or return it to the store you purchased it from.
Please refer to the user's manual or just contact our helpful tech support team:
Merkury Innovations
45 Broadway, 3rd Fl
New York, NY 10006
www.merkuryinnovations.com
support@merkuryinnovations.com
This device complies with Part 15 of the FCC Rules. Operation is subject to the two following conditions:
1. This device may not cause harmful interference.
2. This device must accept any interference received, including interference that may cause
undesired operation.
©2017 Merkury Innovations, LLC. • To explore our full selection of products, please visit www.merkuryinnovations.com.
The illustrated product and specifications may differ slightly from those supplied. All other trademarks and trade names
are those of their respective owners. Made in China
Advertisement

Summary of Contents for EVO VR MIC-VRPB3
- Page 1 - Slide the switch on the side of the gamepad to iOS or Android The front panel of the EVO VR Headset is removable, to allow camera access • With the headset powered off, press the power button on the right side for these types of games and apps.
- Page 2 8 - Au besoin, ajustez légèrement les lentilles de gauche et de droite à l'aide des 3 - Sortez la plaque de support avant de votre casque EVO VR en la faisant glisser. • Après quelques secondes, sélectionnez “VR BOX”.
Need help?
Do you have a question about the MIC-VRPB3 and is the answer not in the manual?
Questions and answers