Table of Contents
Advertisement
Advertisement
Table of Contents

Related Manuals for TomTom 4PN50


Summary of Contents for TomTom 4PN50
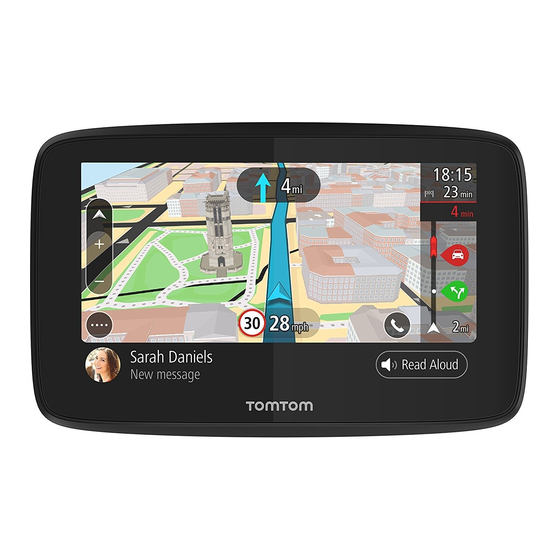
- Page 1 TomTom PRO User Manual 17.1...
-
Page 2: Table Of Contents
Setting up............................11 GPS reception ........................... 11 Connecting to LINK and WEBFLEET ....................12 Connecting to WEBFLEET ........................ 12 Sending information to TomTom ....................13 Memory card slot ..........................13 Device not starting ........................... 13 Charging your device ........................14 Caring for your PRO ......................... - Page 3 Reordering the Main Menu buttons ....................34 Traffic About TomTom Traffic ........................36 About RDS-TMC ..........................36 The route bar ............................ 36 Looking at traffic on the map ......................38 Looking at traffic on your route ....................... 39 Traffic incidents ..........................39 Approaching a traffic jam warning ....................
- Page 4 Entering search terms ......................... 80 Working with search results ....................... 81 About ZIP codes .......................... 82 List of POI type icons ........................83 Planning a route using step-by-step search ..................86 Planning a route to an address ....................86 Planning a route to a POI ......................88 Planning a route to a city center ....................
- Page 5 Suspend and change orders ......................118 Switch to another order ......................... 118 Cancel orders ..........................119 Messages About messages ..........................120 Dealing with messages ........................120 Sending messages ......................... 120 OptiDrive About OptiDrive ..........................121 Trip Results ............................. 121 Performance Trends ........................123 Considerations Considerations ..........................
- Page 6 Crossing into another area or country ..................139 Safety camera warnings ........................ 139 Changing the way you are warned ....................141 Reporting a new safety camera ..................... 141 Confirm or remove a speed trap ....................142 Updating locations for cameras and hazards ................142 Danger Zones About danger zones and risk zones ....................
- Page 7 Help ..............................162 Getting Help Help ..............................164 Product certification Finding product certification information on your device ............165 Addendum Copyright notices TomTom Telematics Limited Warranty...
-
Page 8: Read Me First
Read me first IMPORTANT: To avoid any malfunction or damage, carefully read these instructions before turning on and using this device. Keep this document for future reference. -
Page 9: Welcome To Navigation With Tomtom
Welcome to navigation with TomTom This User Manual explains all you need to know about your new TomTom PRO Driver Terminal. If you want a quick read of the essentials, we recommend that you read the Get going chapter. This covers installation, turning on, setting up, and planning your first route. -
Page 10: Get Going
Get going Installing in your car Use the supplied mount to install your TomTom PRO in your vehicle. Read the instructions about positioning your device before you install your PRO. To install your PRO, do the following: 1. Connect the supplied USB cable to the mount. If the mount is integrated into your PRO, connect the USB cable to the device. -
Page 11: Turning On And Off
Language and Units in the Settings menu. When you first switch on your TomTom PRO, you have to answer a few questions to set it up. Answer the questions by touching the screen. GPS reception When you first start your TomTom PRO, it may need a few minutes to determine your position. In the future, your position will be found much faster. -
Page 12: Connecting To Link And Webfleet
If you have a TomTom LINK device installed in your vehicle, we recommend that you connect your TomTom PRO device to the TomTom LINK installed in your car and retrieve the GPS signal from the LINK device. Important: Connecting to your TomTom LINK device will help your TomTom PRO find your GPS position faster. -
Page 13: Sending Information To Tomtom
Note: If you choose not to send location information to us, you will no longer receive our services. This is because services need to send the location of your device to TomTom in order to receive the traffic information related to where you are. The end date of your subscription remains the same, even if you do not send this information to us. -
Page 14: Charging Your Device
You are warned when the battery level is low or critical. You lose your connection to some TomTom services when the battery level is low or critical. When the battery is empty, your PRO goes into sleep mode. -
Page 15: Wi-Fi Connection
Wi-Fi connection About Wi-Fi® The easiest way to manage your maps, software, and all your device content is over a Wi-Fi connection. Your device can be updated using Wi-Fi without the need to connect to a computer. It remembers previously connected Wi-Fi networks so you can keep your device up-to-date when you are in range of that network. -
Page 16: Forgetting A Wi-Fi Network
Forgetting a Wi-Fi network To forget a Wi-Fi network from your list of available networks do the following: 1. Select Settings in the Main Menu, then select Wi-Fi. You see a list of available Wi-Fi networks and saved Wi-Fi networks that are currently out of range. - Page 17 Tip: When updating using Wi-Fi, we recommend that you keep you device connected to a power supply. Tip: Press the On/Off button to switch off the screen and save battery power while downloading an update. To select and install updates and new items, do the following: 1.
-
Page 18: What's On The Screen
What's on the screen The map view The map view is shown when you have no planned route. Your actual location is shown as soon as your PRO has found your GPS location. You can use map view in the same way as you might look at a traditional paper map. You can move around the map using gestures, and zoom using the zoom buttons. - Page 19 10. Green Speed advice for eco-friendly driving. Note: Green speed advice is only available if your TomTom PRO is connected to a TomTom LINK 5xx/4xx device that is connected to a TomTom ecoPLUS/LINK 105. 11. Your route, if you have planned a route.
-
Page 20: The Guidance View
The guidance view The guidance view is used to guide you along the route to your destination. The guidance view is shown when you start driving. You see your current location and details along your route, including 3D buildings in some cities. Note: 3D buildings in guidance view are not available in all countries and only available in selected cities. -
Page 21: The Webfleet Panel
Green speed advice for the optimal speed to save fuel. Note: Green speed advice only available if your TomTom PRO is connected to a TomTom LINK 5xx/4xx device that is connected to a TomTom ecoPLUS/LINK 105. 8. Current location. This symbol shows your current location. Select the symbol or the speed... -
Page 22: The Route Bar
Note: Active driver feedback and advice are only available if your TomTom PRO is connected to a TomTom LINK 5xx/4xx/3xx that is connected to a TomTom LINK 105. 2. Your current... -
Page 23: Distances And The Route Bar
The next two stops on your route. Gas stations that are directly on your route. TomTom Traffic. TomTom Safety Cameras Danger Zones. Rest stops directly on your route. You can choose the information you see on your route. -
Page 24: The Wide Route Bar
Other route information that you can select to show. Active Driver Feedback and advice Note: Active driver feedback and advices are only available if your TomTom PRO is connected to a TomTom LINK 5xx/4xx/3xx that is connected to a TomTom LINK 105. - Page 25 About Active Driver Feedback and advice Your TomTom PRO helps you to improve your driving behavior. The symbols for Active Driver Feedback and advice in the WEBFLEET panel and the route bar in the map and guidance views show real-time advice and alerts to remind you to drive in a safer and more eco-friendly way.
- Page 26 These icons indicate your fuel efficiency measured against an average value which is configured by the dispatcher. Tap the fuel efficiency buttons to see statistical information about your driving safety and fuel consumption. Alerts and advice in the route bar You require a TomTom LINK 105/ecoPLUS and LINK 4xx/5xx installed in your vehicle.
-
Page 27: Working Time Buttons
The following alerts and advice are shown in the route bar. Harsh braking - you are breaking too hard. The number of red squares indicate the severity of the driving event. Harsh steering - you are cornering too fast. The number of red squares indicate the severity of the driving event. -
Page 28: Order State Buttons
The following icon shows that your PRO device is not connected to WEBFLEET. By tapping this icon you can bring up the connection status view. The connection status view shows detailed information about the connectivity of your device to mobile networks, WEBFLEET, the TomTom LINK 4xx/5xx and more. -
Page 29: The Quick Menu
Not connected The quick menu To open the quick menu, select the current location symbol or the speed panel in the guidance view. You can then do any of the following: Mark a location Report a new safety camera ... - Page 30 Select this button to open the list of your recent destinations. Select a Recent Destination recent destination to plan a route to that destination. Select this button to clear or change your planned route or track. Current Route / Current Track Select this button to report working times to the office.
- Page 31 Select this button to find tips and tricks for eco-friendly and safe driving OptiDrive and statistics about your overall performance on driving performance and the individual key performance indicators. Select this button to show your saved places. My Places Select this button to show your saved routes.
-
Page 32: Main Menu Smaller Buttons And Symbols
Select this button to report a safety camera. Report Safety Camera Main Menu smaller buttons and symbols On the map view or guidance view, select the Main Menu button to open the Main Menu. The following buttons and symbols are available in the Main Menu screen, in addition to the navigation buttons: Select this button to open the Settings... -
Page 33: Volume Control
This symbol shows that your device is not connected to the internet using Wi-Fi. This button shows that you will hear voice instructions. Select the button to switch off voice instructions. You will no longer hear spoken route instructions but you will still hear information such as traffic information and warning sounds. -
Page 34: Reordering The Main Menu Buttons
Double tap Touch one finger on the screen twice in rapid succession. Example of when to use this: Zooming in. Drag Put one finger on the screen and move it across the screen. Example of when to use this: Scrolling a screen. Flick Flick the tip of a single finger across the screen. - Page 35 Tip: Alternatively, select the Edit button in the Main Menu. The menu button is shown with left and right arrows. 3. Press the left or right arrow on the menu button to move the button to a new position in the menu.
-
Page 36: Traffic
Note: PRO devices using a WEBFLEET connection to access TomTom services require a subscription that supports LIVE services. Note: TomTom services are not available in all countries or regions, and not all services are available in all countries or regions. For more information on available services in each region, go to tomtom.com/services. - Page 37 Note: Active driver feedback and advice are only available if your TomTom PRO is connected to a TomTom LINK 5xx/4xx/3xx that is connected to a TomTom ecoPLUS/LINK 105. * Coasting means keeping the car moving, without accelerating while the car remains in gear.
-
Page 38: Looking At Traffic On The Map
type of incident and the delay in minutes. Select a symbol to see more information about a stop, an incident or a safety camera. If a symbol is shown on top of another symbol, selecting the symbols zooms in on the route bar to show each symbol separately. -
Page 39: Looking At Traffic On Your Route
A symbol or number at the start of the incident shows the type of incident or the delay in minutes, for example 5 minutes. The color of the incident indicates the speed of traffic relative to the maximum allowed speed at that location, with red being the slowest. -
Page 40: Approaching A Traffic Jam Warning
Accident Dangerous conditions Road work Lane closure Road closure Rain Ice or snow Wind The symbol or number at the start of the incident shows the type of incident or the delay in minutes, for example 4 minutes. The color of the incident indicates the speed of traffic relative to the maximum allowed speed at that location, with red being the slowest. -
Page 41: Avoiding A Traffic Jam On Your Route
A warning symbol is shown in the route bar. The route bar zooms in to the start of the traffic jam. Your distance to the start of the traffic jam is shown in the route bar. The color of the road on the route bar changes to orange or red, ... -
Page 42: Advanced Lane Guidance
Tip: To be asked to select a route, select Ask me so I can choose in the Route Planning menu in Settings. If you've not already selected the faster route, as you approach the faster route it is shown on the guidance view in green. -
Page 43: Time-Dependent Speed Limits
You can choose to see a split screen with the Guidance view on the left and lane guidance on the right or a full screen with only lane guidance. You can also switch off lane guidance. Go to Appearance in to change the Highway exit previews setting. -
Page 44: Setting Your Vehicle Type
Setting your vehicle type About My Vehicle Important: Route planning for a specific vehicle type is available only when a truck map is installed. If a truck map is not installed, a car route is planned instead. My Vehicle lets you choose the type of vehicle you are driving so that the route planned by your device is suitable for your vehicle. - Page 45 2. Select Vehicle Type then select your vehicle type from the list shown. 3. Read the Your Safety information then select OK. 4. The My Vehicle screen is shown with the settings for the selected vehicle type. Select each setting and enter the correct value for your vehicle type. If a setting will not be a route restriction, for example Maximum Speed, set it to zero.
-
Page 46: Planning A Route For A Bus Or Truck
Planning a route for a Bus or Truck When you plan a route and you have a Bus or Truck as your vehicle type, you are shown the My Vehicle screen before your route is calculated. Check that your vehicle's settings are correct, then select the continue button: A route is planned and guidance to your destination begins. -
Page 47: Quick Search
Quick search Choosing which search to use The following two types of search are available: Quick search Start typing your destination, place, or POI to immediately see a list of street names, places, and POIs that match. Step-by-step search ... -
Page 48: Using Quick Search
Using quick search About search QUICK SEARCH ONLY You can use the search feature to find a wide range of places and then navigate to them. You can search for the following: A specific address, for example, type in 123 Oxford Street, London. ... - Page 49 1. Back button. Select this button to go back to the previous screen. 2. Search input box. Enter your search term here. As you type, matching addresses and POIs are shown. Tip: If you press and hold a letter key on the keyboard, you get access to extra characters if they are available.
-
Page 50: Working With Search Results
Select this button to change your keyboard layout to another language. You can choose up to four layouts from the list. If you have more than one layout selected, selecting the keyboard layout button opens a pop-up so you can quickly swap between your selected keyboard layouts. -
Page 51: About Zip Codes
When you select an address from the list of search results, you can choose to show it on the map, add a crossroad or plan a route to that chosen location. To get an exact address you can add the house number. -
Page 52: About Mapcodes
ZIP codes for streets Countries such as the Netherlands and the United Kingdom use this type of ZIP code. When you search using this type of ZIP code, enter the ZIP code, then leave a space and then optionally enter the house number. - Page 53 Legal - other services Food services Convenience store Fast food restaurant Restaurant Chinese restaurant Accommodation Hotel or motel Luxury hotel Campground Economy chain hotel Emergency services Hospital or clinic Dentist Police station Veterinarian Doctor Fire station Car-related services Outside parking Gas station Parking garage Car wash...
- Page 54 Other services Embassy Pet services Government office Telecommunication Company Community service Post office Pharmacy Shopping center Beauty services Tourist information office Shop Education College or university School Library Convention center Leisure Casino Winery Theater Tourist attraction Movie Theater Concert hall Amusement park Museum Exhibition center...
- Page 55 Opera Cultural center Nightlife Leisure center Children's Farm Sport Sports Park Swimming pool Mountain peak Water sports Beach Tennis court Park or recreation area Ice skating rink Yacht basin or marina Sports center Stadium Golf course Religion Church Place of worship Travel Railroad station Mountain pass...
- Page 56 Ferry terminal ZIP code Note: Not used in all countries. Border crossing Residential area Bus station City center Toll plaza Electric/hybrid car charging stations Rest area Truck stop...
-
Page 57: Planning A Route Using Quick Search
Planning a route using quick search Planning a route to an address QUICK SEARCH ONLY Important: In the interest of safety and to avoid distractions while you are driving, you should always plan a route before you start driving. To plan a route to an address using search, do the following: 1. - Page 58 Note: When searching, the whole map is searched. If you want to change how the search is done, select the button to the right of the search box. You can then change where the search is done, for example, to being along the route or in a city. 4.
-
Page 59: Planning A Route To A City Center
If you don't have a house number, select Add Cross Road or Show on Map. Tip: If you enter a house number that is not found, then the number appears red. The nearest house number that is found is shown in the Drive button. You can enter a new house num- ber, or you can select Drive/Ride to drive to the nearest house number. - Page 60 3. Use the keyboard to enter the name of the city or town you want to plan a route to. You can search for a town, city, or ZIP code. Tip: To search for a specific city you can use the city's ZIP code or the country. For example, searching for New York will return many results.
- Page 61 The city name is shown in the right side of the search input box, and the city center POI is shown below in the right-hand column. 6. Select the city center POI. The city center location is shown on the map. 7.
-
Page 62: Planning A Route To A Poi
Planning a route to a POI QUICK SEARCH ONLY Important: In the interest of safety and to avoid distractions while you are driving, you should always plan a route before you start driving. To plan a route to a POI type or a specific POI (Point of Interest) using search, do the following: 1. - Page 63 4. As you type, suggestions based on what you have entered are shown in columns. You can continue typing or select a suggestion. Tip: To see more results, hide the keyboard or scroll down the results list. Tip: You can switch between seeing the results on the map or in a list by selecting the list/map button: 5.
-
Page 64: Planning A Route To A Poi Using Online Search
Wi-Fi or WEBFLEET with a LIVE subscription. If you did a POI search but could not find the POI you were looking for, you can search TomTom Places online. To find POIs by searching online, do the following: Search for a POI using Search in the Main Menu. - Page 65 You can search for a POI (Point of Interest) type, such as a restaurant or tourist attraction. Alternatively, you can search for a specific POI, for example "Rosie's Pizzeria". Note: When searching, you can search near your current location, in a town or city, or near your destination.
-
Page 66: Planning A Route Using The Map
6. To plan a route to this destination, select Drive/Ride, depending on which device you are using. A route is planned and then guidance to your destination begins. As soon as you start driving, the guidance view is shown automatically. Tip: If your destination is in a different time zone, you see a plus (+) or a minus (-) sign and the time difference in hours and half hours in the arrival information... - Page 67 A pop-up menu shows the nearest address. 3. To plan a route to this destination, select Drive/Ride, depending on which device you are using. A route is planned and then guidance to your destination begins. As soon as you start driving, the guidance view is shown automatically.
-
Page 68: Planning A Route Using My Places
Planning a route using My Places To navigate to one of My Places from your current location, do the following: 1. Select the Main Menu button to open the Main Menu. 2. Select My Places. A list of all your Places opens. 3. -
Page 69: Planning A Route Using Coordinates
Your chosen Place is shown on the map with a pop-up menu. 4. To plan a route to this destination, select Drive/Ride, depending on which device you are using. A route is planned and then guidance to your destination begins. As soon as you start driving, the guidance view is shown automatically. - Page 70 3. Select the type of search button to the right of the search box. 4. Select Latitude Longitude. Tip: The example coordinates shown on the screen are your current latitude and longitude. 5. Type in your pair of coordinates. You can enter any of these coordinate types: Decimal values, for example: ...
-
Page 71: Planning A Route Using A Mapcode
Planning a route using a mapcode QUICK SEARCH ONLY Important: In the interest of safety and to avoid distractions while you are driving, you should always plan a route before you start driving. To plan a route using a mapcode, do the following: 1. -
Page 72: Planning A Route In Advance
Planning a route in advance You can plan a route in advance before you drive it. You can save the route as part of your Routes list. To plan a route in advance, do the following: 1. Search for the location you want to use as a starting point. 2. -
Page 73: Finding A Parking Lot
A pop-up menu shows a list of options. 3. Select Remove Starting Point. Your route is replanned with your current location as the starting point. The original starting point is removed from your route. Changing the starting point into a stop 1. - Page 74 2. Select Parking. The map opens showing the locations of parking lots. If a route is planned, the map shows parking lots near your destination. If a route isn't planned, the map shows parking lots near your current location. You can change the screen to show a list of parking lots by pressing this button: You can select a parking lot from the list to locate it on the map.
-
Page 75: Finding A Gas Station
If you want to change how the search is done, select the button to the right of the search box. You can then change where the search is carried out, for example, to search near you or the whole map. 3. - Page 76 To find a gas station, do the following: 1. Select the Main Menu button to open the Main Menu. 2. Select Gas Station. The map opens showing the locations of gas stations. If a route is planned, the map shows gas stations along your route. If a route isn't planned, the map shows gas stations near your current location.
- Page 77 Tip: You can scroll down the list of results using the scroll bar on the right side of the screen. If you want to change how the search is done, select the button to the right of the search box. You can then change where the search is carried out, for example, to search near you or the whole map.
- Page 78 A pop-up menu opens on the map showing the name of the gas station. 4. Select Drive/Ride, depending on which device you are using. A route is planned and then guidance to your destination begins. As soon as you start driving, the guidance view is shown automatically.
-
Page 79: Step By Step Search
Step by step search Choosing which search to use The following two types of search are available: Quick search Start typing your destination, place, or POI to immediately see a list of street names, places, and POIs that match. Step-by-step search ... -
Page 80: Entering Search Terms
Entering search terms STEP-BY-STEP SEARCH ONLY Select Drive To in the Main Menu, then select Address or Point of Interest. The search screen shows the keyboard and the following buttons: 1. Back button Select this button to go back to the previous screen. 2. -
Page 81: Working With Search Results
Select this button to hide the keyboard. 8. Show/hide keyboard button Select this button to show or hide the keyboard. Tip: Select the Shift key once to make the next letter you type upper case. Double tap the Shift key to use Caps-Lock where all the letters you type are upper case. Select the Shift key once to quit Caps-Lock. -
Page 82: About Zip Codes
When you show the address or POI on the map, you can use the pop-up menu to add the location to My Places. If a route is already planned, you can add the location to your current route. Note: The best search results are shown on the map. When you zoom in, the lower ranked search results are gradually shown. -
Page 83: List Of Poi Type Icons
List of POI type icons Legal and financial services Court house Legal - Attorneys Bank Legal - other services Food services Convenience store Fast food restaurant Restaurant Chinese restaurant Accommodation Hotel or motel Luxury hotel Campground Economy chain hotel Emergency services Hospital or clinic Dentist Police station... - Page 84 Parking garage Car wash Car dealer Vehicle inspection center Rental car facility Electric/hybrid car charging point(s) Rental car parking Car repair facility Other services Embassy Pet services Government office Telecommunication Company Community service Post office Pharmacy Shopping center Beauty services Tourist information office Shop Education...
- Page 85 Theater Tourist attraction Movie Theater Concert hall Amusement park Museum Exhibition center Opera Cultural center Nightlife Leisure center Children's Farm Sport Sports Park Swimming pool Mountain peak Water sports Beach Tennis court Park or recreation area Ice skating rink Yacht basin or marina Sports center Stadium Golf course...
-
Page 86: Planning A Route Using Step-By-Step Search
Church Place of worship Travel Railroad station Mountain pass Airport Scenic or panoramic view Ferry terminal ZIP code Note: Not used in all countries. Border crossing Residential area Bus station City center Toll plaza Electric/hybrid car charging stations Rest area Truck stop Planning a route using step-by-step search Planning a route to an address... - Page 87 2. Select Drive To. 3. Select Address. You can change the country or state setting by selecting the flag before you select a city. 4. Enter the town or city name, or the ZIP code. Towns with similar names are shown in the list while you type. When the correct city or town appears in the list, select the name.
-
Page 88: Planning A Route To A Poi
Tip: If the house number does not exist then it appears red. The nearest house number is then shown in the Drive to button. 7. Select Drive/Ride, depending on which device you are using. A route is planned and then guidance to your destination begins. As soon as you start driving, the guidance view is shown automatically. - Page 89 - Along route if you have planned a route. - Near destination if you have planned a route. - Near point on map if you have selected a point on the map. - Near departure point if you have planned a route or a track. 5.
-
Page 90: Planning A Route To A City Center
Tip: If your destination is in a different time zone, you see a plus (+) or a minus (-) sign and the time difference in hours and half hours in the arrival information panel. The estimated time of arrival is the local time at your destination. Tip: You can add a stop to a route that you have already planned. -
Page 91: Planning A Route To A Poi Using Online Search
5. Select the city center POI. 6. Select Drive/Ride, depending on which device you are using. A route is planned and then guidance to your destination begins. As soon as you start driving, the guidance view is shown automatically. Tip: If your destination is in a different time zone, you see a plus (+) or a minus (-) sign and the time difference in hours and half hours in the arrival information panel. - Page 92 If you did a POI search but could not find the POI you were looking for, you can search TomTom Places online. To find POIs by searching online, do the following: Search for a POI using Drive to in the Main Menu.
-
Page 93: Planning A Route Using The Map
Tip: You can switch between seeing the results on the map or in a list by selecting the list/map button: 4. Select an individual POI from the list. The location is shown on the map. 5. To see more information about the POI, select the POI on the map and then select the pop-up menu button. - Page 94 Move the map and zoom in until you can see the destination that you want to navigate to. Tip: You can also select a map symbol to open the pop-up menu, then select the Drive/Ride button to plan a route to that location. 2.
-
Page 95: Planning A Route Using My Places
Tip: You can use the location you selected in other ways, such as adding it to Places, by selecting the pop-up menu button. Tip: If your destination is in a different time zone, you see a plus (+) or a minus (-) sign and the time difference in hours and half hours in the arrival information panel. - Page 96 A list of all your Places opens. 3. Select the Place you want to navigate to, for example Home. Your chosen Place is shown on the map with a pop-up menu. 4. To plan a route to this destination, select Drive/Ride, depending on which device you are using.
-
Page 97: Planning A Route Using Coordinates Using Step-By-Step Search
Planning a route using coordinates using step-by-step search STEP-BY-STEP SEARCH ONLY Important: In the interest of safety and to avoid distractions while you are driving, you should always plan a route before you start driving. To plan a route using a pair of coordinates, do the following: 1. -
Page 98: Planning A Route In Advance
7. To plan a route to this destination, select Drive/Ride, depending on which device you are using. A route is planned and then guidance to your destination begins. As soon as you start driving, the guidance view is shown automatically. Tip: If your destination is in a different time zone, you see a plus (+) or a minus (-) sign and the time difference in hours and half hours in the arrival information... -
Page 99: Finding A Parking Lot
Changing the starting point to be your current location 1. Select the starting point of the route in the map view. 2. Select the pop-up menu button. A pop-up menu shows a list of options. 3. Select Remove Starting Point. Your route is replanned with your current location as the starting point. - Page 100 1. Select the Main Menu button to open the Main Menu. 2. Select Parking. The map opens showing the locations of parking lots. If a route is planned, the map shows parking lots near your destination. If a route isn't planned, the map shows parking lots near your current location.
- Page 101 Tip: You can scroll down the list of results using the scroll bar on the right side of the screen. If you want to change how the search is done, select the button to the right of the search box. You can then change where the search is carried out, for example, to search near you or the whole map.
-
Page 102: Finding A Gas Station
A pop-up menu opens on the map showing the name of the parking lot. 4. Select Drive/Ride, depending on which device you are using. A route is planned and then guidance to your destination begins. As soon as you start driving, the guidance view is shown automatically. - Page 103 The map opens showing the locations of gas stations. If a route is planned, the map shows gas stations along your route. If a route isn't planned, the map shows gas stations near your current location. You can change the screen to show a list of gas stations by pressing this button: You can select a gas station from the list to locate it on the map.
- Page 104 If you want to change how the search is done, select the button to the right of the search box. You can then change where the search is carried out, for example, to search near you or the whole map. 3.
-
Page 105: Changing Your Route
Changing your route The Current Route menu When you have planned a route or track, select the Current Route or Current Track button in the Main Menu to open the Current Route or Current Track Menu. The following buttons are available in the menu: Clear Route / Clear Select this button to clear the currently planned route or track. - Page 106 Up to two road numbers shown in road signs whenever available. An instruction arrow. An instruction description. The distance between two consecutive instructions. Exit number. The full addresses of stops on your route. Tip: Select an instruction to see a preview of that section of the route in the map view.
-
Page 107: Avoiding A Blocked Road
Drive to Starting On the Current Track menu, select this button to plan a route to the starting point of the track. The starting point is converted to a stop. For Point more information, see Navigating using a track. Share track On the Current Track menu, select this button to export the current track as a GPX file and save it on a memory card for sharing with other users. -
Page 108: Finding An Alternative Route
2. Select Current Route. 3. Select Avoid Part of Route. A screen opens showing a list of the sections that comprise your current route. 4. Select the section of the route that you want to avoid. A preview shows you the section you have chosen on the map. 5. -
Page 109: Types Of Route
Tip: Information from the TomTom Traffic is used when calculating alternative routes. Any route that is 50% longer in time than the original route is not shown. 5. Select your chosen route by tapping on the time balloon. Guidance to your destination begins. As soon as you start driving, the guidance view is shown automatically. -
Page 110: Avoiding An Incident Or Route Feature Using The Route Bar
Note: Carpool lanes are sometimes known as High Occupancy Vehicle Lanes (HOV lanes) and are not present in every country. To travel on these lanes, you may need to have more than one person in the car, for example, or the car may need to use environmentally-friendly fuel. If you choose to avoid a route feature, a new route is planned. -
Page 111: Adding A Stop To Your Route From The Current Route Menu
Adding a stop to your route from the current route menu 1. In the Main Menu, select Current Route. 2. Select Add Stop to Route. The map view is shown. 3. To select a stop, do one of the following steps: Zoom in on the map, then press and hold to select a location. - Page 112 3. Select the stops one by one in the order you wish to drive them. The symbols change to a flag as you select each stop. The last stop you select becomes your destination. Your route is recalculated with the stops in the changed order.
-
Page 113: Report Working Time
To generate personalized work time reports, you need to identify yourself by entering your PIN code. Note: Using WEBFLEET, the office can select to have you enter your PIN code each time you turn on your TomTom PRO. 1. Tap the Main Menu button. 2. Tap the Working times button. -
Page 114: Working Time Buttons
Alternatively, you can tap the button showing the currently selected working state in the WEBFLEET panel on the left while in map or guidance view. 2. Tap the appropriate button to change your work status. You can select between Start, Pause and End. When you tap Start, the time you started working is indicated. -
Page 115: Using The Logbook
Using the logbook Change logbook mode You can generate a driver’s logbook with your TomTom PRO. To use this functionality, you need to adjust the odometer in the Vehicle Details first. You can do this by tapping Set odometer in the Logbook menu. -
Page 116: Orders
About orders The office can send service orders, delivery orders, and pick up orders. They are stored on your TomTom PRO. You can read and deal with them at any time by tapping the Orders button in the WEBFLEET panel in the map or guidance view. -
Page 117: Working On Orders
Delivery started / Pickup finished Delivery finished / Pickup started Working on orders To show the complete list of your orders, do the following: 1. Tap the Orders button in the WEBFLEET panel in the map or guidance view to bring up the list of orders. -
Page 118: Sending Order Status Messages
2. Tap the sort list button in the bottom right corner left to the keyboard button. The icon shown on the sort list button changes according to the selected sorting criterion. 3. Select from the list how to order the list. Sending order status messages When you are working on an order, you can send order-related status messages to the office. -
Page 119: Cancel Orders
Cancel orders You can cancel an order at any time. To cancel an order, do the following. 1. Select the order from the list of orders. 2. Tap the pop-up menu button. A list opens. 3. Tap Cancel order. You are asked to enter a reason for canceling the order. Then you are asked if you want to delete the order. -
Page 120: Messages
Messages About messages The office can send text messages to you. They are stored on your Driver Terminal. You can read them at any time by tapping the Messages button in the WEBFLEET panel in the map or guidance view. The Messages button in the WEBFLEET panel shows the number of unread messages. -
Page 121: Optidrive
OptiDrive About OptiDrive You require a TomTom LINK 105/ecoPLUS and a LINK 4xx/5xx installed in your vehicle. OptiDrive helps you to drive safer and more eco-friendly by providing historical and in-trip statistical information about your driving style and giving background information about your driving performance. - Page 122 Fuel Consumption Constant Speed Gear Shifting * Coasting means keeping the car moving, without accelerating while the car remains in gear. You should not travel while the car is out of gear or with the clutch depressed. This is danger- ous as it reduces driver control.
-
Page 123: Performance Trends
show information about how eco-friendly you are currently driving or have driven during your last trip, tap the Trip Results button. To delete the statistical information tap the Reset button. Performance Trends In the Performance Trends menu you can see statistics on the development of your individual driving style. - Page 124 Coasting - Tap this button to see the graph and statistics for a selected period on how often you released the accelerator, remained in gear, and let the vehicle roll to decrease your speed. Green Speed — Tap this button to see a graph and the statistics for a selected period on how you made use of the Green Speed advice while driving.
-
Page 125: Considerations
Considerations Considerations This section contains important considerations for the use of your TomTom PRO together with the TomTom LINK and/or WEBFLEET. Maintain connection to LINK The following applies when you are using a PRO 7xxx connected to a TomTom LINK. -
Page 126: My Routes
My Routes About My Routes My Routes provides an easy way to save and retrieve routes and tracks. You may want to use My Routes in one or more of the following situations: While working - Your job involves driving several routes with multiple stops on a daily basis. ... -
Page 127: Saving A Route
ITN files become routes after import. Using ITN files There are several things you can do with your ITN file: You can import an ITN file onto your TomTom PRO so you can travel that same route again and get navigation instructions. -
Page 128: Navigating Using A Saved Route
The name of the route is shown in the edit screen. 5. Edit the name of the route so that you can easily recognize it. 6. Save your route in the My Routes list. Tip: You can also save a route using the Add to My Routes button in the Current Route menu. -
Page 129: Navigating To A Stop On A Saved Route
Navigating to a stop on a saved route You can navigate from your current location to a stop on your saved route instead of to the start of the saved route. The stop is changed to the start of your route. Your new starting point might be one closer to your current location, or you might just want to make your route shorter. -
Page 130: Recording A Track
3. Select the pop-menu button to open the menu. 4. Select Manage Stops. 5. Select Add Stop to Route. 6. Select your new stop on the map. Tip: If you know the name of your new stop, you can use Search to select your stop instead of using the map. -
Page 131: Deleting A Route Or A Track From My Routes
The track route is shown on the map view. 3. Select the track, then select the pop-up menu. 4. Select Drive to Starting Point. The starting point of the track is converted to your first stop and then the route is planned. Guidance to your destination begins from your current location. -
Page 132: Exporting Tracks To A Memory Card
5. When you see a message that your tracks have been exported successfully, remove your memory card to share your tracks with other users. Note: Each exported route is saved as a GPX file in the TomTom folder on your memory card. -
Page 133: Voice Control (Speak & Go)
Note: Voice control is not supported on all devices or in all languages. If your device has voice control capability, you will see a Voice Control button in the main menu: Instead of selecting items on the screen to control your TomTom PRO, you can use your voice to control your PRO. -
Page 134: Making Your Own Wake-Up Phrase
Making your own wake-up phrase You can make your own wake-up phrase to start Voice Control. You can choose any words you like to make your wake-up phrase fun or easy to say. To make your own wake-up phrase, do the following: 1. -
Page 135: Some Tips For Using Voice Control
2. The status of voice control on your PRO. You can speak when your PRO says "I'm listening" and you see the microphone symbol in the left corner. The status message tells you if voice control cannot understand what you said and gives you instructions about using voice control. -
Page 136: Saying Commands In Different Ways
"Go via a parking lot" and "Go via a gas station" "Display My Places" and "Recent destinations" "Travel via a recent destination," and "Travel via a saved place" "Report safety camera" "When will I get there?" ... -
Page 137: Going Home Using Voice Control
4. Say the address or location. You can also say the name of a place or a city center. Your PRO repeats what you say and asks for confirmation. Important: Say "number one" or "number two" and not "one " or "two" when selecting an item from a list such as a house number. -
Page 138: Changing A Setting Using Voice Control
Tip: Say "All commands" to see a list of commands you can say. Alternatively, select Help in the Main menu, then select Voice control and then select Which commands can I say?. For some commands, voice control repeats what you say and asks for confirmation. If a route is planned, a list of gas stations along your route is shown. -
Page 139: Safety Cameras
The Safety Cameras service also warns you about the following safety hazards: Accident blackspot locations. To get TomTom services on your PRO, you must be connected to the internet. Note: Some TomTom services might not be available in your current location. Crossing into another area or country When you drive into an area or country that does not permit safety camera warnings, your PRO switches the safety cameras service off. - Page 140 Symbol shown on Symbol shown in Description route bar Safety camera - this type of camera checks the speed of passing vehicles and is fixed in one place. Speed trap - this type of camera checks the speed of passing vehicles and can be moved to different locations.
-
Page 141: Changing The Way You Are Warned
If you pass a new safety camera that you were not warned about, you can report it instantly. The safety camera is saved on your device automatically, and is also sent to other users. Note: To report a safety camera, you must be connected to TomTom services and logged in to your TomTom account. -
Page 142: Confirm Or Remove A Speed Trap
Select No if the speed trap has been removed. Your selection is sent to TomTom. We collect reports from many users to determine if the camera warning should be kept or removed. Updating locations for cameras and hazards The locations of safety cameras can change frequently. -
Page 143: Danger Zones
zone. Information about the location of zones is continually updated by TomTom and other users and frequently sent to your PRO so that you always have the latest information. You can also contribute by reporting new risk zone locations. -
Page 144: Danger Zone And Risk Zone Warnings
The locations of danger zones and risk zones can change frequently. New zones can also appear without warning. Your TomTom PRO receives all zone updates in real time. You do not need to do anything to receive updates – they are sent to your PRO automatically. -
Page 145: My Places
My Places About My Places My Places provides an easy way to select a location without the need to search for the location each time. You can use My Places to create a collection of useful or favorite addresses. Tip: The terms "favorite" and "place" mean the same thing - favorites are places that you go to often. -
Page 146: Changing Your Home Location
2. Select Add Home or Add Work. Tip: To set your home location, you can also select Add Home from the Main Menu. 3. To select a location for home or work, do one of the following: Zoom in on the map at the location you want to select. Press and hold to select the loca- ... -
Page 147: Adding A Location From My Places
Zoom in on the map at the location you want to select. Press and hold to select the loca- tion, then select the home location symbol. Select the Search button and search for a location. Select a location to set as home. Select ... -
Page 148: Adding A Location To My Places Using Search
2. Press and hold to select the location. 3. Select the pop-up menu button. 4. Select Add to My Places. The name of the location is shown in the edit screen. 5. Edit the name of the location so you can easily recognize it. 6. -
Page 149: Deleting A Recent Destination From My Places
Tip: Some TomTom Navigation devices have POI lists pre-installed. Your PRO uses .OV2 files for POI collections. - Page 150 Tip: You can switch between seeing the results on the map or in a list by selecting the list/map button: 4. Select a POI from the list, or select the map view to see the POIs on the map. 5. To plan a route to this destination, select Drive/Ride, depending on which device you are using.
-
Page 151: Settings
Vehicle Select Settings in the Main Menu, then select Driver & Vehicle. Select Vehicle to search for the TomTom LINK device installed in your car and to connect your PRO to the LINK device. When you have selected Vehicle, your PRO immediately starts searching for LINK devices. This can take some time. -
Page 152: License Plate
Selecting the vehicle type To set the vehicle type do the following. 1. Select Vehicle Type. 2. Select the type of vehicle from the list. If you cannot find the type of vehicle you have in the list, select Others. Defining the dimensions, weight and maximum speed To define the dimensions, weight and maximum speed, do the following. -
Page 153: Appearance
Select this setting to advise to shift up and release the accelerator to start coasting* in the route bar and to show the optimal speed to drive eco-friendly. Note: The Green speed advice is only available if you have a TomTom LINK 5xx/4xx installed that is connected to a TomTom ecoPLUS/LINK 105. -
Page 154: Display
Display Select Settings in the Main Menu, then select Appearance. Theme color Select Theme color to change the color used in the menus, buttons and icons, and on the map. Tip: The current location symbol and route also change to the selected color. You can always change back to the original color. -
Page 155: Route Information
Note: The wide route bar can only be shown if the screen is wide enough. When the wide route bar is shown, you see more information about your route. For example, you see time and distance to traffic and more. Arrival information Select Arrival information to change the following settings: Show remaining distance... -
Page 156: Guidance View
Select this setting to see stops on your route. Rest areas Select this setting to see rest areas on your route. Toll zones Select this setting to see toll zones on your route. Ferries and car shuttle trains ... -
Page 157: Wi-Fi
When a faster route is available If a faster route is found while you are driving, TomTom Traffic can replan your trip to use the faster route. Select from the following options: Always take the fastest route - the fastest route will always be chosen for you. -
Page 158: Maps
Network security Depending on the type of Wi-Fi network, you may see just password, proxy, and IP settings. A more secure network, however, has extra security settings such as: Network name or SSID. EAP method, for example, PEAP, TLS, TTLs, etc. ... -
Page 159: Sounds And Warnings
Additional settings Traffic jam ahead Traffic jam warnings in the route bar are part of TomTom Traffic. You can choose never to be warned or to always be warned when approaching a jam too quickly. When speeding ... -
Page 160: Voices
Voices Select Settings in the Main Menu, then select Voices. Choosing a voice Select Choose a voice to change the voice that gives spoken directions and other route instructions. A wide range of voices are available. There are computer voices which can read street names and other information directly from the map and there are recorded voices which have been recorded by actors. -
Page 161: Language And Units
Select this setting to start voice control when you say the wake-up phrase. The default wake-up phrase is "Hello TomTom," but you can make your own wake-up phrase. Change the wake-up phrase Use this setting to make your own wake-up phrase. -
Page 162: System
This is an information screen rather than a setting and shows you information about your TomTom PRO. You may be asked to go to this screen during a call to TomTom Customer Support. Information includes: Serial number, Application version, Installed maps, Product certifica- tions, Free space, Copyright, Licenses. - Page 163 Tips for using voice control Which commands can I say? Legal & privacy information For warranty and privacy information, go to tomtom.com/legal. Where to get more help Go to telematics.tomtom.com to see videos, FAQs and more.
-
Page 164: Getting Help
This is an information screen rather than a setting and shows you information about your TomTom PRO. You may be asked to go to this screen during a call to TomTom Customer Support or you may need to enter information taken from this screen when using the TomTom Shop. -
Page 165: Product Certification
Product certification Finding product certification information on your device To find product certification information, such as the ICASA-approved certification number, do the following on your PRO: 1. Select Help in the Main Menu. 2. Select Legal & privacy information. 3. Select Certificates. 4. -
Page 166: Addendum
Government of Russia, which is solely responsible for its availability and accuracy. Changes in GPS or GLONASS availability and accuracy, or in environmental conditions, may impact the operation of this device. TomTom disclaims any liability for the availability and accuracy of GPS or GLONASS. - Page 167 55°C (122°F) or below -20°C (-4°F). Avoid dropping the device. If the device is dropped and you suspect damage, please contact customer support. Use the device only with the chargers, mounts, or USB cables provided. For TomTom approved replacements, go to telematics.tomtom.com.
- Page 168 Operating temperature This device will remain fully operational within the temperature range 14°F / -10°C to 131°F / 55°C. Prolonged exposure to higher or lower temperatures can cause damage to your device, and is therefore advised against. Long period storage: -4°F / -20°C to 95°F / 35°C. Important: Before you switch on the device, let the device acclimatize to the standard operating temperature range for at least 1 hour.
- Page 169 WEEE – e-waste disposal In the EU/EEA, this product is marked with the separate collection symbol on its body and/or packaging as required by Directive 2012/19/EU (WEEE). This product shall not be treated as household waste or be disposed of as unsorted municipal waste. You can dispose of this product by returning it to the point of sale or bringing it to your local municipal collection point for recycling.
- Page 170 TomTom, Inc. bears no responsibility for and hereby disclaims all liability for any fines, penalties or damage incurred by a driver for violations of the law. While driving in any state with windshield mounting restrictions, TomTom recommends using the supplied Adhesive Disk or purchasing an alternative mounting system (e.g.
- Page 171 TomTom, the FCC may withdraw the user’s right to operate the equipment. For customers in the USA, the following booklet prepared by the Federal Communications Commission may be of help: "How to Identify and Resolve Radio-TV Interference Problems."...
- Page 172 New Zealand: 09915 0241 Notice for South Africa The model 4PN50 (PRO 7350); 4PL50 (PRO 5350) is ICASA approved. These instructions apply to all countries with a digital label. To see the product certification information for your device, do the following: Select Help in the Main Menu.
- Page 173 The information is subject to change without notice. TomTom shall not be liable for technical or editorial errors or omissions contained herein, nor for incidental or consequential damages resulting from the performance or use of this document. This document may not be copied without the prior written consent of TomTom Telematics B.V.
- Page 174 Accessories not supplied with this device To access all the features of your TomTom PRO one or more of the following accessories is/are required. TomTom LINK 5xx TomTom LINK 105 Note: Alternative fixed installation docks are available Terms and conditions: Warranty and EULA reference Our terms and conditions, including our limited warranty and end user license terms, apply to this product;...
-
Page 175: Copyright Notices
Bluetooth® The Bluetooth® word mark and logos are registered trademarks owned by Bluetooth SIG, Inc. and any use of such marks by TomTom is under license. Other trademarks and trade names are those of their respective owners. Wi-Fi®... -
Page 176: Tomtom Telematics Limited Warranty
(Return Materials Authorization) if necessary. You must return the Hardware during the Warranty Period, along with the RMA number provided by TomTom and an explanation of the Defect, to the address provided to you by TomTom. If a Defect arises and a valid claim under this Limited... - Page 177 This Limited Warranty cannot be transferred to any other person. LIMITATION OF LIABILITY Neither TomTom nor its suppliers shall be liable to you or to any third party for any damages either direct, indirect, incidental, consequential, or otherwise (including in each case, but...
Need help?
Do you have a question about the 4PN50 and is the answer not in the manual?
Questions and answers