Table of Contents

Summary of Contents for Facilis TX16
- Page 1 TX16 Expansion & Direct Attached SAS Storage Setup Guide Prior to installing your new hardware, please contact Facilis Support for further installation instructions. To reach support please call 1 978 562 7022 option 2 or email support@facilis.com...
- Page 2 TO THE EXTENT ALLOWED BY LOCAL LAW, EXCEPT FOR THE OBLIGATIONS SPECIFICALLY SET FORTH IN THIS WARRANTY STATEMENT, IN NO EVENT SHALL FACILIS TECHNOLOGY OR ITS THIRD PARTY SUPPLIERS BE LIABLE FOR DIRECT, INDIRECT, SPECIAL, INCIDENTAL, OR CONSEQUENTIAL DAMAGES, WHETHER BASED ON CONTRACT, TORT, OR ANY OTHER LEGAL THEORY AND WHETHER ADVISED OF THE POSSIBILITY OF SUCH DAMAGES.
- Page 3 Server RAID Adaptor Installation Cabling Power Cord Bringing the RAID Set Online Taking the RAID Set Offline Adding the TX16 Volume for Multi-user Write Chapter 4 – Installation for Direct Attached Storage Before You Begin Environmental Considerations Electrical Specifications System Setup...
-
Page 4: Chapter 1 - Using This Guide
Chapter 1 - Using This Guide Who Should Use This Guide This guide is intended for any user or administrator of the TX16 SAS Storage system. What This Guide Contains This guide covers the information you will need to: ... -
Page 5: Chapter 2 - Overview & Hardware
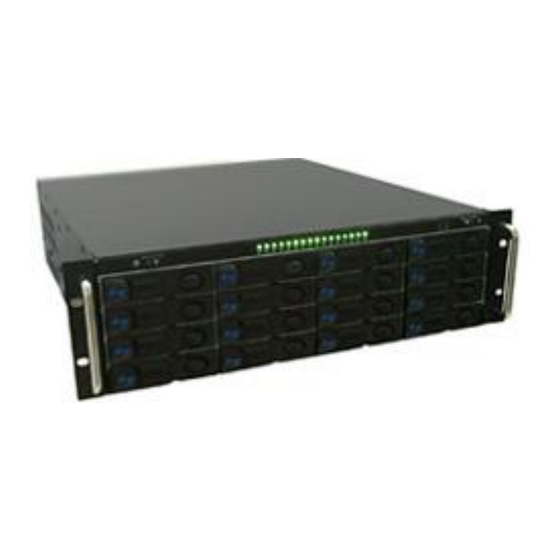
6 is supported as well, but will require recreating the RAID set (see Appendix A). In a Facilis TX16 SAS storage 16-drive system, if a drive fails, the TX16 storage can automatically begin the rebuild process once a new drive is installed into the... - Page 6 Configuration Tool for easy configuration. Hardware The TX16 SAS chassis contains available slots for 16 hard drives. The drives are delivered pre-configured in drive sled carriers for easy installation. The chassis functionality as well as status indicators are detailed below: Front Panel 1.
- Page 7 1. Power Supplies – There are two power supplies in the center of the rear panel of the TX16. Toggle the on/off switches upward before fully powering the unit from the front panel. The unit may run with one power supply if a failure should occur. It is recommended to run with both at all times.
-
Page 8: Tools And Utilities
There are several tools and utilities available which can help you monitor the status of your Facilis TX16 SAS Storage system. SNMP Monitoring is supported as well for direct attached clients. Please refer to the ATTO Utilities Manual that comes with your enclosure. -
Page 9: Chapter 3 - Installation For Expansion Storage To A Terrablock Server
TerraBlock server for use as expanded storage. Before You Begin Unpack the TX16 storage unit and make sure you have all the components that shipped with the system available at the time of installation. If you are missing any of the components listed above (see page 6 - Hardware Components Kit), do not attempt installation until contacting your dealer. -
Page 10: System Setup
Connect the power cord (supplied) into the AC port on the rear of the enclosure. Before turning on the TX16, make sure that you have all the drive carriers installed in the enclosure. Proceed to the next section before powering on the TX16. The... - Page 11 Bringing the Expansion Chassis online The TerraBlock 24D or fully populated 24EX model will contain 24 drives. The TX16 chassis will expand the working drive set to include an additional 16 drives. Before the expansion upgrade is started, be sure there are no drive errors or volumes in recovery on the system.
-
Page 12: Chapter 4 - Installation For Direct Attached Storage
Before You Begin Unpack the TX16 storage unit and make sure you have all the components that shipped with the system available at the time of installation. If you are missing any of the components listed above (see page 6 - Hardware Components Kit), do not attempt installation until contacting your dealer. - Page 13 Before turning on the TX16, make sure that you have all the drive carriers installed in the enclosure in order. You can now turn on the TX16. The Power button is located on the front of the enclosure (enclosure door open) in the upper left corner.
-
Page 14: Client Configuration
Client Configuration The Mac or Windows client workstation utilizing the TX16 storage array will need to set the correct transfer size for the R680 HBA to provide optimal performance. 1. Open the ATTO configuration tool on your Mac or Windows client. -
Page 15: Appendix A - Recreating The Disk Set (Direct Attached Use Only)
Appendix A – Recreating the disk set (Direct Attached use only) This Appendix describes how to recreate the disk set should that be necessary. This will destroy any data present on the drives. This process takes approximately 8 hours. Launch the ATTO Configuration Tool. Go to the RAID tab and select “Custom RAID”; Click OK. - Page 16 Select options to configure the new RAID Group (Sector size 512 bytes, SpeedRead, Rebuild Priority, and make sure Autobuild button is checked. Click Finish. Make sure you have selected “Single” for Option.
- Page 17 Check all your parameters; Click Yes. Right click on the RAID set and set Prefetch to “2” and click Accept.
-
Page 18: Appendix B - Upgrading R680/H680 Firmware
Appendix B – Upgrading R680/H680 Firmware This Appendix describes how update the firmware of the R680/H680 HBA should that be necessary. The latest firmware can be found in the Firmware directory of the supplied USB Key or at http://www.attotech.com/. Launch the ATTO Configuration Tool. Select the R680/H680 HBA in the left pane. Next select the “Flash”...


Need help?
Do you have a question about the TX16 and is the answer not in the manual?
Questions and answers