
Summary of Contents for Clayton LPS
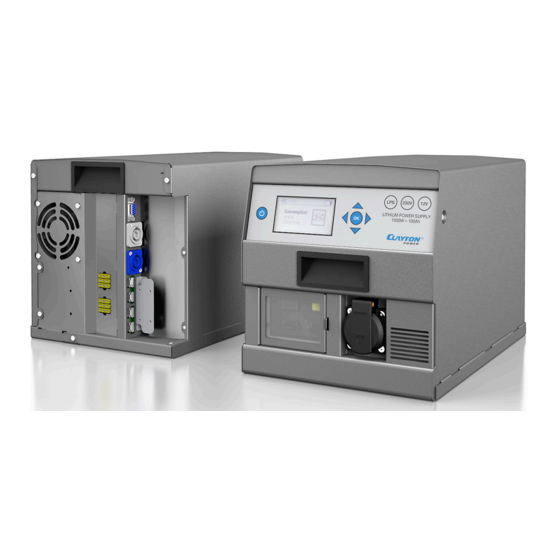
- Page 1 Lithium Power Supply User Manual Document rev: 01.14 Firmware rev: 02:02:01 Date: 16-11-2016 Lithium Power Supply...
-
Page 2: S Afety I Nstructions
The Lithium Power Supply must be handled only by qualified and trained personnel. The lowest protection degree of specific parts of the LPS is IP21. Ensure that the installation of the Lithium Power Supply is in accordance with IP21 requirements. - Page 3 Lithium Power Supply User Manual Page 3 ...
-
Page 4: Table Of Contents
Lithium Power Supply User Manual Table of Contents 1. S afety I nstructions ........................ 2 2. G eneral i nformation ........................ 5 2.1. T ransport ............................ 5 ... -
Page 5: General Information
Lithium Power Supply User Manual 2. General information When the LPS is not used for longer periods of time it must be stored fully charged and recharged every 6 months ATTENTION: Read the safety instructions before installing the Lithium Power Supply. -
Page 6: Lps1512-100Ah Box
Lithium Power Supply User Manual 3. LPS1512-100Ah Box Included in the box: 1 pcs. Manual Page 6 ... - Page 7 Lithium Power Supply User Manual 1 pcs. Neutrik Input connector 1 pcs. Neutrik Output connector 1 pcs. Anderson DC Input connector 1 pcs. Anderson DC Output connector 4 pcs. M3 screws 4 pcs. Anderson SB50 pins Page 7 ...
-
Page 8: Lithium Power Supply - General Parameters
Lithium Power Supply User Manual 4. Lithium Power Supply - General parameters Table 1 Battery type 100Ah-12V (LiFePO Battery capacity 100Ah (1320Whr) Available capacity 80Ah (1050Whr) AC Input Voltage 207 VAC – 253 VAC AC Input frequency 45 Hz – 65 Hz AC Input power 1000 W (Charge power) - Page 9 Lithium Power Supply User Manual Table 2 Protection Class Class I (Do only connect to a Residual-current device (RCD) protected source) 2014/35/EU (Low voltage directive) • EN 62368-1: 2014 (Safety, Information technology equipment) Certifications 2014/30/EU (EMC directive); • EN 61000-6-3: 2007 + A1:2011 Emission household equipment EN 61000-6-2: 2005 Immunity industrial 230vac Input protected by 10AT fuse...
-
Page 10: Physical Dimensions And Mounting Overview
ATTENTION: Mount the LPS topside up, never upside down or on the side. ATTENTION: The LPS has forced air cooling. Make sure air can flow freely around the unit. The LPS has four M5 mounting holes in the bottom as shown in figure 1. - Page 11 Lithium Power Supply User Manual 244.00 390.00 Data Connector 230VAC Out 230VAC In 12VDC Out 12VDC In 244.00 Figure 2 230VAC Out RCD 244.00 Figure 3 Page 11 ...
-
Page 12: General Instructions
Note: Always use a RCD protected source to supply the LPS 1512-100Ah from 230VAC. When installing the LPS into a vehicle it is important that the 230VAC in is supplied from an unbroken cable from the external power source to the 230VAC input on the LPS as shown in figure 4. -
Page 13: Installation / Use Of 230Vac Output
6.2. Installation / Use of 230VAC Output Fuses Both 230VAC outputs on the LPS (Schuko on the front, Neutrik in the back) are protected with 8A relays and a RCD, which allows you to make fixed 230VAC installations in the vehicle. If an installation is wired around the LPS, separate relays must be used. -
Page 14: Neutrik Connector Assembly (230Vac In/Out)
Lithium Power Supply User Manual 6.3. Neutrik connector assembly (230VAC In/Out) Figure 6 For 230VAC installations, 3-core, 1mm minimum is recommended Page 14 ... -
Page 15: Use Of 12Vdc Input
Figure 7 Note: Fuses can be purchased at your Clayton Power sales representative. For the LPS to charge from the surplus energy from the vehicle, the D+ signal from the generator must be connected to pin 9 of the communications connector. -
Page 16: Use Of 12Vdc Output
Lithium Power Supply User Manual 6.5. Use of 12VDC Output For 12VDC equipment connected to the 12VDC out no fuse is needed, as this is included in the LPS. 12VDC! Load! #!!!!!!!!!!!!!!!!!!!!!!!!!! +!!!!!!!!!! Figure 8 6.6. Anderson connector assembly (12VDC In/Out) When installing the unit, make sure to use 16mm cables for the DC connections. -
Page 17: Use Of Starter Help (Extra)
12. The blue and black wire must be connected to pin 6 in the DB9 communication plug as seen in figure 13. Figure 12 Note: The fuse, CDR and DB9 communication connector can be purchased at your local Clayton Power sales representative. ... -
Page 18: Data Connector Details
Lithium Power Supply User Manual 6.8. Data connector details The data connector pins are numbered according to figure 13. The following table shows all pin details on the data connector. Figure 13 Table 3 Connector Pin Signal name Description Single Wire Data connection CAN Low For firmware update... -
Page 19: Operations
Lithium Power Supply User Manual 7. Operations 7.1. Power On/Off To turn the unit on press the power button . The following menu will show. Figure 15 ´To turn on both 230VAC and 12VDC output press . If only 230VAC or 12VDC is needed select either “AC Out”... -
Page 20: Icon Description
Lithium Power Supply User Manual 7.2. Icon description Table 4 12VDC Input Shows the status of the 12VDC Input module. • The power bar shows the level of total 12VDC charge • current. 12VDC Output Shows the status of the 12VDC Output module. •... -
Page 21: Menu Overview
Lithium Power Supply User Manual 7.3. Menu overview • Home screen • Menu o 230VAC Output ! Energy Saver (No load) ! Energy Saver (Threshold) o 230VAC Charge ! Maximum Current o 12VDC Output ! Jumpstart ! Shutdown Delay o 12VDC Charge o General ! Battery Status ! Temperature... -
Page 22: Functionality / Menu Description
Lithium Power Supply User Manual 7.4. Functionality / Menu description By pressing OK the main menu will be entered. Five submenus can be selected Figure 17 7.5. 230VAC Output Figure 18 In the 230VAC Output menu it is possible to get details about: Current operation status •... - Page 23 Lithium Power Supply User Manual Energy Saver (No load) Time for shutting down 230VAC Output automatically. Default 1 hour • Available range (00:01:00 – 10:00:00). Press to exit • For deactivating the function set the level below 00:01:00. The time will change to “inactive”. Press •...
-
Page 24: 30Vac C Harging
Lithium Power Supply User Manual 7.6. 230VAC Charging Figure 20 In the 230VAC Charging menu it is possible to get details about: Current operation status • Current charge power • Current charge voltage • Current charge current • Furthermore following setting is possible to set: Maximum Current Maximum current drawn on the 230VAC input Default 10A... -
Page 25: 2Vdc O Utput
Lithium Power Supply User Manual 7.7. 12VDC Output Figure 21 In the 12VDC Output menu it is possible to get details about: Current operation status • Current output power • Current output voltage • Current output current • Furthermore following settings are possible to set: Jumpstart Press “Arrow Up”... -
Page 26: 2Vdc C Harging
Lithium Power Supply User Manual 7.8. 12VDC Charging Figure 22 In the 12VDC Charging menu it is possible to get details about: Current operation status • Current charge power • Current charge voltage • Current charge current • 7.9. General Figure 23 ... - Page 27 Lithium Power Supply User Manual In the General menu it is possible to get details about: Battery Status Shows the following information about the internal battery: Operation Status • Remaining Operation time • Current capacity level • Current Power consumption •...
-
Page 28: Failure Description
Lithium Power Supply User Manual 8. Failure description If the unit detects a failure in the electronics it will display a failure code. The following table shows the failure codes and the action required to solve the problem. In case the unit displays a failure code that is not listed in the table, the unit needs service. Table 5 Inv = Inverter, Chg = Charger Failure... - Page 29 Lithium Power Supply User Manual getting t oo h igh lower a mbient t emperature. E059 One or more cell temperature(s) is Simple All Allow t he u nit t o c ool d own o r p lace i t i n too ...
-
Page 30: Additional Information
1/1000 of a volt makes a difference. Cell temperature measurement The LPS measures the temperature of all individual cells to ensure that none of the cells overheat or cause thermal runaway. The temperature information is also used for SOC calculations. -
Page 31: Warranty
Power conservation When the LPS is not in use it will enter a low power state. In this state the LPS keeps power consumption very low to avoid unnecessary discharge of the battery. The LPS can be reactivated through the power switch or by applying a charge source to either the 230VAC input or the 12VDC input. - Page 32 Lithium Power Supply User Manual Clayton Power Pakhusgården 42 – 48 DK-5000 Odense C Denmark Phone: +45 4698 5760 E-mail: sales@claytonpower.com Web: www.claytonpower.com Page 32 ...
Need help?
Do you have a question about the LPS and is the answer not in the manual?
Questions and answers