
Related Manuals for Formech 300XQ


Summary of Contents for Formech 300XQ
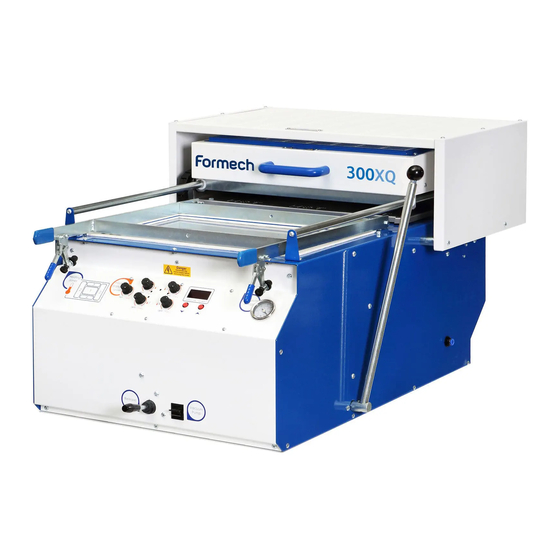
- Page 1 Desktop Vacuum . . . Forming Machine 300XQ Installation, Operating and Service Manual For Parts, Service & Technical Assistance Telephone: +44 (0) 1582 496797 Fax: +44 (0) 1582 496646...
-
Page 2: Table Of Contents
Post Forming Operations After forming Trimming Warranty Heating elements Vacuum system Service / Repair Replacing seals Replacing heating element Electrical troubleshooting Vacuum / Pressure troubleshooting Cleaning Lubrification Wiring Diagram Formech 300XQ Spare Parts Listing EC Machinery Directive Manual - Formech 300XQ... -
Page 3: Safety
Safety Thank you for choosing Formech. Please read and follow the below safety instructions before attempting to install or operate your machine. >Do not operate the machine until you have been trained and are fully conversant with it. >Read and understand all of this user manual. - Page 4 RISK OF FIRE AS A RESULT OF HEAT AND PLASTICS PRESENTS AN EMERGENCY SITUATION. ENSURE FIRE SAFETY TRAINING IS PERFORMED & CONTROLLED. IT IS ESSENTIAL TO HAVE FIREFIGHTING EQUIPMENT AVAILABLE AT OR NEAR THE MACHINE. USE DRY POWDER (BLUE) OR CARBON DIOXIDE (BLACK) FIRE EXTINGUISHERS. Manual - Formech 300XQ...
- Page 5 DO NOT USE THE TOP OF THE HEATER OR TOP OF THE HEATER GUARD TO STACK PLASTICS OR OTHER MATERIALS. DO NOT USE THE MACHINE TO STACK OR LEAN ITEMS AGAINST THE SIDES. DO NOT USE ANY OTHER PART OF THE HEATER TO MOVE THE HEATER FORWARDS AND BACKWARDS OTHER THAN THE HEATER HANDLE. Manual - Formech 300XQ...
-
Page 6: Introduction And Initial Assembly
Introduction and initial assembly Your Formech machine is supplide with: Desktop Vacuum . . . Forming Machine 300XQ Installation, Operating and Service Manual For Parts, Service & Technical Assistance Telephone: +44 (0) 1582 496797 Fax: +44 (0) 1582 496646 1x Installation/Operations/Repair... -
Page 7: General Arrangement
A minimum of 2 persons are required to lift the machine. In the case of the 300XQ trolley, ensure that the 2 machine retaining screws are fi tted to the under side of the trolley / Machine. -
Page 8: Machine Arrangement
NOTE: A mechanical interlock designed to prevent a mould being raised into the heating elements stops the table being raised unless the heater box is fully back. 9. Control Panel. See below control panel layout. Manual - Formech 300XQ... - Page 9 14. Heater Zone Controls. The 300XQ heater is divided into 4 zones as shown by the diagram (12) on the control panel. This is to allow the user maximum fl exibility especially when producing mouldings from diffi cult moulds or diffi cult plastics.
-
Page 10: Reducing Windows 10
Reducing windows allow the use of smaller sheet material for smaller mouldings. Reducing windows allow for better sheet utilisation. To fi t the reducing window: 1. Lift the clamp frame. 2. Place the lower reducing window on to the top frame aperture so that the corner locating screws are aligned. Manual - Formech 300XQ... - Page 11 4. Close the clamp frame. Check alignment of top and bottom window. Fit the required plastic material on the sealed lower reducing plate. The material toggle clamps will need adjusting so that the clamp. Machine fi tted with a Top and bottom reducing reducing window windows in place Manual - Formech 300XQ...
-
Page 12: Operating Procedures
(2) When set to zero the timer will count up. This will help you establish the time for the heating cycle. (3)A wire mesh is supplied with your machine to be placed under the mould to assist with vacuum airflow. Manual - Formech 300XQ... - Page 13 Finished mould. (4) Remember that the heater must be fully back before the table can be raised (5) If the plastic is still too soft when you try to release it, some distortion may occur. Manual - Formech 300XQ...
-
Page 14: Operating Techniques
The heater is then pushed back. The set time is stored until it is altered. If you don’t want to use the timer, set the time to zero. Manual - Formech 300XQ... -
Page 15: Optional Extras
2. Formech has available a standard size of reducing windows. This reducing window has an aperture of 228mm x 203mm, to use plastic size of 248mm x 223mm. Formech can also produce special size reducing windows. For more information please contact our sales department. -
Page 16: Tools
Repairs to the vacuum circuit can be costly. The use of talc as a release agent is not recommended. It may clog the vacuum circuit. MDF Baseboard Aluminium Baseboard Manual - Formech 300XQ... - Page 17 15mm 19-20mm The baseboard has to be 4mm shorter in both directions than the forming aperture of the machine e.g. Forming aperture 280mm x 430mm = baseboard size 276mm x 426mm. Manual - Formech 300XQ...
-
Page 18: Plastics
Formech has available a Vacuum Forming Guide which will cover some of these topics in more details. Please contact Formech to gain access to this guide. -
Page 19: Post Forming Operations
Formech has available a Vacuum Forming Guide which will cover some of these topics in more details. Please contact Formech to gain access to this guide. -
Page 20: Warranty
Warranty Reliability and a long service life are synonymous with the Formech brand. However, as with any machinery, certain parts will require periodic replacement. The silicon seals applied to the mould table and to the top aperture of the machine (clamp) are seen as being consumable parts, their service life will depend on how the machine is treated and how often it is used. -
Page 21: Service / Repair
4. With a sharp blade cut a 45° mitre joint at all corners. Fill gaps in the joints with sealant. Remove the masking tape before the sealant has set. For best performance leave seal to set overnight. Manual - Formech 300XQ... -
Page 22: Replacing Heating Element
If all appears OK then set the defective zone to 100% and check the voltage at the zone using a suitable volt meter. 3- If no voltage is present then contact Formech for service and advice. If a single element is found to be faulty then it will require replacement. - Page 23 Replace the screws are secured. connector cover and test the heater. Finally reassemble the heater top cover and retaining plate for the front fixings. Manual - Formech 300XQ...
-
Page 24: Electrical Troubleshooting
Check the internal fuse located in the fuse holder connected to the power inlet and switch. The fuse is 20MM, 12.5A . Manual - Formech 300XQ... - Page 25 Note: Continuity should be obtained between the top and bottom contacts of the switch not side to side. If the supply is present but the motor hums and does not run, the capacitor may be faulty or has become disconnected. Check the connections to the capacitor by carefully removing its black cover. Manual - Formech 300XQ...
-
Page 26: Vacuum / Pressure Troubleshooting
Check the reading you If the vacuum gauge reading of get on the vacuum gauge 25”Hg or higher is Normal. A lower reading indicates poor vacuum where attention is required. Manual - Formech 300XQ... -
Page 27: Cleaning
Lubrication The 300XQ requires minimum lubrication. Apply general purpose grease to the table guide bars when required to assist with table movement. Apply a small amount of fine silicone oil or fine oil to the heater slide bars when required to assist free movement of the heater. -
Page 28: Wiring Diagram Formech 300Xq
Wiring Diagram Formech 300XQ Manual - Formech 300XQ... -
Page 29: Spare Parts Listing
Clip C Pipe Clip for 3/8" pipe Clip F Vacuum Gauge 40mm Vac gauge Pump Filter Std In-line filter 300XQ Heat Controller / Timer AG 300XQ CTRL PCB Knob 300XQ CTRL Knob Paddle Switch H11 E Mains Inlet & Switch, C20... -
Page 30: Ec Machinery Directive
2004 / 108/EC - EMC 2006 / 95/EC - LVD Technical File Compiled by: Andrew Berry at address below Formech International Limited, Unit 4, Thrales End Farm, Thrales End Lane, Harpenden Hertfordshire AL5 3NS, United Kingdom Significant harmonised standards applied:... - Page 31 Unit 4, Thrales End Farm, Thrales End Lane, Harpenden, Hertfordshire, AL5 3NS U.K. Tel: +44 (0)1582 469797 Fax: +44 (0)1582 469646 Accounts: +44 (0)1582 469028 Email: sales@formech.com Registered office as above address. Registered in England Number 2999925 VAT no. GB 604 0796 55...
Need help?
Do you have a question about the 300XQ and is the answer not in the manual?
Questions and answers