Table of Contents
Advertisement
Advertisement
Table of Contents

Related Manuals for Breville Smart Oven BOV670


Summary of Contents for Breville Smart Oven BOV670
- Page 1 Smart Oven Compact Convection ® Instruction Book - BOV670...
-
Page 2: Table Of Contents
BREVILLE Contents RECOMMENDS SAFETY FIRST 2 Breville recommends safety first At Breville we are very safety 8 Components conscious. We design and 10 Quick Start Guide manufacture consumer 14 Assembly products with the safety of you, - Preparing the oven for use... - Page 3 • Do not place the oven near the • Do not touch hot surfaces. edge of a bench or table during Appliance surfaces, including operation. Ensure the surface the door and outer surface of is level, clean and free of water, the oven are hot during and flour, etc.
- Page 4 • Caution should be exercised provided by Breville for use in when using lids in the oven, as the ribbed section on top of the pressure build up in a covered oven.
- Page 5 • This appliance is for household • To disconnect from the wall use only. outlet, first turn OFF the oven, and then remove the power • Do not use the appliance plug from the wall outlet. for anything other than its intended purpose as described •...
- Page 6 3-prong wall outlet. and visit www.Breville.com • Do not, under any or call Breville Consumer circumstances, cut or remove Support at 1-866-BREVILLE the third (ground) prong from for examination, repair or the power cord or use an adjustment.
-
Page 7: Save These Instructions
BREVILLE ASSIST PLUG™ SHORT CORD INSTRUCTIONS • Your Breville appliance comes with a unique Assist Plug™, • Your Breville appliance is fitted conveniently designed with with a short power supply a finger hole in the power cord as a safety precaution... -
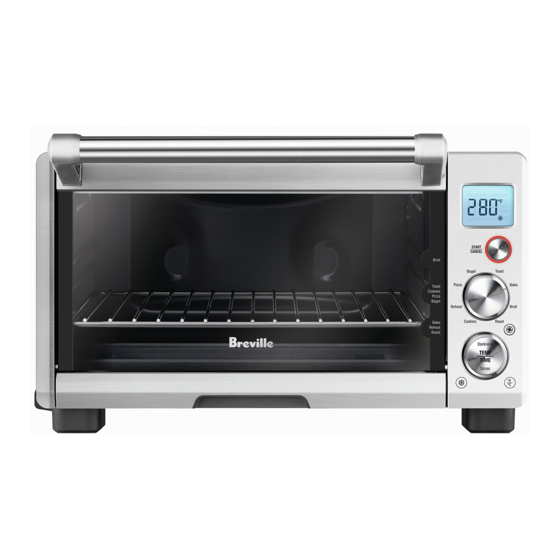
Page 8: Components
I. Crumb tray Always use protective hot pads or insulated J. Ventilation slots oven mitts when inserting, removing or handling items from the oven. K. Breville Assist Plug ® L. LCD screen NOTE M. START/CANCEL button Only place items in the ribbed section on top N. - Page 9 Available accessories sold separately: Bamboo Cutting Board Part No: BOV650CB Bamboo is the ideal material for a cutting board, as it absorbs very little moisture and has natural antibacterial properties. Bamboo is harder than most hardwoods, leaving less visible knife marks on the board surface. 12”...
-
Page 10: Quick Start Guide
QUICK START GUIDE This Quick Start Guide is designed for first time use. For safety and more information, refer to rest of the Instruction Booklet. PREPARING THE OVEN 5. Press the START/CANCEL button to activate. The button surround will (A ONE-TIME PROCESS) illuminate red, the oven alert will sound and In order to remove any protective substances the LCD screen will illuminate orange. - Page 11 Breville baking pan and broil rack depending on the recipe, amount of food and (see Page 23 of the Instruction Book for your personal taste.
- Page 12 OVEN FUNCTIONS BAKE FUNCTION: Bakes cakes, muffins, brownies and pastries TOAST FUNCTION: evenly throughout. Also is ideal for cooking pre-packaged frozen Evenly toasts bread so it’s crisp and crunchy on meals including lasagna and pies. the outside, while soft and moist on the inside. Rack Position: Rack Position: Bottom...
- Page 13 - depending on the Rack Position: food, quantity and your personal taste. Middle When broiling, the Breville broil rack must be inserted into the Breville baking pan. Optional Settings: When assembled together, the broil rack is...
-
Page 14: Assembly
Press the center of the TEMP/TIME dial. The LCD screen will indicate the preset time of Assembly ‘15 MINS’. PREPARING THE OVEN FOR USE 1. Remove and safely discard any packing material, promotional labels and tape from the oven. 8. Press the START/CANCEL button to 2. -
Page 15: A Note On Cooking Times
A NOTE ON COOKING TIMES It is normal to notice the following occur during the cooking cycle: The Breville Smart Oven Compact ® • It is normal that during the broil function, Convection features Element IQ - a unique ®... -
Page 16: A Note On Rack Height Positions
a) To change the cooking temperature, press A NOTE ON RACK HEIGHT the center of the TEMP/TIME dial until the POSITIONS LCD screen displays the temperature screen. Cooking results are significantly affected by • Turn the dial to the left to reduce the the position of the wire rack as this determines temperature, or to the right to increase the how close the food is to the heating elements. -
Page 17: A Note On Standby Mode
A NOTE ON OPTIONAL SETTINGS For optimum cooking results: • The wire rack should always be CONVECTION Button inserted into the rack height position with the spokes facing upwards. Convection cooking uses fan assistance to circulate heated air around the food. This produces faster, more even and more energy efficient cooking, when selected, it will automatically adjust the temperature setting to... -
Page 18: Functions
Functions TOAST FUNCTION Elements Top and bottom heating elements cycle on and 5. The darkness setting and number of off to regulate the correct temperature. slices can be adjusted before or during the toasting cycle. Rack Position To change the darkness setting, press the Middle center of the TEMP/TIME (Darkness/ Slices) dial until the LCD screen displays a... - Page 19 a) To change the number of slices, press the 8. At the end of the toasting cycle, the oven center of the TEMP/TIME (Darkness/ alert will sound three times. The START/ Slices) dial until the LCD screen displays a CANCEL button surround will no longer flashing ‘SLICES’.
-
Page 20: Bagel Function
BAGEL FUNCTION Elements Top and bottom heating elements cycle on and off to regulate the correct temperature. Rack Position Middle Optional Settings FROZEN FOODS button 4. Close the oven door. 5. Turn the FUNCTION dial until the The BAGEL function crisps the insides of indicator reaches the BAGEL function. - Page 21 As a general guide: NOTE Desired Bagel Color Setting During the BAGEL function, Element IQ will ® Light color bagel 1 or 2 automatically adjust the power of the cooking elements for optimum results. It is normal to Medium color bagel 3, 4 or 5 notice the bottom set of elements turn off while Dark color bagel...
-
Page 22: Bake Function
BAKE FUNCTION Elements Top and bottom heating elements cycle on and off to regulate the correct temperature. Rack Position Bottom 4. The baking temperature, time and Optional Settings convection setting can be adjusted before or during the baking cycle. CONVECTION button a) The preset ‘325°F’... - Page 23 Be sure that the metal foil is fitted securely as close contact with the oven’s heating elements can cause overheating and risk of fire. 7. Place food, positioned on the Breville enamel baking pan or in an oven-proof dish, When using metal foil to cover accessories,...
-
Page 24: Roast Function
9. At the end of the cooking cycle, the oven 4. The roasting temperature, time and alert will sound three times. The START/ convection setting can be adjusted before or CANCEL button surround will no longer during the roasting cycle. illuminate red and LCD screen will a) The preset ‘350°F’... - Page 25 When roasting, the Breville enamel broil rack oven from the power outlet. When the oven is may be inserted into Breville enamel baking plugged back into the power outlet, the ROAST pan.
-
Page 26: Broil Function
Check doneness with a reliable meat thermometer. Use an independent timer to 2. Insert the Breville enamel broil rack into remind you to check the meat temperature. the enamel baking pan. Place food on the assembled broil rack or in an oven-proof 10. - Page 27 IMPORTANT Always ensure the oven door is completely Closed when using the BROIL function. 4. Turn the FUNCTION dial until the indicator Turn the dial to adjust the Broiling time in one reaches the BROIL function. minute increments up to a maximum of The LCD screen indicates the preset BROIL 20 minutes.
-
Page 28: Pizza Function
Breville recommends using a dark colored, 9. The BROIL cycle can be stopped at any non-stick pizza pan when cooking a pizza. time by pressing the START/CANCEL Light colored pans reflect heat and may not button. - Page 29 3. Turn the FUNCTION dial until the NOTE indicator reaches the PIZZA function. The LCD screen indicates the preset The cooking technology in The Smart PIZZA temperature of ‘400°F’. The preset Oven Compact Convection allows foods to ® CONVECTION and FROZEN FOODS cook more evenly and quickly, significantly settings will also be displayed.
- Page 30 7. Place the pizza pan or pizza on the wire rack so air flows around the sides of the food. NOTE Pizza pan color, size, and thickness can affect browning/crispiness of the pizza base. 8. After the PREHEATING alert has sounded, the timer will automatically begin to count down in one minute increments.
-
Page 31: Cookie Function
COOKIE FUNCTION 4. The baking temperature, time and convection setting can be adjusted before or during the baking cycle. Elements a) The preset baking temperature of 325˚F Top and bottom heating elements cycle on and is displayed as the default on the LCD off to regulate the correct temperature. - Page 32 TEMP/TIME dial. Toggle between Temperature and Time by pressing the TEMP/TIME button. 7. Place food on the Breville enamel baking pan or in an oven-proof pan, then place on the center of the wire rack so air flows around the back, as well as the front of the food.
-
Page 33: Reheat Function
1. Insert the wire rack into the bottom rack height position. The wire rack should be positioned with the spokes facing upwards. 2. Place food on the Breville enamel baking pan or in an oven-proof dish, then place on the center of the wire rack so air flows around the sides of the food. - Page 34 We recommend turning or stirring the food • The (optional) Bamboo Cutting Board halfway through to ensure more even cooking. accessory provided by Breville for use in Make sure food reaches a safe minimum the ribbed section on top of the oven. Visit internal temperatures as outlined on Food breville.com for more information and refer to...
-
Page 35: Care And Cleaning
Cleaning the interior Care & Cleaning 1. The walls on the inside of the oven feature a non-stick coating for easy cleaning. To clean any spattering that may occur, Ensure the oven is turned OFF by pressing the wipe the walls with a soft, damp sponge. START/CANCEL button on the control panel. - Page 36 Cleaning the wire rack, broil rack and baking pan. 1. Wash all accessories in warm soapy water with a soft sponge or soft plastic scouring pad. Rinse and dry thoroughly. 2. To extend the life of your accessories, we do not recommend that these be placed in the dishwasher.
-
Page 37: Troubleshooting
180 degrees for more even browning. • The pizza crust Breville recommends using a dark colored, non-stick pizza pan when does not crisp cooking a pizza. Light colored pans reflect heat and may not effectively crisp the pizza crust. Oven accessories are available at breville.com •... - Page 38 8-10 minutes from start-up, including opening the oven door when the ‘preheat’ alert sounds, to reach the target temperature. To ensure the fastest heat up time, the Breville oven uses the maximum allowable power from the outlet (1500W for baking, 1800W for toasting).
- Page 39 Notes...
- Page 40 1-866-BREVILLE Web: www.brevilleusa.com Breville is a registered trademark of Breville Pty. Ltd. A.B.N. 98 000 092 928. Copyright Breville Pty. Ltd. 2017. Due to continued product improvement, the products illustrated/photographed in this booklet may vary slightly from the actual product.
Need help?
Do you have a question about the Smart Oven BOV670 and is the answer not in the manual?
Questions and answers