
Subscribe to Our Youtube Channel
Summary of Contents for HEAT-TECH HTP STANDARD
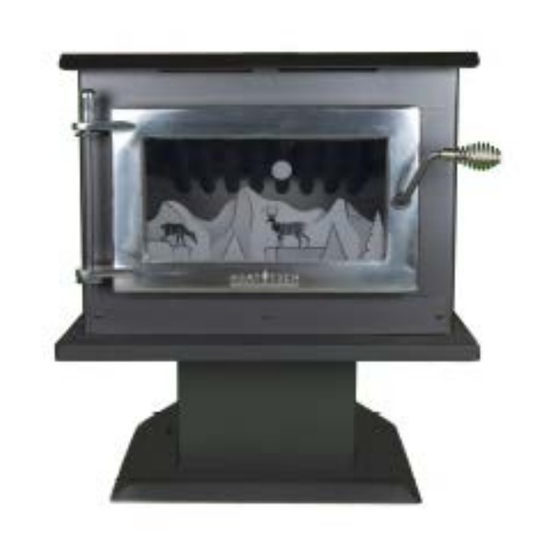
- Page 1 HTP BAY & HTP STANDARD PELLET STOVE OWNER’S MANUAL Installation, Operating and Maintenance Instructions for Pellet Stoves...
- Page 2 Congratulations on your purchase of a HEAT-TECH pellet stove. We at HEAT-TECH take great pride in the quality of our products. We assure you that with proper management, your HEAT-TECH stove will provide you with many years of comfort and enjoyment. Please read this owner’s manual and follow the guidelines thoroughly.
-
Page 3: Table Of Contents
Table of Contents INTRODUCTION ....................3 SPECIFICATIONS/FEATURES ................3 SAFETY FEATURES ...................... 3 GOVERNMENT LISTINGS ..................... 3 INSTALLATION ....................4 WARNINGS AND PRECAUTIONS ................. 4 CLEARANCES ......................5 EXHAUST HORIZONTALLY THROUGH A WALL ............. 6 EXHAUST VERTICALLY THROUGH A CEILING ............... 6 INSERT INSTALLATION .................... -
Page 4: Introduction
INTRODUCTION This stove has been independently tested and approved in accordance with the specifications and procedures outlined by Underwriters Laboratories, Inc. standards for safety UL 1482, UL 907 solid fuels type room heater, April 1987, and HUD requirements for installation as a stove heater and insert for masonry or metal fireplaces, plus Oregon’s rules for mobile homes (814-23- 900 through 814-23-9090). -
Page 5: Installation
INSTALLATION WARNINGS AND PRECAUTIONS: Installation should be done by your qualified dealer or approved stove installer in order to meet all federal, state, and local codes for pellet burning appliances. Improper installation or operation may result in a house fire. Care must be taken not to interfere with the structural integrity of the building. -
Page 6: Clearances
CLEARANCES Your Heat Tech freestanding stove has 3” clearances to combustibles on back and sides. The hearth pad must extend out a minimum of 3” from the stove on each side and a minimum of 6” in front of the door. Page 5... -
Page 7: Exhaust Horizontally Through A Wall
EXHAUST HORIZONTALLY THROUGH A WALL Position the stove, adhering to clearances. • Locate position of hole in wall, directly behind stove’s exhaust vent. • Cut an opening in the wall: 9 5/8” round for 3” vent or 10 5/8” for 4” vent. -
Page 8: Insert Installation
INSERT INSTALLATION • Insert installations must be vented with 3” or 4” pipe. Pipe may be single wall steel flexible pipe. Vent should extend to the chimney top. • The fireplace and chimney should be cleaned thoroughly before starting the installation. We suggest painting the interior of particularly old and dirty fireplaces to seal any odors. -
Page 9: Mobile Home Installation
MOBILE HOME INSTALLATION SPECIAL MOBILE HOME REQUIREMENTS: Mobile home installations made prior to the sale of the mobile home are governed by U.S. Department of Housing and Urban Development (HUD) standards. They include the following: not install in a sleeping room Stove should be grounded with a #8 copper wire and terminated with a N.E.C. -
Page 10: Electrical Installation
ELECTRICAL INSTALLATION This stove is provided with an 8-foot grounded cord extending from the rear of the stove. This should be connected to a standard 110volt, 60hz electrical outlet. The approximate power requirements are 125 watts. THERMOSTAT INSTALLATION A thermostat may help you maintain a constant house temperature automatically. - Page 11 ON/OFF THERMOSTAT MODE o In this mode when the home is warm enough the stove will shut off. The fans will continue to run until the stove cools. o When the home cools below the thermostat setting, the stove will automatically restart and run at the last feed rate setting. NOTE: When in “high/low”...
-
Page 12: Operation
OPERATION OPERATION WARNINGS AND PRECAUTIONS CAUTION! DO NOT USE FLAMMABLE FLUIDS OR CHEMICALS TO START OR RESTART THE HEAT TECH STOVE. NEVER ALLOW STOVE TO RUN IF THE SMELL OF SMOKE IS PRESENT OR ANY PART OF THE STOVE GLOWS RED. IF EITHER OR BOTH THINGS HAPPEN, TURN STOVE OFF. -
Page 13: Basic Operation
Gasket materials should be checked for normal wear or damage annually. Replace gasket material if damaged or worn. Contact your local dealer or Heat Tech for proper size and instructions. Maintain proper ventilation. It is important that adequate oxygen be supplied to the fire for the combustion process. -
Page 14: Shut Down Procedures
SHUT DOWN PROCEDURES Turning the Heat Tech pellet stove off is simply a matter of turning the control panel switch to OFF. The blowers will continue to operate until the internal firebox temperatures have fallen to a preset level. Page 13... -
Page 15: Maintenance
MAINTENANCE Always make sure fire is out when servicing stove. ASH REMOVAL Empty ashes from burn pot after every 48 hours of burning. Remove burn pot by grasping and twist, pulling straight out. NOTE: Inspect burn pot weekly to ensure that holes have not become plugged or that holes have not become burnt out. - Page 16 and run drill in forward position until drill contacts tube. Note: Only run drill in forward position. DO NOT reverse drill to pull brush out of tubes. • Next, close the front door of the stove. Notice under the door there is a plate the full width of the stove held on by 2 or 3 screws.
-
Page 17: Trouble Shooting
TROUBLE SHOOTING When your stove is not functioning properly, use this guide to identify and correct common simple problems. Most problems can be solved by following the instructions indicated. If problems continue, or for problems not addressed in this guide, contact your dealer for assistance. WARNING: UNPLUG STOVE FIRST WHEN POSSIBLE! Stove shuts off and the #2 light flashes COMMON CAUSES... -
Page 18: Stove Shuts Off And The #3 Light Flashes
Stove shuts off and the #3 light flashes COMMON CAUSES INSTRUCTIONS TO CORRECT PROBLEM Refill the hopper with approved pellet fuel See The hopper is empty “Maintenance” section for specifications of approved pellet fuel The burnpot is not pushed completely to the rear of the Make sure that the air intake collar on the burnpot is firebox touching the rear wall of the firebox. -
Page 19: Home Smells Of Smoke
of the igniter from the front of the stove. After about 2 minutes the tip should glow. If it does not, the element is bad. Check the voltage going to the igniter during startup. It should be a full current. If the voltage is lower than full The control board is not sending power to the igniter current, check the wiring. -
Page 20: Glass Soots Up Quickly, Flame Is Lazy/Dark/Has Black Tips, Burnpot Overfills
twisting downward on the auger motor. This will empty the auger housing, thus unjamming the auger. After you have removed the shaft, inspect it for bent flights, burrs, or broken welds. Remove any foreign material that might have caused the jam. Also, check the auger tube for signs of damage such as burrs, rough spots, or grooves cut into the metal that could have caused a jam. -
Page 21: Smoke Smell Or Soot Buildup
(corn mixed in with wood pellets) in the stove, it is not recommended to burn above the number 3 heat level. Check for signs of fuel other than wood pellets. If there are signs of corn being used, find out what mix was being used and what setting. -
Page 22: Diagrams
DIAGRAMS Page 21... - Page 23 Page 22...
-
Page 24: Warranty
WARRANTY Heat Tech Industries gives a five year limited warranty on all steel manufactured parts. A one year warranty is provided on electrical components including the solid state circuit control board. The above limited warranties are extended to only the original purchaser. There is NO warranty on the following parts: •...
Need help?
Do you have a question about the HTP STANDARD and is the answer not in the manual?
Questions and answers