Lennox iComfort M30 Installation And Setup Manual
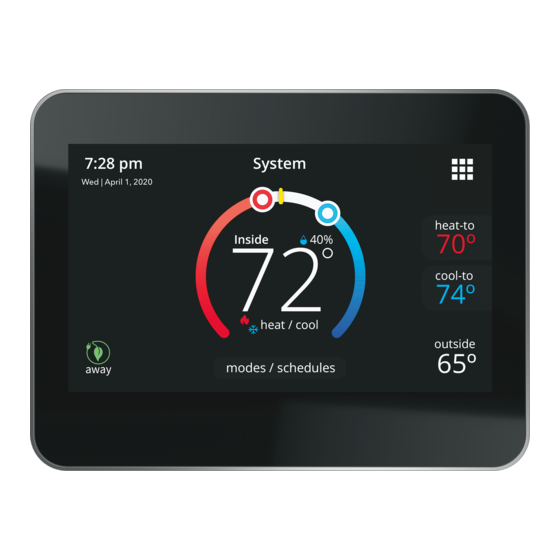
Smart thermostat
Hide thumbs
Also See for iComfort M30:
- User manual ,
- Installation and setup manual (52 pages) ,
- User manual (36 pages)

Related Manuals for Lennox iComfort M30


Summary of Contents for Lennox iComfort M30
- Page 1 Disponible en español en www.LennoxPros.com. iComfort M30 Smart Thermostat ® 507739-01 10/2017 Installation and Setup Guide Supersedes 9/2017...
-
Page 2: Table Of Contents
Tables of Contents Shipping and Packing List ......3 Wireless Connectivity Troubleshooting Tips ... 29 Determining Wireless Connection Signal Thermostat ............ 3 Strength ..............29 Wall Plate Dimensions (H x W) ....... 3 Alert Codes ..........30 Compressor Short-Cycle Protection System Test Modes ........ -
Page 3: Shipping And Packing List
omPressor Hort yCle roteCtion WARNING omPressor roteCt This thermostat is equipped with automatic This product contains a chemical known to the compressor protection to prevent potential damage State of California to cause cancer, birth defects, due to short cycling or extended power outages. or other reproductive harm. -
Page 4: Installation Considerations
IMPORTANT CAUTION In all applications, the M30 thermostat can only This is a 24VAC low-voltage thermostat. Do not be used with all residential units and approved install on voltages higher than 30VAC. commercial split-system matches, and those Do not short (jumper) across terminals on the gas which meet the following installation criteria: valve or at the system control to test installation. -
Page 5: Outdoor Temperature Sensor Installation (Optional)
Outdoor Temperature Sensor Thermostat Installation Installation (Optional) nstallation Install the optional (purchase separately) outdoor The following procedure is for new installation or sensor (X2658) on a northern wall of the home, away from direct sunlight or other heat sources that installing the M30 to a new location in an existing home. -
Page 6: Replacement Installation
4. Run thermostat wiring from indoor unit to location where thermostat will be installed. 1/4” 5. Drill or make opening through wall for thermostat wiring 3/4” x 3/4” (19mm x 19mm). ePlaCement nstallation Use the following two steps to replace an existing thermostat. - Page 7 2. Drill 3/16” (5 mm) holes in wall for provided wall anchors. Insert provided wall anchors into Wall Plate (optional) drilled holes. Run thermostat wire through openings Thermostat Back Plate 5. Secure back plate and wall plate (optional) to wall with the two provided mounting screws. Wall Plate (optional) 3.
-
Page 8: Thermostat Terminal Information
Hermostat erminal nformation Table 1. Terminal Designations Terminal Purpose Table 1. Terminal Designations Heat pump reversing valve operations. When O (de- Terminal Purpose fault) is selected under settings > advanced set- tings > terminal settings, the relay is ON during Used for connection to an optional outdoor tempera- Tc and To cooling and OFF during heating. -
Page 9: System Wiring Diagrams
Table 2. O/B Terminal Relationship States State O/B Terminal Control During heating O terminal : OFF B terminal : ON During cooling Heat/Cool O terminal : ON mode B terminal : OFF NOTE: Remember to seal the hole in the wall with No Demand a suitable material to prevent drafts from entering the thermostat case. - Page 10 Table 3. Supported Configurations No Heat Y1+Y2 Y1+Y2 W1+W2 W1+W2 Gas / Oil Y1+Y2 Y1+Y2 Y1+Y2 W1+ W2 W1+W2 Y1+Y2 Y1+W1 Y1+W1 Y1+W1+W2 W1+W2 Elec Y1+Y2 Y1+Y2+W1 Y1+Y2 Y1+Y2 Y1+Y2+W1 Y1+Y2+W1 +W2 W1 W1+W2 Y1+Y2...
- Page 11 Table 3. Supported Configurations No Heat Y1+Y2 W1+W2 Gas / Oil or Y1+Y2 Elect W1+W2 Y1+Y2 Gas / No OU Oil or W1+W2 Elect OU = Outdoor Unit Elect = Electrical Heat...
-
Page 12: Install Thermostat To Backplate
Commissioning and Advanced Settings After power is applied to the thermostat for the first time it displays the Lennox “splash screen”. ® The Installer is then presented with the several Setup Screens to configure the system prior to operation. - Page 13 Table 4. Commissioning Screens MENU SETTING (default is bold) Notes: Dealer ID Number Enter id Installer can add the dealer number and phone number using the key- Dealer Phone Number Enter phone board tool. DEALER INFO Name, email, website, dealer address (address1, address2, city, state and zip/postal code English Language Français...
- Page 14 Table 4. Commissioning Screens MENU SETTING (default is bold) Notes: Daylight Savings On or Off GENERAL Date and Time Temperature Units °F or °C TERMINAL SETTINGS (See Terminal Settings on page 17) SYSTEM SETUP (See System Setup on page 15) OUTDOOR SENSOR (See Outdoor Sensor on page 16) HUMIDITY...
-
Page 15: Advanced Settings
DvanCeD ettings “Table 5. Advanced Settings” on page 15 list the menu options and parameters that can be set under the Advance Settings menu option. Table 5. Advanced Settings MENU SETTING (default is bold) Notes: Not Installed 1 Stage A/C Unit 2 Stage A/C Unit 1 Stage HP Unit Outdoor Unit... - Page 16 Table 5. Advanced Settings MENU SETTING (default is bold) Notes: Not Installed Humidifier Humidification These options only appear under System Not Installed Setup if the H/D and ACC terminals have been SYSTEM SETUP Humiditrol - Min enabled for the specific type of accessory. Go to Terminal Settings to enabled attached Dehumidifier Humiditrol - Mid...
- Page 17 Table 5. Advanced Settings MENU SETTING (default is bold) Notes: Stage 1 - 1.0°F Adjustable (0.5 to 8.0°F) Stage 2 - 1.0°F Adjustable (0.5 to 8.0°F) STAGE DIFFERENTIAL Stage 3 - 0.5°F Adjustable (0.5 to 8.0°F) Stage 4 - 0.5°F Adjustable (0.5 to 8.0°F) On or Off STAGE DELAY...
-
Page 18: Advanced Settings Parameter Descriptions
Table 5. Advanced Settings MENU SETTING (default is bold) Notes: RESET SETTING Confirm Button Resets all parameters to factory settings RESTART Confirm Button Reboot the thermostat. DvanCeD ettings arameter esCriPtions Table 6. Parameter Descriptions Parameter Name Definition SSR is an algorithm designed to smoothly” reach a occupied program schedule setpoint. The algorithm looks 2 hours ahead for the occupied program schedule period’s setpoint. - Page 19 Table 6. Parameter Descriptions Parameter Name Definition There are four options for stage differential: • 1st Stage Differential: The default is 1.0°F. The first stage differential is the difference between the equipment activation and deactivation temperatures. The first stage differential is used in all models.
- Page 20 Table 6. Parameter Descriptions Parameter Name Definition There are four settings for this option: • Stage Delay Timer: The user shall be able to select ON (default) or OFF for stage delay timers. When OFF is selected all STG DELAYS timers (STG 2 DELAY, STG 3 DELAY, STG 4 DELAY) are disabled.
- Page 21 This setting when enabled controls the temperature in the home when no one is home. For this to function, the Smart Away Lennox Mobile app needs to be installed on a mobile device. (Multistage Heat Pump Model only) -The default is 25°F. This option will only be available if an outdoor sensor is installed.
-
Page 22: Stage Control
Table 6. Parameter Descriptions Parameter Name Definition There are two options for offset which are: • Temperature offset can be used to offset the displayed space temperature by up to +/- 5 degrees. Offset The default temperature offset is zero. This offset also applies to the control temperature. •... - Page 23 1st stage 1st stage Stages Stg1 Differential Locked = 2nd stage 2nd stage Stg2 Differential 1st stage 1st stage Stages Stg1 Differential Locked = 2nd stage 2nd stage Stg2 Differential POINTS: SP -3.0 SP -2.5 SP -2.0 SP -1.5 SP -1.0 SP -0.5 SP +0.5 Figure 3.
- Page 24 1st stage 1st stage Stages Stg1 Differential Locked = 2nd stage 2nd stage Stg2 Differential 3rd stage 3rd stage Stg3 Differential 4th stage 4th stage Stg4 Differential 1st stage 1st stage Stages Stg1 Differential Locked = 2nd stage 2nd stage Stg2 Differential 3rd stage 3rd stage...
- Page 25 1st stage 1st stage Stages Stg1 Differential Locked = 2nd stage 2nd stage Stg2 Differential 3rd stage 3rd stage Stg3 Differential 1st stage 1st stage Stages Stg1 Differential Locked = 2nd stage 2nd stage Stg2 Differential 3rd stage 3rd stage Stg3 Diff.
- Page 26 1st stage 1st stage Stages Stg1 Differential Locked = 2nd stage 2nd stage Stg2 Differential 3rd stage 3rd stage Stg3 Differential 4th stage 4th stage Stg4 Differential 1st stage 1st stage Stages Stg1 Differential Locked = 2nd stage 2nd stage Stg2 Differential 3rd stage 3rd stage...
-
Page 27: Wi-Fi Connection
Wi-Fi Connection Wireless networks supported by this system are: • 802.11b is 2.4Ghz band (max 11 Mbit/s) • 802.11g is 2.4Ghz band (max 54 Mbit/s) • 802.11n is 2.4Ghz band (max 130 Mbit/s) This is for connecting the thermostat to a secure home wireless network. -
Page 28: Connecting To Visible Home Wi-Fi Access Point
3. If Wi-Fi is set to disabled, touch the > icon to onneCting to iDDen CCess oint enabled. The Wi-Fi screen will appear where 1. Touch Wi-Fi network. Scroll down to others. you can toggle it to ON. 2. Enter new network information. You will need the name of the access point and the type of security being used. -
Page 29: Wireless Terminology
ireless erminology etermining ireless onneCtion ignal trengtH The following terminology is used: The ideal signal strength range for the thermostat is -1 to -69 Received Signal Strength Indication • Received Signal Strength Indication (RSSI). This (RSSI). The signal strength can be viewed from the indicates the signal strength of the Wi-Fi router thermostat interface. -
Page 30: Alert Codes
Alert Codes Table 7. Alert Codes and Reminders Alert Priority Display Message Condition System Action Clear/Recovery Code Condition When the thermostat is in heat mode and a heat demand If the temperature exists, if the temperature measured by outdoor measured by outdoor sensor The outside temperature is sensor is rises above low is below the low balance point,... - Page 31 Table 7. Alert Codes and Reminders Alert Priority Display Message Condition System Action Clear/Recovery Code Condition • Operation will be performed. (Weather information is not used) • Thermostat will stop the operation that requires outdoor temperature information (i.e. balance If the outdoor sensor reads Outdoor Temperature Outdoor sensor reads out point control and 2nd...
- Page 32 Table 7. Alert Codes and Reminders Alert Priority Display Message Condition System Action Clear/Recovery Code Condition • Indoor temp is displayed as Thermostat will have to “–“ on the home screen. This Local temperature sensor be replace or if sensor will STOP all temperature reads out of range -4ºF returns to with in the normal...
-
Page 33: System Test Modes
System Test Modes Table 8. Energy Saving Set Points Time Heating Cooling After the thermostat has been installed and set- Wake 70°F (21°C) 78°F (25°C) up, the installer may run a system test function (accessed through the installer settings menu), to Leave 62°F (17°C) 85°F (29°C) -
Page 34: Dehumidification Control
Dehumidification Control ormal anD Dehumidification options are listed at menu > settings > humidity. Under Humidity Control, select dehumidify to enable dehumidification. By default it is disabled. There are four setting options which are Normal, Max, Humiditrol* and Aux Dehumidifier*. * Requires hardware accessory Slide bar adjust with a range of 40% to 60% RH. -
Page 35: Humiditrol
UmiDitrol Equipment Operation with Humiditrol Enabled This option is available if the Humiditrol accessory Notes: The Humiditrol Comfort Adjust (HCA) variable is user-selectable and can be set to MIN, MAX,or is present and enabled in the Advanced Settings Humiditrol prohibited if outdoor temperature > 95 F OR if indoor temperature <... -
Page 36: Auxiliary Dehumidifier
Uxiliary eHUmiDifier Table 10. Auxiliary Dehumidifier Option This option is available if the Auxiliary Dehumidifier Option Description accessory is present and enabled in the Advanced • Activate: If RH measured is >= (RH set Settings > System Setup. Under Advanced point + Activate: IF RH measured is >= Settings >... -
Page 37: Normal And Max
ormal anD Table 11. Humidification Modes The following table describes the function of normal Option Description and max humidification settings. (Humidification with or without Heat Demand) • Activate: IF RH measured is <= (RH set Table 11. Humidification Modes point - 2%), and unit is in heat mode (regardless of whether a heating demand exists), then H Option Description... - Page 38 Table 12. Dew Point Control Modes Option Description Normal Dew Point Control mode is useful in colder climates where moisture can collect on interior window surfaces. Normal dew point control helps to minimize this condensation. In this mode the activation and deactivation of H/D terminal is controlled as follows.
-
Page 39: Installer Checklist
Has the homeowner downloaded the Lennox Thermostat application from either Google Play or IOS App Store to their mobile devices? Is the Lennox Dealer account number or your main shop phone number been added to the dealer information screen? This will tie the homeowners system to your LennoxPROS account. -
Page 40: Index
Index High Balance Point 21 Humidification Control 36 Smart Away 21 Humiditrol 35 Smooth Setback Recovery 18 Advanced Settings 15 Stage 2HP Lock Temp 20 Alert Codes 30 Stage Control 22 Installer Checklist 39 Auxiliary Dehumidifier 36 Stage Delays 20 Stage Differential 19 System Configurations 9 System Test Mode 33...
Need help?
Do you have a question about the iComfort M30 and is the answer not in the manual?
Questions and answers