Table of Contents
Advertisement
Advertisement
Table of Contents
Troubleshooting

Related Manuals for Vertiv Liebert Mini-Mate2


Summary of Contents for Vertiv Liebert Mini-Mate2
- Page 1 Liebert® Mini-Mate2™ 5 Tons, 50 & 60 Hz User Manual...
- Page 2 Technical Support Site If you encounter any installation or operational issues with your product, check the pertinent section of this manual to see if the issue can be resolved by following outlined procedures. Visit https://www.VertivCo.com/en-us/support/ for additional assistance.
-
Page 3: Table Of Contents
7.4.2 Evaporator Air Distribution 7.4.3 Piping Connections and Coolant Requirements 7.4.4 Electrical Connections 7.5 Indoor Air-Cooled Centrifugal Fan Condensing Unit Installation 7.5.1 Location Considerations 7.5.2 Electrical Connections 7.5.3 Piping Connections 7.5.4 Ducting Vertiv | Liebert Mini-Mate2—5 ton User Manual |... - Page 4 8.17 Run Diagnostics (Available On Rev 1.001.0 and higher) 9 System Performance Microprocessor Controls 9.1 Temperature Control 9.1.1 Cooling/Heating Required 9.1.2 Cooling Operation (Compressorized Direct Expansion and Chilled Water) 9.1.3 Heating Operation Vertiv | Liebert Mini-Mate2—5 ton User Manual |...
- Page 5 11.2.3 Blower System 11.2.4 Blower Removal 11.2.5 Refrigeration System 11.3 Replacement Procedures 11.3.1 Compressor Replacement 11.3.2 Electrical Failure 11.3.3 Steam Generating Humidifier-Operation Procedures 11.3.4 Humidifier Circuit Board Adjustments 12 Maintenance Inspection Checklist 13 Troubleshooting Vertiv | Liebert Mini-Mate2—5 ton User Manual |...
- Page 6 Vertiv | Liebert Mini-Mate2—5 ton User Manual |...
-
Page 7: Important Safety Instructions
This manual contains important safety instructions that should be followed during the installation and maintenance of the Liebert Mini-Mate2. Read this manual thoroughly before attempting to install or operate this unit. Only properly trained and qualified personnel should move, install or service this equipment. - Page 8 Post a sign to alert people to report water flowing from the secondary drain pan. Vertiv™ recommends installing monitored leak detection equipment for unit and supply lines and in the secondary drain pan.
-
Page 9: Product Model Information
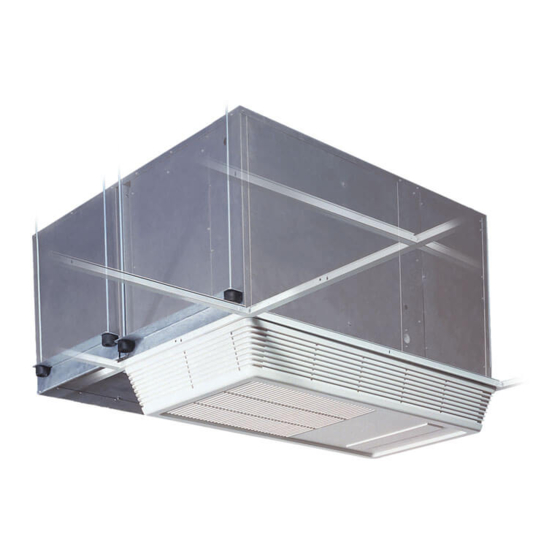
2 PRODUCT MODEL INFORMATION Figure 2.1 Split system evaporators Vertiv | Liebert Mini-Mate2—5 ton User Manual |... - Page 10 Figure 2.2 Air-cooled systems—indoor centrifugal condensing units Figure 2.3 Air-cooled systems—outdoor prop fan condensing units Vertiv | Liebert Mini-Mate2—5 ton User Manual |...
- Page 11 Figure 2.4 Water/glycol-cooled systems—indoor condensing units Vertiv | Liebert Mini-Mate2—5 ton User Manual |...
- Page 12 Table 2.1 System configurations—60 Hz Condensing Unit Nominal Cooling Unit Capacity Indoor Air-Cooled Outdoor Air-Cooled Indoor Water/ Centrifugal Fan Propeller Fan Glycol 5 Tons MMD60E MCD65A PFH067A MCD69W 5 Tons MMD92C Self Contained – Chilled Water Vertiv | Liebert Mini-Mate2—5 ton User Manual |...
- Page 13 Table 2.2 System configurations—50 Hz Condensing Unit Nominal Cooling Unit Capacity Indoor Air-Cooled Outdoor Air-Cooled Indoor Remote Centrifugal Fan Propeller Fan Water/Glycol MMD59E MCD64A PFH066A MCD68W 5 Tons MMD91C Self-Contained – Chilled Water Vertiv | Liebert Mini-Mate2—5 ton User Manual |...
- Page 14 This page intentionally left blank. Vertiv | Liebert Mini-Mate2—5 ton User Manual |...
-
Page 15: Introduction
All indoor components are installed above the ceiling, so no floor space is required. Reliable The Liebert Mini-Mate2 family installed base is a testimony to the system reliability. Components include a rugged scroll compressor, high-efficiency copper tube, aluminum-fin evaporator coil and a double inlet, direct drive fan. - Page 16 Do not mount these units above sensitive equipment. A field-supplied pan with drain must be supplied beneath cooling units and water/glycol condensers. Do not mount units in areas where normal unit operating sound might disturb the working environment. Vertiv | Liebert Mini-Mate2—5 ton User Manual |...
-
Page 17: Standard Features-5 Ton Systems
Chilled water models are self-contained and include a chilled water coil, belt-driven centrifugal blower, factory-mounted disconnect switch and two-way, slow-close motorized valve. Design pressure is 300psi (2068kPa), 60psi (414kPa) close-off differential. Vertiv | Liebert Mini-Mate2—5 ton User Manual |... -
Page 18: System Controls
• Adjustable auto restart • 5 day/2 day setback • Password protection • Alarm enable/disable • Self-diagnostics • Calibrate sensors • Predictive humidity control • Common alarm output • Remote shutdown terminals Vertiv | Liebert Mini-Mate2—5 ton User Manual |... -
Page 19: Optional Factory-Installed Features - Evaporator/Chilled Water Units
Remote Humidifier Contact allows the unit’s humidity controller to control a humidifier outside the unit. Power to operate the remote humidifier does not come from the Liebert Mini-Mate2. Available on units with or without internal humidifier. -
Page 20: Free-Cooling
Quiet-Line models for low noise level conditions (below 56 dBA) and catalog capacities for ambient temperatures up to 95°F (35°C). • Condenser coil(s) can be phenolic-coated for extended coil life in coastal areas. Vertiv | Liebert Mini-Mate2—5 ton User Manual |... -
Page 21: Optional Configurations-Water/Glycol Condensing Units
Two-way modulating chilled water valve, rated for 400psi (2758kPa) operating pressure, 72psi (496kPa) close-off rating. Valve is non-spring return. • Three-way modulating chilled water valve, rated for 400psi (2758kPa) operating pressure. Valve is non-spring return. Vertiv | Liebert Mini-Mate2—5 ton User Manual |... - Page 22 This page intentionally left blank. Vertiv | Liebert Mini-Mate2—5 ton User Manual |...
-
Page 23: Ship-Loose Accessories-Field-Installed
The Liebert AC4™ Autochangeover Controller provides autochangeover and autosequence control for up to four Liebert Mini-Mate2 units within a room. The Liebert AC4 will enable redundant units in an alarm condition, balance usage and test standby units at programmed intervals. Two common alarm relay outputs are available. - Page 24 The NIC-ENCL1 and NIC-ENCL2 package one or two Liebert IntelliSlot® Web/485 Cards with Adapters, respectively, in one steel enclosure for installation external to the Liebert Mini-Mate2. The Liebert IntelliSlot Web/485 Card with Adapter provides communication with the Liebert Mini-Mate2™ via SNMP, HTTP, RTU Modbus 485 and BACnet IP.
-
Page 25: Site Preparation And Installation
Input Voltage Entering Fluid Temperature ° ° ° ° +10% F (18.3 C) * F (46 ° ° *Operation below 65 F (18 C) may result in reduced valve life and fluid noise. Vertiv | Liebert Mini-Mate2—5 ton User Manual |... -
Page 26: Room Preparation
NOTE: Temperature and humidity sensors are located in the wall box. Carefully select a position for the box where discharge air DOES NOT blow directly on the sensors. Figure 7.1 Air-cooled systems Vertiv | Liebert Mini-Mate2—5 ton User Manual |... - Page 27 Figure 7.2 Water/glycol cooled systems Figure 7.3 Chilled water systems Vertiv | Liebert Mini-Mate2—5 ton User Manual |...
-
Page 28: Ceiling Unit Weights
Using a suitable lifting device that is rated for the weight of the unit (see Ceiling Unit Weights above), raise the unit up and pass the threaded rods through the four mounting holes in the flanges that are part of the unit base. Vertiv | Liebert Mini-Mate2—5 ton User Manual |... -
Page 29: Close Coupled Installations
If the return air duct is short or if noise is likely to be a problem, sound-absorbing insulation should be used inside the duct. Duct work should be fabricated and installed in accordance with national and local codes. Vertiv | Liebert Mini-Mate2—5 ton User Manual |... -
Page 30: Piping Connections And Coolant Requirements
The evaporator drain pan includes a float switch to prevent unit operation if drain becomes blocked. The optional condensate pump kit is required when the evaporator is installed below the level of the gravity-fed drain line. Vertiv | Liebert Mini-Mate2—5 ton User Manual |... - Page 31 5/8" 1-1/8" 150 (45.7) 5/8" 1-3/8" Suction line and liquid line sizing based on < 3 psi pressure drop in each and suction line refrigerant velocities >1000FPM (5.1m/s) for proper oil return. Vertiv | Liebert Mini-Mate2—5 ton User Manual |...
- Page 32 Refrigerant trap = Four times equivalent length of pipe per this table Figure 7.4 Refrigerant piping diagram NOTE: If field supplied refrigerant piping is installed, refrigerant must be added to the system. Vertiv | Liebert Mini-Mate2—5 ton User Manual |...
- Page 33 Maximum recommended total equivalent pipe length is 150 ft (46m). Suction and liquid lines may require additional specialty items when vertical lines exceed 20 ft. (6m) and/or condensing unit installation is more than 15 ft. (4.6m) below the evaporator. Contact Vertiv™ Application Engineering for assistance.
- Page 34 This final quarter-turn is necessary to insure that the joint will not leak. Refer to Table 7.11 below for torque requirements. Table 7.11 Refrigerant quick connect sizes and torque Size O.D. Cu Coupling Size Torque lb-ft 1/2” 35-45 1-1/8” 50-65 Vertiv | Liebert Mini-Mate2—5 ton User Manual |...
- Page 35 Figure 7.5 Evaporator unit dimensional data Vertiv | Liebert Mini-Mate2—5 ton User Manual |...
-
Page 36: Electrical Connections
• Control wiring between the evaporator unit and the condensing unit, if applicable. • Control wiring between the control panel (wallbox) and the evaporator unit control board. Vertiv | Liebert Mini-Mate2—5 ton User Manual |... - Page 37 Additional control wiring will be required if your system includes other optional monitoring and control devices. Four (4) wire (thermostat type) must be connected between the evaporator control board and the wall box. See Figure 7.7 on the next page. Vertiv | Liebert Mini-Mate2—5 ton User Manual |...
- Page 38 Figure 7.7 Evaporator unit electrical connections Vertiv | Liebert Mini-Mate2—5 ton User Manual |...
-
Page 39: Indoor Air-Cooled Centrifugal Fan Condensing Unit Installation
Refer to Electrical Connections on page 36 for general wiring requirements and cautions. Refer to electrical schematic when making connections. Refer to unit serial tag for full load amp and wire size amp ratings. Vertiv | Liebert Mini-Mate2—5 ton User Manual |... -
Page 40: Piping Connections
In addition, install a triple layer bird screen over rain hood openings to eliminate the possibility of insects, birds, water or debris entering the unit. Avoid directing the hot exhaust air toward adjacent doors or windows. Vertiv | Liebert Mini-Mate2—5 ton User Manual |... - Page 41 Figure 7.9 Indoor air-cooled centrifugal condensing unit dimensions and pipe connections Vertiv | Liebert Mini-Mate2—5 ton User Manual |...
- Page 42 Figure 7.10 Indoor air-cooled centrifugal condenser electrical connections Vertiv | Liebert Mini-Mate2—5 ton User Manual |...
- Page 43 Figure 7.11 System piping with indoor or outdoor air-cooled condensing unit Vertiv | Liebert Mini-Mate2—5 ton User Manual |...
-
Page 44: Outdoor Air-Cooled Condensing Unit Installation
2 inches larger than the dimensions of the condensing unit base. For snowy areas, a base of sufficient height to clear snow accumulation must be installed. Vertiv | Liebert Mini-Mate2—5 ton User Manual |... - Page 45 Figure 7.12 Dimensions—Air-cooled systems, standard ambient outdoor condensing module Table 7.12 Weights for standard ambient outdoor condensing modules, air-cooled systems Model # Weight, lb (kg) 60Hz 50Hz PFH067A-L PFH066A-L 351 (159) Vertiv | Liebert Mini-Mate2—5 ton User Manual |...
-
Page 46: Piping Connections
Refer to electrical schematic when making connections. Power Connections The outdoor condensing unit requires its own power source and earth ground, with a disconnect switch (field supplied) to isolate the unit for maintenance. Vertiv | Liebert Mini-Mate2—5 ton User Manual |... -
Page 47: Indoor Water- And Glycol-Cooled Condensing Unit Installation
The maximum fluid pressure is 150 PSI standard pressure and 350 PSI for high pressure units (Refer to unit serial tag and model number description page at beginning of this manual). Automotive antifreeze must not be used in glycol systems. Prepare glycol solution using customary practices. Vertiv | Liebert Mini-Mate2—5 ton User Manual |... - Page 48 Water/Glycol cooled units include a coolant flow regulating valve that is factory-adjusted and should not need field adjustment. Standard pressure and high pressure valves are adjusted differently. Contact Vertiv™’s Precision Cooling Support before making any adjustments. Vertiv | Liebert Mini-Mate2—5 ton User Manual |...
- Page 49 Figure 7.14 Indoor water/glycol condensing unit dimensional data Vertiv | Liebert Mini-Mate2—5 ton User Manual |...
- Page 50 Figure 7.15 Indoor water/glycol condensing unit electrical field connections Vertiv | Liebert Mini-Mate2—5 ton User Manual |...
- Page 51 Figure 7.16 System piping with indoor water/glycol cooled condensing unit Vertiv | Liebert Mini-Mate2—5 ton User Manual |...
-
Page 52: Optional Equipment Piping
7.8.2 Hot Water Reheat Coil Building hot water can be piped to a factory-installed hot water reheat coil, located downstream of the cooling coil. A factory-installed solenoid valve opens upon a call for reheat. Vertiv | Liebert Mini-Mate2—5 ton User Manual |... - Page 53 Figure 7.18 Optional hot water reheat (two-way valve) Vertiv | Liebert Mini-Mate2—5 ton User Manual |...
-
Page 54: Checklist For Completed Installation
18. Fans and blowers rotate freely without unusual noise. 19. Inspect all piping connections for leaks during initial operations. Correct as needed. 20. Rubber band is removed from evaporator condensate pan float switch. Vertiv | Liebert Mini-Mate2—5 ton User Manual |... -
Page 55: Microprocessor Control
8 MICROPROCESSOR CONTROL The Microprocessor Control for the Liebert Mini-Mate2 unit features an easy to use menu-driven LCD display. The menus, control features and circuit board details are described in this section. Detailed information concerning controls (System Performance Microprocessor Controls on page 69) and alarms... -
Page 56: Main Menu
• CUSTOM ALARMS • CUSTOM TEXT • DIAGNOSTICS • END OF MENU Use the UP and DOWN arrows to scroll through the selections; when ready to select a particular function press Enter. Vertiv | Liebert Mini-Mate2—5 ton User Manual |... -
Page 57: Setpoints
Present” or “Alarm XX of YY” alert and description. If more than one alarm is activated, use the UP or DOWN arrow to scroll through the alarms list. (“XX” reference is the number of the alarm shown, while the “YY” reference is the total number of alarms activated). Vertiv | Liebert Mini-Mate2—5 ton User Manual |... -
Page 58: Time
C/F DEGREES • HUMIDITY CONTROL METHOD • SHOW DIPSWITCH • CW FLUSH • VALVE TIME Use the Up and Down arrows to scroll through the submenu. Press Enter to select a particular function. Vertiv | Liebert Mini-Mate2—5 ton User Manual |... -
Page 59: Restart Time Delay
For example, if the valve travel time is 165 seconds and 50% cooling is being called for, the valve will open for 83 seconds to achieve 50% open. Vertiv | Liebert Mini-Mate2—5 ton User Manual |... -
Page 60: Cw Flush (For Systems With A Modulating Chilled Water Valve)
If the sensors are located too close to the air discharge, they will likely experience rapid swings in measurement. Another method in reducing compressor cycling is to increase the temperature and/or humidity sensitivity. Vertiv | Liebert Mini-Mate2—5 ton User Manual |... -
Page 61: Alarm Enable
Use the Up and Down arrows to scroll to a particular alarm, press the Enter button to select it, then press the Enter button again to select Yes or No. Vertiv | Liebert Mini-Mate2—5 ton User Manual |... -
Page 62: Custom Alarms
LCD display. NOTE: In order to update the dip switch settings, power must be cycled off, then on, from the unit disconnect switch. Vertiv | Liebert Mini-Mate2—5 ton User Manual |... -
Page 63: Run Diagnostics (Available On Rev 1.001.0 And Higher)
Custom alarm #2: Normally off unless this special customer selectable alarm is active. • Power: Normally on unless unit is turned off through the wall box or any of the following optional devices: High Temperature Sensor, Smoke Sensor, High Water Alarm or Remote Shutdown Vertiv | Liebert Mini-Mate2—5 ton User Manual |... - Page 64 By selecting this function, the microcontroller will perform a self test lasting approximately 10 seconds. When the test is complete, the display will show the ROM checksum, ROM part number and firmware revision number. Vertiv | Liebert Mini-Mate2—5 ton User Manual |...
- Page 65 Figure 8.2 Control menu Vertiv | Liebert Mini-Mate2—5 ton User Manual |...
- Page 66 Figure 8.3 Control board—inside evaporator Vertiv | Liebert Mini-Mate2—5 ton User Manual |...
- Page 67 Figure 8.4 Wall box board Vertiv | Liebert Mini-Mate2—5 ton User Manual |...
- Page 68 This page intentionally left blank. Vertiv | Liebert Mini-Mate2—5 ton User Manual |...
-
Page 69: System Performance Microprocessor Controls
The control will automatically lock the compressor cooling to “ON” position, except when the temperature falls below the low temperature alarm set point. Cooling will then be disabled until the room temperature reaches the temperature set point. Vertiv | Liebert Mini-Mate2—5 ton User Manual |... -
Page 70: Humidity Control
Temperature Sensitivity • Humidity Set point • Humidity Sensitivity • High Temperature Alarm • Low Temperature Alarm • High Humidity Alarm • Low Humidity Alarm • ON/OFF STATUS and CONTROL • SILENCE ALARM Vertiv | Liebert Mini-Mate2—5 ton User Manual |... -
Page 71: Alarms
(for up to 2 alarms). IF CUSTOMIZED TEXT IS USED, MAINTENANCE PERSONNEL SHOULD BE INFORMED OF THE ALARM FUNCTION AND THE REQUIRED ACTION. Vertiv | Liebert Mini-Mate2—5 ton User Manual |... -
Page 72: High Head Pressure
Check for a disconnected cable or failed sensor. NOTE: Check for proper setpoints. Does the room have a vapor barrier to seal it from outdoor humidity? Are doors or windows open to outside air? Vertiv | Liebert Mini-Mate2—5 ton User Manual |... -
Page 73: Temperature
A differential air pressure switch closes when the pressure drop across the filters becomes excessive. The switch is adjustable using the procedure on the switch label. Vertiv | Liebert Mini-Mate2—5 ton User Manual |... -
Page 74: High Temperature Sensor
This smoke sensor is not intended to function as or replace any room smoke detection system that may be required by local or national codes. Locate the source of the smoke and follow appropriate emergency procedures. Vertiv | Liebert Mini-Mate2—5 ton User Manual |... -
Page 75: System Operation, Testing And Maintenance
A connection point is provided for remote shutdown devices supplied by the customer. This terminal strip is located on the printed circuit board. (Terminals TB1-4 and TB1-5 are fitted with a jumper when no remote shutdown device is installed). Vertiv | Liebert Mini-Mate2—5 ton User Manual |... -
Page 76: Maintenance And Component Operation
2. Remove the panel by removing screws from top and bottom sections 3. Remove the blower motor from the blower sled. 4. Remove the four bolts holding the blower sled to the base isolators. 5. Slide the blower/sled assembly forward and rotate 90°. Vertiv | Liebert Mini-Mate2—5 ton User Manual |... -
Page 77: Refrigeration System
At the same time check for bent or damaged coil fins and repair as necessary. Check all refrigerant lines and capillaries for vibration and support as necessary. Carefully inspect all refrigerant lines for signs of oil leaks. Vertiv | Liebert Mini-Mate2—5 ton User Manual |... - Page 78 During hot gas bypass operation higher superheats, 50-60°F (19 to 15°C), may be observed at the compressor. The liquid quenching valve is internally equalized and superheat is not adjustable. Vertiv | Liebert Mini-Mate2—5 ton User Manual |...
- Page 79 7. There may be a fluctuation of approximately 3 to 6 PSIG (21 to 41 kPa) on the evaporator due to the differential on the hot gas bypass. 8. Return temperature setpoint to the desired setting. Figure 11.1 Hot gas bypass Vertiv | Liebert Mini-Mate2—5 ton User Manual |...
-
Page 80: Replacement Procedures
IMPROPER SYSTEM CLEANING CONSTITUTES ABUSE UNDER THE TERMS OF THE WARRANTY, THEREBY VOIDING THE WARRANTY Replacement compressors are available from your Vertiv™ supplier and will be shipped to the job site in a reusable crate (as required by the service contractor). If the compressor is under warranty, it must be returned to Vertiv™, in order to receive proper warranty credit. -
Page 81: Steam Generating Humidifier-Operation Procedures
This reduces electrode contact with the water and lowers the current flow to the amperage set point. Boiling soon commences and the canister operates normally. Vertiv | Liebert Mini-Mate2—5 ton User Manual |... - Page 82 Make note of the wiring configuration before removing any wires. Refer to schematic on unit. Slide the rubber boot back to expose the connections. Remove the two (2) power wires and the canister-full wire. Do not loosen the screws that secure the electrodes. Vertiv | Liebert Mini-Mate2—5 ton User Manual |...
-
Page 83: Humidifier Circuit Board Adjustments
The DIP switch settings are used to set the capacity of the humidifier. If the humidifier is replaced in the field the DIP switches should be set to the required settings described below. Table 11.2 Humidifier control board DIP switch settings Voltage Amps 380/415 Vertiv | Liebert Mini-Mate2—5 ton User Manual |... - Page 84 This page intentionally left blank. Vertiv | Liebert Mini-Mate2—5 ton User Manual |...
-
Page 85: Maintenance Inspection Checklist
1. Impellers free of debris and move freely 1. Check for obstructions and sediment buildup. 2. Bearings in good condition 2. Check for damage and/or corrosion. 3. Check belt tension and condition 3. Check for leaks Vertiv | Liebert Mini-Mate2—5 ton User Manual |... - Page 86 1. Check electrical connections 2. Motor mount tight 2. Operational sequence 3. Refrigerant lines properly supported Electric Reheat 1. Check element for corrosion Signature:________________________________________________________________ Make photocopies of this form for your records Vertiv | Liebert Mini-Mate2—5 ton User Manual |...
-
Page 87: Troubleshooting
Remove debris from coil and air inlets. condenser coil Water/Glycol Compressor Cooled only: high head No fluid Check fluid supply to regulating valve. Adjust valve if necessary. pressure flowing through condenser Condenser fan Check fan operation. not operating Vertiv | Liebert Mini-Mate2—5 ton User Manual |... - Page 88 Check voltage at P2-1 and P1-9 on interface board for 24 VAC ± 2 VAC. If voltage, check reheat contactor and defective reheat contact reheat safety. If no voltage, check wiring and/or replace board. or defective board Element is Turn off power. Check element continuity with an Ohmmeter. burned out Vertiv | Liebert Mini-Mate2—5 ton User Manual |...
- Page 89 NOTE: It may take up to 20 seconds for the display to appear on the wall box LCD after power is applied. Vertiv | Liebert Mini-Mate2—5 ton User Manual |...
- Page 90 This page intentionally left blank. Vertiv | Liebert Mini-Mate2—5 ton User Manual |...
- Page 92 VertivCo.com | Vertiv Headquarters, 1050 Dearborn Drive, Columbus, OH, 43085, USA © 2017 Vertiv Co. All rights reserved. Vertiv and the Vertiv logo are trademarks or registered trademarks of Vertiv Co. All other names and logos referred to are trade names, trademarks or registered trademarks of their respective owners. While every precaution has been taken to ensure accuracy and completeness herein, Vertiv Co.
Need help?
Do you have a question about the Liebert Mini-Mate2 and is the answer not in the manual?
Questions and answers