
Related Manuals for Andonstar ADSM302


Summary of Contents for Andonstar ADSM302
-
Page 1: User Manual
Andonstar ADSM302 Digital Microscope Andonstar ADSM302 Digital Microscope USER MANUAL... - Page 2 Andonstar ADSM302 Digital Microscope V1.1 / 2018-05-10...
-
Page 3: Table Of Contents
TABLE OF CONTENTS General Rules ..............................- 2 - Basic Parameters............................... - 3 - Parts of ADSM302 ............................. - 4 - ◆ Main Device ............................- 4 - ◆ Remote Controller ..........................- 5 - Connect & Outputs............................. - 6 - General Use ............................... -
Page 4: General Rules
Shenzhen Andonstar Technology Co., Ltd. It realized Full HD, high object distance, multifunction, multi-output at the same time. With help of the Andonstar measuring software, it can easily meet many different requirements in many industries, such as industrial overhaul and teaching demonstration. And it’s appearance design combines more ergonomic consideration, provides users better experience. -
Page 5: Basic Parameters
Andonstar ADSM302 Digital Microscope Basic Parameters Image sensor 3 Mega Pixels HD Sensor Video output 1080P Full HD (via HDMI) ;720P (via PC) Video format Magnification ratio Up to 560×(HDMI monitor 22 inch) Photo resolution Photo format JPEG Focus range... -
Page 6: Parts Of Adsm302
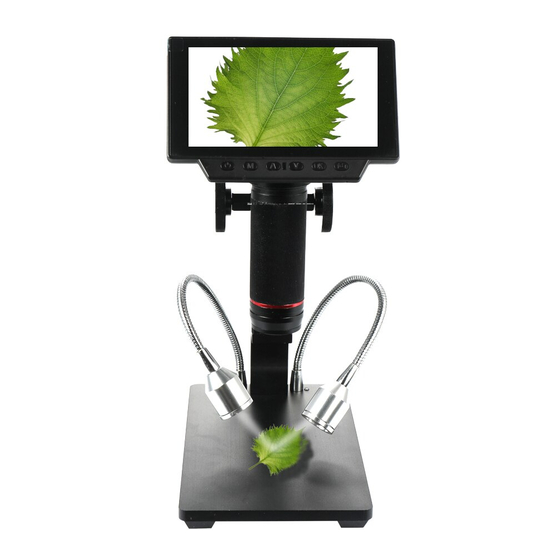
Andonstar ADSM302 Digital Microscope Parts of ADSM302 ◆ Main Device *Fasten screw: It aim to adjust the compactness between the Lifting stand and the Distance controllers, so users can fasten the distance from the lens to the object table. - 4 -... -
Page 7: Remote Controller
Andonstar ADSM302 Digital Microscope ◆ Remote Controller • Frozen: Stop the image on the screen. It works at standby, record and capture modes. • Zoom in/out: digital zooming up to 4 times. • Brightness up/down: exposure compensation from +2.0 to -2.0. -
Page 8: Connect & Outputs
Andonstar ADSM302 Digital Microscope Connect & Outputs The ADSM302 has 5 possible outputs: its own monitor, HDMI, AV/TV, USB and memory card. ①:AV output * ⑤:Connect the device to the switch. ②:Memory card ⑥:Connect the switch to the power supply. -
Page 9: General Use
Andonstar ADSM302 Digital Microscope *) Separate cables needed (not included). General Use ◆ Use Individually 1. According to the instructions given by last chapters, connect the camera to the power supply like ⑤⑥⑦. 2. Press the “ON/OFF” button on the monitor. (Sometimes the camera will switch on automatically when it is connected to the power supply) 3. -
Page 10: Hdmi
Then put the object on the table and adjust the focus controller. Please note: The ADSM302 internal screen won’t show an image when the device is connected via HDMI. You still can take pictures and save them if you have a memory card inside the microscope, but you can’t record videos in this output mode. - Page 11 Andonstar ADSM302 Digital Microscope - 9 -...
-
Page 12: Software Overview
Andonstar ADSM302 Digital Microscope Software Overview *Icon Definitions Zoom In Measuring a 3points angle (degree) Normal Distance of parallel lines(Length) Zoom out Distance of a point and a line (Length) Undoes the last action Distance of 2 circles (Radius, length) -
Page 13: Interface Definitions And Functions
Andonstar ADSM302 Digital Microscope *Interface Definitions and Functions ① Main menu: Here, users can open different devices or lead in pictures to observe or edit, do video setting or save setting, choose which windows to show or hide etc. ② Toolbar: Here are the tools that would be useful for users to do measuring and image analysis. - Page 14 Andonstar ADSM302 Digital Microscope ⑤ Main operating window: This windows shows the full view from the microscope. And it is also the place where users do measuring and image analysis. ⑥ Calibration Management and Measuring Results: These two windows shows at the same place, users can switch at the bottom of this window.
-
Page 15: Software Operation
Software Operation * Start 1. Open the software “Andonstar”. 2. Click “File”→ “Open”→ “Open Device”→ “USB MODE” → “Andonstar Camera”. * Calibration 1. Put a ruler under the digital microscope, adjust the focus wheel and the height of the stand, to get the best clearance. (during the rest of the process, do not change the object distance any more). -
Page 16: Measuring
* Measuring 1. Choose the tool you need to do measuring in the toolbar. 2. Click dots or draw lines that you need to measure in the main operating window. 3. Place the results of measuring in a proper place around the target. - 14 -... -
Page 17: Image Effects
* Image Effects Edge detection, Inverse color, Flip horizontal, Relief, Sharpen, Smooth. 1. Choose the special effect you need in the toolbar. 2. In the main operating window, long press the Left to draw a rectangle which can covers the whole target area, loose the Left, get the special effect result. -
Page 18: Faq
Second, if there is still no image, please check the “Device Manager” of your PC, delete the “USB Camera” in the “Imaging devices” and rescan . Let the system identifies again. After all, in the “Imaging devices” there will show another name, which is “Andonstar Camera”. Then restart the software. 3.Why there is a measurement error? First, if you want to get a more precise result, you need to use a more precise calibration. -
Page 19: Thanks
If you have any question, or any advice and feedbacks, feel free to contact us: support@andonstar.com We’d like to provide the best service to you. Our official website is www.andonstar.com. We reserve all the right for the final explanation. Warranty Card User’s name: Address:...
Need help?
Do you have a question about the ADSM302 and is the answer not in the manual?
Questions and answers