Table of Contents
Advertisement
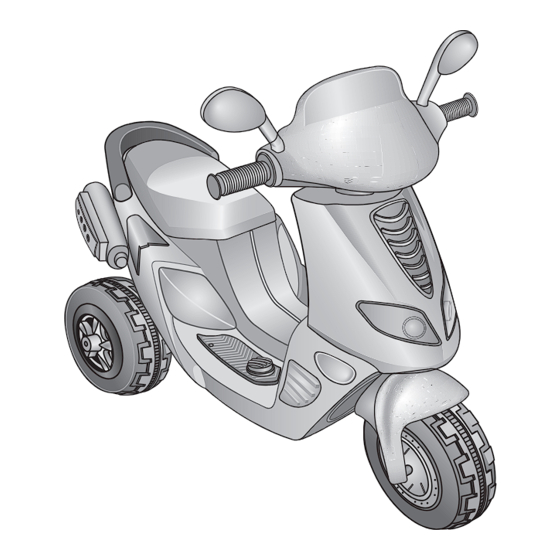
Frozen Scooter
Owner's Manual
Model Number: KT1164/KT1165
The owner's manual contains assembly, use and maintenance
instructions. The Frozen Scooter must be assembled by an adult
who has read and understands the instructions in this manual.
Keep the packaging away from children and dispose all packaging
before use.
©2014 Pacific Cycle Inc.
4902 Hammersley Rd.
Madison, WI 53711
United States of America
Phone: (877) 741-6154
www.kidtraxtoys.com
Styles and Colors may vary
Made in China
Keep instructions for future reference.
Advertisement
Table of Contents

Related Manuals for PACIFIC CYCLE KT1165


Summary of Contents for PACIFIC CYCLE KT1165
- Page 1 Frozen Scooter Owner’s Manual Model Number: KT1164/KT1165 The owner’s manual contains assembly, use and maintenance instructions. The Frozen Scooter must be assembled by an adult who has read and understands the instructions in this manual. Keep the packaging away from children and dispose all packaging before use.
-
Page 2: Thank You
Thank You For purchasing the Frozen Scooter. Your child will have fun and years of riding enjoyment. Features on the scooter include lights and melodies, forward / reverse and a rechargeable battery. Please call us at Kid Trax Toys Consumer Relations at 877-741-6154 with comments or questions. -
Page 3: Table Of Contents
Contents Safety 1 User Requirements ......2 Parts ........3 Assembly . -
Page 4: Safety
Safety WARNING! The following safety hazards may result in serious injury or death to the user of the scooter: • This product contains small parts that are for adult assembly only. Keep small children away when assembling. Remove and dispose of all protective material and poly bags before assembly. -
Page 5: User Requirements
User Requirements The suitable age range for a child using the Scooter is 3 + years. The maximum weight of the child is 44 lbs (20kg). Before using the scooter the child must understand the vehicle controls and safety issues. They must also demonstrate the capability to handle the vehicle and operate its controls. -
Page 6: Parts
Parts rear view mirrors (2) seat (1) handlebar (1) fasteners (2) Scooter body (1) muffler (1) charger (1) 6V 5A battery (1) spanner (1) front wheel (1) axle (1) rear wheels (2) wheel small gear box spacer (1) covers (2) washers (2) locknuts (2) hubcaps (2) -
Page 7: Assembly
Assembly Attach the Front Wheel fork fork holes splash guard splash guard tab front wheel locking tab bushing front axle bushing slot 1. Place the bushings attached to the front axle into the fork. 2. Push the bushings up into the fork until the locking tabs engage into the fork holes on both sides of the wheel. -
Page 8: Attach The Muffler
Attach the Muffler fasteners muffler screws 1. Turn the Scooter body over. 2. Align the two muffler screws with the two holes in the Scooter body. 3. Slide the muffler into place, and attach with the two red fasteners. Insert the Axle Scooter body axle holes gear box end large washer... -
Page 9: Attach The Gear Box
Attach the Drive Wheel spanner drive wheel hubcap locknut axle small wheel washer cover Note: Both rear wheels are identical and can be placed on either axle. 1. Press the hubcap onto the wheel. 2. Place the drive wheel onto the axle. 3. -
Page 10: Attach The Left Rear Wheel
Attach the Left Rear Wheel spanner hubcap wheel large washer axle locknut wheel small cover washer Note: Both rear wheels are identical and can be placed on either axle. 1. Remove the locknut and the small washer from the axle. Leave the large washer on the axle. -
Page 11: Attach The Rearview Mirrors
Attach the Rearview Mirrors 1. Position the rearview mirror so mirrors the mirror side is facing in. 2. Press the rearview mirror down into the mirror slots located on the handlebar until you hear a click. 3. Repeat steps one and two for the remaining mirror. -
Page 12: Connecting The Wires
Connecting the Battery battery fuse connector connector from battery from pedal 1. Connect the red connector from the battery to the red connector from the pedal. Note: The connectors from the gear box to the pedal is connected at the factory. -
Page 13: Attaching The Seat
Attaching the Seat 1. Align the seat tab with the seat slot. Open 2. Lower the seat into place. Be sure that it is properly positioned. Close 3. Turn the locking screw clockwise until the lock is engaged. seat slo seat tab locking screw... - Page 14 WARNING! The following safety hazards may result in serious injury or death to the user of the Scooter: • Use of a battery or charger other than the supplied Kid Trax Toys 6V rechargeable battery and charger may cause a fire or explosion. Only use the supplied Kid Trax Toys 6V rechargeable battery and charger with the vehicle.
-
Page 15: Charging The Battery
Charging the Battery battery red battery connector charger Important! Before using the Frozen Scooter for the first time the battery needs to be charged for a full 10 hours. Only an adult who has read and understands the following safety warnings should handle, charge or recharge of the battery. -
Page 16: Battery Storage
Re-Charge Interval and Time Important! • Damage to the battery may occur if it is allowed to drain completely. Do not allow the battery to drain completely. • Check the battery and charger (supply chord, connector) for wear and damage before charging. Do not charge the battery if damage has occurred. -
Page 17: Battery Replacement And Disposal
Battery Replacement and Disposal Kid Trax Toys 6V 5A battery battery strap battery connectors The Kids Trax Toys 6V 5A battery will eventually lose the ability to hold a charge. Depending on the amount of use, and varying conditions, the battery should operate for one to three years. Follow these steps to replace and dispose the battery: 1. -
Page 18: Insert Batteries For Sound
Important! Recycle the dead battery responsibly. The battery contains lead acid (electrolyte) and must be disposed of properly and legally It is illegal in most areas to incinerate lead acid batteries or dispose of them in landfills. Take it to a federal or state-approved lead acid battery recycler, such as a Kid Trax Toys authorized service center or your local automotive battery retailer. -
Page 19: Use
Important! Before using the Scooter for the first time the battery needs to be charged for a full 10 hours. Only an adult who has read and understands the safety warnings (see Charging the Battery) should handle, charge or recharge of the battery. music button Forward / Stop / Reverse switch... -
Page 20: Maintenance
Maintenance The Scooter should be checked for damage, missing or badly worn parts before use. • Check the tightness of the fasteners before each use. • Check the tightness of the wheel locknuts. Note: If the wheel locknuts are not tight the drive wheel will not engage and the vehicle will not run. -
Page 21: Troubleshooting Guide
Troubleshooting Guide The following are examples of potential problems. Completely read through this manual and the troubleshooting guide table before calling Kid Trax Toys Consumer Relations. If you still need help resolving the problem please call 877-741-6154. Kid Trax Toys recommends that you take the vehicle to an authorized service center for periodic maintenance and service. - Page 22 Problem Possible Cause Remedy Vehicle does not Battery is old Replace battery (see run very long Battery: Replacement and Disposal Vehicle runs Battery low on power Recharge battery (see sluggishly or Battery: Recharge beeping occurs Interval and Time) Battery is old Replace battery (see Battery: Replacement and Disposal...
-
Page 23: Services, Repairs And Parts
Problem Possible Cause Remedy 6V Battery will not Battery connector or Check that battery recharge adapter connector is connectors are firmly plugged into each other loose Check that battery charger Charger not plugged in is plugged into a working wall outlet Call Consumer Relations Charger is not at 877-741-6154 for an... -
Page 24: Warranty Limitations
Warranty One-Year Limited Warranty Six-Month Limited Warranty on Battery Pacific Cycle, Inc. (PC) warrants this product to the original retail purchaser as follows: The vehicle (except for the 6-volt battery) is warranted against defective materials or workmanship for one year from the date of original purchase. - Page 25 Limitation of Warranties and Warranty Terms Any implied warranties, including implied warranties of the merchantability and fitness for a particular purpose, shall be limited to the duration and terms of the express written warranty. Some states do not allow limitations as the exclusion or limitation of incidental or consequential damages, so the above limitation may not apply to you.
- Page 26 Contact Information If you have any questions or comments please contact us at: In U.S.A. ©2014 Pacific-Cycle Inc. 4902 Hammersly Rd. Madison, WI 53711 Customer Service: 877-741-6154 customerservice@kidtraxtoys.com www.kidtraxtoys.com...
Need help?
Do you have a question about the KT1165 and is the answer not in the manual?
Questions and answers